Note
Access to this page requires authorization. You can try signing in or changing directories.
Access to this page requires authorization. You can try changing directories.
Important
Azure Cosmos DB for NoSQL global secondary indexes are currently in preview. This preview is provided without a service-level agreement. At this time, we don't recommend that you use global secondary indexes for production workloads. Certain features of this preview might not be supported or might have constrained capabilities. For more information, see the supplemental terms of use for Microsoft Azure previews.
Global secondary indexes improve query efficiency by storing data with a different partition key. Global secondary indexes are read-only containers that are automatically synchronized with the source container, maintaining a persistent copy of its data. Each index container has its own settings, distinct from the source container, including partition key, indexing policy, Request Unit (RU) limit, and data model, which can be customized by selecting specific item properties.
Use cases
Applications often need to query data using properties other than the partition key. These queries must be executed across all partitions, even if some partitions don't contain data that matches the filter criteria. As a result, queries that don't include the partition key consume more RUs and have higher latency.
With a global secondary index, you can:
- Store data with a different partition key to convert cross-partition queries on the source container into single partition lookups.
- Add global secondary indexes to existing containers to keep queries efficient as application needs change.
- Isolate a subset of your workload, such as creating vector or full text search indexes in the global secondary index without impacting transactional operations on the source container.
Global secondary index benefits
Azure Cosmos DB global secondary indexes offer the following benefits:
- Automatic Syncing: Index containers are automatically synced with the source container, eliminating the need for custom logic in client applications.
- Eventual Consistency: Index containers are eventually consistent with the source container without impacting write latency in the source.
- Performance Isolation: Index containers have their own storage and RU limits, providing performance isolation.
- Optimized Read Performance: Fine-tuned data model, partition key, and indexing policy for optimized read performance with support for queries using the rich NoSQL query syntax.
- Improved Write Performance: Clients only need to write to the source container, improving write performance compared to a multi-container-write strategy.
- Read-Only Containers: Writes to the index container are asynchronous and managed automatically. Client applications don't need to write directly to the index container.
- Multiple Indexes: You can create multiple index containers for the same source container without extra overhead.
Defining global secondary indexes
Creating a global secondary index is similar to creating a new container, with added properties to specify the source container and a query defining the global secondary index data model. Many customizations for containers also apply to global secondary index container, including custom indexing, vector, and full text search policies. Global secondary index containers must use autoscale throughput, which helps them respond to spikes in traffic without getting throttled or falling behind from updates in the source container.
Each item in the global secondary index has a one-to-one mapping to an item in the source container. To maintain this mapping, the id field in global secondary index items is auto populated. The value of id from the source container is represented as _id in the index container.
The query used to define a global secondary index must adhere to the following constraints:
- The SELECT statement allows projection of only one level of properties in the JSON tree, or it can be SELECT * to include all properties.
- Aliasing property names using AS isn’t supported.
- Queries can’t include a WHERE clause or other clauses such as JOIN, DISTINCT, GROUP BY, ORDER BY, TOP, OFFSET LIMIT, and EXISTS.
- System functions and user-defined functions (UDFs) aren't supported.
For example, a valid query is: SELECT c.userName, c.emailAddress FROM c, which selects the userName and emailAddress properties from the source container c. This query defines the data model of the global secondary index, determining which properties are included in the index container for each item. The source container and definition query can't be changed once created.
Learn how to create global secondary indexes.
Tip
If you want to delete a source container, you must first delete all global secondary indexes that are created for it.
Syncing global secondary indexes
Global secondary index containers are automatically kept in sync with changes to data in source containers using change feed. When a global secondary index is defined for a source container, a change feed job is created and managed for you. Changes are asynchronously reflected to data in index containers and don't affect writes to the source container. Index containers are eventually consistent with the source container regardless of the consistency level set for the account.
Change feed reads consume RUs from the source container, and writes to the global secondary index consume RUs from the index container. RUs provisioned on both containers determine how quickly indexes are hydrated and synced.
Global secondary indexes in multi-region accounts
For Azure Cosmos DB accounts with a single region, change feed reads from the source container and writes to the global secondary index container occur in that region. In a multi-region account with a single write region, change feed reads and global secondary index writes occur in the write region. In an account with multiple write regions, change feed reads and global secondary index writes occur in one of the write regions. If there's a failover for your account, change feed reads and global secondary index writes occur in the new write region.
Querying global secondary indexes
Querying data from global secondary indexes is similar to querying data from any other container. You can use the full, rich Azure Cosmos DB for NoSQL query syntax to perform queries on global secondary index containers. This includes vector, full text search, and hybrid search queries. Similar to other containers, you should tune the indexing policy on global secondary index containers based on your query patterns.
Because global secondary indexes can have a different partition key than source containers, executing would-be cross-partition queries on global secondary indexes is more efficient, saving both latency and RUs.
Monitoring
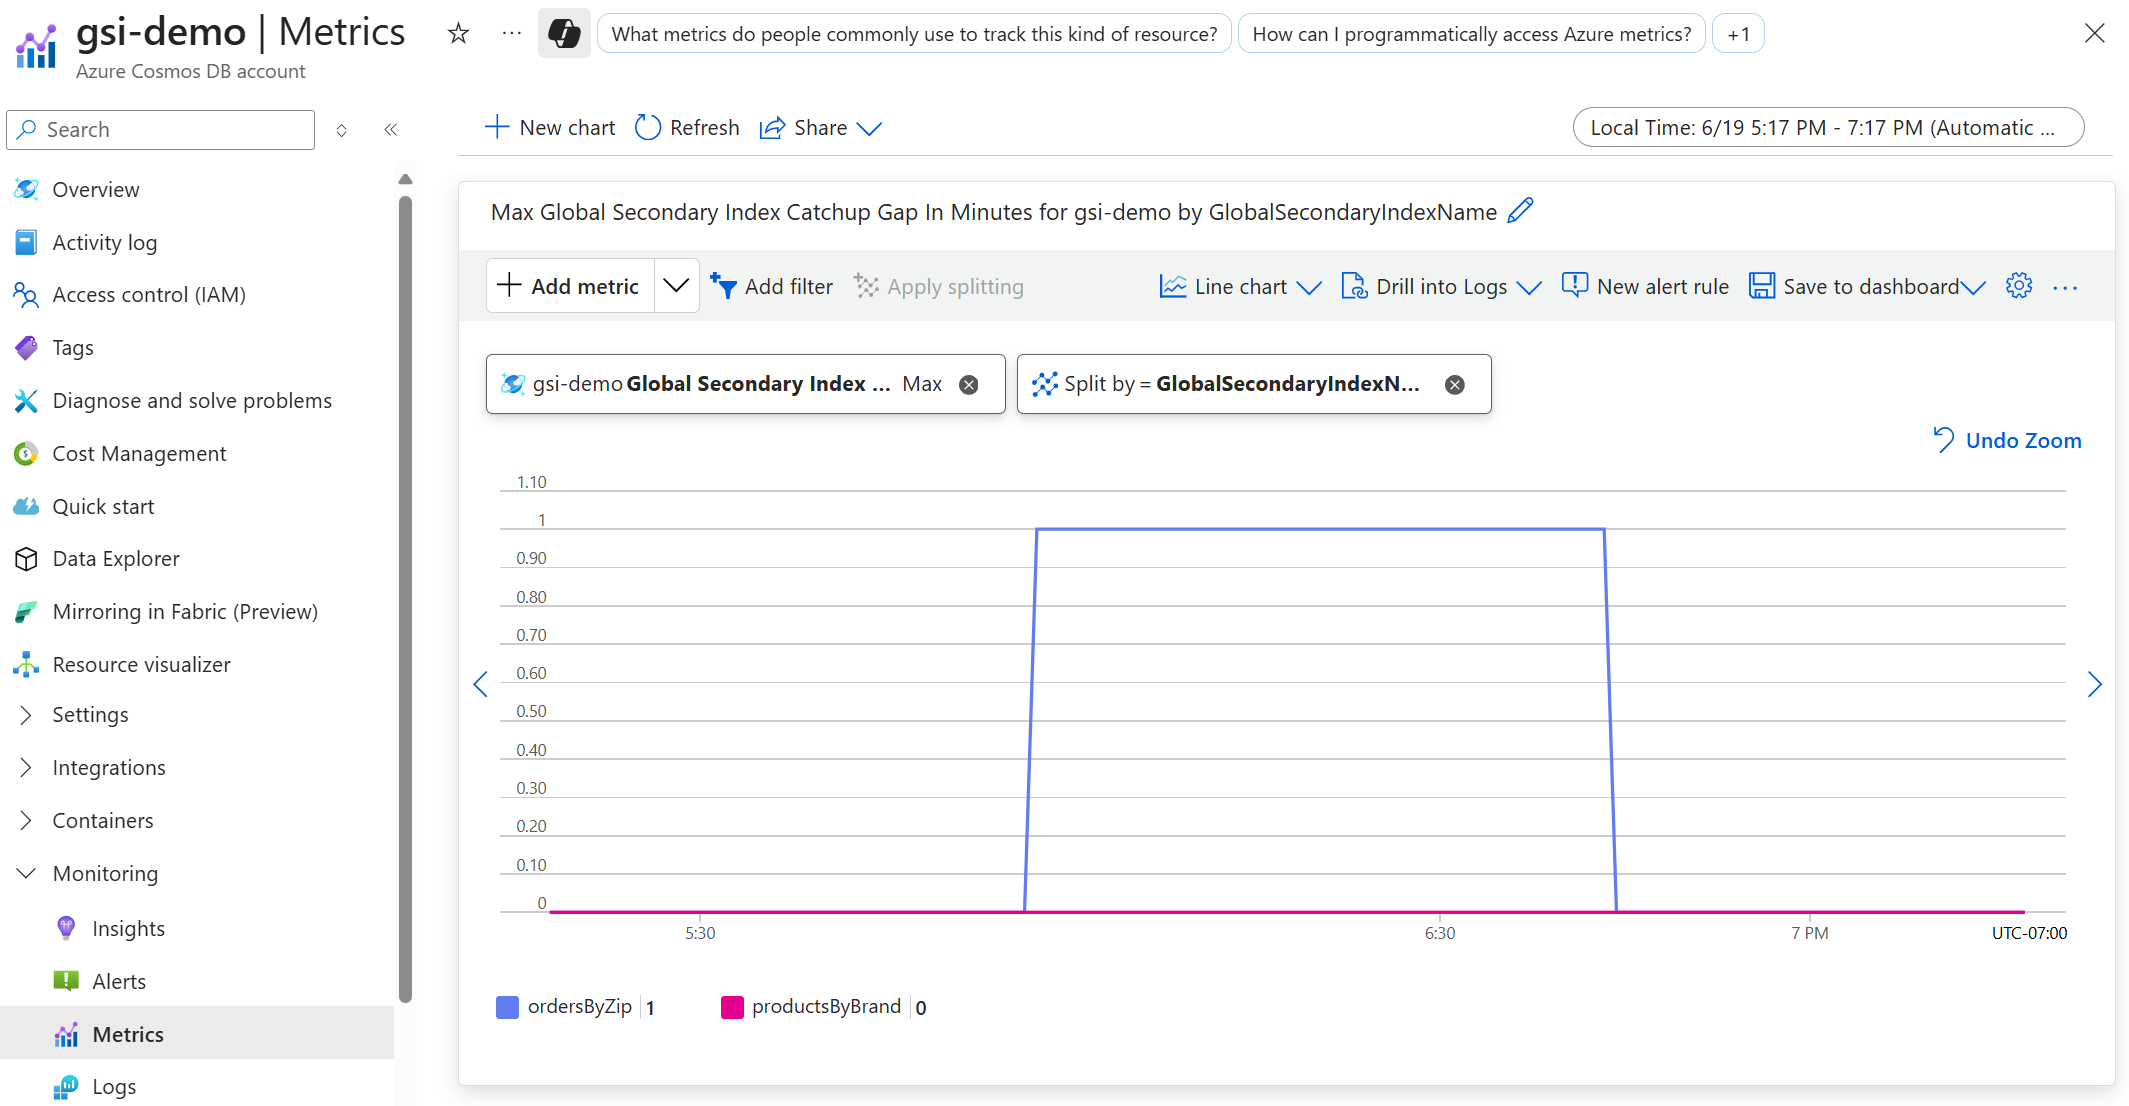
You can monitor the lag in building global secondary indexes through the Global Secondary Index Catchup Gap In Minutes metric in Metrics in the Azure portal. To learn about these metrics, see Supported metrics for Microsoft.DocumentDB/DatabaseAccounts.
Troubleshooting common issues
I want to understand the lag between my source container and index containers
The Global Secondary Index Catchup Gap In Minutes metric shows the maximum difference in minutes between data in source containers and global secondary index containers. To view the lag for an individual index container, select Apply splitting then Split by and select GlobalSecondaryIndexName.
I want to understand if my global secondary index containers have enough RUs
The RUs provisioned on source and index containers affect the rate of changes propagated to the global secondary index container. Check the Normalized RU Consumption metric, if it's too high the container may benefit from increasing the maximum RUs.
Limitations
There are a few limitations with the Azure Cosmos DB for NoSQL API global secondary index feature.
- You must enable continuous backups on your account before global secondary indexes can be enabled.
- Global secondary index containers aren't automatically restored during the account restore process. You must enable the global secondary index feature on the restored account after the restore process is finished. Then, you can create the global secondary indexes again.