Note
Access to this page requires authorization. You can try signing in or changing directories.
Access to this page requires authorization. You can try changing directories.
Important
Azure Cosmos DB for PostgreSQL is no longer supported for new projects. Don't use this service for new projects. Instead, use one of these two services:
Use Azure Cosmos DB for NoSQL for a distributed database solution designed for high-scale scenarios with a 99.999% availability service level agreement (SLA), instant autoscale, and automatic failover across multiple regions.
Use the Elastic Clusters feature of Azure Database For PostgreSQL for sharded PostgreSQL using the open-source Citus extension.
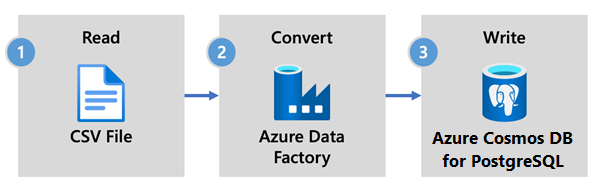
Azure Data Factory is a cloud-based ETL and data integration service. It allows you to create data-driven workflows to move and transform data at scale.
Using Data Factory, you can create and schedule data-driven workflows (called pipelines) that ingest data from disparate data stores. Pipelines can run on-premises, in Azure, or on other cloud providers for analytics and reporting.
Data Factory has a data sink for Azure Cosmos DB for PostgreSQL. The data sink allows you to bring your data (relational, NoSQL, data lake files) into Azure Cosmos DB for PostgreSQL tables for storage, processing, and reporting.
Important
Data Factory doesn't support private endpoints for Azure Cosmos DB for PostgreSQL at this time.
Data Factory for real-time ingestion
Here are key reasons to choose Azure Data Factory for ingesting data into Azure Cosmos DB for PostgreSQL:
- Easy-to-use - Offers a code-free visual environment for orchestrating and automating data movement.
- Powerful - Uses the full capacity of underlying network bandwidth, up to 5 GiB/s throughput.
- Built-in connectors - Integrates all your data sources, with more than 90 built-in connectors.
- Cost effective - Supports a pay-as-you-go, fully managed serverless cloud service that scales on demand.
Steps to use Data Factory
In this article, you create a data pipeline by using the Data Factory user interface (UI). The pipeline in this data factory copies data from Azure Blob storage to a database. For a list of data stores supported as sources and sinks, see the supported data stores table.
In Data Factory, you can use the Copy activity to copy data among data stores located on-premises and in the cloud to Azure Cosmos DB for PostgreSQL. If you're new to Data Factory, here's a quick guide on how to get started:
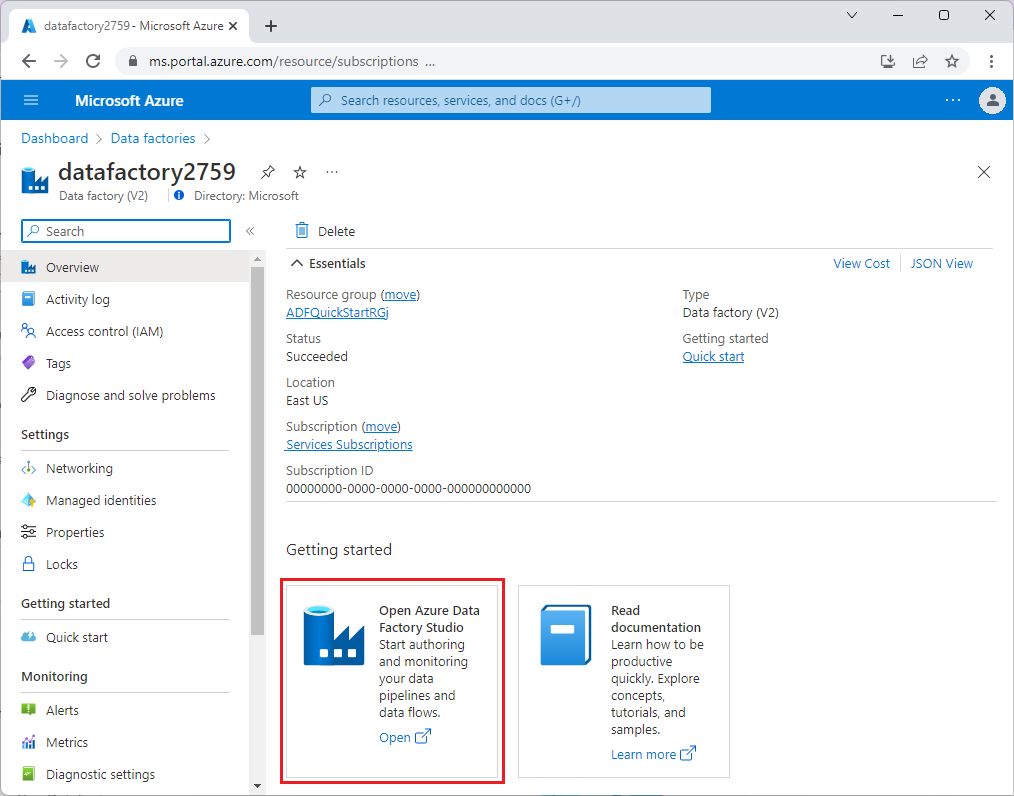
Once Data Factory is provisioned, go to your data factory and launch Azure Data Factory Studio. You see the Data Factory home page as shown in the following image:
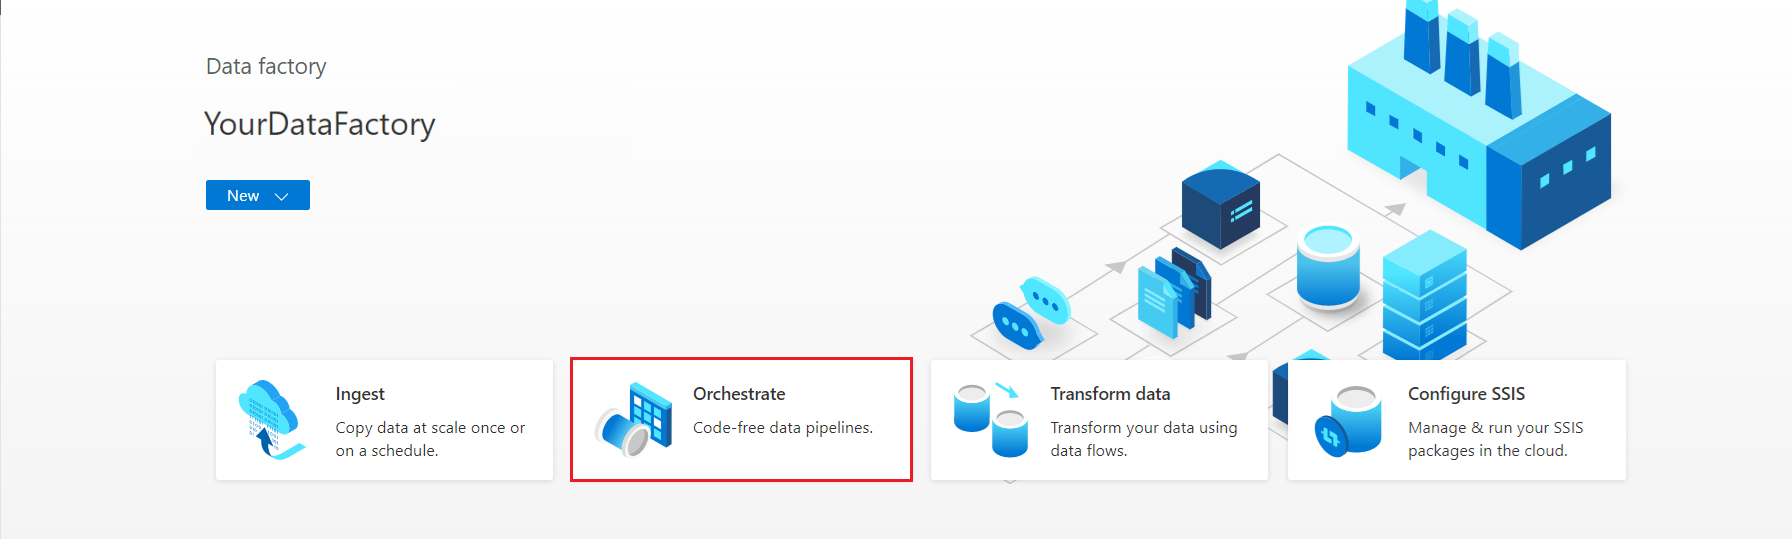
On the Azure Data Factory Studio home page, select Orchestrate.
Under Properties, enter a name for the pipeline.
In the Activities toolbox, expand the Move & transform category, and drag and drop the Copy data activity to the pipeline designer surface. At the bottom of the designer pane, on the General tab, enter a name for the copy activity.

Configure Source.
On the Activities page, select the Source tab. Select New to create a source dataset.
In the New Dataset dialog box, select Azure Blob Storage, and then select Continue.
Choose the format type of your data, and then select Continue.
On the Set properties page, under Linked service, select New.
On the New linked service page, enter a name for the linked service, and select your storage account from the Storage account name list.
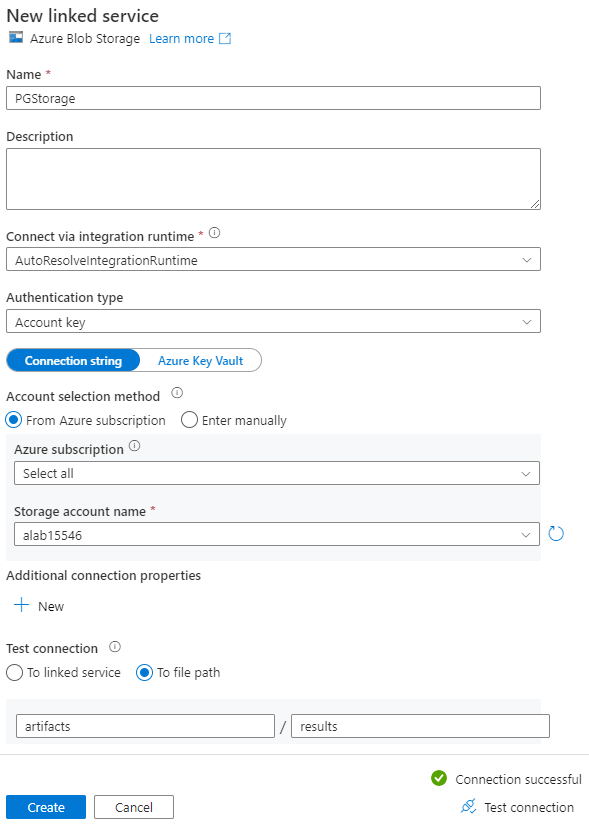
Under Test connection, select To file path, enter the container and directory to connect to, and then select Test connection.
Select Create to save the configuration.
On the Set properties screen, select OK.
Configure Sink.
On the Activities page, select the Sink tab. Select New to create a sink dataset.
In the New Dataset dialog box, select Azure Database for PostgreSQL, and then select Continue.
On the Set properties page, under Linked service, select New.
On the New linked service page, enter a name for the linked service, and select Enter manually in the Account selection method.
Enter your cluster's coordinator name in the Fully qualified domain name field. You can copy the coordinator's name from the Overview page of your Azure Cosmos DB for PostgreSQL cluster.
Leave default port 5432 in the Port field for direct connection to the coordinator or replace it with port 6432 to connect to the managed PgBouncer port.
Enter database name on your cluster and provide credentials to connect to it.
Select SSL in the Encryption method drop-down list.
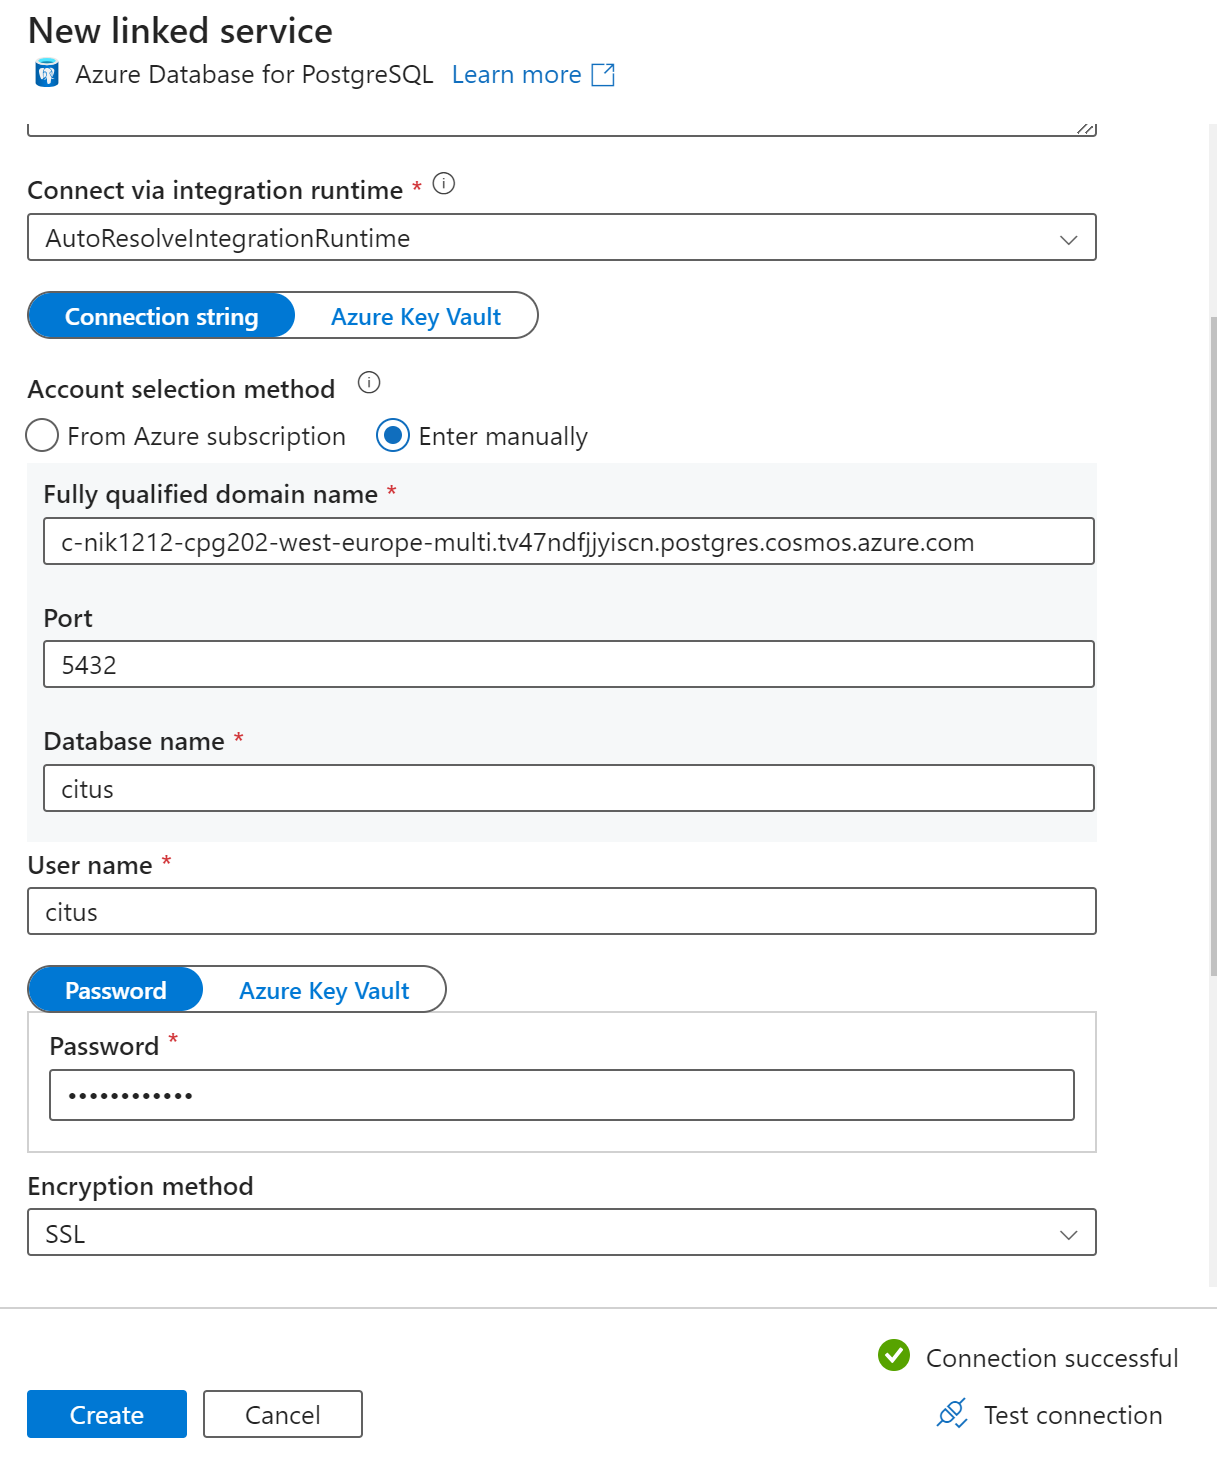
Select Test connection at the bottom of the panel to validate sink configuration.
Select Create to save the configuration.
On the Set properties screen, select OK.
In the Sink tab on the Activities page, select Open next to the Sink dataset drop-down list and select the table name on destination cluster where you want to ingest the data.
Under Write method, select Copy command.

From the toolbar above the canvas, select Validate to validate pipeline settings. Fix any errors, revalidate, and ensure that the pipeline is successfully validated.
Select Debug from the toolbar to execute the pipeline.
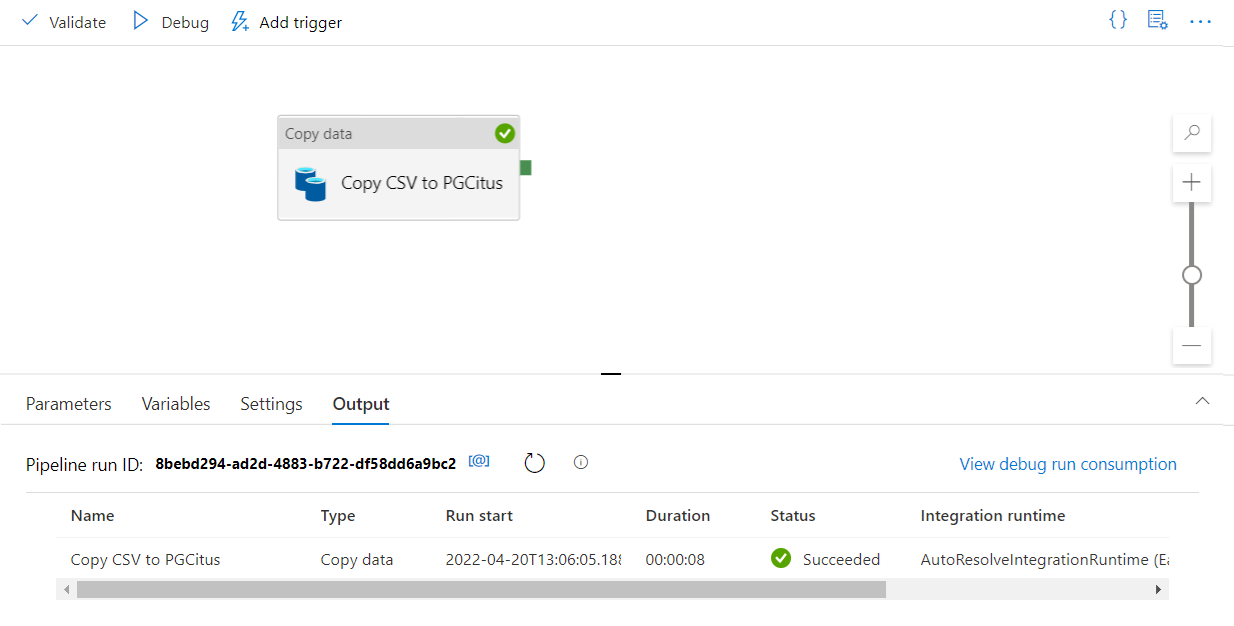
Once the pipeline can run successfully, in the top toolbar, select Publish all. This action publishes entities (datasets and pipelines) you created to Data Factory.
Call a stored procedure in Data Factory
In some specific scenarios, you might want to call a stored procedure/function to push aggregated data from the staging table to the summary table. Data Factory doesn't offer a stored procedure activity for Azure Cosmos DB for PostgreSQL, but as a workaround you can use the Lookup activity with a query to call a stored procedure as shown below:

Next steps
- Learn how to create a real-time dashboard with Azure Cosmos DB for PostgreSQL.
- Learn how to move your workload to Azure Cosmos DB for PostgreSQL