Note
Access to this page requires authorization. You can try signing in or changing directories.
Access to this page requires authorization. You can try changing directories.
Important
This connector can be used in Real-Time Intelligence in Microsoft Fabric. Use the instructions in this article with the following exceptions:
- If required, create databases using the instructions in Create a KQL database.
- If required, create tables using the instructions in Create an empty table.
- Get query or ingestion URIs using the instructions in Copy URI.
- Run queries in a KQL queryset.
The Azure Data Explorer connector for Power Automate (previously Microsoft Flow) enables you to orchestrate and schedule flows, send notifications, and alerts, as part of a scheduled or triggered task.
You can:
- Send notifications and alerts based on query results, such as when thresholds exceed certain limits.
- Send regular, such as daily or weekly, reports containing tables and charts.
- Schedule regular jobs using management commands on clusters. For example, copy data from one table to another using the
.set-or-appendcommand. - Export and import data between Azure Data Explorer and other databases.
For more information, see Azure Data Explorer Power Automate connector usage examples.
Note
In order for a Power Automate connector to access a network protected cluster, you must add the outbound IP addresses associated with the region of your connector to the firewall allowlist. For more information, see Manage public access to your Azure Data Explorer cluster.
Create a new flow using the Azure Data Explorer connector
To use the connector, you must first add a trigger. You can define a trigger based on a recurring time period, or as a response to a previous flow action.
Sign in to Power Automate.
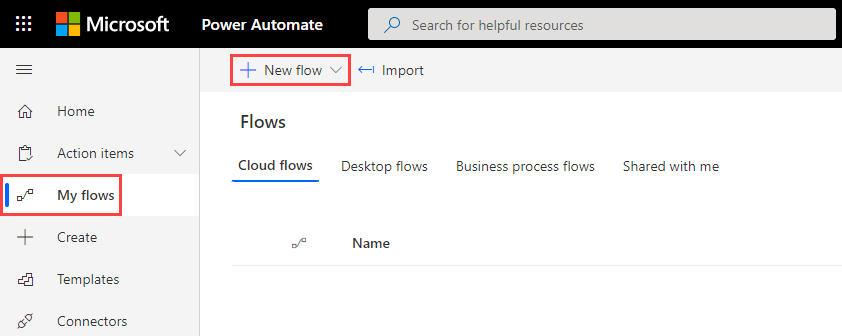
Create a new flow, or, from the Power Automate home page, select the My flows > + New flow.
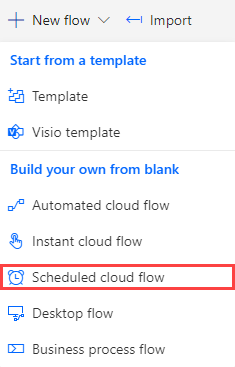
Select Scheduled cloud flow.
In Build a scheduled cloud flow, enter the required information.
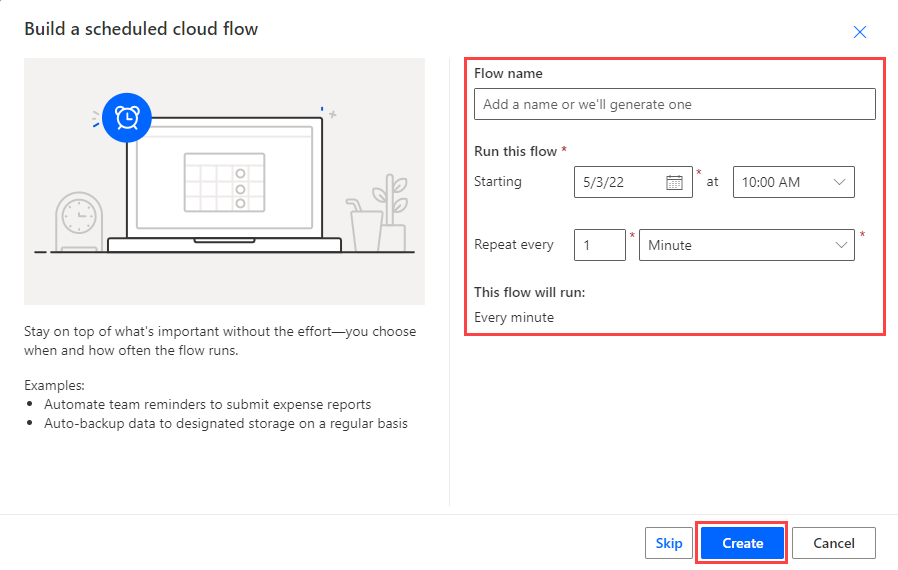
Select Create > + New step.
In the search box, enter Kusto or Azure Data Explorer, and select Azure Data Explorer.
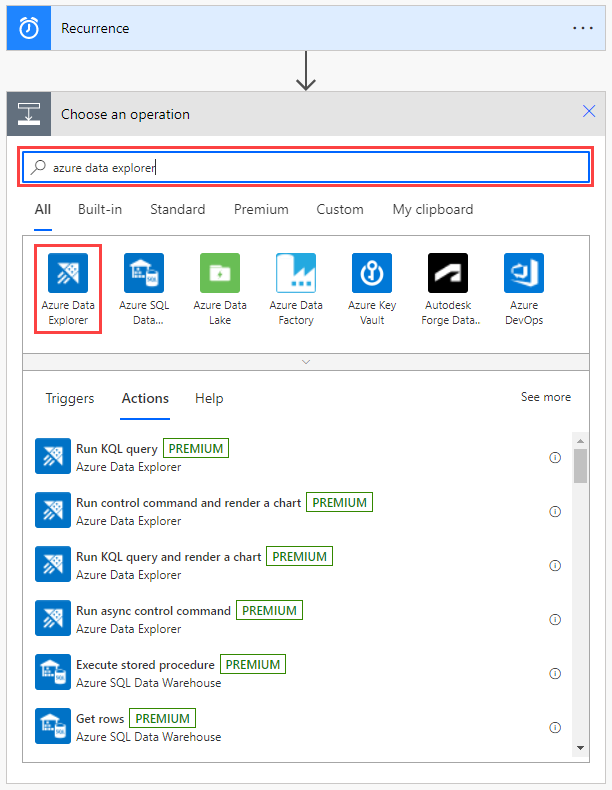
Select an action from the list. For an explanation of each action and how to configure them, see Flow actions.
Important
You must have a valid Azure Data Explorer connection for your flow to run. For information about creating a connection, see Create an Azure Data Explorer connection in Power Automate.

Flow actions
When you select the Azure Data Explorer connector, you can choose one of the following actions to add to your flow:
- Run Kusto Query Language (KQL) query
- Run KQL query and render a chart
- Run async management command
- Run management command and render a chart
- Run show management command
This section describes the capabilities and parameters for each action and provides an example showing how to add an email action to any flow.
Run KQL query
Note
If your query starts with a dot, it's a management command. Use Run async management command.
Use this action to query the specified cluster. The actions that are added afterwards iterate over each line of the results of the query.
If the query takes more than 8 minutes to run, it fails with a "RequestTimeout" exception. To prevent this issue, optimize your query or divide it into smaller parts. For more information, see Query best practices.
Example
The following flow triggers a query every minute. The query checks the number of records in the table, and then sends an email only if the number of records is greater than 0.

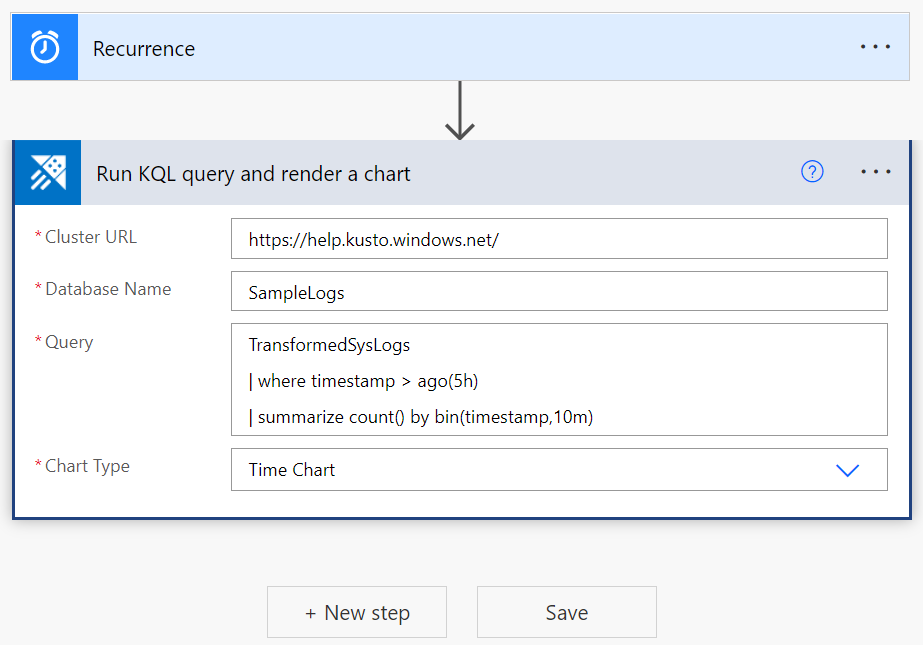
Run KQL query and render a chart
Note
If your query starts with a dot, it's a management command. Use Run management command and render a chart.
Use this action to visualize a KQL query result as a table or chart. For example, use this flow to receive daily reports by email.
If the query takes more than 8 minutes to run, it fails with a "RequestTimeout" exception. To prevent this issue, optimize your query or divide it into smaller parts. For more information, see Query best practices.
Example
The following flow presents the query results as a timechart.
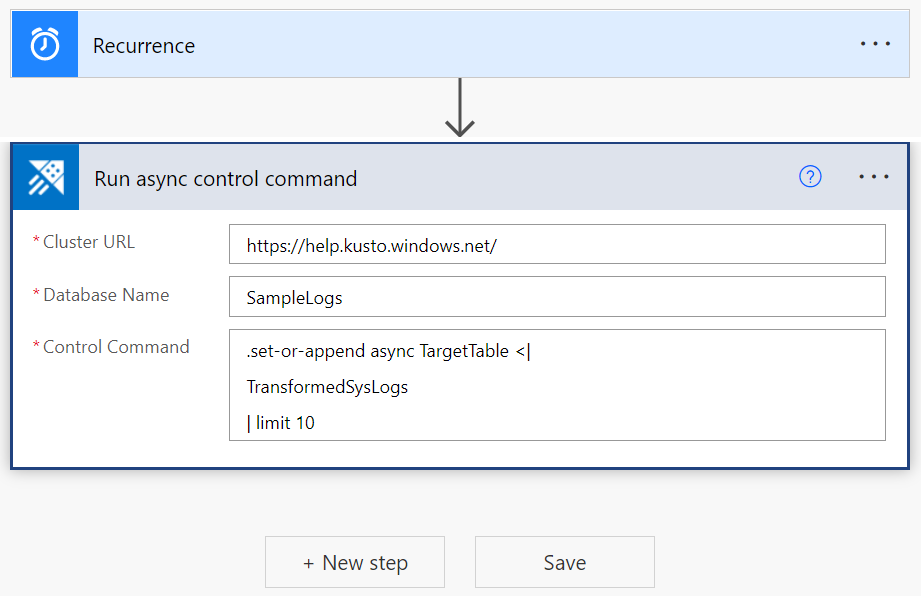
Run async management command
Use this action to run a management command asynchronously, which means it continues to run in the background. The action returns an ID, state, and status. To check the status and details of an async command, use the .show operations command with the ID returned by this action.
If the async management command takes more than 60 minutes to run, it fails with a "RequestTimeout" exception.
Example
The following flow triggers an async command to copy 10 records from the TransformedSysLogs table to the TargetTable. The async keyword is required in the query.
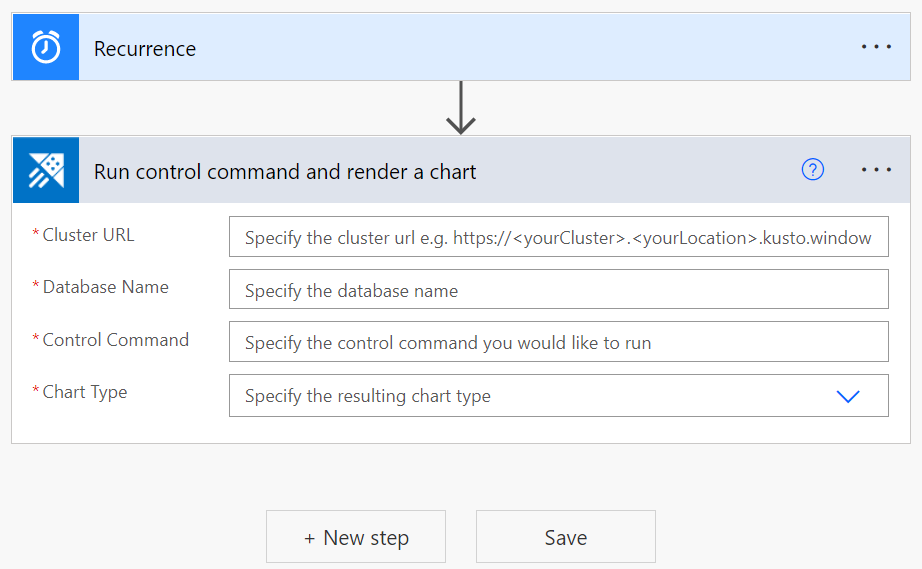
Run management command and render a chart
Use this action to run a management command and display the result as a chart. The chart options include an HTML table, pie chart, time chart, and bar chart.
If the management command takes more than 8 minutes to run, it fails with a "RequestTimeout" exception.
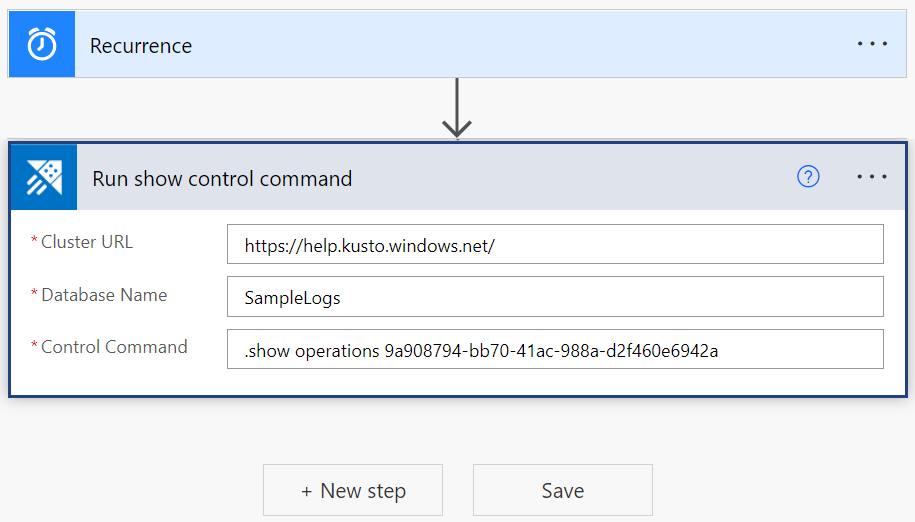
Run show management command
This action runs the show management command and returns the result that can be used in the following connectors.
If the management command takes more than 8 minutes to run, it fails with a "RequestTimeout" exception.
Example
The following flow runs the .show operation command to find the status of an async command using an operation ID returned by an async command execution.
Email Kusto query results
You can include a step in any flow to send reports by email, to any email address.
- Select + New Step to add a new step to your flow.
- In the search box, enter Office 365 and select Office 365 Outlook.
- Select Send an email (V2).
- Enter the email address to which you want the email report sent.
- Enter the subject of the email.
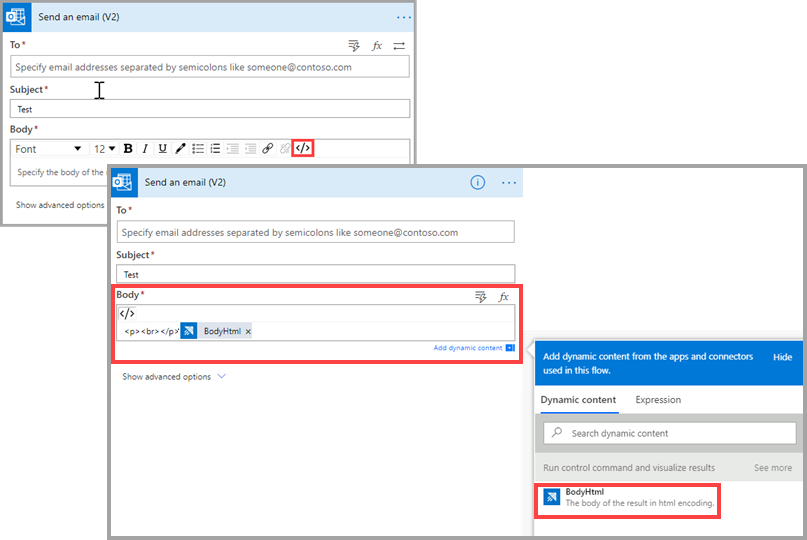
- Select Code view.
- Place your cursor in the Body field, and select Add dynamic content.
- Select BodyHtml.
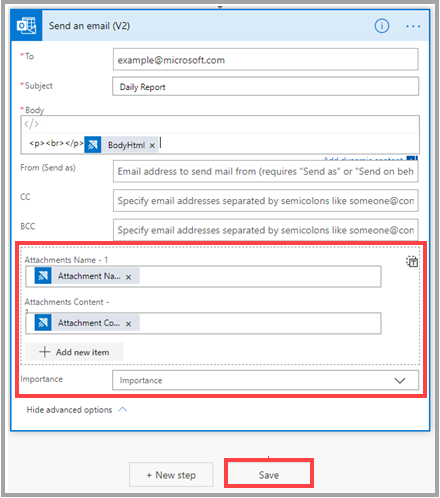
- Select Show advanced options.
- Under Attachments Name -1, select Attachment Name.
- Under Attachments Content, select Attachment Content.
- If necessary, add more attachments.
- If necessary, set the importance level.
- Select Save.
Create an Azure Data Explorer connection
To run a flow that contains an Azure Data Explorer connector, you must use a valid Azure Data Explorer connection. You can create and authenticate a new connection from the Power Automate left pane, select Data > Connections or from within the flow, by selecting the Azure Data Explorer connector's menu > Add new connection.
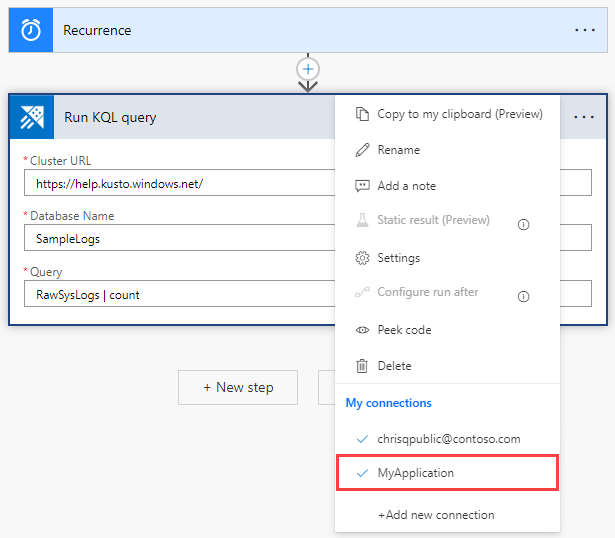
The following steps show how to create a connection from within a flow.
In Run KQL query, select the three dots at the top right of the Power Automate connector.
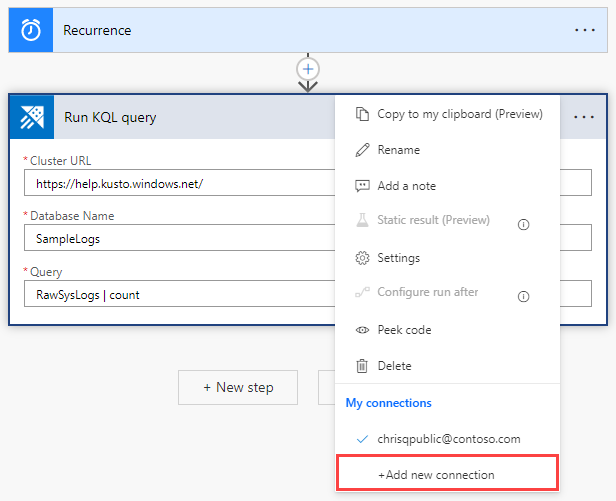
Select Add new connection. When you connect for the first time, you're prompted to sign in to authenticate the connection.
Authentication
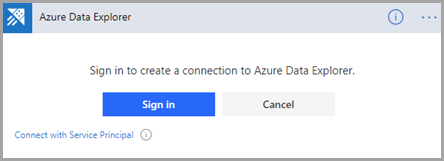
You can authenticate with user credentials or with a Microsoft Entra application. To authenticate with credentials, select Sign in, and enter your credentials.
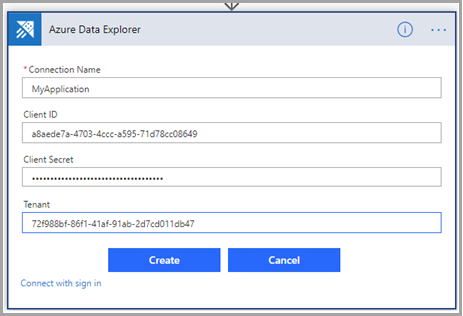
To authenticate with a Service Principal:
Select Connect with Service Principal.
Fill out the form with the following information:
- Connection Name: A descriptive and meaningful name for the new connection. In this example, we've used MyApplication.
- Client ID: Your application ID.
- Client Secret: Your application key.
- Tenant: The ID of the Microsoft Entra directory in which you created the application.
Note
Make sure your application is an Microsoft Entra application and is authorized to run queries on your cluster.
When authentication is complete, verify that your flow uses the new connection.
Once the connection is set, the flow runs using the application credentials.
Test the flow
To check if your flow works, check the flow's run history:
Go to the Power Automate home page.
From the main menu, select My flows.
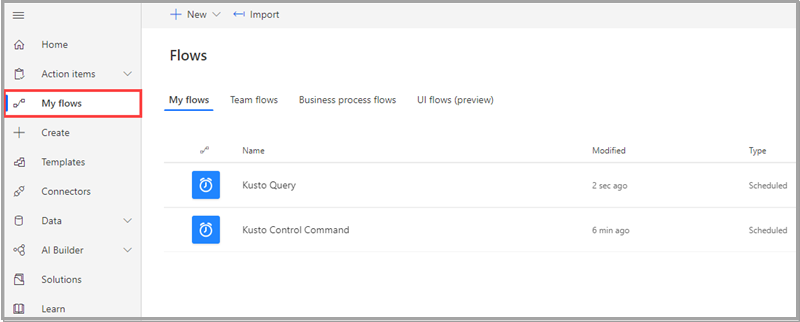
On the row of the flow you want to investigate, select the more commands icon, and then select Run history.

All flow runs are listed, with information about start time, duration, and status.

For full details about the flow, on My flows, select the flow you want to investigate.
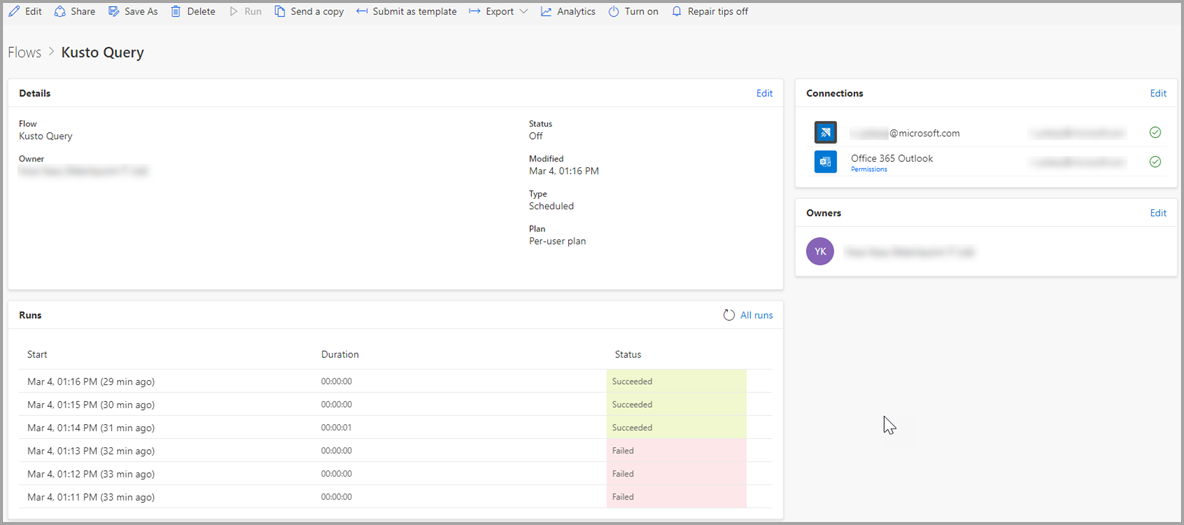
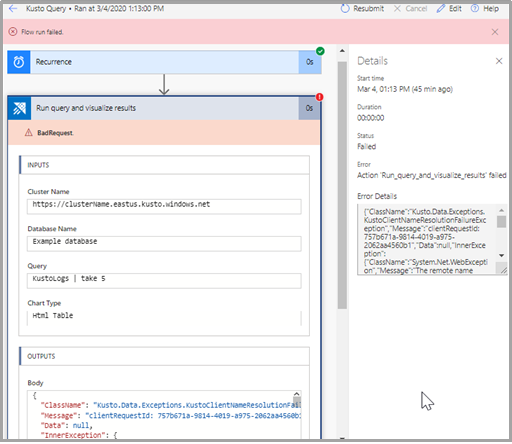
To see why a run failed, select the run start time. The flow appears, and the step of the flow that failed is indicated by a red exclamation point. Expand the failed step to view its details. The Details pane to the right contains information about the failure so that you can troubleshoot it.
Limitations
- The maximum number of records per request is 50,000 and the maximum data size per request is 32 MB. These limits can't be changed.
- Synchronous requests have a timeout of 8 minutes.
- Asynchronous requests have a timeout of 60 minutes.
- The connector doesn't support operators that aren't supported by the
getschemaoperator. For example, the fork, facet, and evaluate operators aren't supported. - Flows work best on Microsoft Edge and Google Chrome.
Related content
- Use the Azure Kusto Logic App connector to run Kusto queries and commands as part of a scheduled or triggered task.