Note
Access to this page requires authorization. You can try signing in or changing directories.
Access to this page requires authorization. You can try changing directories.
Azure Data Explorer is a fast, fully managed data analytics service for real-time analysis of large volumes of data streaming from applications, websites, IoT devices, and more.
Power Apps is a suite of apps, services, connectors, and data platform that provides a rapid application development environment to build custom apps that connect to your business data. The Power Apps connector is useful if you have a large and growing collection of streaming data in Azure Data Explorer and want to build a low code, highly functional app to make use of this data. In this article, you create a Power Apps application to query Azure Data Explorer data.
Prerequisites
- Power platform license. Get started at https://powerapps.microsoft.com.
- Familiarity with the Power Apps suite.
Connect to Azure Data Explorer Connector
Go to https://make.powerapps.com/ and sign in.
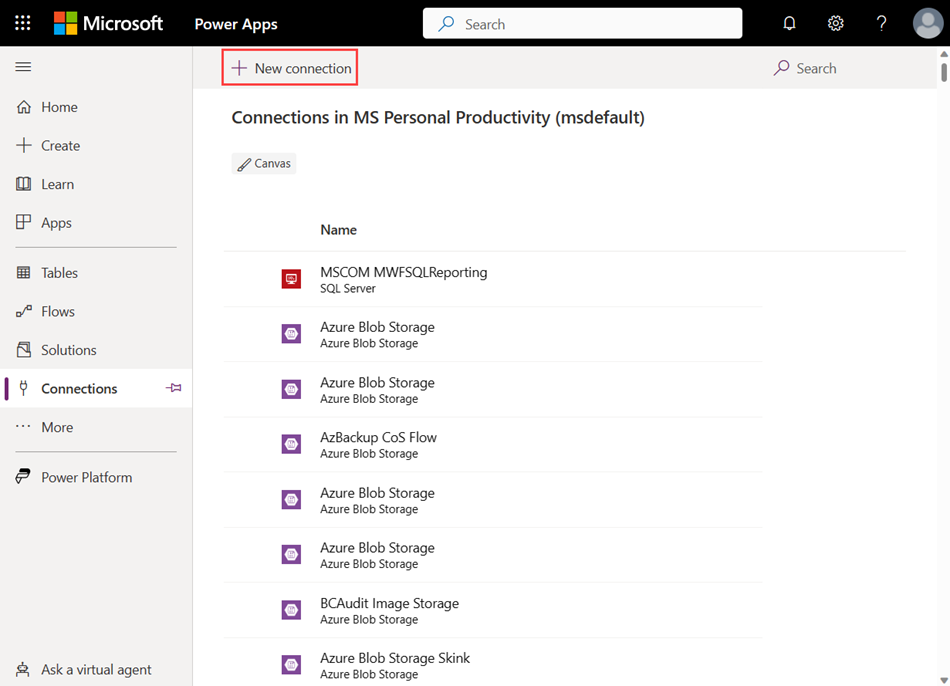
On the left menu, select more > Connections.
Select + New connection.
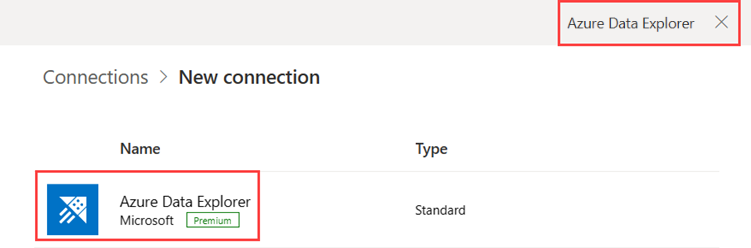
Search for Azure Data Explorer, and then select Azure Data Explorer.
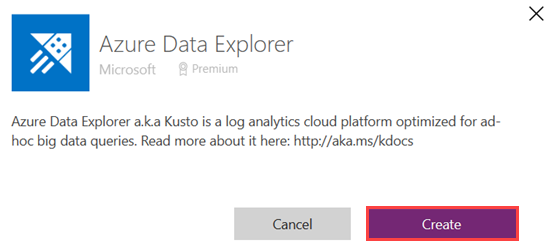
Select Create on the Azure Data Explorer window that appears.
Provide your credentials in the authentication window.
For more information on the Azure Data Explorer connector in Power Apps, see Azure Data Explorer connector
Create app
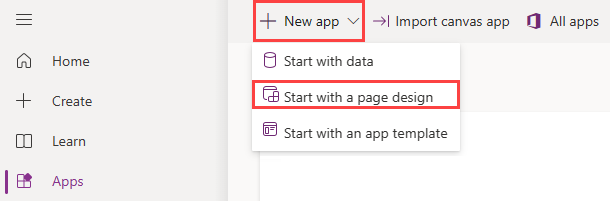
On the left menu, select Apps.
Select + New app > Start with a page design.
Select Blank canvas. By default, Tablet format is selected.
Add connector
On the left menu, select Data.
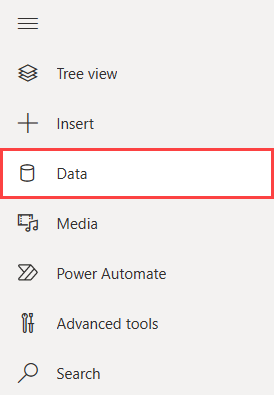
Select Add data.
Expand Connectors, select Azure Data Explorer, and then select your Azure Data Explorer user.
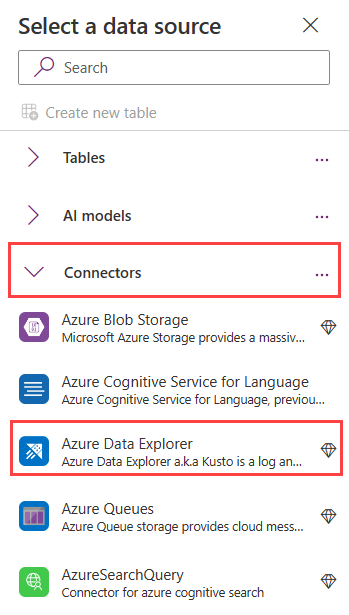
You added Azure Data Explorer as a data source.
Configure data row limit
Optionally, set how many records to retrieve from server-based connections where delegation isn't supported.
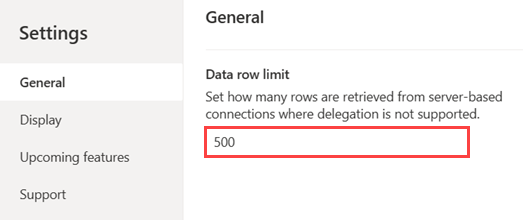
On the menu bar, select Settings.
In General settings, scroll to Data row limit, and then set your returned records limit. The default limit is 500.
Note
The limit value for returned records is between 1 and 2,000.
Add Dropdown
On the menu bar, select +Insert.
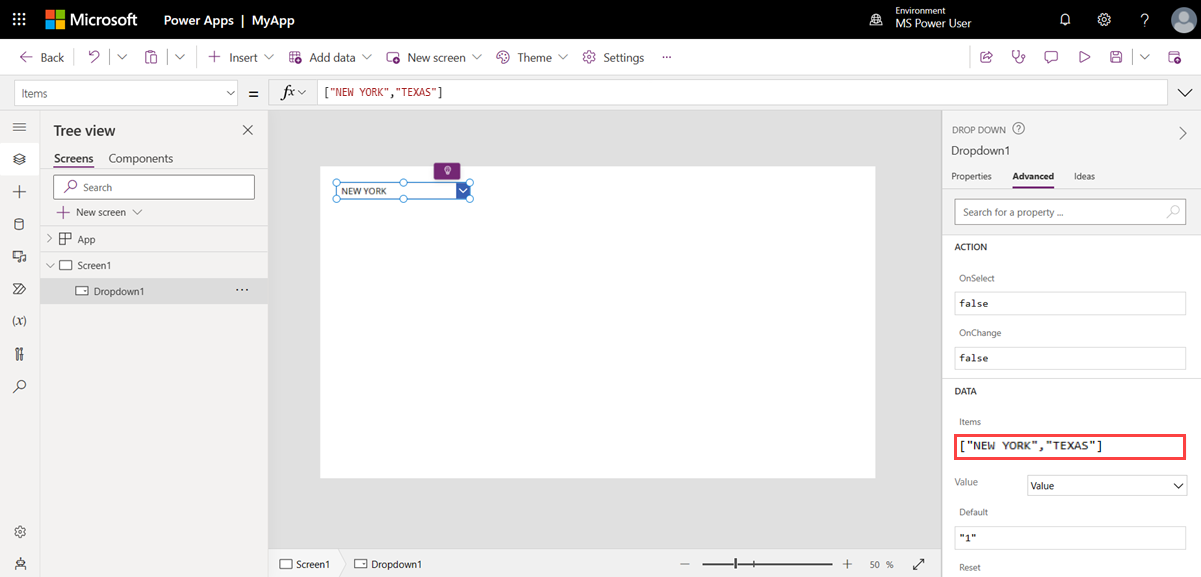
Select Input, and then select Drop down. The Drop Down properties pane appears on the rightmost of the canvas.
In the properties pane, select the Advanced tab.
Under Data, replace the placeholder text for Items with:
["NEW YORK","TEXAS"]A dropdown menu appears on the canvas. Once you have data, you can select New York or Texas by expanding the dropdown menu.
With the dropdown still selected, replace the placeholder text for OnChange with the following formula.
ClearCollect(
KustoQueryResults,
AzureDataExplorer.listKustoResultsPost(
"https://help.kusto.windows.net",
"Samples",
"StormEvents | where State == '" & Dropdown1.SelectedText.Value & "' | take 15"
).value
)

Add Data Table
Select +Insert in the menu bar.
Select Layout > Data table. Reposition the data table as needed.
In the properties pane, select the Advanced tab.
Under Data, replace the placeholder text for Items with the following formula. The formula specifies the column types to map according to the formula in Add Dropdown.
ForAll(
KustoQueryResults,
{
EventId: Value(Value.EventId),
EventType: Text(Value.EventType),
DamageProperty: Value(Value.DamageProperty)
}
)
In the properties pane, select the Properties tab.
The Data source autopopulates with the source you specified in the Items section of the data table. In this example, the source is
KustoQueryResults.Select Edit fields, and then select + Add field.
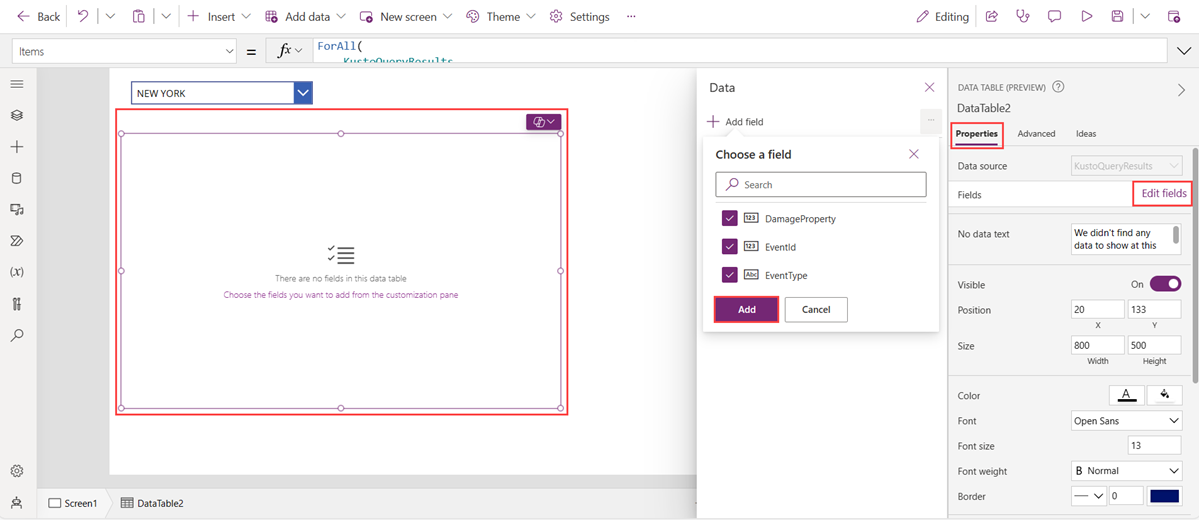
Select desired fields and then select Add. A preview of the selected data table appears.
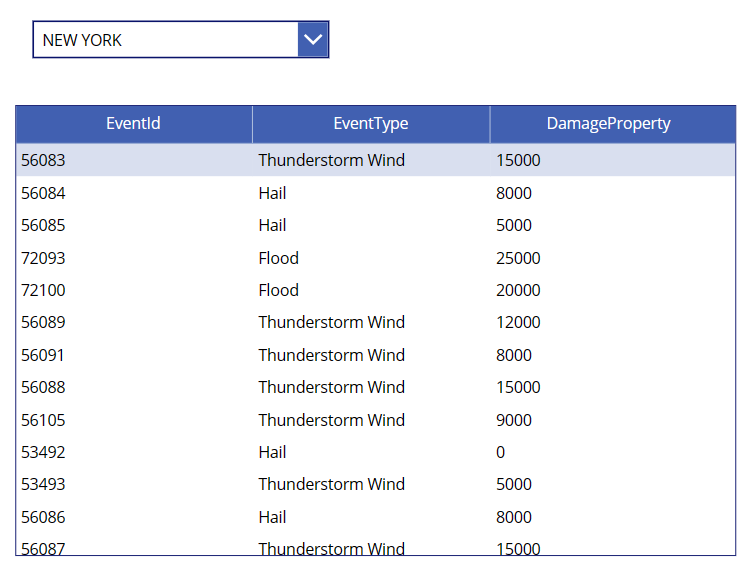
Select Save, and then enter a name for your app.

Validate app
- Select the Play button on the rightmost of the menu bar, or select F5 to preview the app.
- Try the dropdown, scroll through the data table, and confirm successful data retrieval and presentation.
Limitations
- Power Apps returns up to 2,000 result records to the client. The overall memory for those records can't exceed 64 MB, and the query has a time limit of seven minutes.
- The connector doesn't support the fork and facet operators.
- Timeout exceptions: The connector has a timeout limitation of seven minutes. To avoid potential timeout problems, make your query more efficient so that it runs faster, or separate it into chunks. Each chunk can run on a different part of the query. For more information, see Query best practices.
For more information on known problems and limitations for querying data by using the Azure Data Explorer connector, see Known issues and limitations.