Note
Access to this page requires authorization. You can try signing in or changing directories.
Access to this page requires authorization. You can try changing directories.
APPLIES TO:  Azure Data Factory
Azure Synapse Analytics
Azure Data Factory
Azure Synapse Analytics
Tip
Try out Data Factory in Microsoft Fabric, an all-in-one analytics solution for enterprises. Microsoft Fabric covers everything from data movement to data science, real-time analytics, business intelligence, and reporting. Learn how to start a new trial for free!
Azure Data Lake Storage Gen2 is a set of capabilities dedicated to big data analytics that's built into Azure Blob storage. You can use it to interface with your data by using both file system and object storage paradigms.
If you currently use Azure Data Lake Storage Gen1, you can evaluate Azure Data Lake Storage Gen2 by copying data from Data Lake Storage Gen1 to Gen2 by using Azure Data Factory.
Azure Data Factory is a fully managed cloud-based data integration service. You can use the service to populate the lake with data from a rich set of on-premises and cloud-based data stores and save time when you build your analytics solutions. For a list of supported connectors, see the table of Supported data stores.
Azure Data Factory offers a scale-out, managed data movement solution. Because of the scale-out architecture of Data Factory, it can ingest data at a high throughput. For more information, see Copy activity performance.
This article shows you how to use the Data Factory copy data tool to copy data from Azure Data Lake Storage Gen1 into Azure Data Lake Storage Gen2. You can follow similar steps to copy data from other types of data stores.
Prerequisites
- An Azure subscription. If you don't have an Azure subscription, create a free account before you begin.
- Azure Data Lake Storage Gen1 account with data in it.
- Azure Storage account with Data Lake Storage Gen2 enabled. If you don't have a Storage account, create an account.
Create a data factory
If you have not created your data factory yet, follow the steps in Quickstart: Create a data factory by using the Azure portal and Azure Data Factory Studio to create one. After creating it, browse to the data factory in the Azure portal.
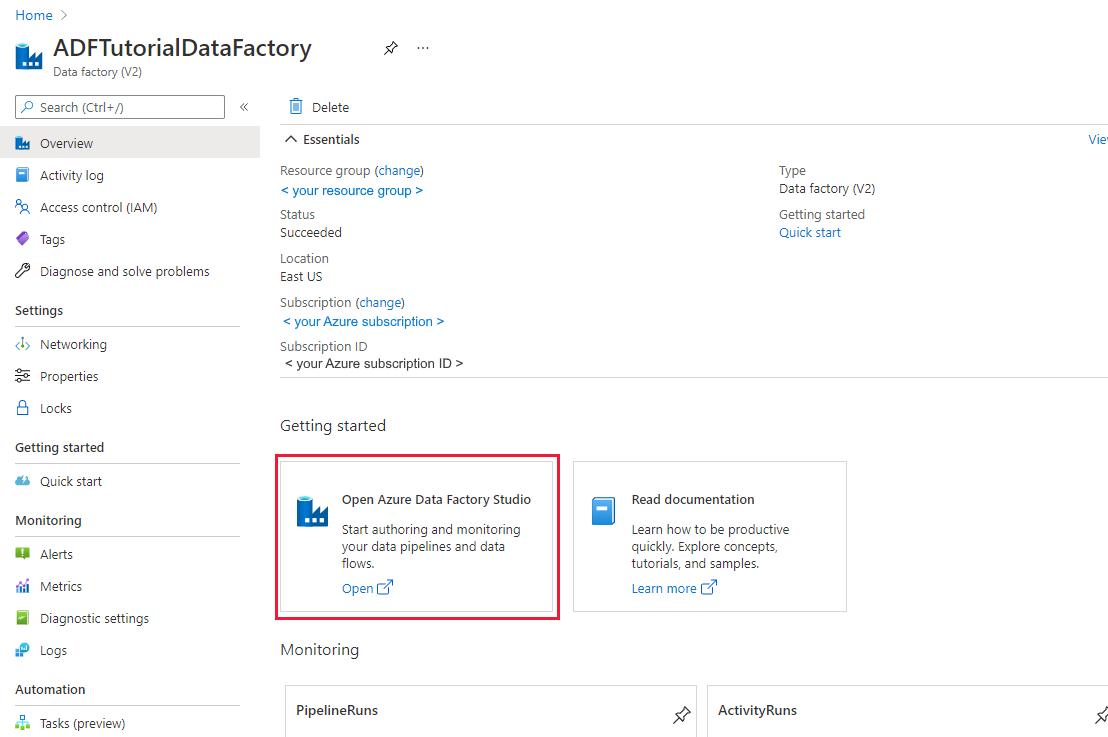
Select Open on the Open Azure Data Factory Studio tile to launch the Data Integration application in a separate tab.
Load data into Azure Data Lake Storage Gen2
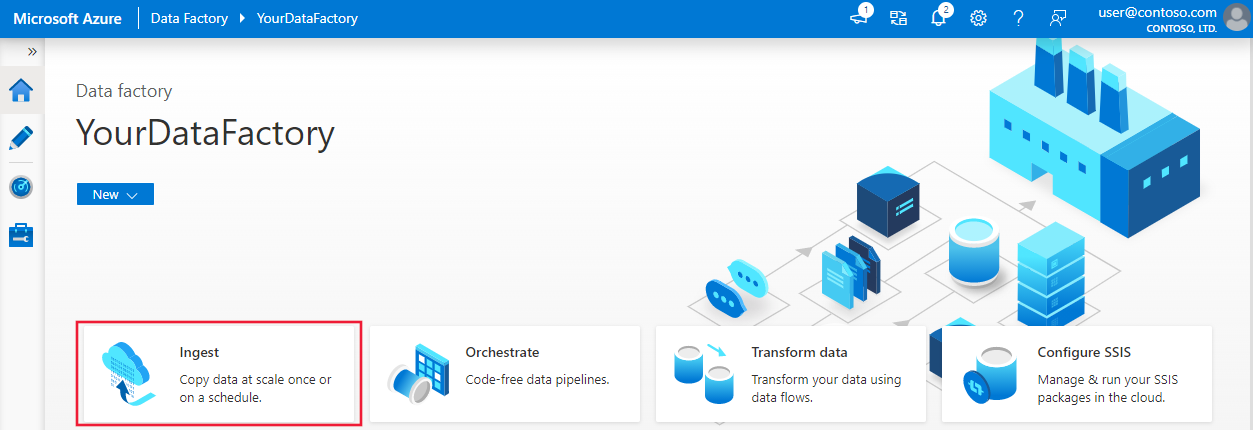
On the home page, select the Ingest tile to launch the copy data tool.
On the Properties page, choose Built-in copy task under Task type, and choose Run once now under Task cadence or task schedule, then select Next.
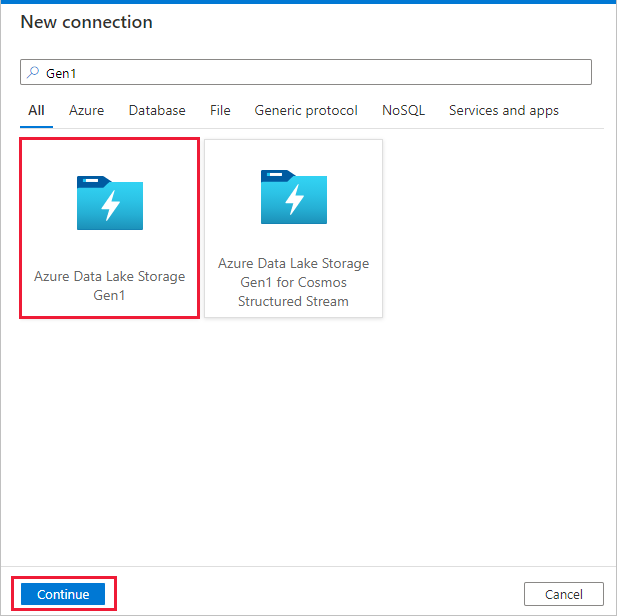
On the Source data store page, select + New connection.
Select Azure Data Lake Storage Gen1 from the connector gallery, and select Continue.
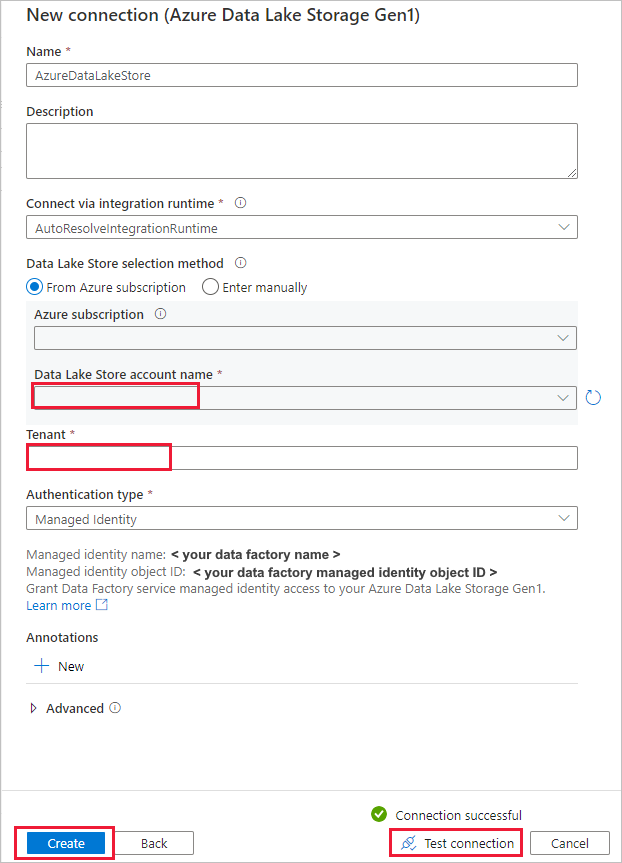
On the New connection (Azure Data Lake Storage Gen1) page, follow these steps:
- Select your Data Lake Storage Gen1 for the account name, and specify or validate the Tenant.
- Select Test connection to validate the settings. Then select Create.
Important
In this walk-through, you use a managed identity for Azure resources to authenticate your Azure Data Lake Storage Gen1. To grant the managed identity the proper permissions in Azure Data Lake Storage Gen1, follow these instructions.
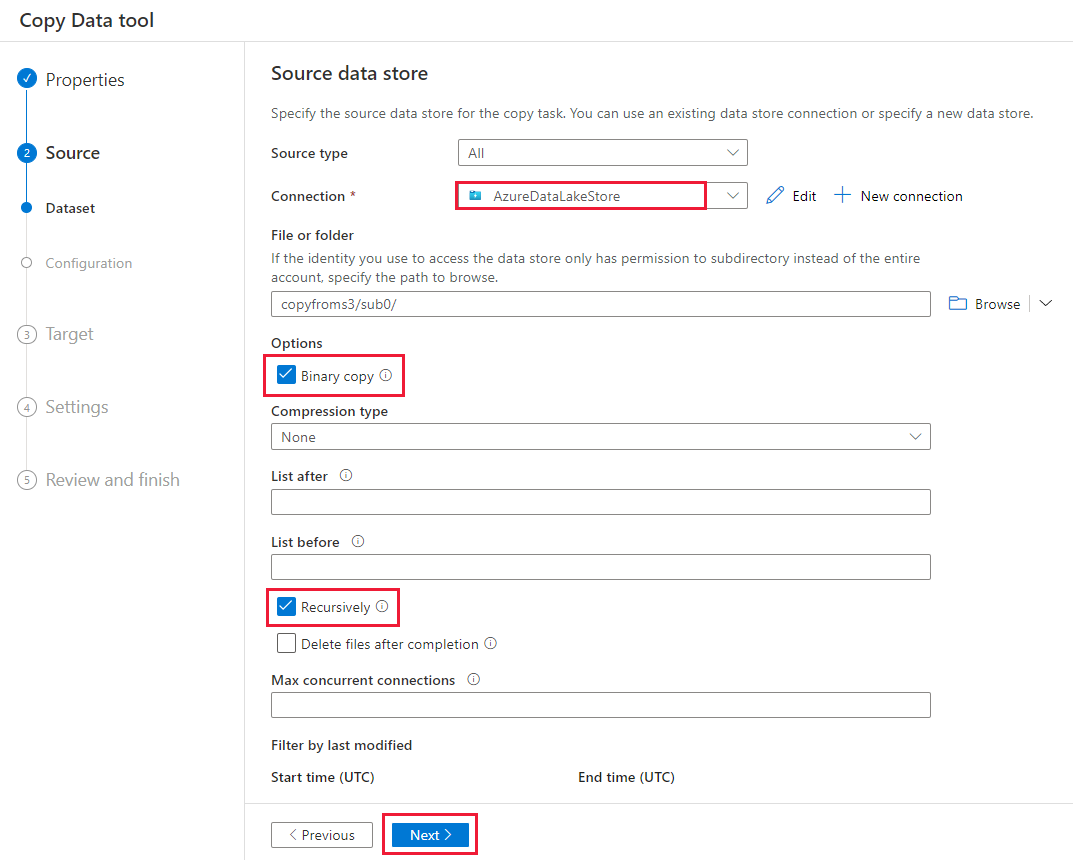
On the Source data store page, complete the following steps.
- Select the newly created connection in the Connection section.
- Under File or folder, browse to the folder and file that you want to copy over. Select the folder or file, and select OK.
- Specify the copy behavior by selecting the Recursively and Binary copy options. Select Next.
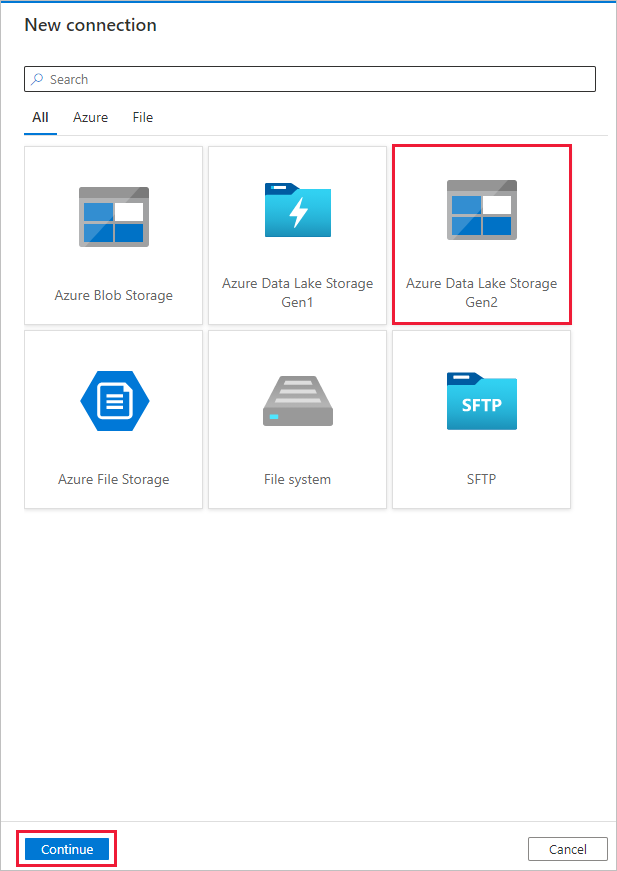
On the Destination data store page, select + New connection > Azure Data Lake Storage Gen2 > Continue.
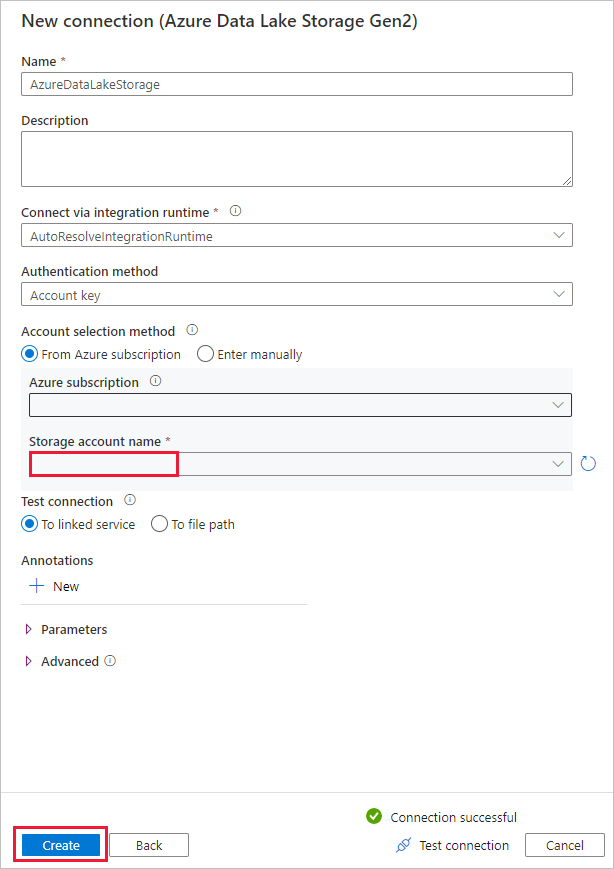
On the New connection (Azure Data Lake Storage Gen2) page, follow these steps:
- Select your Data Lake Storage Gen2 capable account from the Storage account name drop-down list.
- Select Create to create the connection.
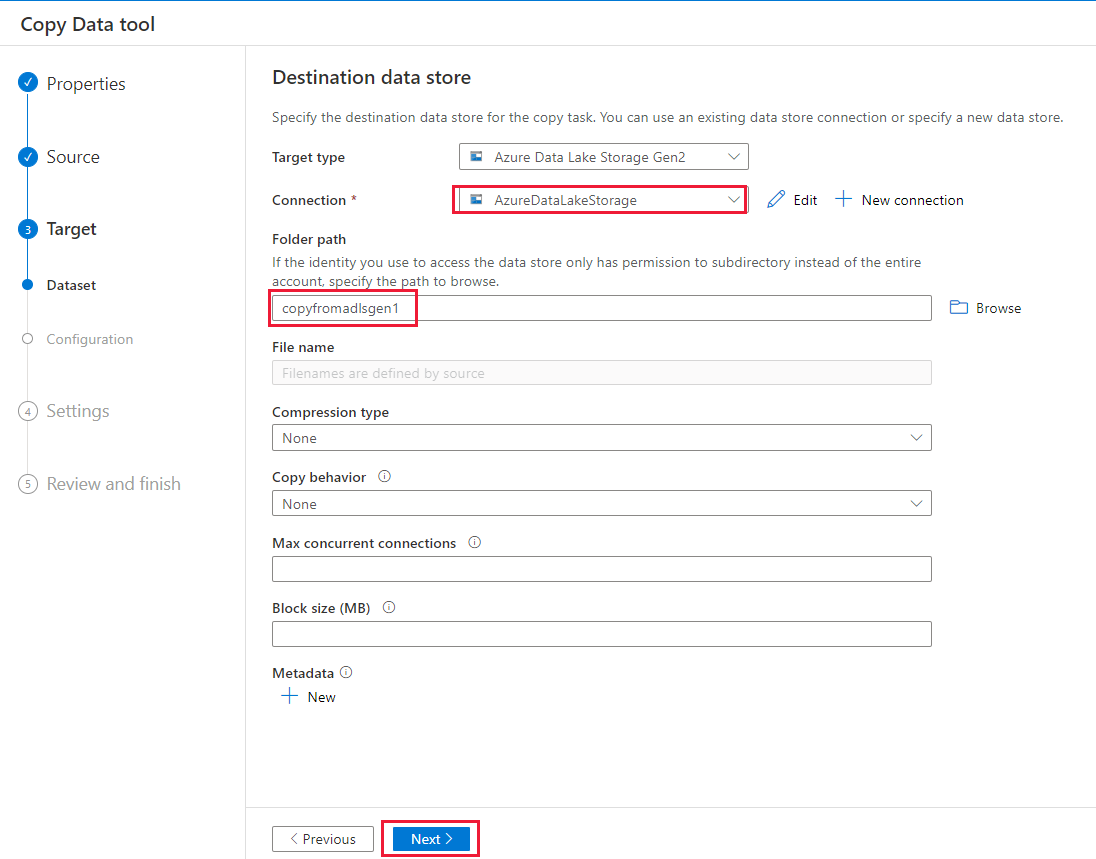
On the Destination data store page, complete the following steps.
- Select the newly created connection in the Connection block.
- Under Folder path, enter copyfromadlsgen1 as the output folder name, and select Next. Data Factory creates the corresponding Azure Data Lake Storage Gen2 file system and subfolders during copy if they don't exist.
On the Settings page, specify CopyFromADLSGen1ToGen2 for the Task name field, then select Next to use the default settings.
On the Summary page, review the settings, and select Next.
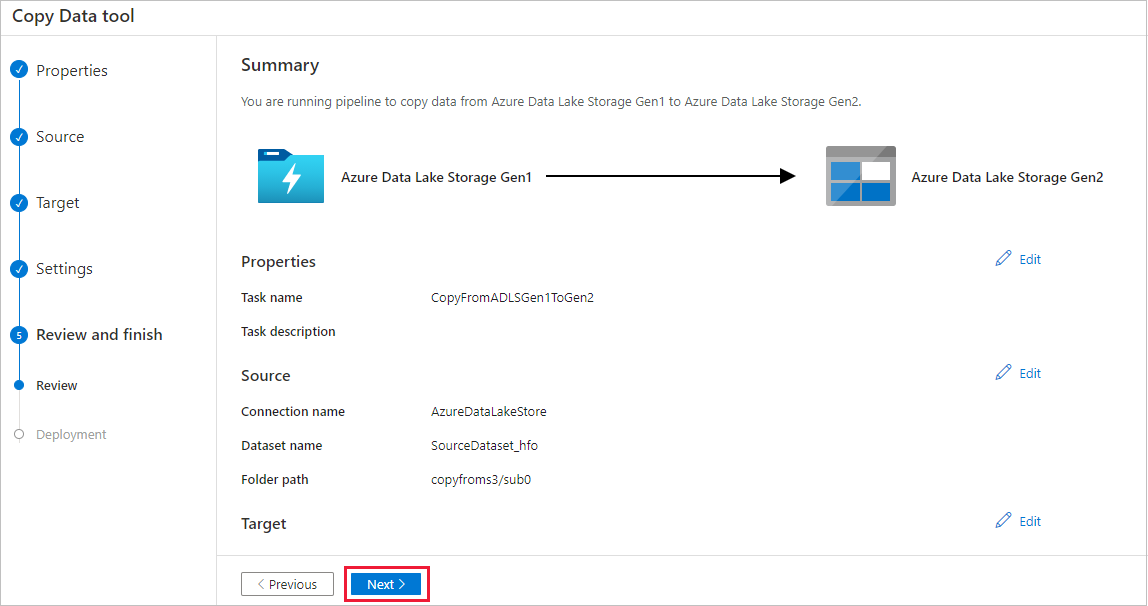
On the Deployment page, select Monitor to monitor the pipeline.
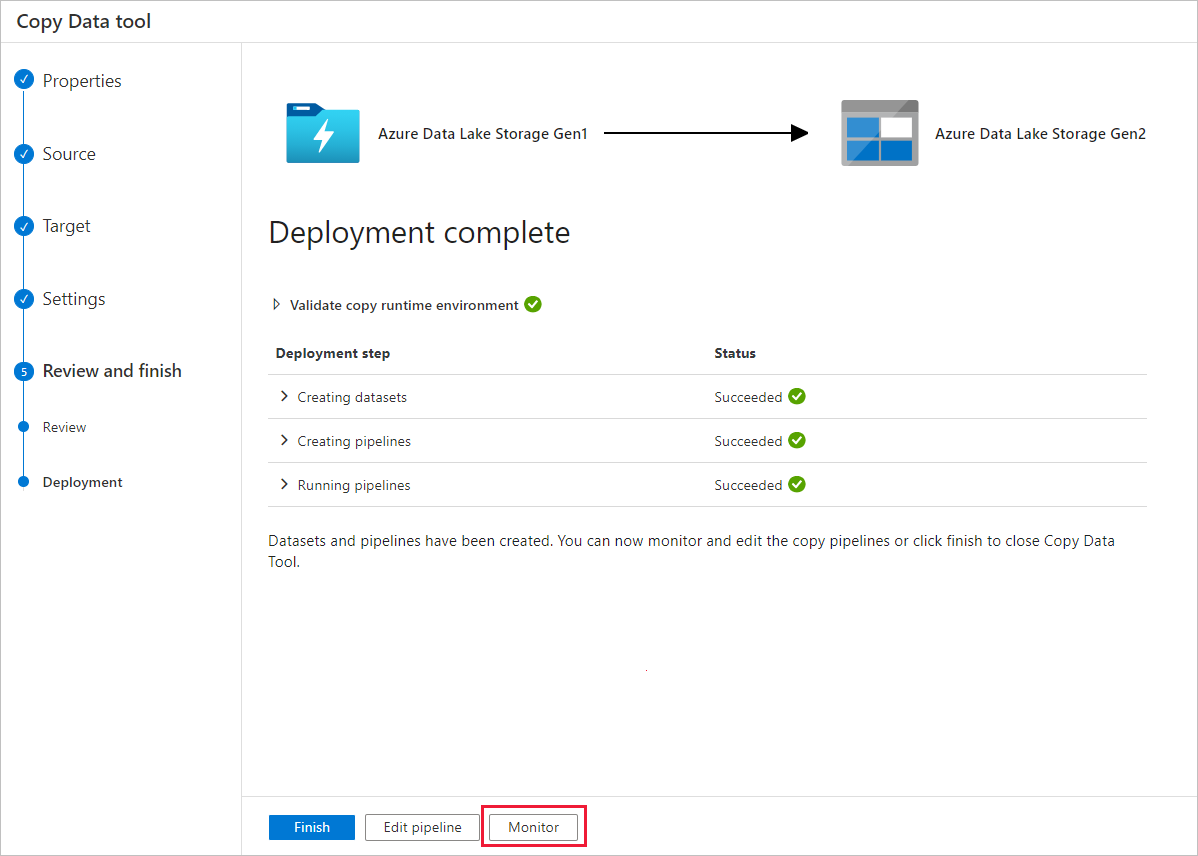
Notice that the Monitor tab on the left is automatically selected. The Pipeline name column includes links to view activity run details and to rerun the pipeline.
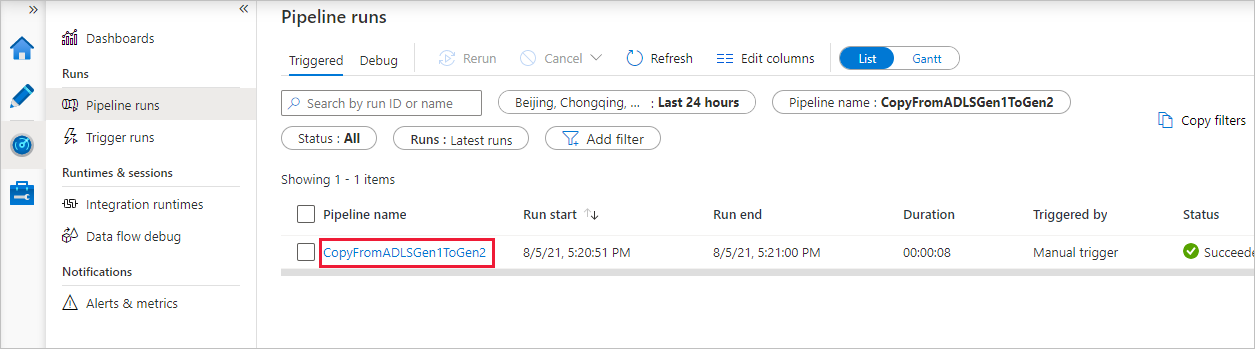
To view activity runs that are associated with the pipeline run, select the link in the Pipeline name column. There's only one activity (copy activity) in the pipeline, so you see only one entry. To switch back to the pipeline runs view, select the All pipeline runs link in the breadcrumb menu at the top. Select Refresh to refresh the list.
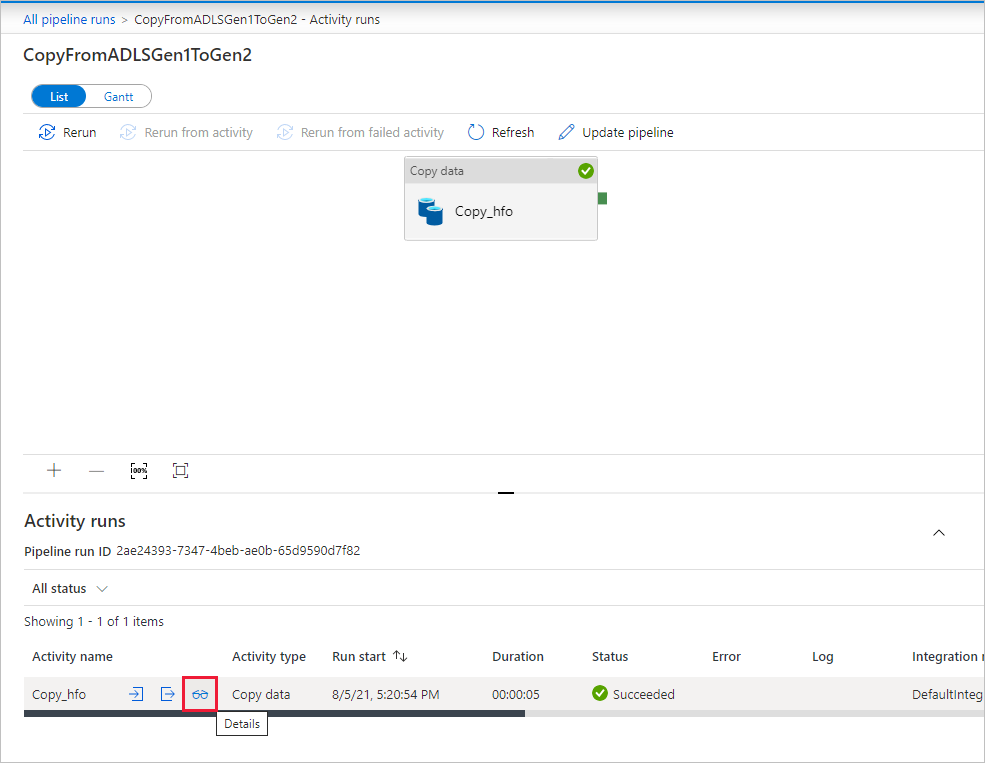
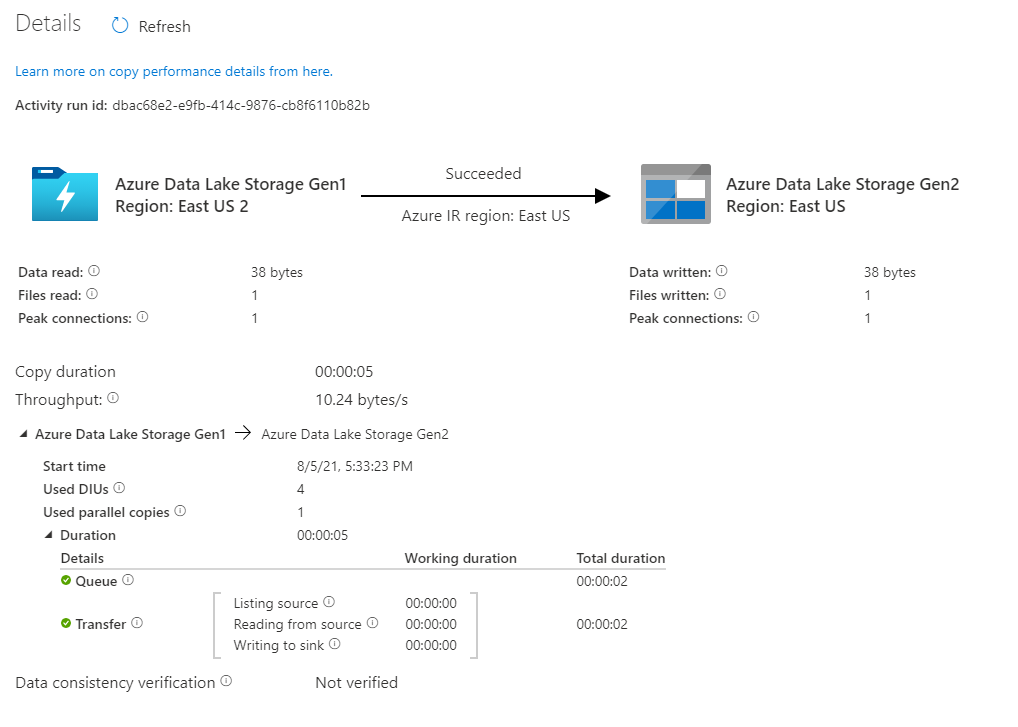
To monitor the execution details for each copy activity, select the Details link (eyeglasses image) under the Activity name column in the activity monitoring view. You can monitor details like the volume of data copied from the source to the sink, data throughput, execution steps with corresponding duration, and used configurations.
Verify that the data is copied into your Azure Data Lake Storage Gen2 account.
Best practices
To assess upgrading from Azure Data Lake Storage Gen1 to Azure Data Lake Storage Gen2 in general, see Upgrade your big data analytics solutions from Azure Data Lake Storage Gen1 to Azure Data Lake Storage Gen2. The following sections introduce best practices for using Data Factory for a data upgrade from Data Lake Storage Gen1 to Data Lake Storage Gen2.
Initial snapshot data migration
Performance
ADF offers a serverless architecture that allows parallelism at different levels, which allows developers to build pipelines to fully utilize your network bandwidth as well as storage IOPS and bandwidth to maximize data movement throughput for your environment.
Customers have successfully migrated petabytes of data consisting of hundreds of millions of files from Data Lake Storage Gen1 to Gen2, with a sustained throughput of 2 GBps and higher.
You can achieve greater data movement speeds by applying different levels of parallelism:
- A single copy activity can take advantage of scalable compute resources: when using Azure Integration Runtime, you can specify up to 256 data integration units (DIUs) for each copy activity in a serverless manner; when using self-hosted Integration Runtime, you can manually scale up the machine or scale out to multiple machines (up to 4 nodes), and a single copy activity will partition its file set across all nodes.
- A single copy activity reads from and writes to the data store using multiple threads.
- ADF control flow can start multiple copy activities in parallel, for example using For Each loop.
Data partitions
If your total data size in Data Lake Storage Gen1 is less than 10 TB and the number of files is less than 1 million, you can copy all data in a single copy activity run. If you have a larger amount of data to copy, or you want the flexibility to manage data migration in batches and make each of them complete within a specific time frame, partition the data. Partitioning also reduces the risk of any unexpected issue.
The way to partition the files is to use name range- listAfter/listBefore in copy activity property. Each copy activity can be configured to copy one partition at a time, so that multiple copy activities can copy data from single Data Lake Storage Gen1 account concurrently.
Rate limiting
As a best practice, conduct a performance POC with a representative sample dataset, so that you can determine an appropriate partition size.
Start with a single partition and a single copy activity with default DIU setting. The Parallel copy is always suggested to be set as empty (default). If the copy throughput is not good for you, identify and resolve the performance bottlenecks by following the performance tuning steps.
Gradually increase the DIU setting until you reach the bandwidth limit of your network or IOPS/bandwidth limit of the data stores, or you have reached the max 256 DIU allowed on a single copy activity.
If you have maximized the performance of a single copy activity, but have not yet achieved the throughput upper limits of your environment, you can run multiple copy activities in parallel.
When you see significant number of throttling errors from copy activity monitoring, it indicates you have reached the capacity limit of your storage account. ADF will retry automatically to overcome each throttling error to make sure there will not be any data lost, but too many retries can degrade your copy throughput as well. In such case, you are encouraged to reduce the number of copy activities running concurrently to avoid significant amounts of throttling errors. If you have been using single copy activity to copy data, then you are encouraged to reduce the DIU.
Delta data migration
You can use several approaches to load only the new or updated files from Data Lake Storage Gen1:
- Load new or updated files by time partitioned folder or file name. An example is /2019/05/13/*.
- Load new or updated files by LastModifiedDate. If you are copying large amounts of files, do partitions first in order to avoid low copy throughput result from single copy activity scanning your entire Data Lake Storage Gen1 account to identify new files.
- Identify new or updated files by any third-party tool or solution. Then pass the file or folder name to the Data Factory pipeline via parameter or a table or file.
The proper frequency to do incremental load depends on the total number of files in Azure Data Lake Storage Gen1 and the volume of new or updated files to be loaded every time.
Network security
By default, ADF transfers data from Azure Data Lake Storage Gen1 to Gen2 using encrypted connection over HTTPS protocol. HTTPS provides data encryption in transit and prevents eavesdropping and man-in-the-middle attacks.
Alternatively, if you do not want data to be transferred over public Internet, you can achieve higher security by transferring data over a private network.
Preserve ACLs
If you want to replicate the ACLs along with data files when you upgrade from Data Lake Storage Gen1 to Data Lake Storage Gen2, see Preserve ACLs from Data Lake Storage Gen1.
Resilience
Within a single copy activity run, ADF has built-in retry mechanism so it can handle a certain level of transient failures in the data stores or in the underlying network. If you migrate more than 10 TB data, you are encouraged to partition the data to reduce the risk of any unexpected issues.
You can also enable fault tolerance in copy activity to skip the predefined errors. The data consistency verification in copy activity can also be enabled to do additional verification to ensure the data is not only successfully copied from source to destination store, but also verified to be consistent between source and destination store.
Permissions
In Data Factory, the Data Lake Storage Gen1 connector supports service principal and managed identity for Azure resource authentications. The Data Lake Storage Gen2 connector supports account key, service principal, and managed identity for Azure resource authentications. To make Data Factory able to navigate and copy all the files or access control lists (ACLs) you will need to grant high enough permissions to the account to access, read, or write all files and set ACLs if you choose to. You should grant the account a super-user or owner role during the migration period and remove the elevated permissions once the migration is completed.