Note
Access to this page requires authorization. You can try signing in or changing directories.
Access to this page requires authorization. You can try changing directories.
APPLIES TO:  Azure Data Factory
Azure Synapse Analytics
Azure Data Factory
Azure Synapse Analytics
Tip
Try out Data Factory in Microsoft Fabric, an all-in-one analytics solution for enterprises. Microsoft Fabric covers everything from data movement to data science, real-time analytics, business intelligence, and reporting. Learn how to start a new trial for free!
In this tutorial, you use the Azure Data Factory user interface (UI) to create a data factory pipeline that copies data from a SQL Server database to Azure Blob storage. You create and use a self-hosted integration runtime, which moves data between on-premises and cloud data stores.
Note
This article doesn't provide a detailed introduction to Data Factory. For more information, see Introduction to Data Factory.
In this tutorial, you perform the following steps:
- Create a data factory.
- Create a self-hosted integration runtime.
- Create SQL Server and Azure Storage linked services.
- Create SQL Server and Azure Blob datasets.
- Create a pipeline with a copy activity to move the data.
- Start a pipeline run.
- Monitor the pipeline run.
Prerequisites
Azure subscription
Before you begin, if you don't already have an Azure subscription, create a free account.
Azure roles
To create data factory instances, the user account you use to sign in to Azure must be assigned a Contributor or Owner role or must be an administrator of the Azure subscription.
To view the permissions you have in the subscription, go to the Azure portal. In the upper-right corner, select your user name, and then select Permissions. If you have access to multiple subscriptions, select the appropriate subscription. For sample instructions on how to add a user to a role, see Assign Azure roles using the Azure portal.
SQL Server 2014, 2016, and 2017
In this tutorial, you use a SQL Server database as a source data store. The pipeline in the data factory you create in this tutorial copies data from this SQL Server database (source) to Blob storage (sink). You then create a table named emp in your SQL Server database and insert a couple of sample entries into the table.
Start SQL Server Management Studio. If it's not already installed on your machine, go to Download SQL Server Management Studio.
Connect to your SQL Server instance by using your credentials.
Create a sample database. In the tree view, right-click Databases, and then select New Database.
In the New Database window, enter a name for the database, and then select OK.
To create the emp table and insert some sample data into it, run the following query script against the database. In the tree view, right-click the database that you created, and then select New Query.
 CREATE TABLE dbo.emp
 (
     ID int IDENTITY(1,1) NOT NULL,
     FirstName varchar(50),
     LastName varchar(50)
 )
 GO

 INSERT INTO emp (FirstName, LastName) VALUES ('John', 'Doe')
 INSERT INTO emp (FirstName, LastName) VALUES ('Jane', 'Doe')
 GO
Azure storage account
In this tutorial, you use a general-purpose Azure storage account (specifically, Blob storage) as a destination/sink data store. If you don't have a general-purpose Azure storage account, see Create a storage account. The pipeline in the data factory that you create in this tutorial copies data from the SQL Server database (source) to Blob storage (sink).
Get the storage account name and account key
You use the name and key of your storage account in this tutorial. To get the name and key of your storage account, take the following steps:
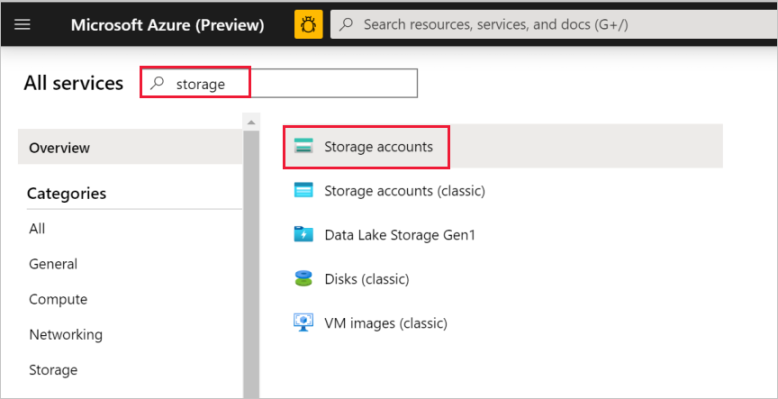
Sign in to the Azure portal with your Azure user name and password.
In the left pane, select All services. Filter by using the Storage keyword, and then select Storage accounts.
In the list of storage accounts, filter for your storage account if needed. Then select your storage account.
In the Storage account window, select Access keys.
In the Storage account name and key1 boxes, copy the values, and then paste them into Notepad or another editor for later use in the tutorial.
Create the adftutorial container
In this section, you create a blob container named adftutorial in your Blob storage.
In the Storage account window, go to Overview, and then select Containers.
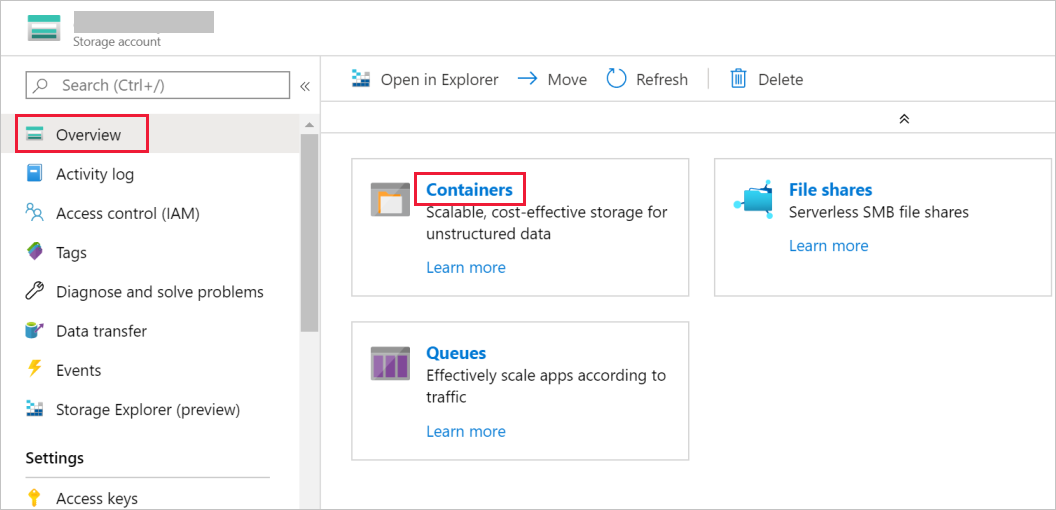
In the Containers window, select + Container to create a new one.
In the New container window, under Name, enter adftutorial. Then select Create.
In the list of containers, select adftutorial you just created.
Keep the container window for adftutorial open. You use it to verify the output at the end of the tutorial. Data Factory automatically creates the output folder in this container, so you don't need to create one.
Create a data factory
In this step, you create a data factory and start the Data Factory UI to create a pipeline in the data factory.
Open the Microsoft Edge or Google Chrome web browser. Currently, Data Factory UI is supported only in Microsoft Edge and Google Chrome web browsers.
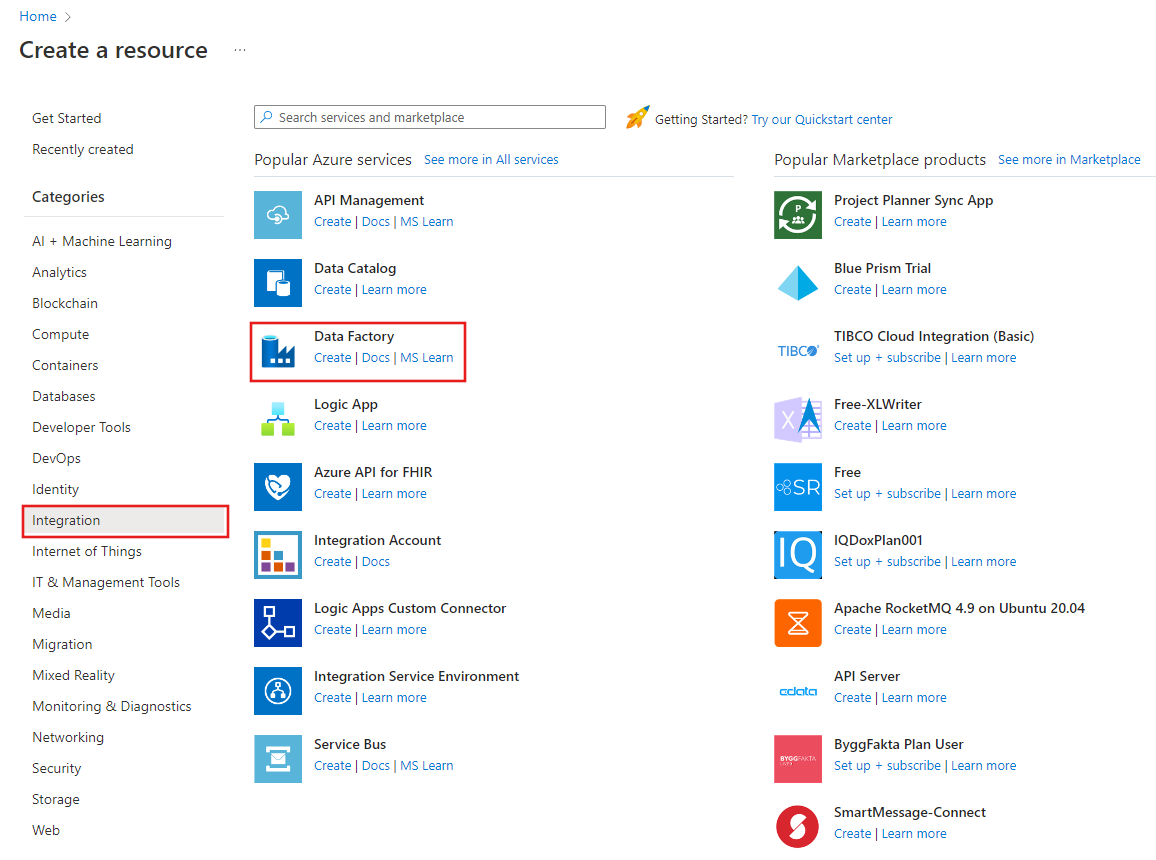
On the top menu, select Create a resource > Analytics > Data Factory :
On the New data factory page, under Name, enter ADFTutorialDataFactory.
The name of the data factory must be globally unique. If you see the following error message for the name field, change the name of the data factory (for example, yournameADFTutorialDataFactory). For naming rules for Data Factory artifacts, see Data Factory naming rules.
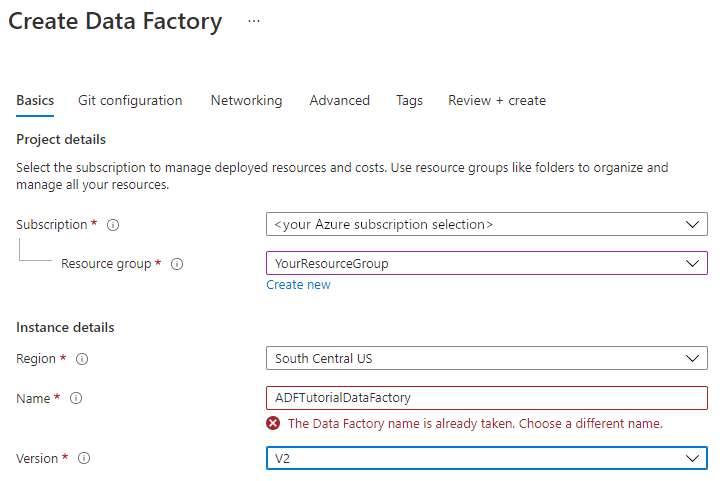
Select the Azure subscription in which you want to create the data factory.
For Resource Group, take one of the following steps:
Select Use existing, and select an existing resource group from the drop-down list.
Select Create new, and enter the name of a resource group.
To learn about resource groups, see Use resource groups to manage your Azure resources.
Under Version, select V2.
Under Location, select the location for the data factory. Only locations that are supported are displayed in the drop-down list. The data stores (for example, Storage and SQL Database) and computes (for example, Azure HDInsight) used by Data Factory can be in other regions.
Select Create.
After the creation is finished, you see the Data Factory page as shown in the image:
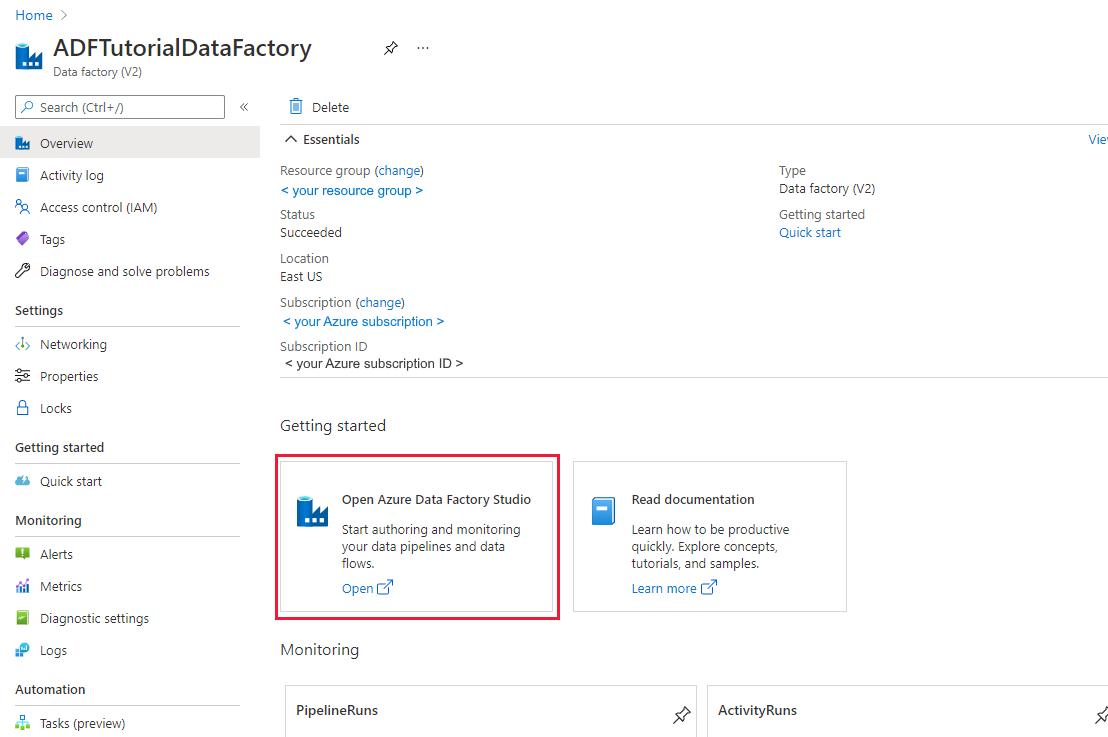
Select Open on the Open Azure Data Factory Studio tile to launch the Data Factory UI in a separate tab.
Create a pipeline
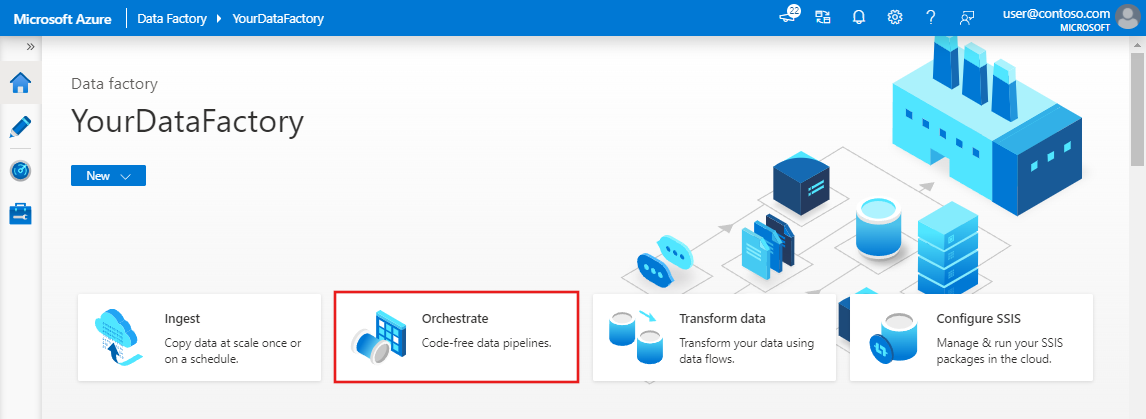
On the Azure Data Factory home page, select Orchestrate. A pipeline is automatically created for you. You see the pipeline in the tree view, and its editor opens.
In the General panel under Properties, specify SQLServerToBlobPipeline for Name. Then collapse the panel by clicking the Properties icon in the top-right corner.
In the Activities tool box, expand Move & Transform. Drag and drop the Copy activity to the pipeline design surface. Set the name of the activity to CopySqlServerToAzureBlobActivity.
In the Properties window, go to the Source tab, and select + New.
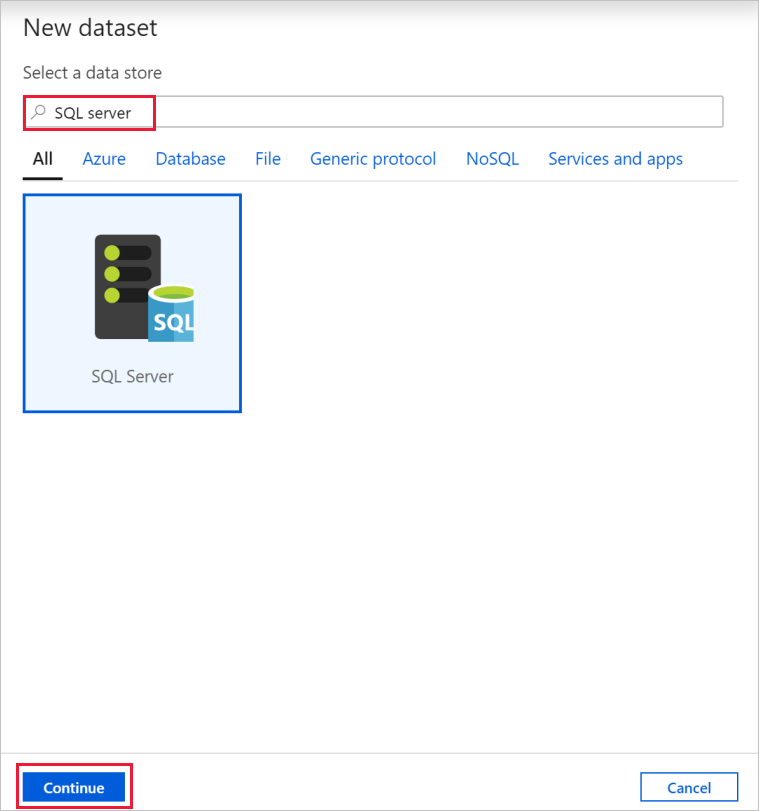
In the New Dataset dialog box, search for SQL Server. Select SQL Server, and then select Continue.
In the Set Properties dialog box, under Name, enter SqlServerDataset. Under Linked service, select + New. You create a connection to the source data store (SQL Server database) in this step.
In the New Linked Service dialog box, add Name as SqlServerLinkedService. Under Connect via integration runtime, select +New. In this section, you create a self-hosted integration runtime and associate it with an on-premises machine with the SQL Server database. The self-hosted integration runtime is the component that copies data from the SQL Server database on your machine to Blob storage.
In the Integration Runtime Setup dialog box, select Self-Hosted, and then select Continue.
Under name, enter TutorialIntegrationRuntime. Then select Create.
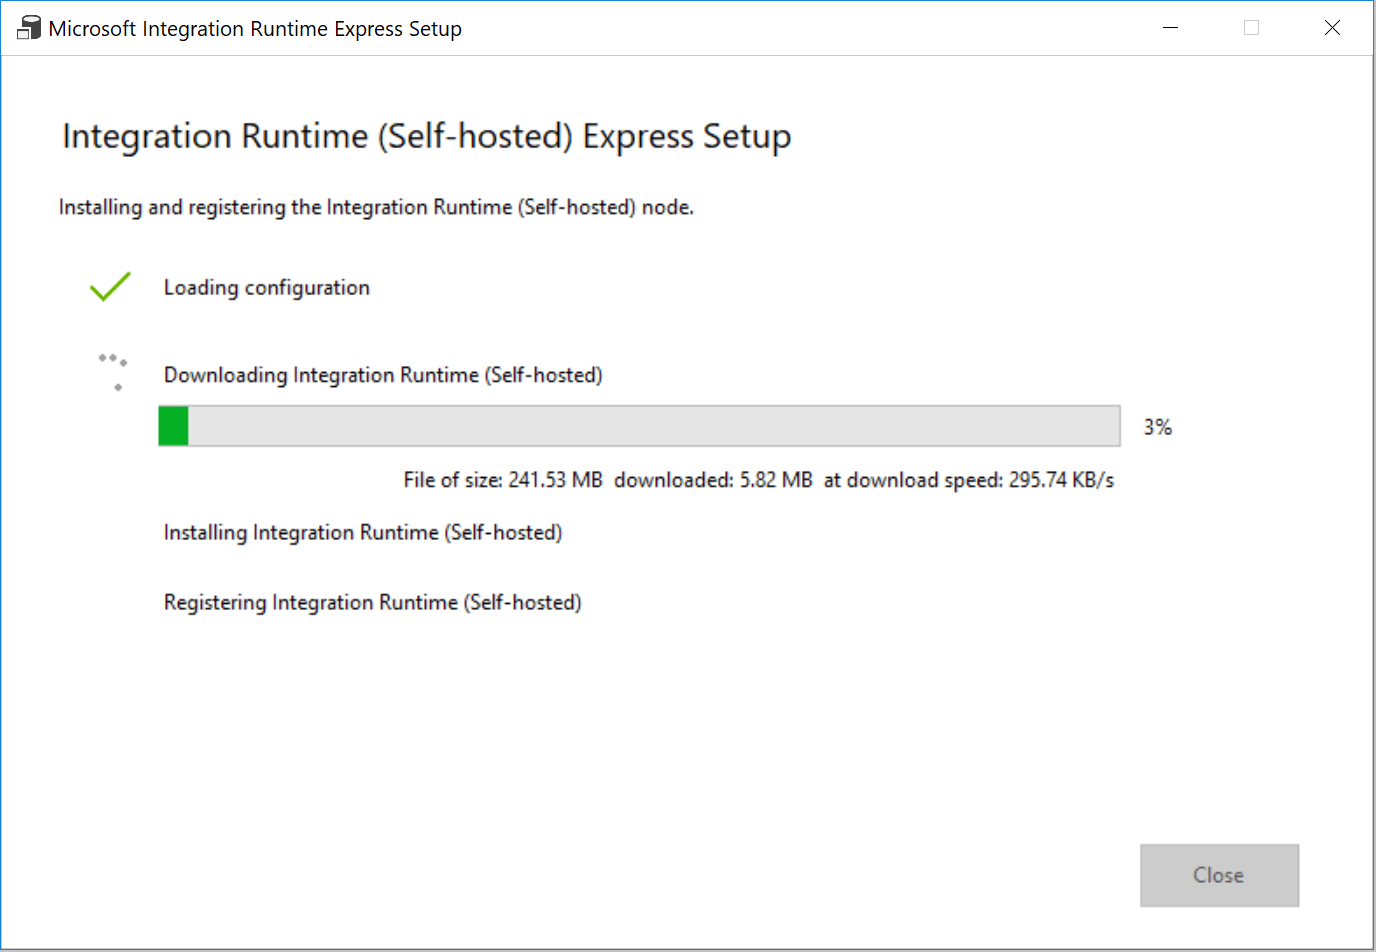
For Settings, select Click here to launch the express setup for this computer. This action installs the integration runtime on your machine and registers it with Data Factory. Alternatively, you can use the manual setup option to download the installation file, run it, and use the key to register the integration runtime.
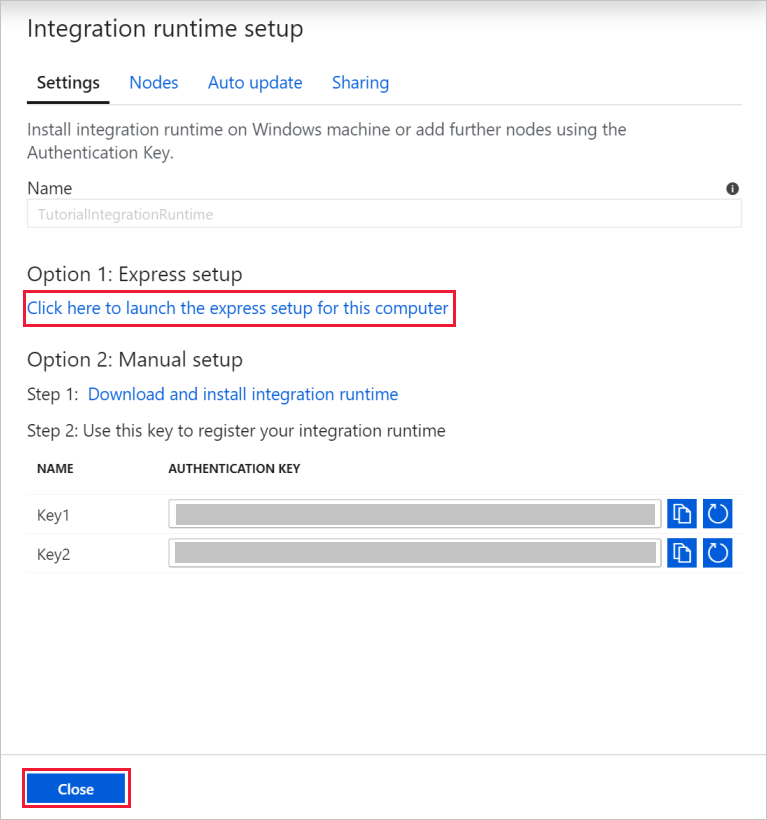
In the Integration Runtime (Self-hosted) Express Setup window, select Close when the process is finished.
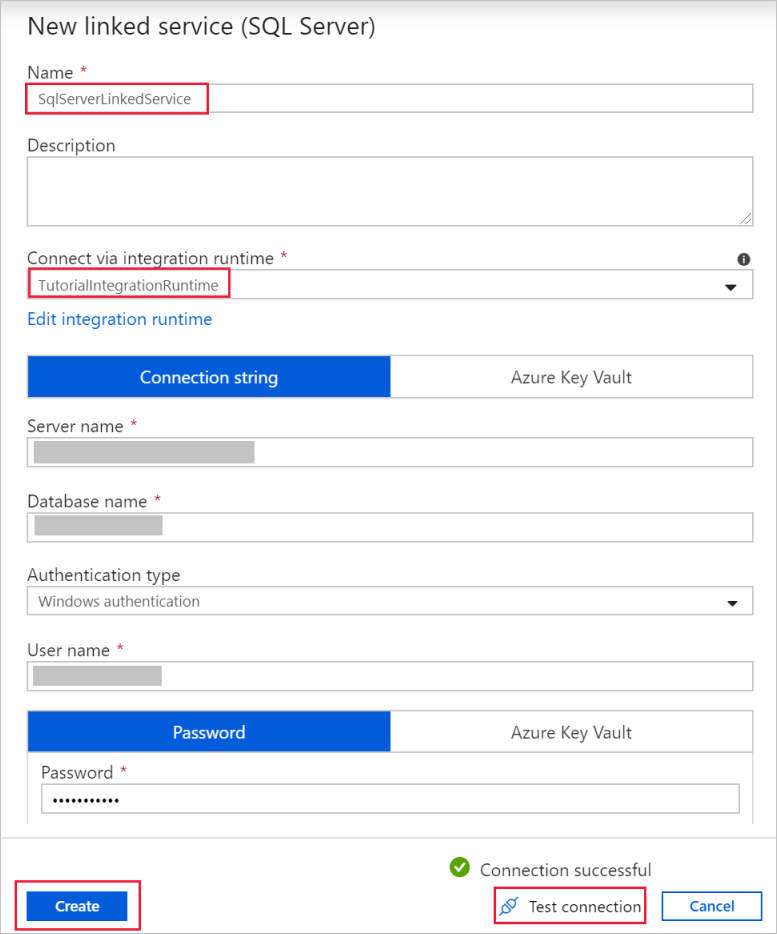
In the New linked service (SQL Server) dialog box, confirm that TutorialIntegrationRuntime is selected under Connect via integration runtime. Then, take the following steps:
a. Under Name, enter SqlServerLinkedService.
b. Under Server name, enter the name of your SQL Server instance.
c. Under Database name, enter the name of the database with the emp table.
d. Under Authentication type, select the appropriate authentication type that Data Factory should use to connect to your SQL Server database.
e. Under User name and Password, enter the user name and password. Use mydomain\myuser as user name if needed.
f. Select Test connection. This step is to confirm that Data Factory can connect to your SQL Server database by using the self-hosted integration runtime you created.
g. To save the linked service, select Create.
After the linked service is created, you're back to the Set properties page for the SqlServerDataset. Take the following steps:
a. In Linked service, confirm that you see SqlServerLinkedService.
b. Under Table name, select [dbo].[emp].
c. Select OK.
Go to the tab with SQLServerToBlobPipeline, or select SQLServerToBlobPipeline in the tree view.
Go to the Sink tab at the bottom of the Properties window, and select + New.
In the New Dataset dialog box, select Azure Blob Storage. Then select Continue.
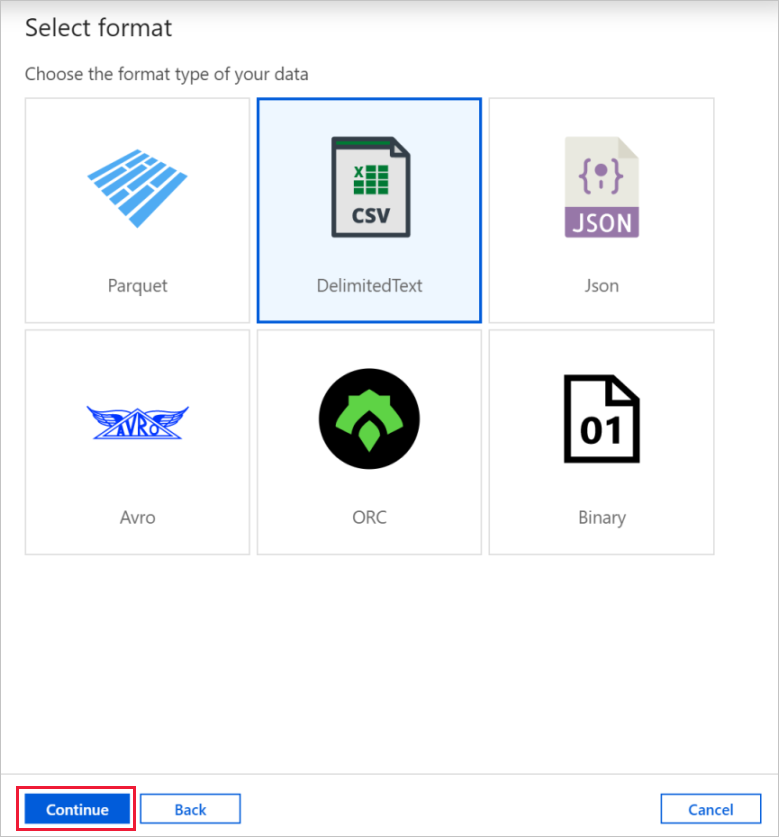
In Select Format dialog box, choose the format type of your data. Then select Continue.
In the Set Properties dialog box, enter AzureBlobDataset for Name. Next to the Linked service text box, select + New.
In the New Linked Service (Azure Blob Storage) dialog box, enter AzureStorageLinkedService as name, select your storage account from the Storage account name list. Test connection, and then select Create to deploy the linked service.
After the linked service is created, you're back to the Set properties page. Select OK.
Open the sink dataset. On the Connection tab, take the following steps:
a. In Linked service, confirm that AzureStorageLinkedService is selected.
b. In File path, enter adftutorial/fromonprem for the Container/ Directory part. If the output folder doesn't exist in the adftutorial container, Data Factory automatically creates the output folder.
c. For the File part, select Add dynamic content.
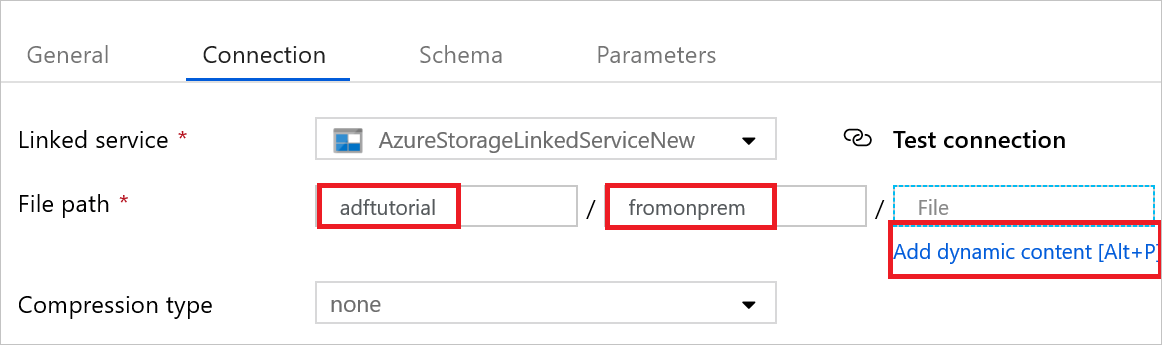
d. Add
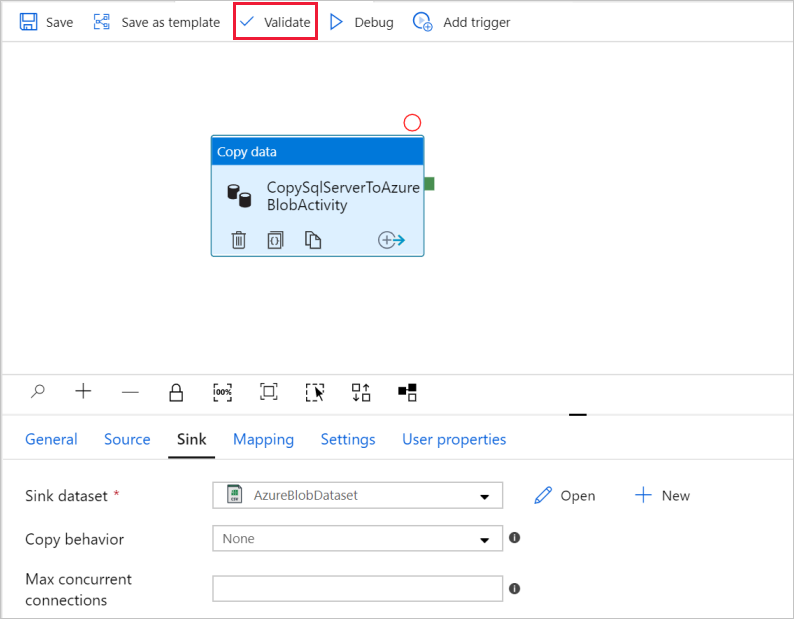
@CONCAT(pipeline().RunId, '.txt'), and then select Finish. This action will rename the file with PipelineRunID.txt.Go to the tab with the pipeline opened, or select the pipeline in the tree view. In Sink Dataset, confirm that AzureBlobDataset is selected.
To validate the pipeline settings, select Validate on the toolbar for the pipeline. To close the Pipe validation output, select the >> icon.
To publish entities you created to Data Factory, select Publish all.
Wait until you see the Publishing completed pop-up. To check the status of publishing, select the Show notifications link on the top of the window. To close the notification window, select Close.
Trigger a pipeline run
Select Add Trigger on the toolbar for the pipeline, and then select Trigger Now.
Monitor the pipeline run
Go to the Monitor tab. You see the pipeline that you manually triggered in the previous step.
To view activity runs associated with the pipeline run, select the SQLServerToBlobPipeline link under PIPELINE NAME.

On the Activity runs page, select the Details (eyeglasses image) link to see details about the copy operation. To go back to the Pipeline Runs view, select All pipeline runs at the top.
Verify the output
The pipeline automatically creates the output folder named fromonprem in the adftutorial blob container. Confirm that you see the [pipeline().RunId].txt file in the output folder.
Related content
The pipeline in this sample copies data from one location to another in Blob storage. You learned how to:
- Create a data factory.
- Create a self-hosted integration runtime.
- Create SQL Server and Storage linked services.
- Create SQL Server and Blob storage datasets.
- Create a pipeline with a copy activity to move the data.
- Start a pipeline run.
- Monitor the pipeline run.
For a list of data stores that are supported by Data Factory, see Supported data stores.
To learn how to copy data in bulk from a source to a destination, advance to the following tutorial: