End-user authentication with Azure Data Lake Storage Gen1 using Microsoft Entra ID
Azure Data Lake Storage Gen1 uses Microsoft Entra ID for authentication. Before authoring an application that works with Data Lake Storage Gen1 or Azure Data Lake Analytics, you must decide how to authenticate your application with Microsoft Entra ID. The two main options available are:
- End-user authentication (this article)
- Service-to-service authentication (pick this option from the drop-down above)
Both these options result in your application being provided with an OAuth 2.0 token, which gets attached to each request made to Data Lake Storage Gen1 or Azure Data Lake Analytics.
This article talks about how to create an Microsoft Entra native application for end-user authentication. For instructions on Microsoft Entra application configuration for service-to-service authentication, see Service-to-service authentication with Data Lake Storage Gen1 using Microsoft Entra ID.
Prerequisites
An Azure subscription. See Get Azure free trial.
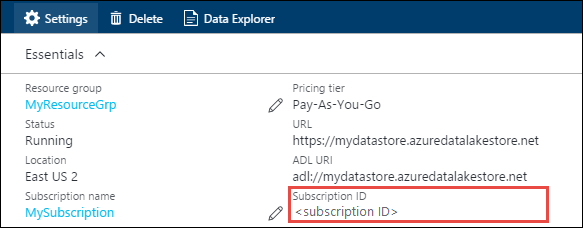
Your subscription ID. You can retrieve it from the Azure portal. For example, it's available from the Data Lake Storage Gen1 account blade.
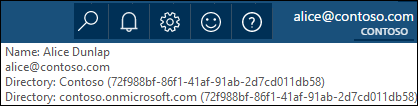
Your Microsoft Entra domain name. You can retrieve it by hovering the mouse in the top-right corner of the Azure portal. From the screenshot below, the domain name is contoso.onmicrosoft.com, and the GUID within brackets is the tenant ID.
Your Azure tenant ID. For instructions on how to retrieve the tenant ID, see Get the tenant ID.
End-user authentication
This authentication mechanism is the recommended approach if you want an end user to sign in to your application via Microsoft Entra ID. Your application is then able to access Azure resources with the same level of access as the end user that logged in. Your end user needs to provide their credentials periodically in order for your application to maintain access.
The result of having the end-user sign-in is that your application is given an access token and a refresh token. The access token gets attached to each request made to Data Lake Storage Gen1 or Data Lake Analytics, and it's valid for one hour by default. The refresh token can be used to obtain a new access token, and it's valid for up to two weeks by default. You can use two different approaches for end-user sign-in.
Using the OAuth 2.0 pop-up
Your application can trigger an OAuth 2.0 authorization pop-up, in which the end user can enter their credentials. This pop-up also works with the Microsoft Entra Two-factor Authentication (2FA) process, if necessary.
Note
This method is not yet supported in the Azure AD Authentication Library (ADAL) for Python or Java.
Directly passing in user credentials
Your application can directly provide user credentials to Microsoft Entra ID. This method only works with organizational ID user accounts; it isn't compatible with personal / “live ID” user accounts, including the accounts ending in @outlook.com or @live.com. Furthermore, this method isn't compatible with user accounts that require Microsoft Entra Two-factor Authentication (2FA).
What do I need for this approach?
- Microsoft Entra domain name. This requirement is already listed in the prerequisite of this article.
- Microsoft Entra tenant ID. This requirement is already listed in the prerequisite of this article.
- Microsoft Entra ID native application
- Application ID for the Microsoft Entra native application
- Redirect URI for the Microsoft Entra native application
- Set delegated permissions
Step 1: Create an Active Directory native application
Create and configure a Microsoft Entra native application for end-user authentication with Data Lake Storage Gen1 using Microsoft Entra ID. For instructions, see Create a Microsoft Entra application.
While following the instructions in the link, make sure you select Native for application type, as shown in the following screenshot:

Step 2: Get application ID and redirect URI
See Get the application ID to retrieve the application ID.
To retrieve the redirect URI, do the following steps.
From the Azure portal, select Microsoft Entra ID, select App registrations, and then find and select the Microsoft Entra native application that you created.
From the Settings blade for the application, select Redirect URIs.
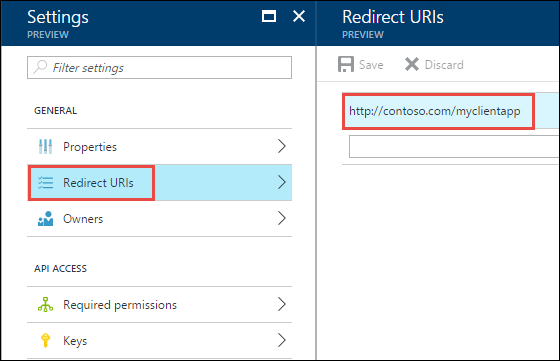
Copy the value displayed.
Step 3: Set permissions
From the Azure portal, select Microsoft Entra ID, select App registrations, and then find and select the Microsoft Entra native application that you created.
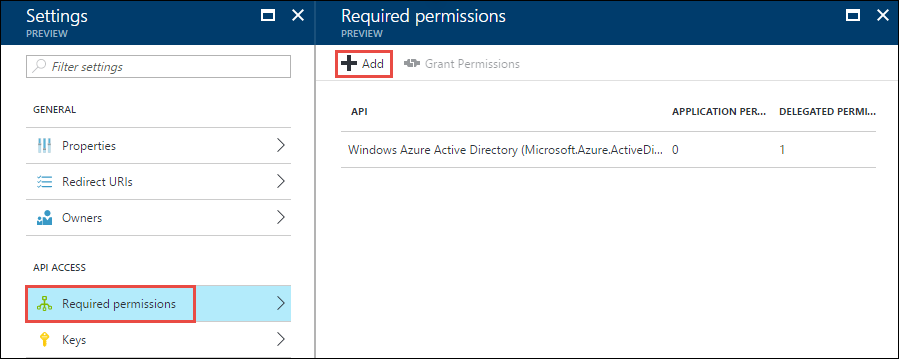
From the Settings blade for the application, select Required permissions, and then select Add.
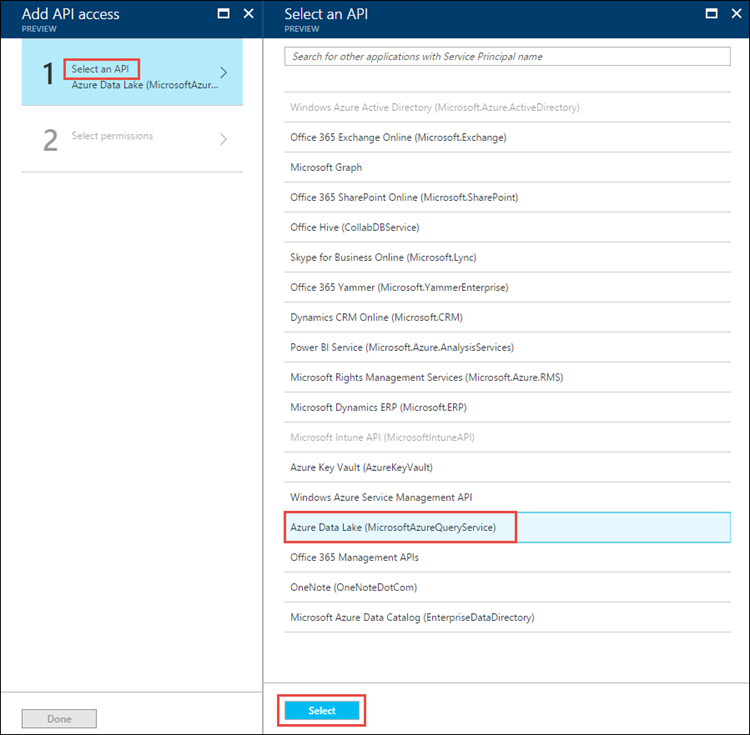
In the Add API Access blade, select Select an API, select Azure Data Lake, and then select Select.
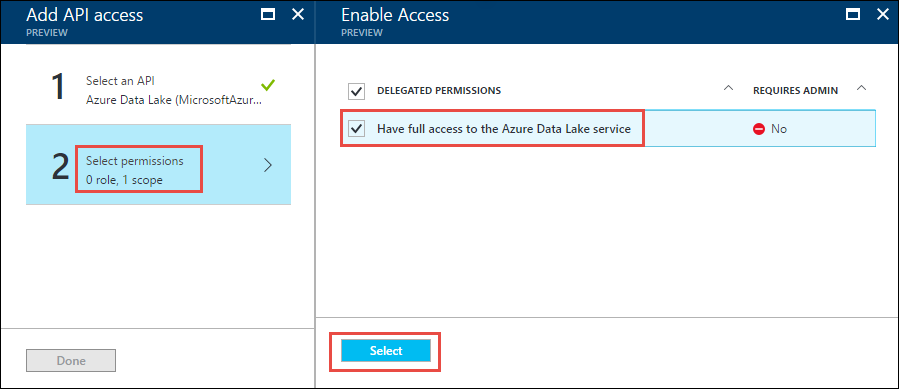
In the Add API Access blade, select Select permissions, select the check box to give Full access to Data Lake Store, and then select Select.
Select Done.
Repeat the last two steps to grant permissions for Windows Azure Service Management API as well.
Next steps
In this article, you created a Microsoft Entra native application and gathered the information you need in your client applications that you author using .NET SDK, Java SDK, REST API, etc. You can now proceed to the following articles that talk about how to use the Microsoft Entra web application to first authenticate with Data Lake Storage Gen1 and then perform other operations on the store.