Note
Access to this page requires authorization. You can try signing in or changing directories.
Access to this page requires authorization. You can try changing directories.
Use a coding agent configuration to give your team a shared setup for agents, models, MCP servers, and skills. Publish the configuration for developers in your Azure Databricks workspace, and the Unity Gateway CLI (ug) fetches it and applies it on each developer's machine.
Important
Coding agent configuration is in Beta. A workspace admin must enable the Unity Gateway Managed Configuration preview from the workspace Previews page. See Manage workspace-level previews.
Coding agent configurations
A workspace admin publishes a coding agent configuration to a Azure Databricks workspace. Developers apply it to their machines with ug configure.
The configuration defines:
| Setting | What it configures |
|---|---|
| Coding agents | The enabled agents and the default agent. |
| Models | Each agent's model source and default models. Use Azure Databricks models or an external provider registered in Unity Catalog. |
| MCP servers | The servers to connect to the enabled agents. |
| Skills | The shared skills to make available to the enabled agents. |
| Unity Gateway features | Agent settings such as Smart Routing and tracing, where supported. |
Reference models, MCP servers, and skills by their Unity Catalog names, or select them from a catalog and schema. For external models, see Bring your own model providers.
Prepare resources
Before you publish, set up the models your team needs and grant developers access to them, along with any MCP servers and skills you include. See Set up model capacity.
Publish a configuration
Use the UI
As a workspace admin:
- Open Unity Gateway > Govern > Agent configuration.
- Click Edit configuration to open the JSON editor.
- Update the agents, models, MCP servers, skills, and features in the configuration. Click Format JSON to format the JSON.
- Click Save to publish the configuration for developers in this workspace.
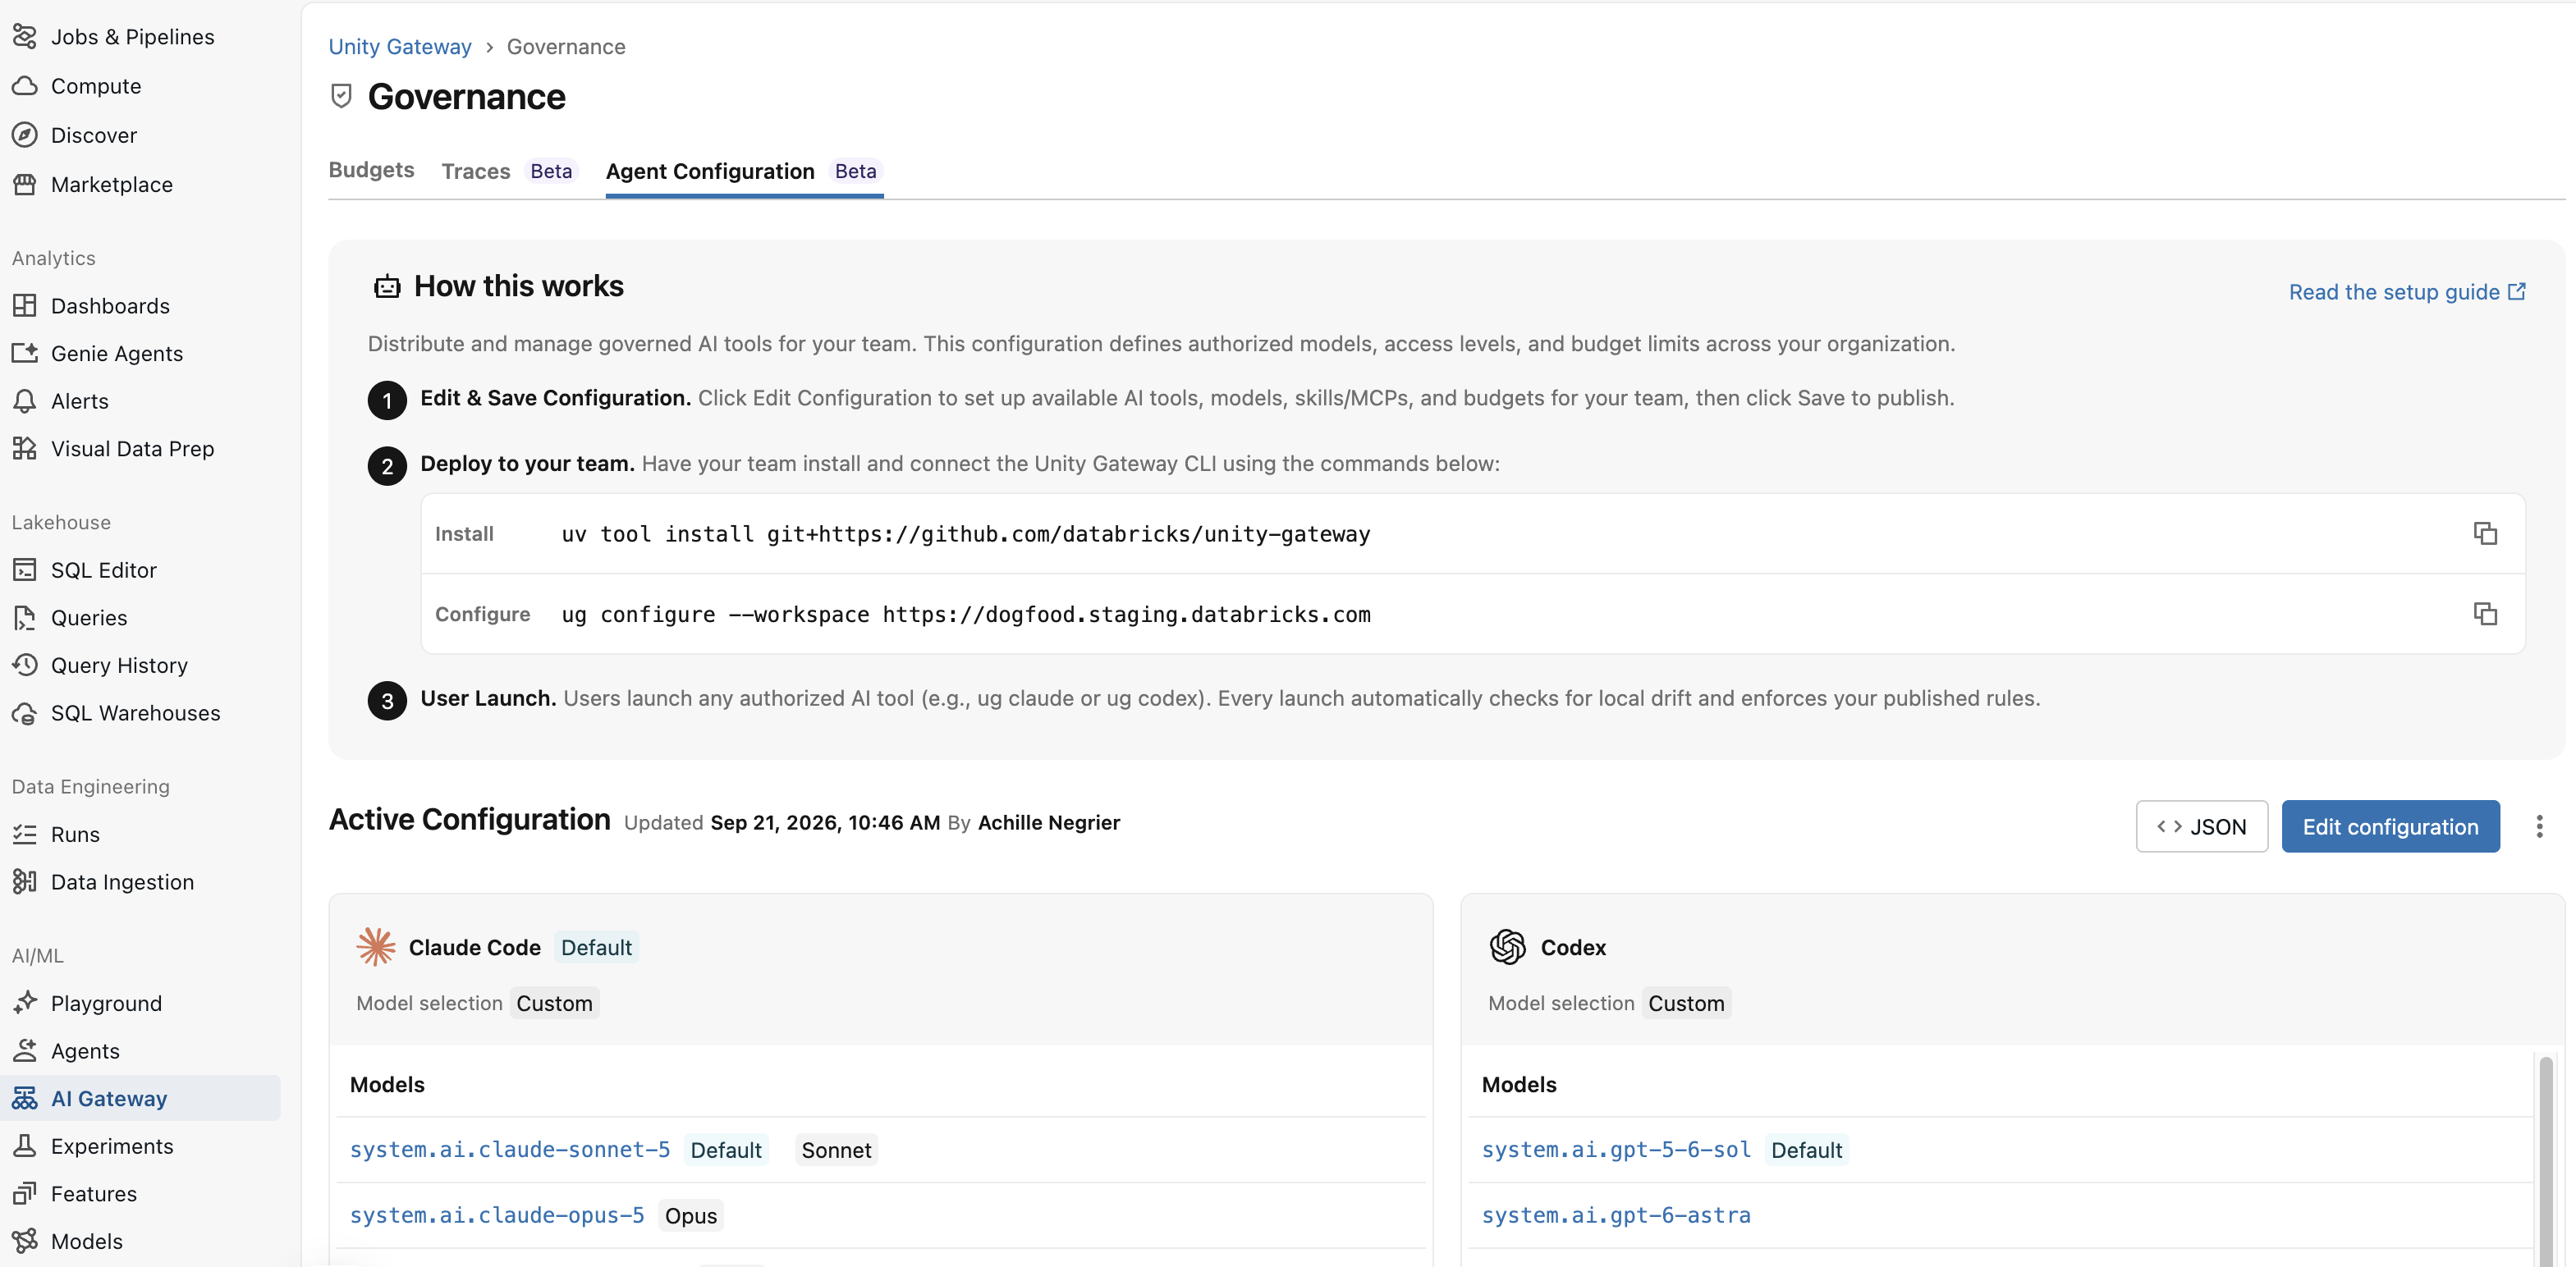
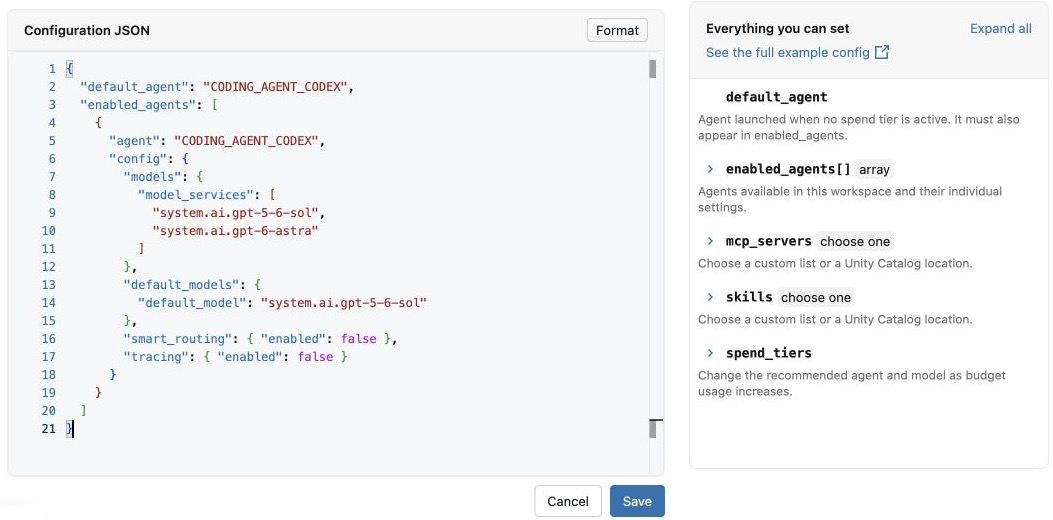
Choose model sources for each agent
For each enabled agent, set exactly one model source in config.models. Agents in the same configuration can use different model source types.
Static list of model services (recommended): Set
model_servicesto the full Unity Catalog names of the model services to make available. Every model service must support an API that is compatible with the agent. For example, Claude Code requires the Anthropic Messages API. Codex requires the Open Responses API or OpenAI Responses API.{ "models": { "model_services": ["system.ai.claude-sonnet-4-6", "system.ai.claude-opus-4-8"] } }
For Smart Routing model-source requirements, see Smart Routing limitations.
Model provider service: Set
model_provider_serviceto the full Unity Catalog name of a model provider service. All models configured for that model provider service are available to developers.{ "models": { "model_provider_service": "main.default.anthropic_prod" } }Unity Catalog location: Set
unity_catalog_locationto a catalog and schema. All model services in that location for which a developer hasEXECUTEpermission are available to that developer.{ "models": { "unity_catalog_location": "system.ai" } }
Configuration example
This example configures Claude Code with a default model, one MCP server, and one skill. Replace the resource names with resources your team can access. When editing an existing configuration, preserve any settings your team still needs.
{
  "default_agent": "CODING_AGENT_CLAUDE_CODE",
  "enabled_agents": [
    {
      "agent": "CODING_AGENT_CLAUDE_CODE",
      "config": {
        "models": {
          "model_services": ["system.ai.claude-sonnet-4-6"]
        },
        "default_models": {
          "default_model": "system.ai.claude-sonnet-4-6"
        }
      }
    }
  ],
  "mcp_servers": { "names": ["main.developer_tools.github"] },
  "skills": { "names": ["main.team_skills.code_review"] }
}
The default_agent must also be listed in enabled_agents.
For details about the overall default and Claude Code family defaults, see Set a default model.
Use the API
To publish from a script, save the JSON as coding-agent-config.json. With the Azure Databricks CLI authenticated to the workspace as a workspace admin, create the configuration:
databricks api post /api/ai-gateway/v2/coding-agent-configs \
  --json @coding-agent-config.json
The workspace supports one published configuration. To change it, update the existing configuration with PATCH /api/ai-gateway/v2/coding-agent-configs/{id}, using the returned resource name and an update_mask query parameter that identifies the fields to change. Keep the JSON file in version control to review changes before publishing them.
Sync configuration updates
When developers launch an agent through ug, it checks the published configuration and applies updated agent and model settings. Changes can take a few minutes to appear.
To refresh immediately and sync managed MCP servers and skills, run:
ug configure
Enable developers to view spend
Linking a budget in the managed configuration is optional, but required for developers to view their spend and budget limits with ug usage.
Ask your account admin to enable the Enhanced Unity Gateway preview from the account console Previews page and provide a Unity Gateway budget ID. The budget must have a per-user threshold with Block usage enabled for developers to view their spend with
ug usage. Smart defaults are in Beta, so this preview is required.Add the supplied budget ID to the top-level
smart_defaultsobject in the managed configuration:{ "smart_defaults": { "budget_id": "<budget-configuration-uuid>" } }Developers can then run
ug usageto view their spending and limits. You can also choose to add optional spend-based recommendation tiers. See Control spending for more details.