Note
Access to this page requires authorization. You can try signing in or changing directories.
Access to this page requires authorization. You can try changing directories.
Important
This feature is in Beta. Workspace admins can control access to this feature from the Previews page by opting into the Lakeflow Connect for OneDrive For Business preview. See Manage Azure Databricks previews.
This page describes how to configure OAuth U2M: Custom-managed authentication for Microsoft OneDrive ingestion into Azure Databricks. Use this method when your organization requires control over the OAuth application, such as owning the app registration in your Microsoft Entra ID tenant, or when OAuth U2M: Databricks-managed isn't available in your workspace.
Tip
For most users, Azure Databricks recommends OAuth U2M: Databricks-managed, which requires no Microsoft Entra ID app registration.
Prerequisites
- Permission to register applications in your Microsoft Entra ID tenant.
- The URL of the Azure Databricks workspace where you create the connection, for example
https://<databricks-instance>. - A Microsoft work or school account that can access the OneDrive for Business My files drive you want to ingest.
Step 1: Create a Microsoft Entra ID client
This step creates a client that can access the OneDrive files.
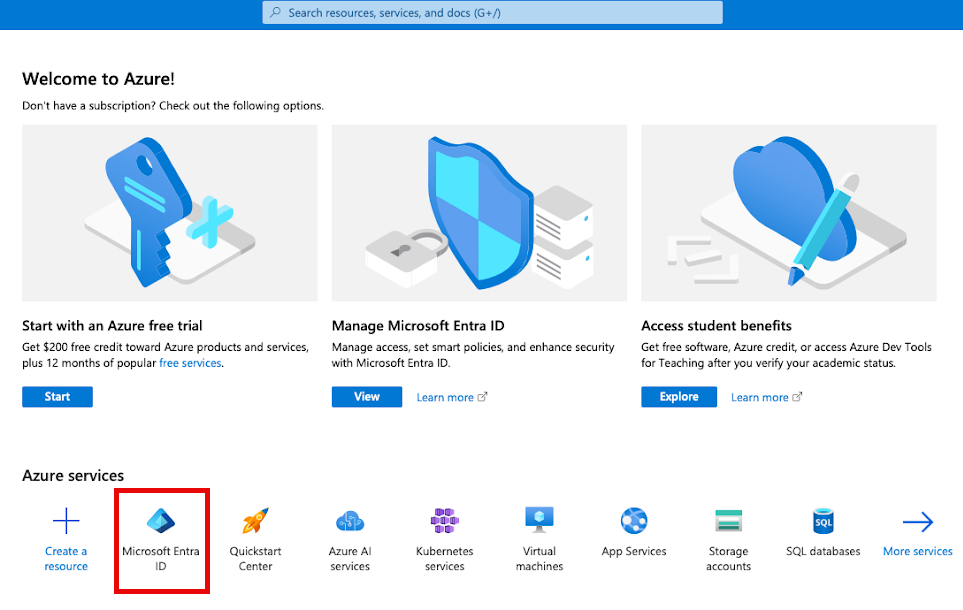
In the Microsoft Azure portal (https://portal.azure.com), click Microsoft Entra ID. You might have to search for "Microsoft Entra ID".
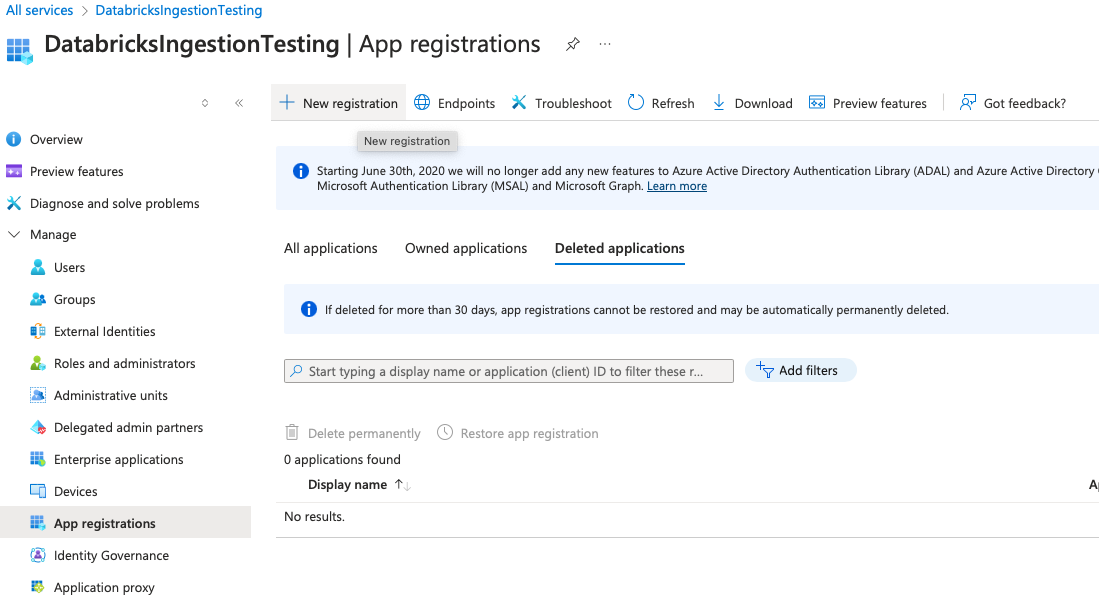
In the left-hand menu, under the Manage section, click App registrations.
Click New registration.
In the Register an application form, specify the following:
- Name: A name for the app.
- Supported account types: Select Accounts in any organizational directory (Any Microsoft Entra ID tenant - Multitenant). The connector signs in through the Microsoft
organizationsendpoint, so an app registered for a single tenant can't complete sign-in. - Redirect URI: Select the Web platform and enter the redirect URL in the following format:
<databricks-instance-url>/login/oauth/connectors/onedrive.html
Click Register.
You're redirected to the app details page.
Make a note of the Application (client) ID.
Step 2: Create a client secret
Click Client credentials : Add a certificate or secret.
Click + New client secret.
Add a description.
Click Add.
The updated list of client secrets displays.
Copy the client secret value and store it securely. After you leave the page, you can't access the client secret.
Note
The connection uses the client secret to refresh its access token. Before the secret expires, create a new secret and update the connection with it.
Step 3: Add Microsoft Graph permissions
The connection requests the delegated Microsoft Graph permissions Files.Read.All and offline_access when a user signs in. Add these permissions to the app so that a Microsoft Entra ID administrator can grant consent for your organization.
- In the left-hand menu, under the Manage section, click API permissions.
- Click + Add a permission.
- Click Microsoft Graph, and then click Delegated permissions.
- Search for and select Files.Read.All and offline_access.
- Click Add permissions.
- If your tenant doesn't allow users to consent to apps, a Microsoft Entra ID administrator must click Grant admin consent for <tenant>.
Next steps
- Create a connection to store the authentication details that you've obtained.
- Create an ingestion pipeline.