Databricks notebook interface and controls
Learn how to use the Databricks notebook toolbar and menus to control the notebook and cell display settings.
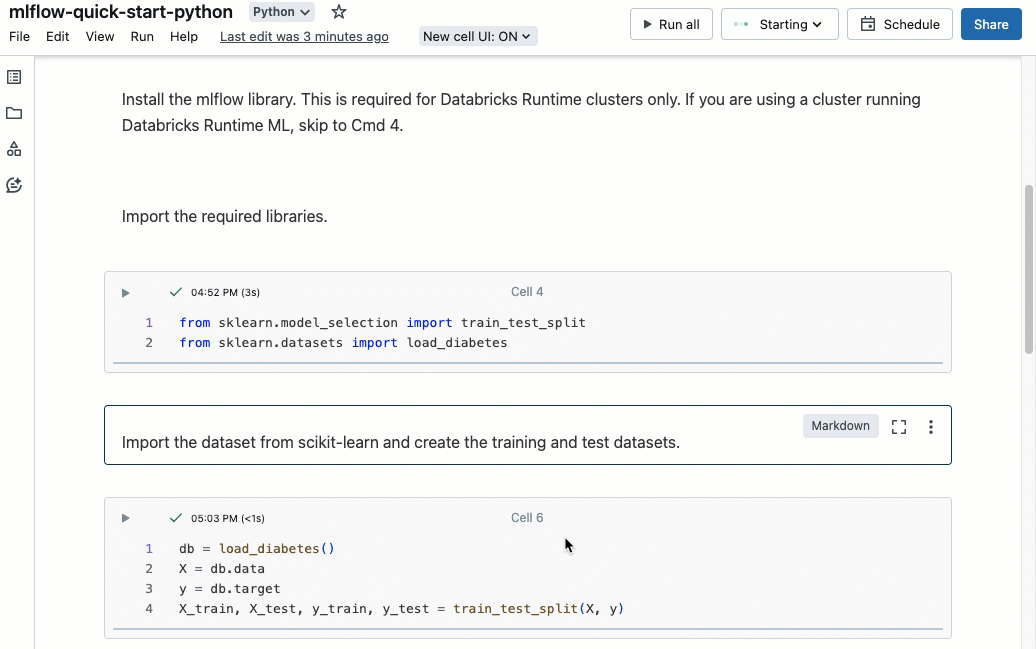
Notebook cells
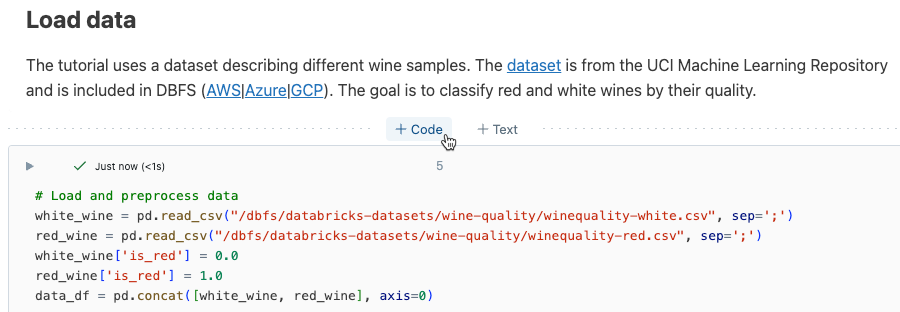
Notebooks contain a collection of two types of cells: code cells and Markdown cells. Code cells contain runnable code, while Markdown cells contain Markdown code that is renders text and graphics. Markdown can be used to document or illustrate your code. You can add or remove cells to your notebook to structure your work.
You can run a single cell, a group of cells, or the whole notebook at once. A notebook cell can contain at most 10MB, and its output is limited to 20 MB.
Notebook toolbar icons and buttons
The toolbar includes menus and icons that you can use to manage and edit the notebook.

Next to the notebook name are buttons that let you change the default language of the notebook and, if the notebook is included in a Databricks Git folder, open the Git dialog.
To view previous versions of the notebook, click the “Last edit…” message to the right of the menus.
The icons and buttons at the right of the toolbar are described in the following table:
| Icon | Description |
|---|---|
 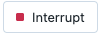 |
Run all cells or stop execution. The name of this button changes depending on the state of the notebook. |
 |
Open compute selector. When the notebook is connected to a cluster or SQL warehouse, this button shows the name of the compute resource. |
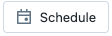 |
Open job scheduler. |
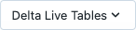 |
Open Delta Live Tables. This button appears only if the notebook is part of a Delta Live Tables pipeline. |
 |
Open permissions dialog. |
Right sidebar actions
Several actions are available from the notebook’s right sidebar, as described in the following table:
| Icon | Description |
|---|---|
 |
Open notebook comments. |
 |
Open MLflow notebook experiment. |
 |
Open notebook version history. |
| Open variable explorer. (Available for Python variables with Databricks Runtime 12.2 LTS and above.) | |
| Open the Python environment panel. This panel shows all Python libraries available to the notebook, including notebook-scoped libraries, cluster libraries, and libraries included in the Databricks Runtime. Available only when the notebook is attached to a cluster. |
Create cells
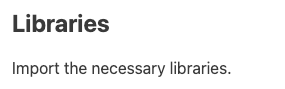
Notebooks have two types of cells: code and Markdown. The contents of Markdown cells are rendered into HTML. For example, this snippet contains markup for a level-one heading:
%md ### Libraries
Import the necessary libraries.
Renders as shown:
To create a new cell, hover over a cell at the top or bottom. Click Code or Text to create a code or Markdown cell, respectively.
Cell actions
The cell actions menu lets you run, cut, and copy cells, move cells around in the notebook, and hide code or results.
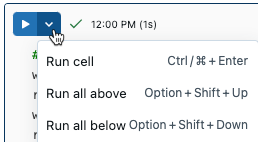
Run a cell
To run code cells, click the down arrow at the upper-left of the code cell.
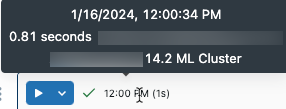
After a cell has been run, a notice appears to the right of the cell run menu, showing the last time the cell was run and its duration. Hover your cursor over the notice for more details.
To show detailed run information by default, click your profile image at the top right. Then click Settings > Developer > Show detailed command run information.
If you have a tabular result output, you can also access this information by hovering over the “Last refreshed” section of the UI.
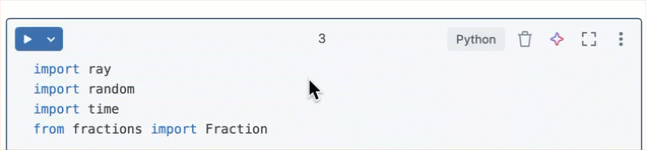
Cell icons
The following screenshot describes the icons that appear at the upper-right of a notebook cell:
![]()
Language selector: Select the language for the cell.
Databricks Assistant: Enable or disable Databricks Assistant for code suggestions in the cell.
Cell focus: Enlarge the cell to make editing easier.
Display cell actions menu: Open the cell actions menu. The options in this menu are slightly different for code and Markdown cells.
Delete a cell
To delete a cell, click the trash icon to the right of the cell. This icon only appears when you hover your cursor over the cell.
![]()
Move a cell
To move a cell up or down, click and hold the drag handle icon ![]() to the left of the cell.
to the left of the cell.
You can also select Move up or Move down from the cell actions menu.
Cut, copy, and paste cells
There are several options for cutting and copying cells. However, if you are using the Safari browser, only the keyboard shortcuts are available.
- From the cell actions menu select Cut cell or Copy cell.
- Use keyboard shortcuts:
Command-XorCtrl-Xto cut andCommand-CorCtrl-Cto copy. - Use the Edit menu at the top of the notebook. Select Cut or Copy.
After you cut or copy cells, you can paste those cells elsewhere in the notebook, into a different notebook, or a notebook in a different browser tab or window. To paste cells, use the keyboard shortcut Command-V or Ctrl-V. The cells are pasted below the current cell.
To undo cut or paste actions, you can use the keyboard shortcut Command-Z or Ctrl-Z or the menu options Edit > Undo cut cells or Edit > Undo paste cells.
To select adjacent cells, click in a Markdown cell and then use Shift + Up or Down to select the cells above or below it. Use the edit menu to copy, cut, paste, or delete the selected cells as a group. To select all cells, select Edit > Select all cells or use the command mode shortcut Cmd+A.
Open Databricks Assistant
To open a Databricks Assistant text box in a cell, click the Databricks Assistant icon ![]() in the upper-right corner of the cell.
in the upper-right corner of the cell.
You can use it in a code cell to get help or suggestions for your code. Databricks Assistant must be enabled in your workspace.
Add code comments
To add a comment to code in a cell, highlight the code. To the right of the cell, a comment icon appears. Click the icon to open the comment box.
![]()
Add a cell to a dashboard
To add a Markdown cell or a cell that has tabular results to a dashboard, select Add to dashboard from the cell actions menu. For more information, see Dashboards in notebooks.
Link to a cell
To get a URL link to a specific command in your notebook, click ![]() to open focus mode and copy the URL from the browser address bar. To exit focus mode, click
to open focus mode and copy the URL from the browser address bar. To exit focus mode, click ![]() .
.
Notebook table of contents
To display an automatically generated table of contents, click the icon at the upper left of the notebook (between the left sidebar and the topmost cell). The table of contents is generated from the Markdown headings used in the notebook. Cells with titles also appear in the table of contents.
Add a cell title
To add a title to a cell, do one of the following:
- Click the cell number at the center of the top of the cell and type the title.
- Select Add title from the cell actions menu.
Cells with titles appear in the notebook’s table of contents.
Promoted cell titles
To make cell titles more visible in the UI, users can enable Show promoted cell titles.
- In the upper-right corner of any page, click your profile photo, then click Settings.
- Click Developer > Enable Show promoted cell titles.
Hide and show cell content
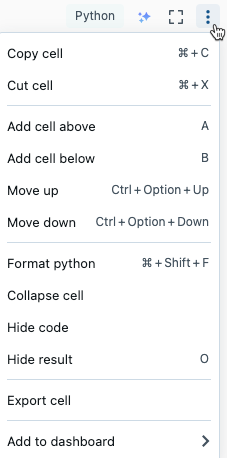
Cell content consists of cell code and the results of running the cell. To hide cell code or results, click the kebab menu ![]() at the upper-right of the cell and select Hide code or Hide result.
at the upper-right of the cell and select Hide code or Hide result.
You can also select Collapse cell to display only the first line of a cell. To expand a collapsed cell, select Expand cell.
To show hidden cells, click the show icon: ![]() .
.
Collapsible headings
Cells that appear after cells containing Markdown headings can be collapsed into the heading cell. To expand or collapse cells after cells containing Markdown headings throughout the notebook, select Collapse all headings from the View menu. The rest of this section describes how to expand or collapse a subset of cells.
Expand and collapse headings
The image shows a level-two heading MLflow setup with the following two cells collapsed into it.
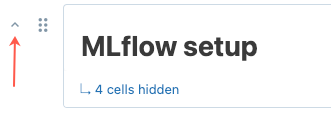
To expand and collapse headings, hover your cursor over the Markdown cell. Click the arrow that appears to the left of the cell.
Cell display options
There are three display options for notebooks. Use the View menu to change the display option.
- Standard view: results are displayed immediately after code cells.
- Results only: only results are displayed.
- Side-by-side: code and results cells are displayed side by side.
Actions are available from icons in the cell gutter (the area to the right and left of the cell). For example, use the grip dots to move a cell up or down![]() in the left gutter. To delete a cell, use the trash can icon in the right gutter.
in the left gutter. To delete a cell, use the trash can icon in the right gutter.
For easier editing, click the focus mode icon ![]() to display the cell at full width. To exit focus mode, click
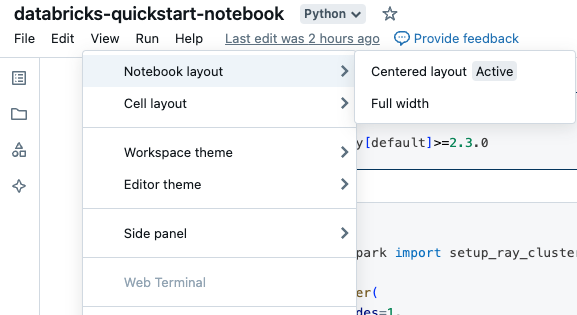
to display the cell at full width. To exit focus mode, click ![]() . You can also enlarge the displayed width of a cell by turning off View > Centered layout.
. You can also enlarge the displayed width of a cell by turning off View > Centered layout.
To automatically format all cells in the notebook to industry standard line lengths and spacing, select Edit > Format notebook.
Remove cell margins
You can expand or minimize margins by clicking View > Notebook layout in the notebook menu.
Line and command numbers
To show or hide line numbers or command numbers, select Line numbers or Command numbers from the View menu. For line numbers, you can also use the keyboard shortcut Control+L. When a cell is in an error state, line numbers are displayed regardless of the selection.
If you enable line or command numbers, Databricks saves your preference and shows them in all of your other notebooks for that browser.
View notebooks in dark mode
You can choose to display notebooks in dark mode. To turn dark mode on or off, select View > Theme and select Light theme or Dark theme.
ble line or command numbers, Databricks saves your preference and shows them in your other notebooks for that browser.
Browse data
Important
This feature is in Public Preview.
To explore tables and volumes available to use in the notebook, click ![]() on the left side of the notebook to open the schema browser. See Browse data for more details.
on the left side of the notebook to open the schema browser. See Browse data for more details.
Compute resources for notebooks
This section covers the options for notebook compute resources. You can run a notebook on a Databricks cluster, or, for SQL commands, you can use a SQL warehouse, a type of compute-optimized for SQL analytics.
Serverless compute for notebooks
Serverless compute allows you to quickly connect your notebook to on-demand computing resources.
To attach to the serverless compute, click the Connect drop-down menu in the notebook and select Serverless.
See Serverless compute for notebooks for more information.
Attach a notebook to a cluster
To attach a notebook to a cluster, you need the CAN ATTACH TO cluster-level permission.
Important
As long as a notebook is attached to a cluster, any user with the CAN RUN permission on the notebook has implicit permission to access the cluster.
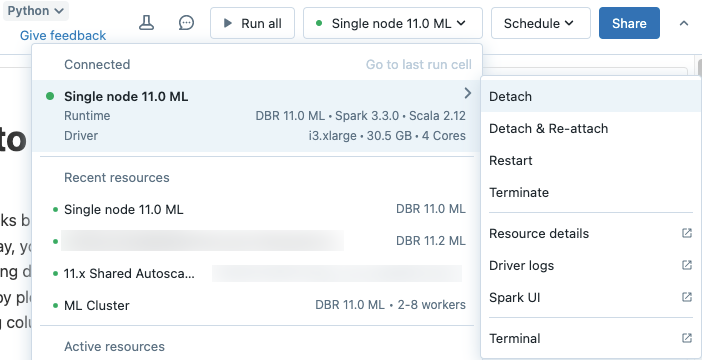
To attach a notebook to a cluster, click the compute selector in the notebook toolbar and select a cluster from the dropdown menu.
The menu shows a selection of clusters you have used recently or are currently running.
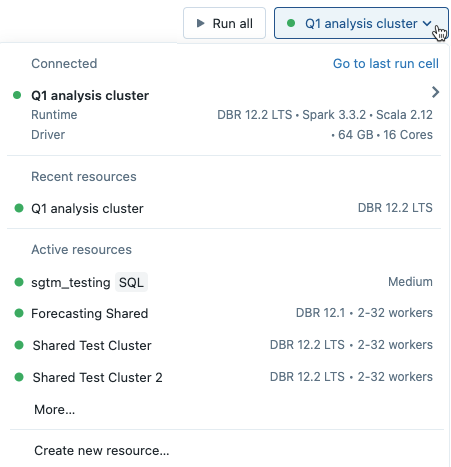
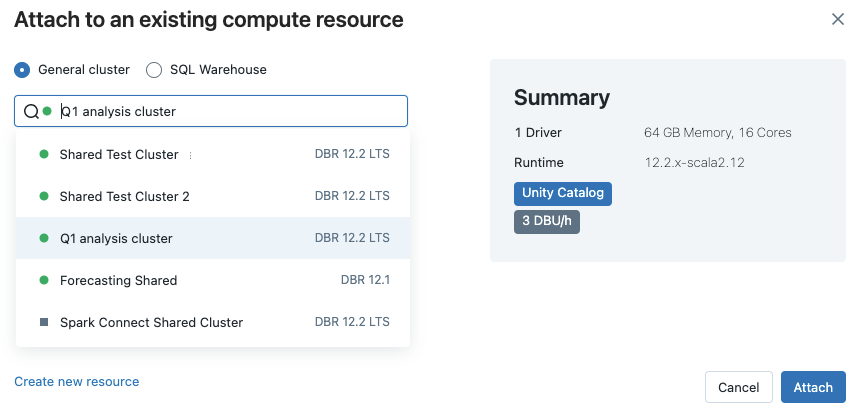
To select from all available clusters, click More…. Click the cluster name to display a dropdown menu, and select an existing cluster.
You can also create a new cluster by selecting Create new resource… from the dropdown menu.
Important
An attached notebook has the following Apache Spark variables defined.
| Class | Variable Name |
|---|---|
SparkContext |
sc |
SQLContext/HiveContext |
sqlContext |
SparkSession (Spark 2.x) |
spark |
Do not create a SparkSession, SparkContext, or SQLContext. Doing so will lead to inconsistent behavior.
Use a notebook with a SQL warehouse
When a notebook is attached to a SQL warehouse, you can run SQL and Markdown cells. Running a cell in any other language (such as Python or R) throws an error. SQL cells executed on a SQL warehouse appear in the SQL warehouse’s query history. The user who ran a query can view the query profile from the notebook by clicking the elapsed time at the bottom of the output.
Running a notebook requires a Pro or Serverless SQL warehouse. You must have access to the workspace and the SQL warehouse.
To attach a notebook to a SQL warehouse do the following:
Click the compute selector in the notebook toolbar. The dropdown menu shows compute resources that are currently running or that you have used recently. SQL warehouses are marked with
 .
.From the menu, select a SQL warehouse.
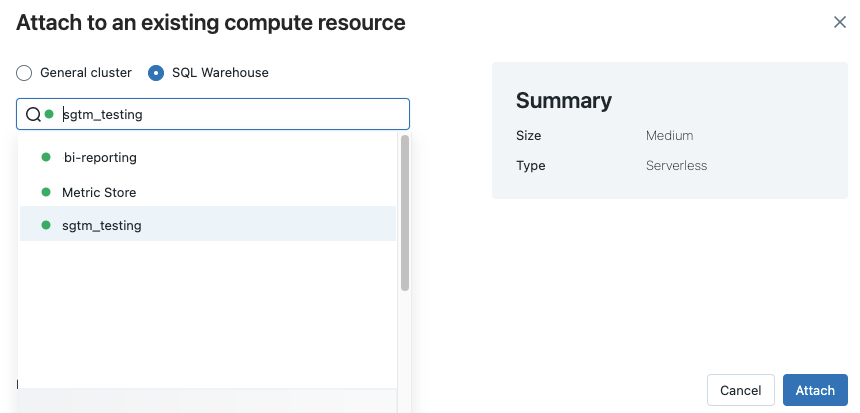
To see all available SQL warehouses, select More… from the dropdown menu. A dialog appears showing compute resources available for the notebook. Select SQL Warehouse, choose the warehouse you want to use, and click Attach.
You can also select a SQL warehouse as the compute resource for a SQL notebook when you create a workflow or scheduled job.
SQL warehouse limitations
See Known limitations Databricks notebooks for more information.
Detach a notebook
To detach a notebook from a compute resource, click the compute selector in the notebook toolbar and hover over the attached cluster or SQL warehouse in the list to display a side menu. From the side menu, select Detach.
You can also detach notebooks from a cluster using the Notebooks tab on the cluster details page.
When you detach a notebook, the execution context is removed, and all computed variable values are cleared from the notebook.
Tip
Azure Databricks recommends that you detach unused notebooks from clusters. This frees up memory space on the driver.
Use web terminal and Databricks CLI
To open the web terminal in a notebook, click  at the bottom of the right sidebar.
Use Databricks CLI in a web terminal
Starting with Databricks Runtime 15.0, you can use the Databricks CLI from the web terminal in the notebook.
Requirements
- The notebook must be attached to a cluster in Single user or No isolation shared access mode.
- The CLI is not available in workspaces enabled for Private Link.
The installed CLI is always the latest version. Authentication is based on the current user.
You cannot use the CLI from a notebook cell. In a notebook, commands like %sh databricks ... do not work with Databricks Runtime 15.0 or above.
Feedback
Coming soon: Throughout 2024 we will be phasing out GitHub Issues as the feedback mechanism for content and replacing it with a new feedback system. For more information see: https://aka.ms/ContentUserFeedback.
Submit and view feedback for