Note
Access to this page requires authorization. You can try signing in or changing directories.
Access to this page requires authorization. You can try changing directories.
Security recommendations in Microsoft Defender for Cloud help you to improve and harden your security posture. Recommendations are based on assessments against security standards defined for Azure subscriptions, AWS accounts, and GCP projects that have Defender for Cloud enabled.
This article describes how to:
- Create custom recommendations for all clouds (Azure, AWS, and GCP) with a KQL query.
- Assign custom recommendations to a custom security standard.
Before you start
- You need Owner permissions on the subscription to create a new security standard.
- You need Security Admin permissions to create custom recommendations.
- To create custom recommendations based on KQL, you must have the Defender CSPM plan enabled. All customers can create custom recommendations based on Azure Policy.
- Review support in Azure clouds for custom recommendations.
We recommend watching this episode of Defender for Cloud in the field to learn more about the feature, and dig into creating KQL queries.
Create a custom recommendation
Create custom recommendations, including steps for remediation, severity, and the standards to which the recommendation should be assigned. You add recommendation logic with KQL. You can use a simple query editor with built-in query templated that you can tweak as needed, or you can write your KQL query from scratch.
In the Defender for Cloud portal > Environment settings, select the relevant scope.
Select Security policies > + Create > Custom recommendation.
In Recommendation details, fill in the recommendation details (for example: name, severity) and select the standards you want to apply the recommendation to.
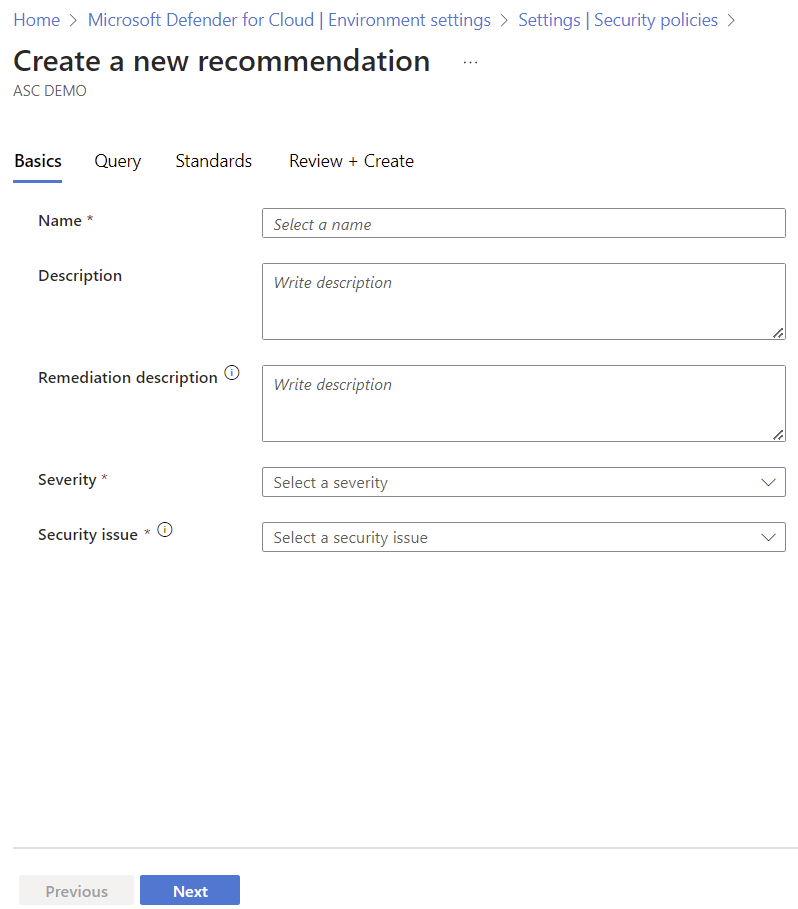
Select Next.
In Recommendation query, write a KQL query, or select Open query editor to structure your query. If you want to use the query editor, follow the instructions below.
After the query is ready, select Next.
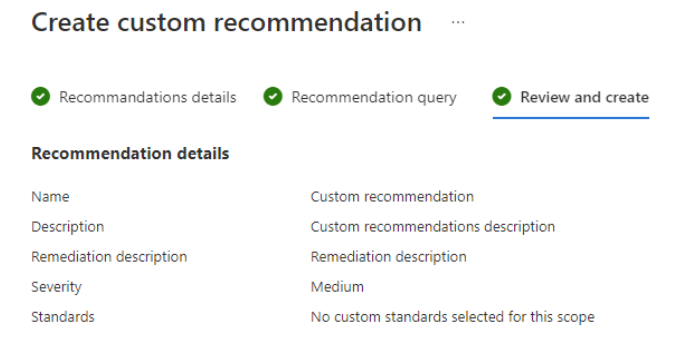
In Standards, select the custom standards to which you want to add the custom recommendation.
and in Review and create, review the recommendations details.


Use the query editor
We recommend using the query editor to create a recommendation query.
- Using the editor helps you to build and test your query before you start using it.
- Select How to to get help on structuring the query, and additional instructions and links.
- The editor contains examples of built-in recommendations queries, that you can use to help build your own query. The data appears in the same structure as in the API.
in the query editor, select New query to create a query
Use the example query template with its instructions, or select an example built-in recommendation query to get started.
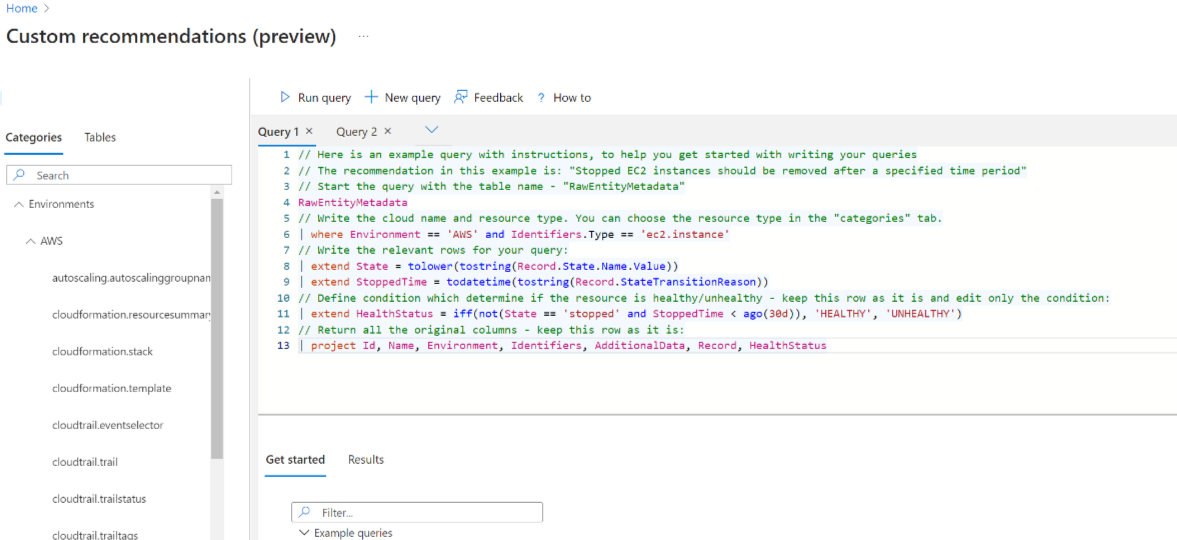
Select Run query to test the query you created.
When the query is ready, cut and paste it from the editor into the Recommendations query pane.

Use custom recommendations at scale
Creating custom recommendations through the Azure portal user interface is best for most users. The interface provides a convenient Kusto Query Language (KQL) editor and built-in validation tools. However, automating the creation of recommendations with a programmatic approach can be helpful. This method is especially useful when you need to deploy recommendations across many environments or subscriptions.
Automate via the API
If you prevalidated KQL queries and want to automate creating custom recommendations, you can use the Azure Defender for Cloud application programming interface (API). This method lets you deploy recommendations quickly, ensuring they're consistent and scalable across your cloud environments.
- Advantages: You can automate and scale the deployment of custom recommendations.
- When to use: This method is ideal for large-scale implementations where you need to apply recommendations consistently across multiple environments.
For more information about using the API to manage custom recommendations, see the API documentation.
Create a custom standard
Custom recommendations can be assigned to one or more custom standards.
Sign in to the Azure portal.
Navigate to Microsoft Defender for Cloud > Environment settings.
Select the relevant scope.
Select Security policies > + Create > Standard.
In Recommendations, select the recommendations that you want to add to the custom standard. For Azure subscriptions, you can see the source as well.
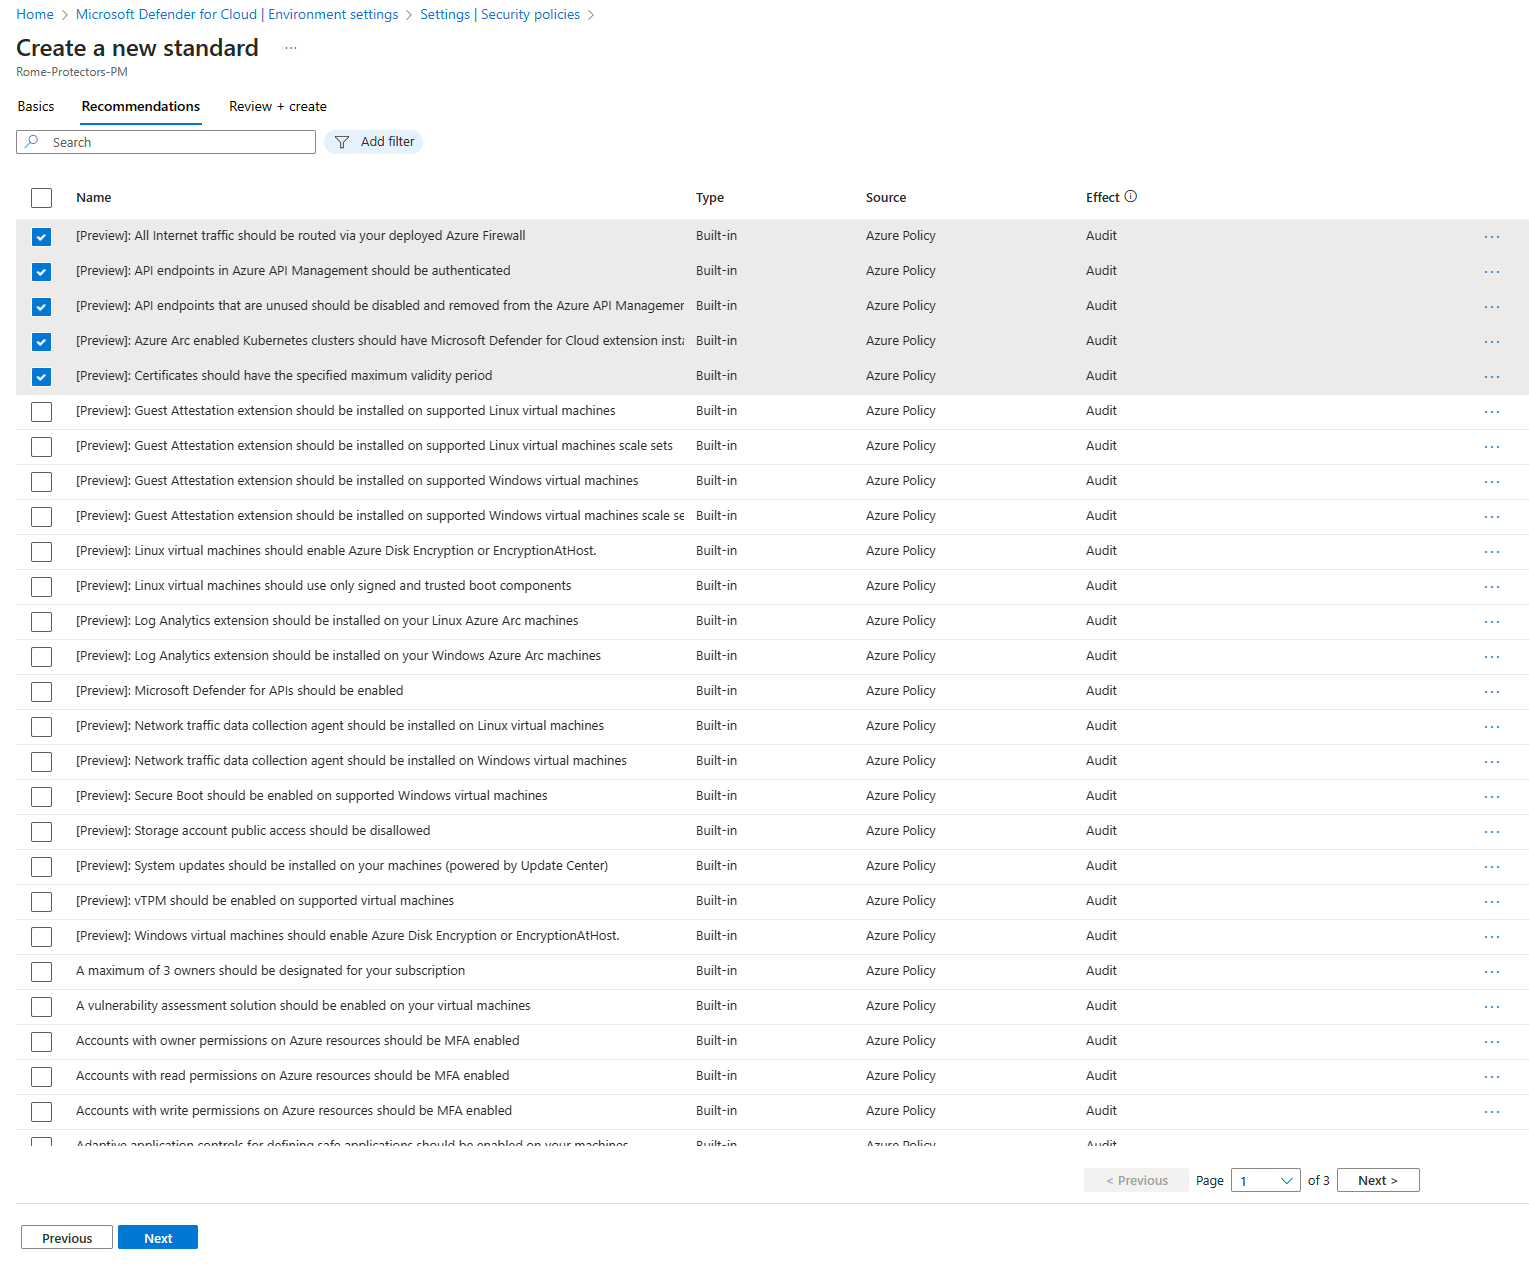
Select Create.

Create and enhance custom recommendations with Azure Policy (legacy)
For Azure subscriptions, you can create custom recommendations and standards, and enhance them, using Azure Policy. This is a legacy feature, and we recommend using the new custom recommendations feature.
Create a custom recommendation/standard (legacy)
You can create custom recommendations and standards in Defender for cloud by creating policy definitions and initiatives in Azure Policy, and onboarding them in Defender for Cloud.
Here's how you do that:
- Create one or more policy definitions in the Azure Policy portal, or programmatically.
- Create a policy initiative that contains the custom policy definitions.
Onboard the initiative as a custom standard (legacy)
Policy assignments are used by Azure Policy to assign Azure resources to a policy or initiative.
To onboard an initiative to a custom security standard in Defender for you, you need to include "ASC":"true" in the request body as shown here. The ASC field onboards the initiative to Microsoft Defender for Cloud.
Here's an example of how to do that.
Example to onboard a custom initiative
  PUT
  PUT https://management.azure.com/subscriptions/{subscriptionId}/providers/Microsoft.Authorization/policySetDefinitions/{policySetDefinitionName}?api-version=2021-06-01

  Request Body (JSON)

  {
    "properties": {
      "displayName": "Cost Management",
      "description": "Policies to enforce low cost storage SKUs",
      "metadata": {
        "category": "Cost Management"
        "ASC":"true"
      },
      "parameters": {
        "namePrefix": {
          "type": "String",
          "defaultValue": "myPrefix",
          "metadata": {
            "displayName": "Prefix to enforce on resource names"
          }
        }
      },
      "policyDefinitions": [
        {
          "policyDefinitionId": "/subscriptions/<Subscription ID>/providers/Microsoft.Authorization/policyDefinitions/7433c107-6db4-4ad1-b57a-a76dce0154a1",
          "policyDefinitionReferenceId": "Limit_Skus",
          "parameters": {
            "listOfAllowedSKUs": {
              "value": [
                "Standard_GRS",
                "Standard_LRS"
              ]
            }
          }
        },
        {
          "policyDefinitionId": "/subscriptions/<Subscription ID>/providers/Microsoft.Authorization/policyDefinitions/ResourceNaming",
          "policyDefinitionReferenceId": "Resource_Naming",
          "parameters": {
            "prefix": {
              "value": "[parameters('namePrefix')]"
            },
            "suffix": {
              "value": "-LC"
            }
          }
        }
      ]
    }
  }
Example to remove an assignment
This example shows you how to remove an assignment:
  DELETE
  https://management.azure.com/{scope}/providers/Microsoft.Authorization/policyAssignments/{policyAssignmentName}?api-version=2018-05-01
Enhance custom recommendations (legacy)
The built-in recommendations supplied with Microsoft Defender for Cloud include details such as severity levels and remediation instructions. If you want to add this type of information to custom recommendations for Azure, use the REST API.
The two types of information you can add are:
- RemediationDescription – String
- Severity – Enum [Low, Medium, High]
The metadata should be added to the policy definition for a policy that is part of the custom initiative. It should be in the 'securityCenter' property, as shown:
 "metadata": {
  "securityCenter": {
    "RemediationDescription": "Custom description goes here",
    "Severity": "High"
    },
Here's another example of a custom policy including the metadata/securityCenter property:
{
"properties": {
"displayName": "Security - ERvNet - AuditRGLock",
"policyType": "Custom",
"mode": "All",
"description": "Audit required resource groups lock",
"metadata": {
  "securityCenter": {
    "RemediationDescription": "Resource Group locks can be set via Azure Portal -> Resource Group -> Locks",
    "Severity": "High"
 }
},
"parameters": {
  "expressRouteLockLevel": {
    "type": "String",
    "metadata": {
      "displayName": "Lock level",
      "description": "Required lock level for ExpressRoute resource groups."
    },
    "allowedValues": [
      "CanNotDelete",
      "ReadOnly"
    ]
  }
},
"policyRule": {
  "if": {
    "field": "type",
    "equals": "Microsoft.Resources/subscriptions/resourceGroups"
  },
  "then": {
    "effect": "auditIfNotExists",
    "details": {
      "type": "Microsoft.Authorization/locks",
      "existenceCondition": {
        "field": "Microsoft.Authorization/locks/level",
        "equals": "[parameters('expressRouteLockLevel')]"
      }
    }
  }
}
}
}
For another example for using the securityCenter property, see this section of the REST API documentation.
Related content
You can use the following links to learn more about Kusto queries: