Note
Access to this page requires authorization. You can try signing in or changing directories.
Access to this page requires authorization. You can try changing directories.
Agentless machine scanning in Microsoft Defender for Cloud improves the security posture of machines connected to Defender for Cloud. Agentless machine scanning includes capabilities such as scanning for software inventory, vulnerabilities, secrets, and malware.
- Agentless scanning doesn't require installed agents or network connectivity, and it doesn't affect machine performance.
- You can turn agentless machine scanning on or off, but you can't disable individual capabilities.
- Scans only run on VMs that are running. VMs that are off during a scan aren't scanned.
- The scan runs on a nonconfigurable schedule once every 24 hours.
When you turn on Defender for Servers Plan 2 or the Defender Cloud Security Posture Management (CSPM) plan, agentless machine scanning is enabled by default. If needed, you can use the instructions in this article to enable agentless machine scanning manually.
Prerequisites
| Requirement | Details |
|---|---|
| Plan | To use agentless scanning the Defender CSPM plan, or Defender for Servers Plan 2 must be enabled. When you enable agentless scanning on either plan, the setting is enabled for both plans. |
| Malware scanning | Malware scanning is only available when Defender for Servers Plan 2 is enabled. For malware scanning of Kubernetes node VMs, either Defender for Servers Plan 2 or the Defender for Containers plan is required. |
| Supported machines | You can scan Azure virtual machines (VMs), Amazon Web Services (AWS) Elastic Compute Cloud (EC2) instances, and Google Cloud Platform (GCP) compute instances without installing an agent, if they're connected to Microsoft Defender for Cloud. |
| Azure VMs | Agentless scanning is available on Azure standard VMs with: - Maximum total disk size id 4TB (sum of all disks). Note: If exceeded, only the OS disk is scanned, provided its size is less than 4TB. - Maximum number of disks allowed: 6 - Virtual machine scale set - Flex Support for disks that are: - Unencrypted - Encrypted (managed disks using Azure Storage encryption with platform-managed keys (PMK)) - Encrypted with customer-managed keys. |
| AWS | Agentless scanning is available on EC2, Auto Scale instances, and disks that are unencrypted, encrypted (PMK), and encrypted (CMK). AMIs requiring third-party licensing, for example from AWS Marketplace, are not supported. |
| GCP | Agentless scanning is available on compute instances, instance groups (managed and unmanaged), with Google-managed encryption keys, and customer-managed encryption key (CMEK) |
| Kubernetes nodes | Agentless scanning for vulnerabilities and malware in Kubernetes node VMs is available. For vulnerability assessment the Defender for Servers Plan 2, or the Defender for Containers plan, or the Defender Cloud Security Posture Management (CSPM) plan is required. For malware scanning, Defender for Servers Plan 2 or Defender for Containers is required. |
| Permissions | Review the permissions used by Defender for Cloud for agentless scanning. |
| Unsupported | Disk type - If any of the VM's disks are on this list, the VM isn't scanned: - UltraSSD_LRS - PremiumV2_LRS - Azure Kubernetes Service (AKS) Ephemeral OS Disks Resource type: - Databricks VM File systems: - UFS (Unix File System) - ReFS (Resilient File System) - ZFS (ZFS Member) RAID and Block storage formats: - OracleASM (Oracle Automatic Storage Management) - DRBD (Distributed Replicated Block Device) - Linux_Raid_Member Integrity mechanisms: - DM_Verity_Hash - Swap |
Enable agentless scanning on Azure
In Defender for Cloud, open Environment settings.
Select the relevant subscription.
For either the Defender CSPM plan, or Defender for Servers Plan 2, select Settings.
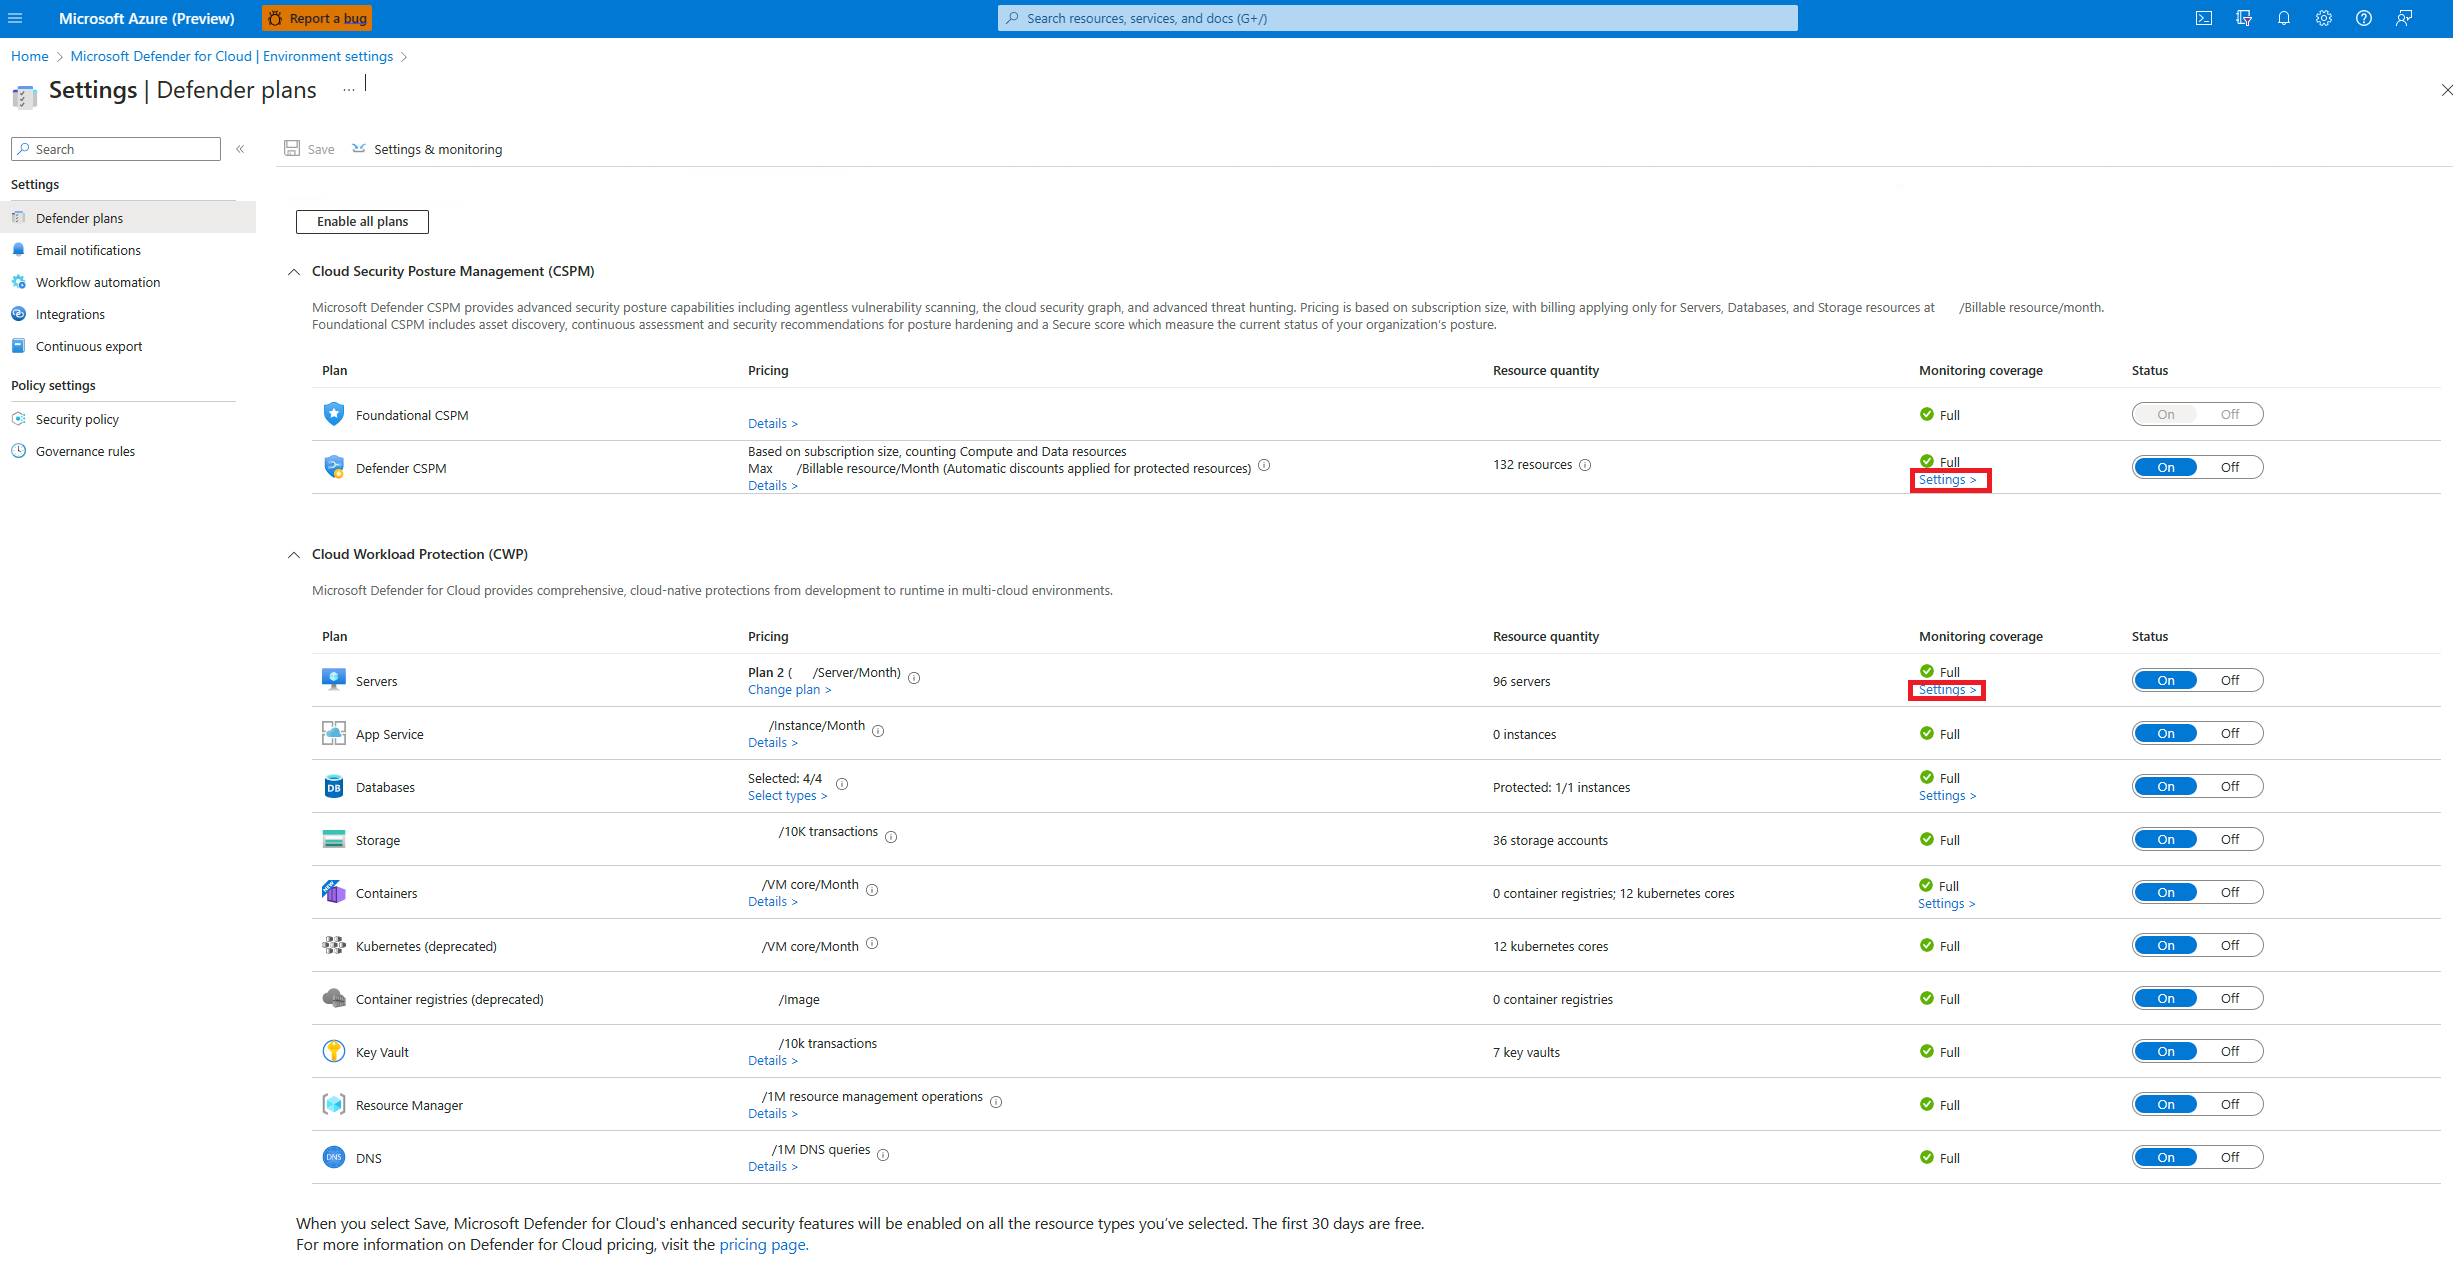
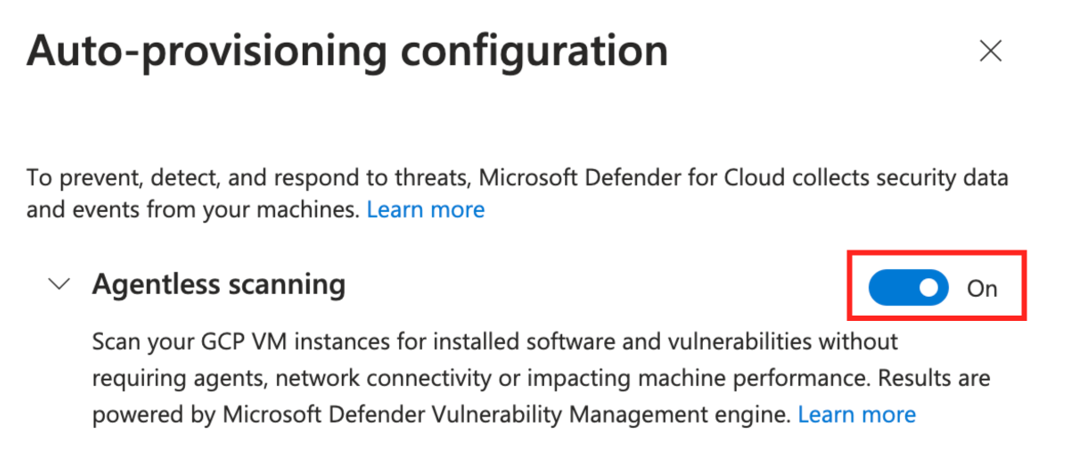
In Settings and monitoring, turn on Agentless scanning for machines.
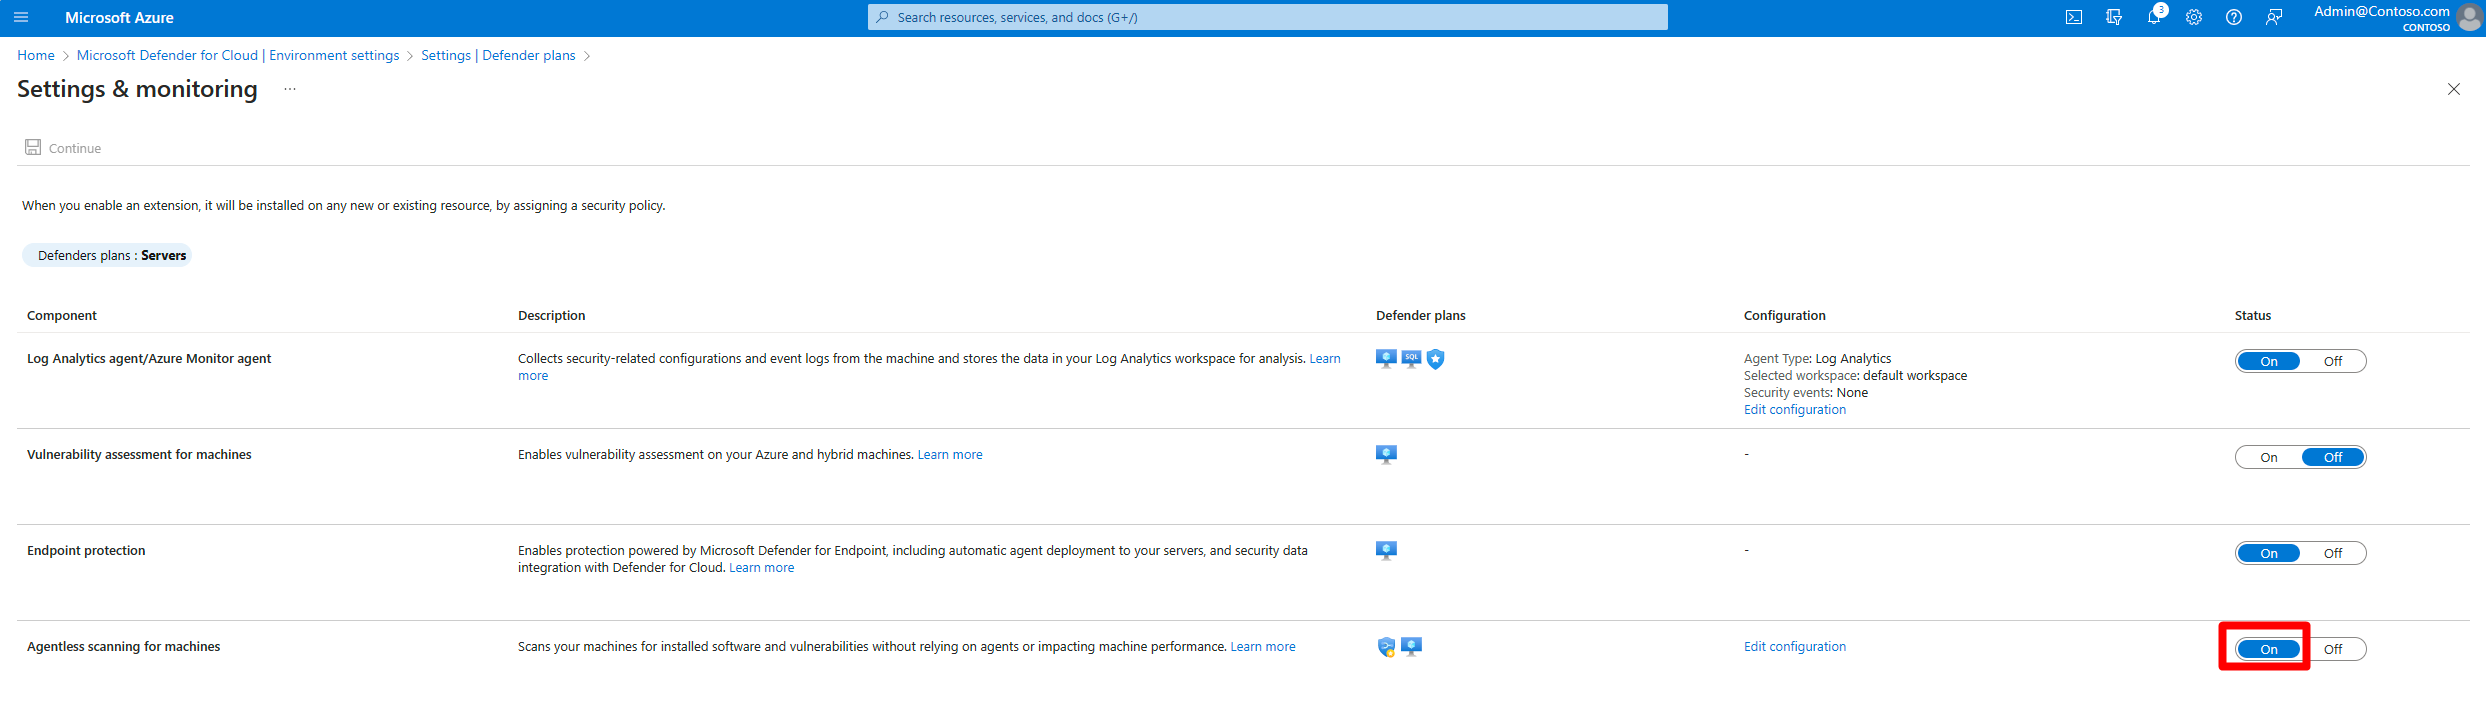
Select Save.


Enable for Azure VMs with CMK encrypted disks
For agentless scanning of Azure VMs with CMK encrypted disks, you need to grant Defender for Cloud extra permissions on Key Vaults used for CMK encryption for the VMs, to create a secure copy of the disks.
To manually assign the permissions on a Key Vault:
- Key vaults with non-RBAC permissions: Assign "Microsoft Defender for Cloud Servers Scanner Resource Provider" (
0c7668b5-3260-4ad0-9f53-34ed54fa19b2) these permissions: Key Get, Key Wrap, Key Unwrap. - Key vaults using RBAC permissions: Assign "Microsoft Defender for Cloud Servers Scanner Resource Provider” (
0c7668b5-3260-4ad0-9f53-34ed54fa19b2) the Key Vault Crypto Service Encryption User built-in role.
- Key vaults with non-RBAC permissions: Assign "Microsoft Defender for Cloud Servers Scanner Resource Provider" (
To assign these permissions at scale for multiple Key Vaults, use this script.
Enable agentless scanning on AWS
In Defender for Cloud, open Environment settings.
Select the relevant account.
For either the Defender Cloud Security Posture Management (CSPM) or Defender for Servers P2 plan, select Settings.
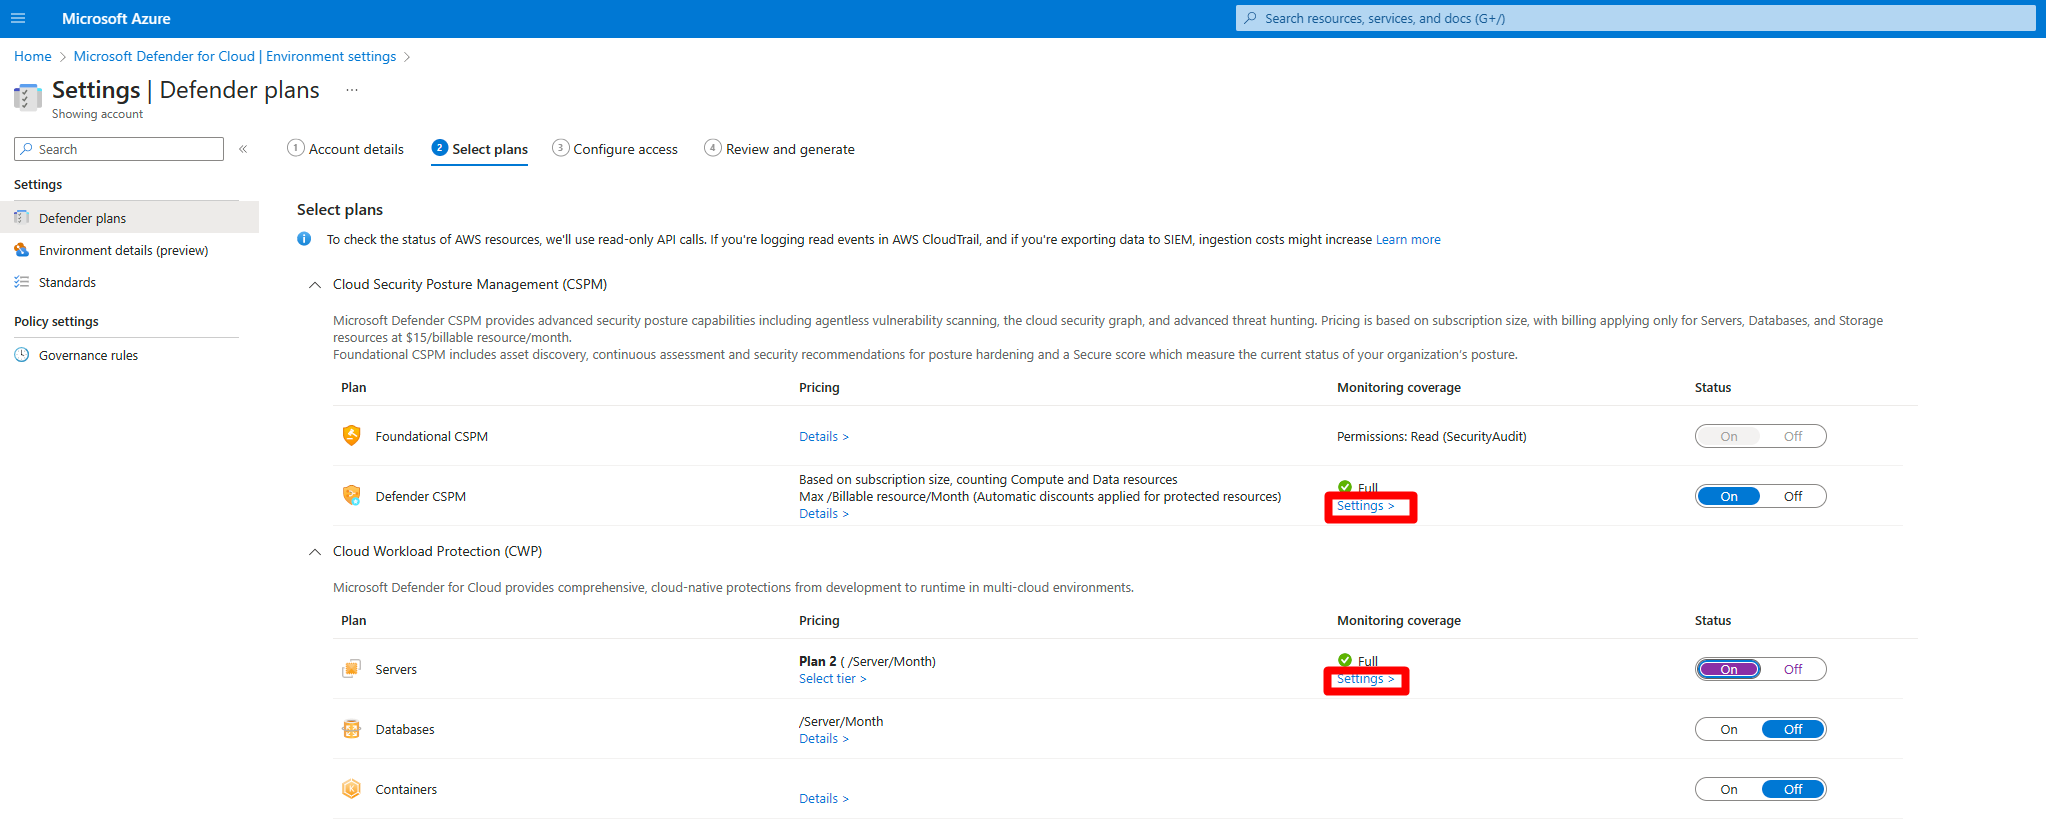
When you enable agentless scanning on either plan, the setting applies to both plans.
In the settings pane, turn on Agentless scanning for machines.
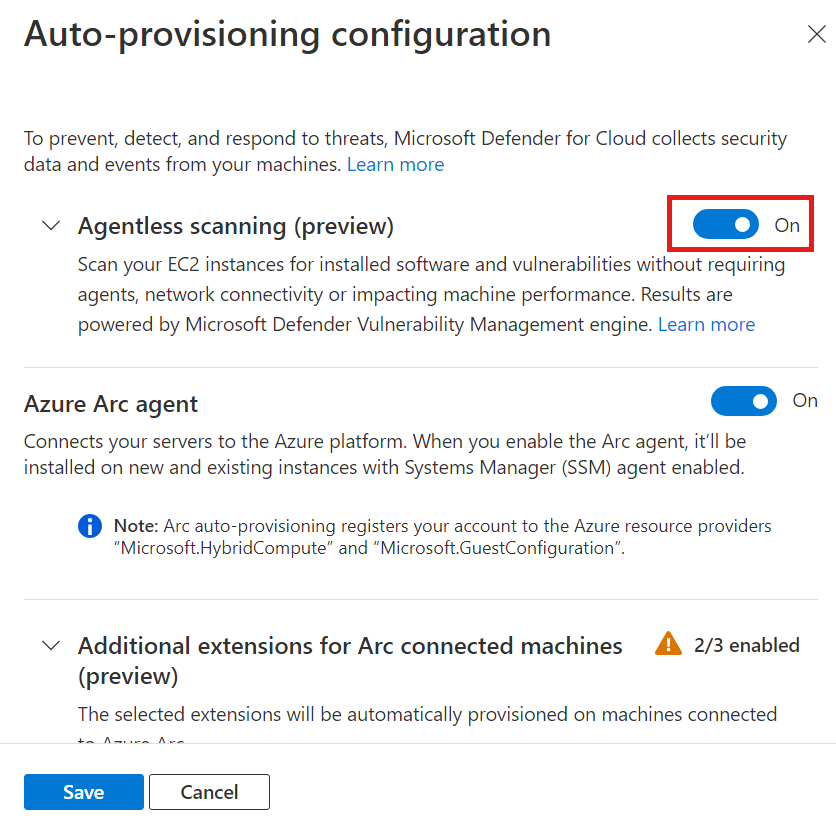
Select Save and Next: Configure Access.
Download the CloudFormation template.
Using the downloaded CloudFormation template, create the stack in AWS as instructed on screen. If you're onboarding a management account, you need to run the CloudFormation template both as Stack and as StackSet. Connectors will be created for the member accounts up to 24 hours after the onboarding.
Select Next: Review and generate.
Select Update.


After you enable agentless scanning, software inventory and vulnerability information are updated automatically in Defender for Cloud.
Enable agentless scanning on GCP
In Defender for Cloud, select Environment settings.
Select the relevant project or organization.
For either the Defender Cloud Security Posture Management (CSPM) or Defender for Servers P2 plan, select Settings.
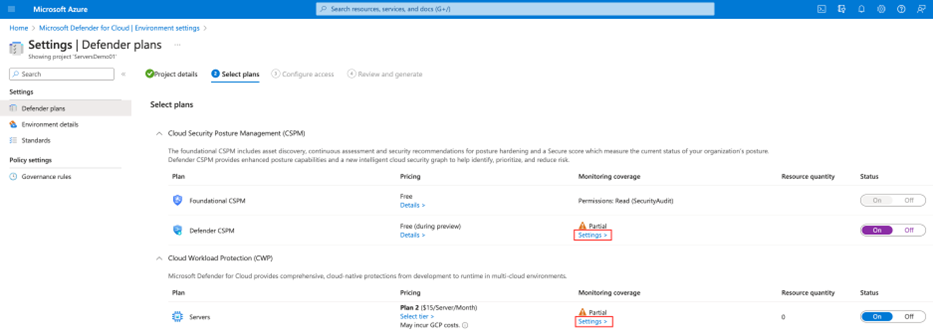
Toggle Agentless scanning to On.
Select Save and Next: Configure Access.
Copy the onboarding script.
Run the onboarding script in the GCP organization/project scope (GCP portal or gcloud CLI).
Select Next: Review and generate.
Select Update.


Related content
Learn more about: