HPE ProLiant DL20 Gen10 Plus (NHP 2LFF)
This article describes the HPE ProLiant DL20 Gen10 Plus appliance for OT sensors monitoring production lines.
The HPE ProLiant DL20 Gen10 Plus is also available for the on-premises management console.
| Appliance characteristic | Details |
|---|---|
| Hardware profile | L500 |
| Performance | Max bandwidth: 200 Mbps Max devices: 1,000 Up to 8x Monitoring ports |
| Physical specifications | Mounting: 1U Minimum dimensions (H x W x D) 1.70 x 17.11 x 15.05 in Minimum dimensions (H x W x D) 4.32 x 43.46 x 38.22 cm |
| Status | Supported; available pre-configured |
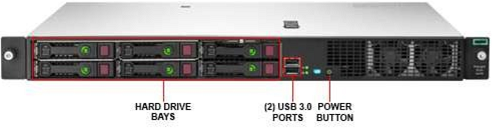
The following image shows a sample of the HPE ProLiant DL20 Gen10 front panel:
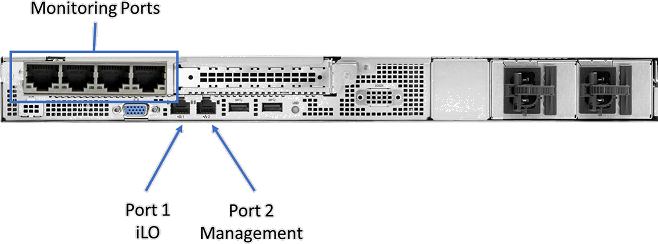
The following image shows a sample of the HPE ProLiant DL20 Gen10 back panel:
Specifications
| Component | Technical specifications |
|---|---|
| Chassis | 1U rack server |
| Physical Characteristics | HPE DL20 Gen10+ NHP 2LFF CTO Server |
| Processor | Intel Xeon E-2334 3.4 GHz 4C 65 W |
| Chipset | Intel C256 |
| Memory | 1x 8-GB Dual Rank x8 DDR4-3200 |
| Storage | 1-TB SATA 6G Midline 7.2 K SFF |
| Network controller | On-board: 2x 1 Gb |
| External | 1 x HPE Ethernet 1-Gb 4-port 366FLR Adapter |
| On-board | iLO Port Card 1 Gb |
| Management | HPE iLO Advanced |
| Device access | Front: One USB 3.0 1 x USB iLO Service Port Rear: Two USBs 3.0 |
| Internal | One USB 3.0 |
| Power | Hot Plug Power Supply 290 W |
| Rack support | HPE 1U Short Friction Rail Kit |
DL20 Gen10 Plus (NHP 2LFF) - Bill of Materials
| Quantity | PN | Description |
|---|---|---|
| 1 | P44111-B21 | HPE DL20 Gen10+ NHP 2LFF CTO Server |
| 1 | P45252-B21 | Intel Xeon E-2334 FIO CPU for HPE |
| 1 | P28610-B21 | HPE 1-TB SATA 7.2K SFF BC HDD |
| 1 | P43016-B21 | HPE 8 GB 1Rx8 PC4-3200AA-E Standard Kit |
| 1 | P21106-B21 | INT I350 1GbE 4p BASE-T Adapter |
| 1 | P45948-B21 | HPE DL20 Gen10+ RPS FIO Enable Kit |
| 1 | 865408-B21 | HPE 500W FS Plat Hot Plug LH Power Supply Kit |
| 1 | 775612-B21 | HPE 1U Short Friction Rail Kit |
| 1 | 512485-B21 | HPE iLO Adv 1 Server License 1 year support |
| 1 | P46114-B21 | HPE DL20 Gen10+ 2x8 LP FIO Riser Kit |
Optional Storage Arrays
| Quantity | PN | Description |
|---|---|---|
| 1 | P26325-B21 | Broadcom MegaRAID MR216i-a x16 Lanes without Cache NVMe/SAS 12G Controller (RAID5) Note: This RAID controller occupies the PCIe expansion slot and does not allow expansion of networking port expansion |
Port expansion
Optional modules for port expansion include:
| Location | Type | Specifications |
|---|---|---|
| PCI Slot 1 (Low profile) | DP F/O NIC | P26262-B21 - Broadcom BCM57414 Ethernet 10/25-Gb 2-port SFP28 Adapter for HPE |
| PCI Slot 1 (Low profile) | DP F/O NIC | P28787-B21 - Intel X710-DA2 Ethernet 10-Gb 2-port SFP+ Adapter for HPE |
| PCI Slot 2 (High profile) | Quad Port Ethernet NIC | P21106-B21 - Intel I350-T4 Ethernet 1-Gb 4-port BASE-T Adapter for HPE |
| PCI Slot 2 (High profile) | DP F/O NIC | P26262-B21 - Broadcom BCM57414 Ethernet 10/25 Gb 2-port SFP28 Adapter for HPE |
| PCI Slot 2 (High profile) | DP F/O NIC | P28787-B21 - Intel X710-DA2 Ethernet 10 Gb 2-port SFP+ Adapter for HPE |
| SFPs for Fiber Optic NICs | MultiMode, Short Range | 455883-B21 - HPE BLc 10G SFP+ SR Transceiver |
| SFPs for Fiber Optic NICs | SingleMode, Long Range | 455886-B21 - HPE BLc 10G SFP+ LR Transceiver |
HPE ProLiant DL20 Gen10 Plus installation
This section describes how to install Defender for IoT software on the HPE ProLiant DL20 Gen10 Plus appliance.
Installation includes:
- Enabling remote access and updating the default administrator password
- Configuring iLO port on network port 1
- Configuring BIOS settings
- Installing Defender for IoT software
Note
Installation procedures are only relevant if you need to re-install software on a pre-configured device, or if you buy your own hardware and configure the appliance yourself.
Enable remote access and update the password
Use the following procedure to set up network options and update the default password.
To enable and update the password:
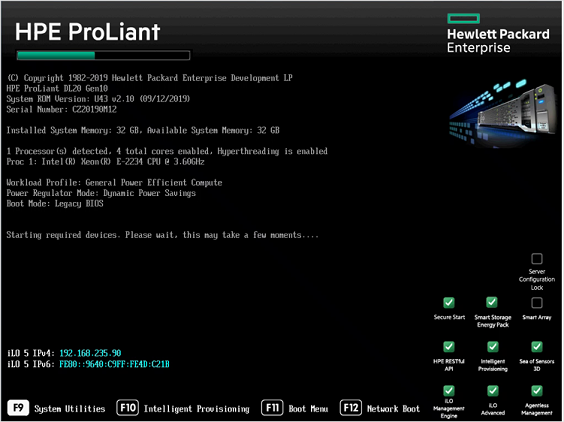
Connect a screen, and a keyboard to the HPE appliance, turn on the appliance, and press F9.
Go to System Utilities > System Configuration > iLO 5 Configuration Utility > Network Options.
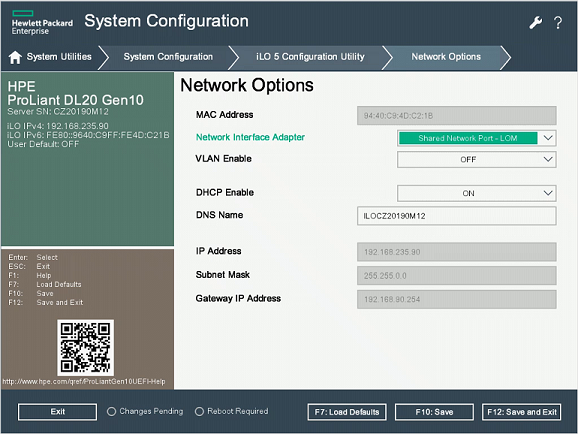
Select Shared Network Port-LOM from the Network Interface Adapter field.
Set Enable DHCP to Off.
Enter the IP address, subnet mask, and gateway IP address.
Select F10: Save.
Select Esc to get back to the iLO 5 Configuration Utility, and then select User Management.
Select Edit/Remove User. The administrator is the only default user defined.
Change the default password and select F10: Save.
Configure the HPE BIOS
This procedure describes how to update the HPE BIOS configuration for your OT deployment.
To configure the HPE BIOS:
Select System Utilities > System Configuration > BIOS/Platform Configuration (RBSU).
In the BIOS/Platform Configuration (RBSU) form, select Boot Options.
Change Boot Mode to UEFI BIOS Mode, and then select F10: Save.
Select Esc twice to close the System Configuration form.
Select Proceed to Next Form.
In the Logical Drive Label form, enter Logical Drive 1.
Select Submit Changes.
In the Submit form, select Back to Main Menu.
Select F10: Save and then press Esc twice.
In the System Utilities window, select One-Time Boot Menu.
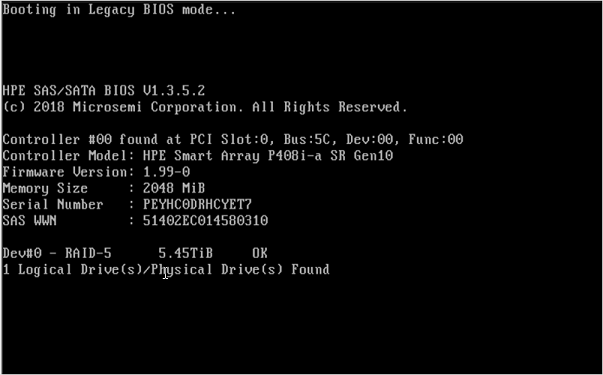
In the One-Time Boot Menu form, select Legacy BIOS One-Time Boot Menu.
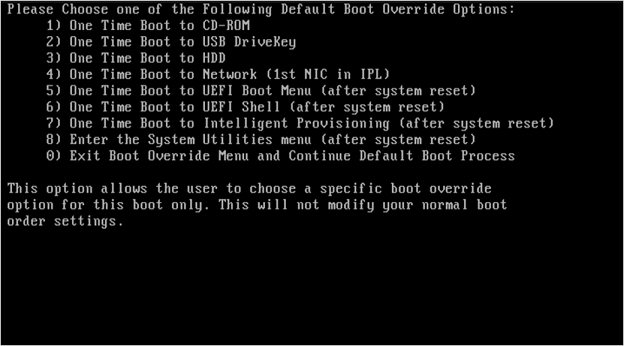
The Booting in Legacy and Boot Override windows appear. Choose a boot override option; for example, to a CD-ROM, USB, HDD, or UEFI shell.
Install iLO remotely from a virtual drive
This procedure describes how to install iLO software remotely from a virtual drive.
Before installing the iLO software, we recommend changing the iLO idle connection timeout setting to infinite, as the installation might take longer than the 30 minutes it is set to by default, depending on your network connection and if the sensor is in a remote location.
To change the iLO idle connection timeout settings:
Sign in to the iLO console, and go to Overview on the top menu.
On the left, select Security, and then select Access settings from the top menu.
Select the pencil icon next to iLO and then select Show advanced settings.
On the Idle connection timeout row, select the triangle icon to open the timeout options, and then select Infinite.
Continue the iLO installation with the following steps.
To install sensor software with iLO:
When signed into the iLO console, select the servers' screen on the bottom left.
Select HTML5 Console.
In the console, select the Virtual media CD icon on the right, and choose the CD/DVD option.
Select Local ISO file.
In the dialog box, choose the Defender for IoT sensor installation ISO file.
Go to the left menu icon, select Power, and then select Reset.
The appliance will restart, and run the sensor installation process.
Install Defender for IoT software on the HPE ProLiant DL20 Gen10 Plus
This procedure describes how to install Defender for IoT software on the HPE ProLiant DL20 Gen10 Plus.
The installation process takes about 20 minutes. After the installation, the system is restarted several times.
To install Defender for IoT software:
Connect the screen and keyboard to the appliance, and then connect to the CLI.
Connect an external CD or disk-on-key that contains the software you downloaded from the Azure portal.
Start the appliance.
Continue by installing your Defender for IoT software. For more information, see Defender for IoT software installation.
Next steps
Continue understanding system requirements for physical or virtual appliances. For more information, see Which appliances do I need?.
Then, use any of the following procedures to continue:
Feedback
Coming soon: Throughout 2024 we will be phasing out GitHub Issues as the feedback mechanism for content and replacing it with a new feedback system. For more information see: https://aka.ms/ContentUserFeedback.
Submit and view feedback for