Note
Access to this page requires authorization. You can try signing in or changing directories.
Access to this page requires authorization. You can try changing directories.
Note
Noted features are in PREVIEW. The Azure Preview Supplemental Terms include other legal terms that apply to Azure features that are in beta, preview, or otherwise not yet released into general availability.
Microsoft Defender for IoT alerts enhance your network security and operations with real-time details about events logged in your network. OT alerts are triggered when OT network sensors detect changes or suspicious activity in network traffic that needs your attention.
This article describes the following methods for reducing OT network alert fatigue in your team:
Create suppression rules from the Azure portal to reduce the alerts triggered by your sensors. If you're working in an air-gapped environment, do this by creating alert exclusion rules on the OT sensor.
Create alert comments for your teams to add to individual alerts, streamlining communication and record-keeping across your alerts.
Create custom alert rules to identify specific traffic in your network
Prerequisites
Before you use the procedures on this page, note the following prerequisites:
| To ... | You must have ... |
|---|---|
| Create alert suppression rules on the Azure portal | A Defender for IoT subscription with at least one cloud-connected OT sensor and access as a Security Admin, Contributor, or Owner. |
| Create a DNS allowlist on an OT sensor | An OT network sensor installed and access to the sensor as the default Admin user. |
| Create alert comments on an OT sensor | An OT network sensor installed and access to the sensor as any user with an Admin role. |
| Create custom alert rules on an OT sensor | An OT network sensor installed and access to the sensor as any user with an Admin role. |
For more information, see:
- Install OT monitoring software on OT sensors
- Azure user roles and permissions for Defender for IoT
- On-premises users and roles for OT monitoring with Defender for IoT
Suppress irrelevant alerts
Configure your OT sensors to suppress alerts for specific traffic on your network that would otherwise trigger an alert. For example, if all the OT devices monitored by a specific sensor are going through maintenance procedures for two days, you might want to define a rule to suppress all alerts generated by that sensor during the maintenance period.
For cloud connected OT sensors, create alert suppression rules on the Azure portal to ignore specified traffic on your network that would otherwise trigger an alert.
For locally managed sensors, create alert exclusion rules on the OT sensor, either using the UI or the API.
Important
Rules configured on the Azure portal override any rules configured for the same sensor on the OT sensor. If you're currently using alert exclusion rules on your OT sensor, we recommend that you migrate them to the Azure portal as suppression rules before you start.
Create alert suppression rules on the Azure portal (Public Preview)
This section describes how to create an alert suppression rule on the Azure portal, and is supported for cloud-connected sensors only.
To create an alert suppression rule:
In Defender for IoT on the Azure portal, select Alerts >
 Suppression rules.
On the Suppression rules (Preview) page, select + Create.
In the Create suppression rule pane Details tab, enter the following details:
Select your Azure subscription from the drop-down list.
Enter a meaningful name for your rule and an optional description.
Toggle on Enabled to have the rule start running as configured. You can also leave this option toggled off to start using the rule only later on.
In the Suppress by time range area, toggle on Expiration date to define a specific start and end date and time for your rule. Select Add range to add multiple time ranges.
In the Apply on area, select whether you want to apply the rule to all sensors on your subscription, or only on specific sites or sensors. If you select Apply on custom selection, select the sites and/or sensors where you want the rule to run.
When you select a specific site, the rule applies to all existing and future sensors associated with the site.
Select Next and confirm the override message.
In the Create suppression rule pane Conditions tab:
In the Alert name dropdown list, select one or more alerts for your rule. Selecting the name of an alert engine instead of a specific rule name applies the rule to all existing and future alerts associated with that engine.
Optionally filter your rule further by defining additional conditions, such as for traffic coming from specific sources, to specific destinations, or on specific subnets. When specifying subnets as conditions, note that the subnets refer to both the source and destination devices.
When you're finished configuring your rule conditions, select Next.
In the Create suppression rule pane Review and create tab, review the details of the rule you're creating and then select Create.
Your rule is added to the list of suppression rules on the Suppression rules (Preview) page. Select a rule to edit or delete it as needed.
Tip
If you need to export suppression rules, select the Export button from the toolbar. All rules configured are exported to a single .CSV file, which you can save locally.
Migrate suppression rules from an OT sensor
If you're currently using an OT sensor with cloud-connected sensors, we recommend that you migrate any exclusion rules to the Azure portal as suppression rules before you start creating new suppression rules. Any suppression rules configured on the Azure portal override alert exclusion rules that exist for the same sensors on the OT sensor.
To export alert exclusion rules and import them to the Azure portal:
Sign into your OT sensor and select Alert Exclusion.
On the Alert Exclusion page, select
 Export to export your rules to a .CSV file.
In Defender for IoT on the Azure portal, select Alerts > Suppression rules.
On the Suppression rules (Preview) page, select Migrate local manager rules, and then browse to and select the .CSV file you'd downloaded from the OT sensor.
In the Migrate suppression rules pane, review the uploaded list of suppression rules you're about to migrate, then select Approve migration.
Confirm the override message.
Your rules are added to the list of suppression rules on the Suppression rules (Preview) page. Select a rule to edit or delete it as needed.
Allow internet connections on an OT network
Decrease the number of unauthorized internet alerts by creating an allowlist of domain names on your OT sensor. When a DNS allowlist is configured, the sensor checks each unauthorized internet connectivity attempt against the list before triggering an alert. If the domain's FQDN is included in the allowlist, the sensor doesn’t trigger the alert and allows the traffic automatically.
All OT sensor users can view a currently configured list of domains in a data mining report, including the FQDNs, resolved IP addresses, and the last resolution time.
To define a DNS allowlist:
Sign into your OT sensor as the admin user and select the Support page.
In the search box, search for DNS and then locate the engine with the Internet Domain Allowlist description.
Select Edit
 for the Internet Domain Allowlist row. For example:
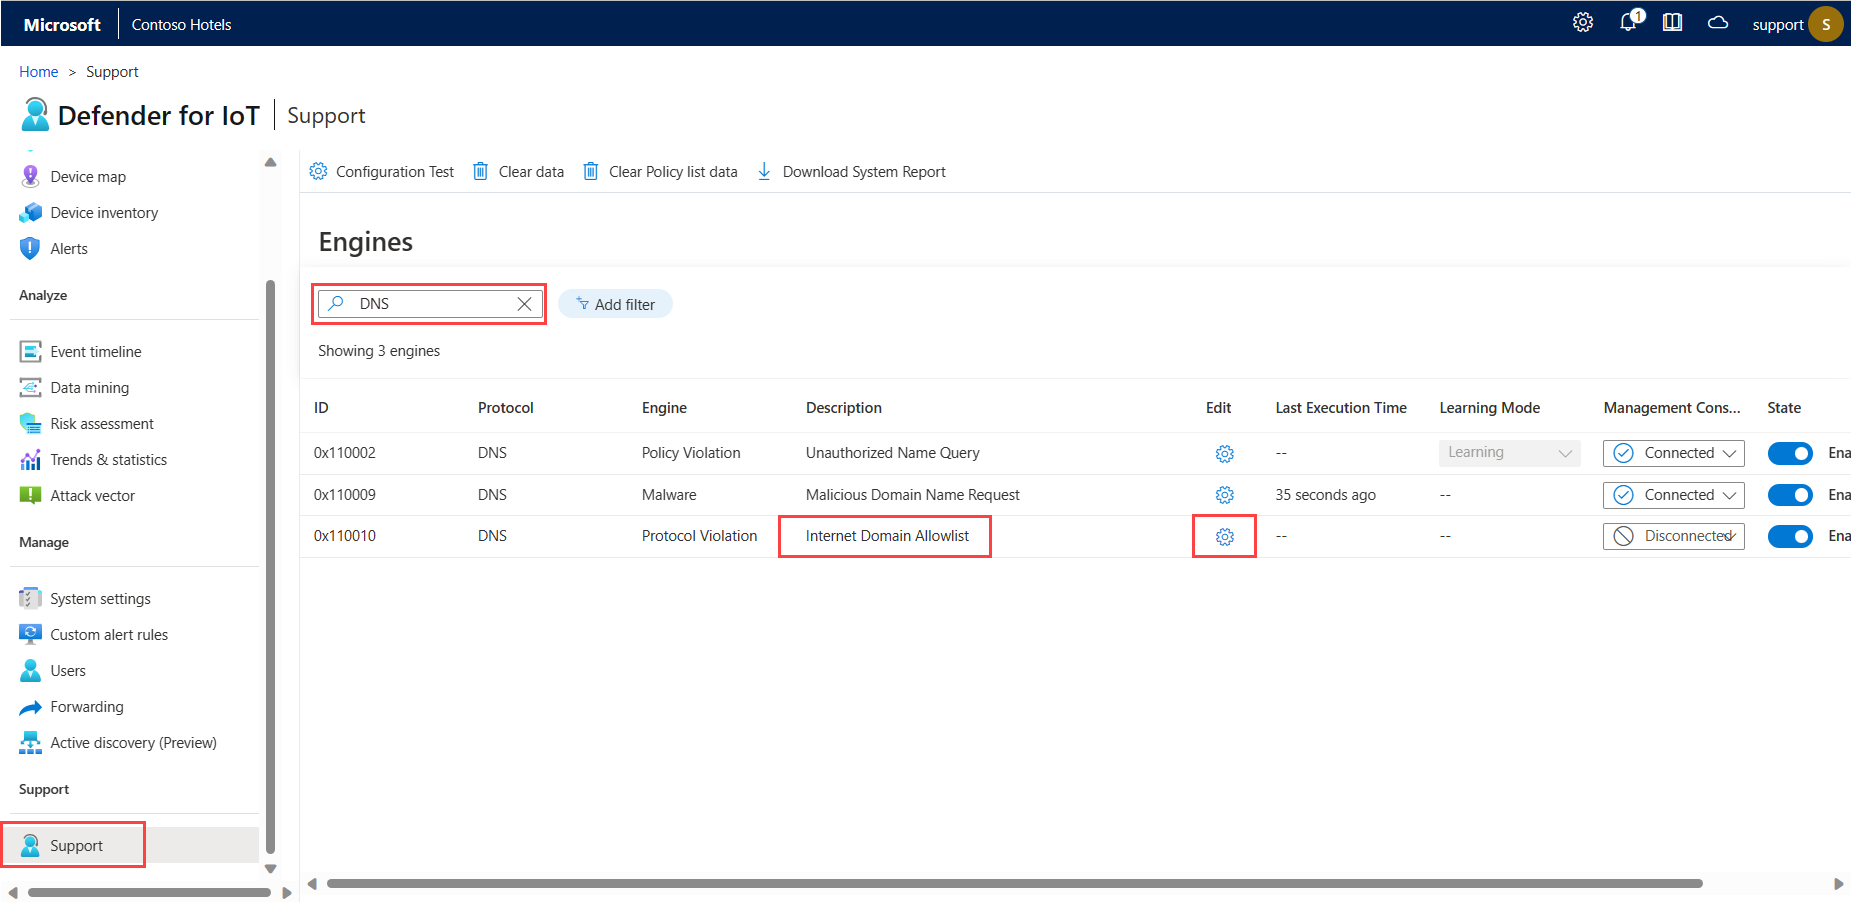
In the Edit configuration pane > Fqdn allowlist field, enter one or more domain names. Separate multiple domain names with commas. Your sensor won't generate alerts for unauthorized internet connectivity attempts on the configured domains.
You can use the
*wildcard at any place in the domain name to easily add subdomains to the allowlist without having to input each one, for example,*.microsoft.comorteams.microsoft.*.Select Submit to save your changes.

To view the current allowlist in a data mining report:
When selecting a category in your custom data mining report, make sure to select Internet Domain Allowlist under the DNS category.
For example:

The generated data mining report shows a list of the allowed domains and each IP address that’s being resolved for those domains. The report also includes the TTL, in seconds, during which those IP addresses won't trigger an internet connectivity alert.
Create alert comments on an OT sensor
Sign into your OT sensor and select System Settings > Network Monitoring > Alert Comments.
In the Alert comments pane, in the Description field, enter the new comment, and select Add. The new comment appears in the Description list below the field.
For example:
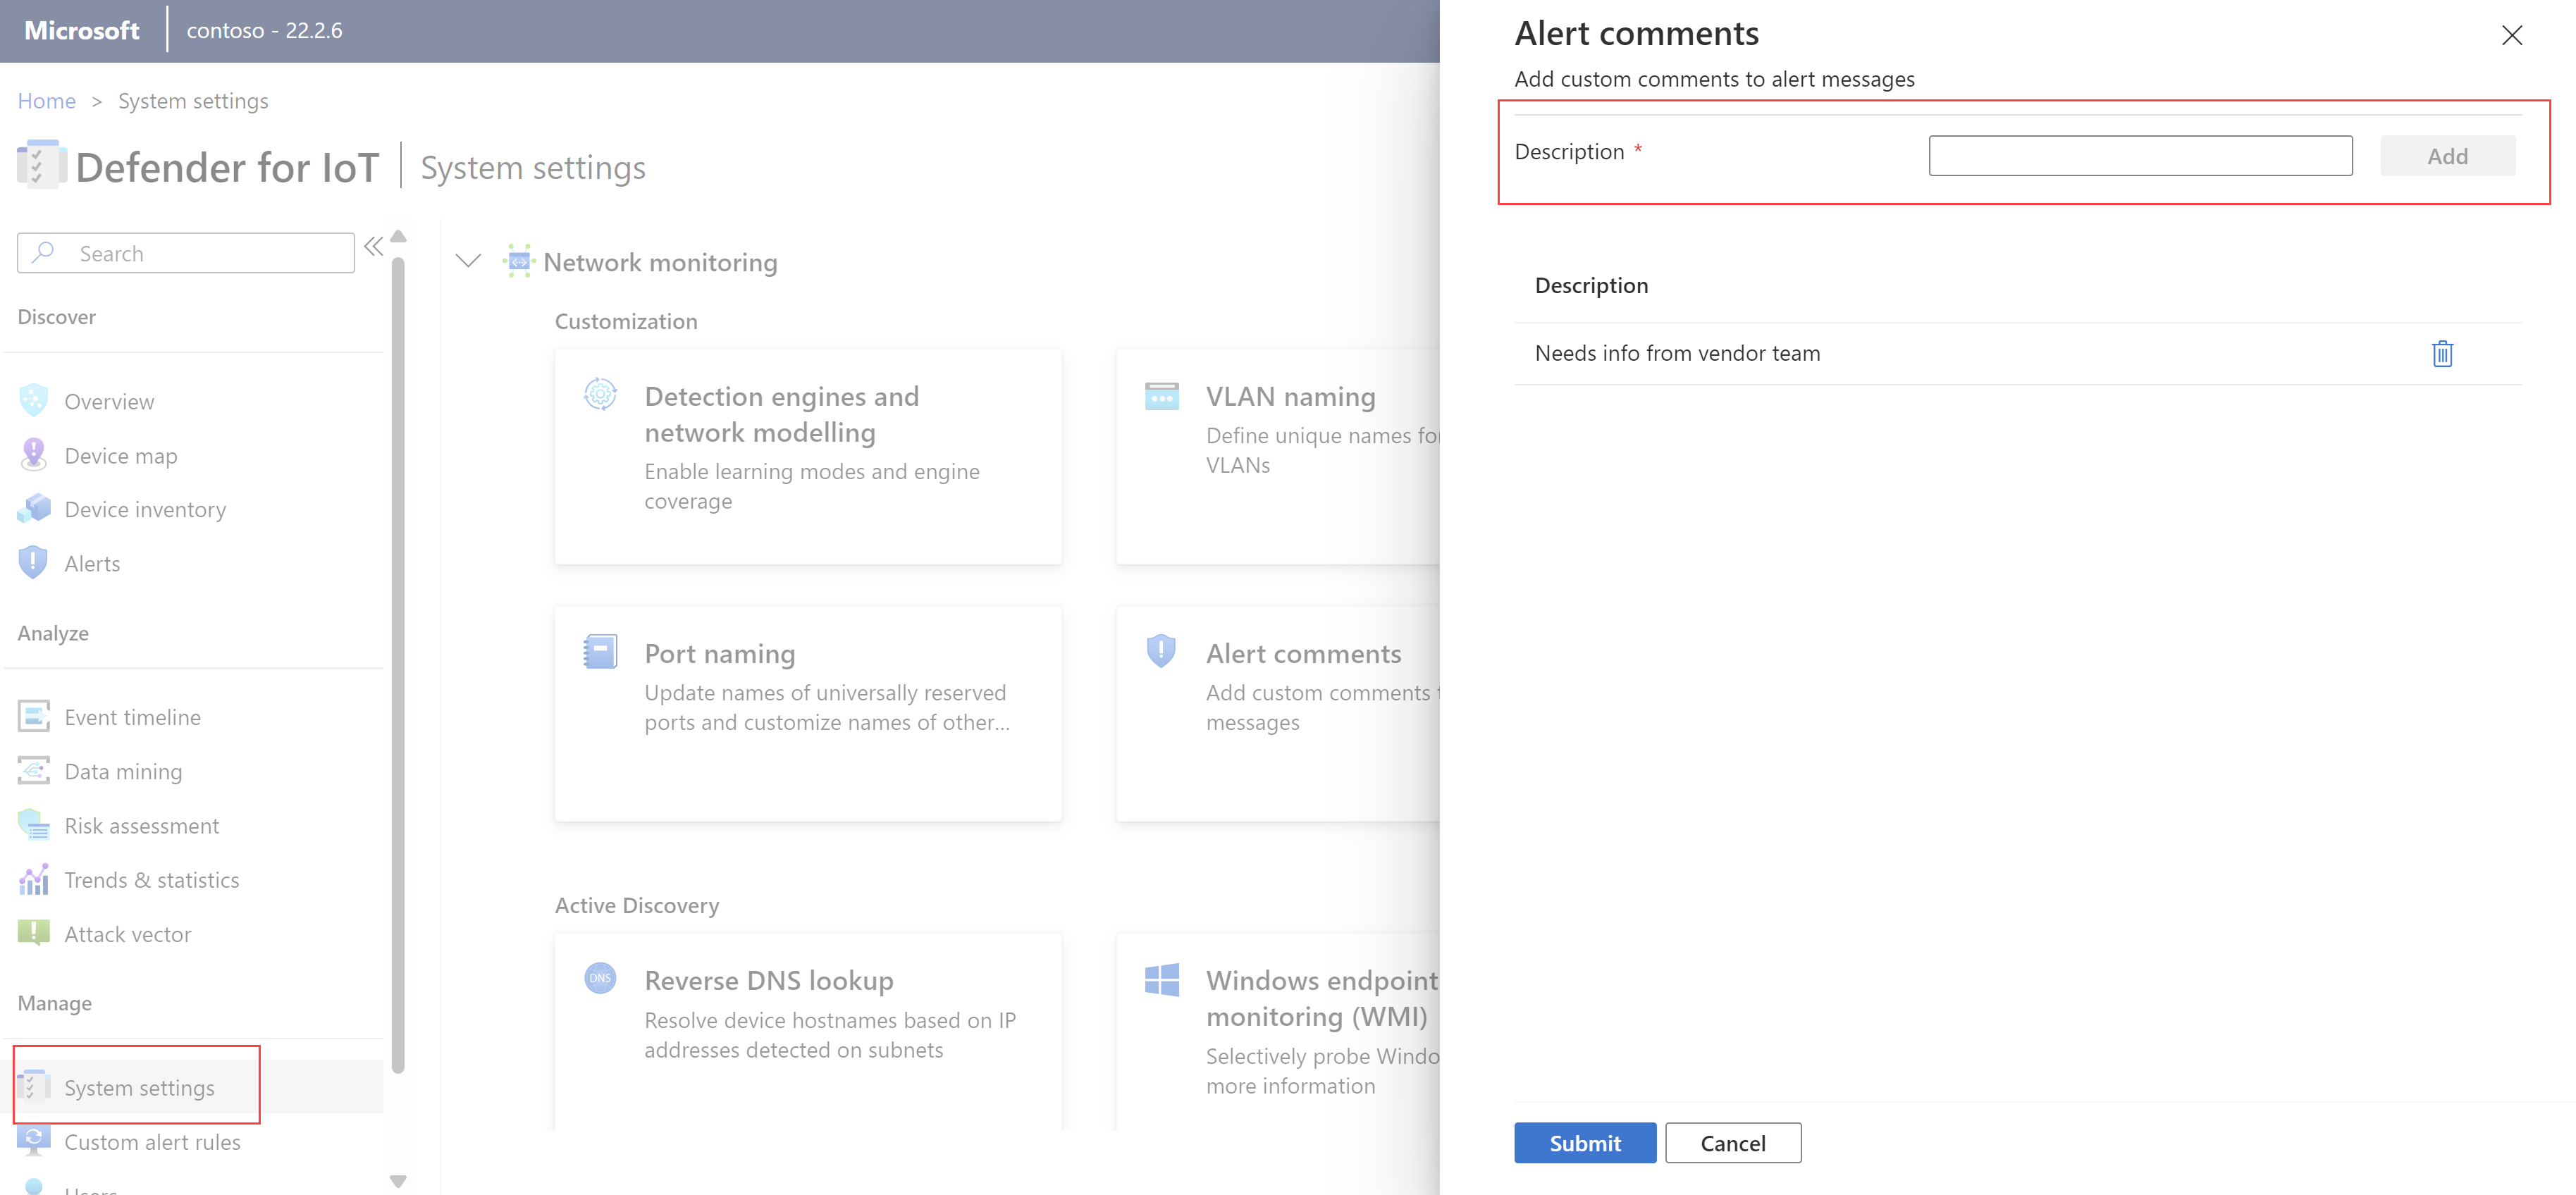
Select Submit to add your comment to the list of available comments in each alert on your sensor.
Custom comments are available in each alert on your sensor for team members to add. For more information, see Add alert comments.
Create custom alert rules on an OT sensor
Add custom alert rules to trigger alerts for specific activity on your network that's not covered by out-of-the-box functionality.
For example, for an environment running MODBUS, you might add a rule to detect any written commands to a memory register on a specific IP address and ethernet destination.
To create a custom alert rule:
Sign into your OT sensor and select Custom alert rules > + Create rule.
In the Create custom alert rule pane, define the following fields:
Name Description Alert name Enter a meaningful name for the alert. Alert protocol Select the protocol you want to detect.
In specific cases, select one of the following protocols:
- For a database data or structure manipulation event, select TNS or TDS.
- For a file event, select HTTP, DELTAV, SMB, or FTP, depending on the file type.
- For a package download event, select HTTP.
- For an open ports (dropped) event, select TCP or UDP, depending on the port type.
To create rules that track specific changes in one of your OT protocols, such as S7 or CIP, use any parameters found on that protocol, such astagorsub-function.Message Define a message to display when the alert is triggered. Alert messages support alphanumeric characters and any traffic variables detected.
For example, you might want to include the detected source and destination addresses. Use curly brackets ({}) to add variables to the alert message.Direction Enter a source and/or destination IP address where you want to detect traffic. Conditions Define one or more conditions that must be met to trigger the alert.
- Select the + sign to create a condition set with multiple conditions that use the AND operator. The + sign is enabled only after selecting an Alert protocol value.
- If you select a MAC address or IP address as a variable, you must convert the value from a dotted-decimal address to decimal format.
You must add at least one condition to create a custom alert rule.Detected Define a date and/or time range for the traffic you want to detect. Customize the days and time range to fit with maintenance hours or set working hours. Action Define an action you want Defender for IoT to take automatically when the alert is triggered.
Have Defender for IoT create either an alert or event, with the specified severity.PCAP included If you've selected to create an event, clear the PCAP included option as needed. If you've selected to create an alert, the PCAP is always included, and can't be removed. For example:
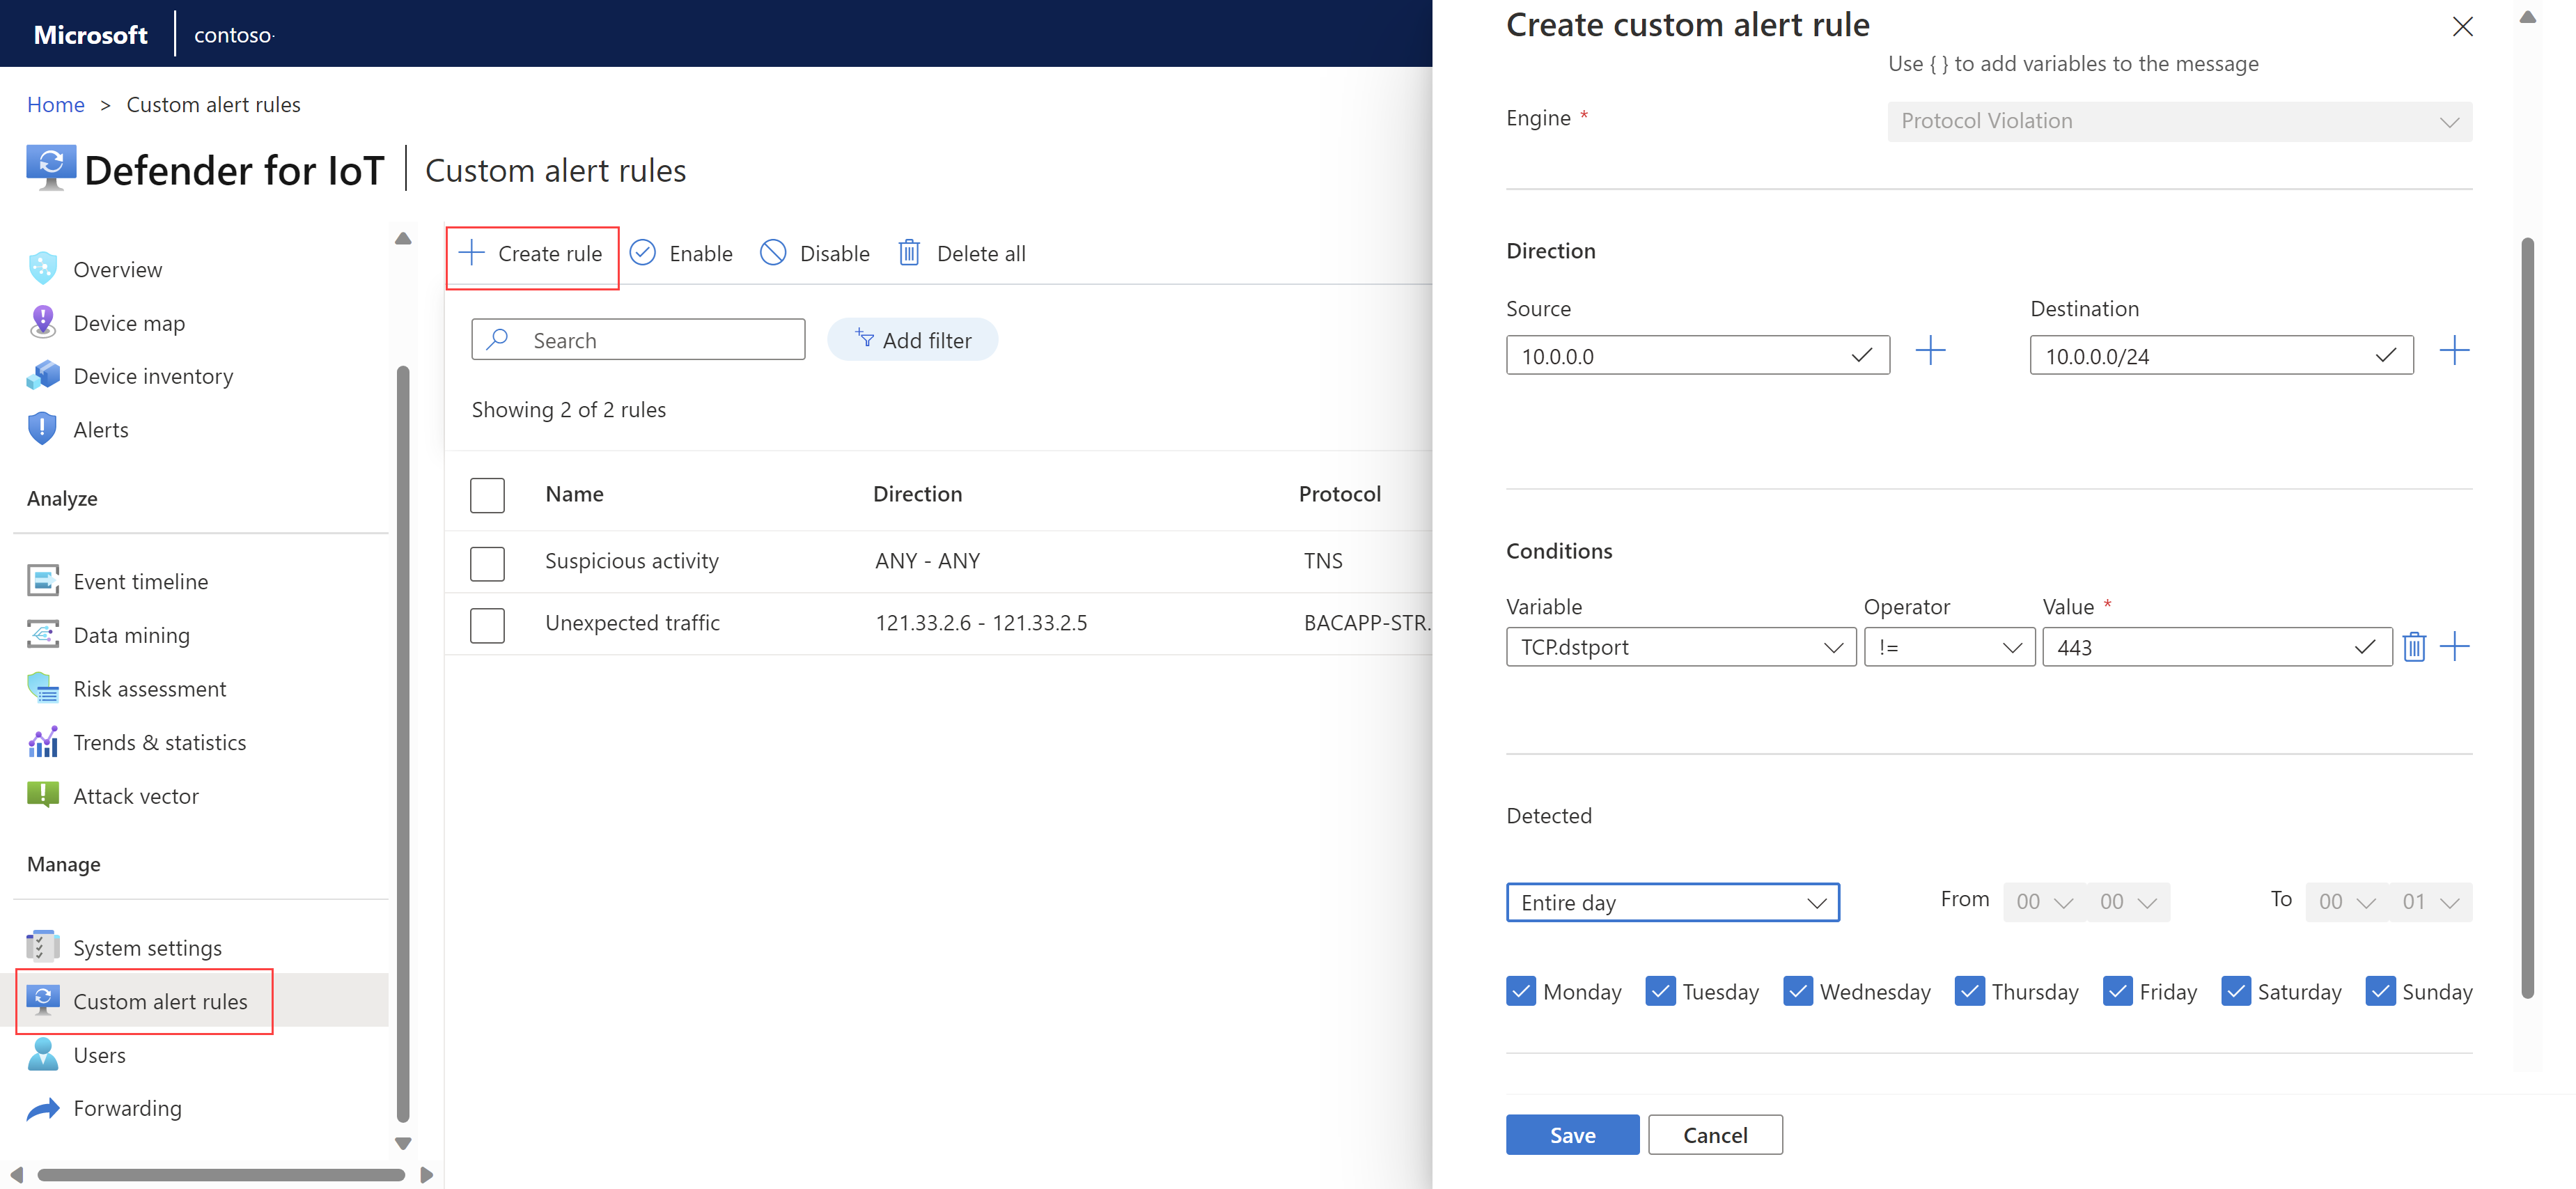
Select Save when you're done to save the rule.

Edit a custom alert rule
To edit a custom alert rule, select the rule and then select the options (...) menu > Edit. Modify the alert rule as needed and save your changes.
Edits made to custom alert rules, such as changing a severity level or protocol, are tracked in the Event timeline page on the OT sensor.
For more information, see Track sensor activity.
Disable, enable, or delete custom alert rules
Disable custom alert rules to prevent them from running without deleting them altogether.
In the Custom alert rules page, select one or more rules, and then select Disable, Enable, or Delete in the toolbar as needed.
Create alert exclusion rules on an OT sensor
Create alert exclusion rules to instruct your sensors to ignore specific traffic on your network that would otherwise trigger an alert.
For example, if you know that all the OT devices monitored by a specific sensor will be going through maintenance procedures for two days, define an exclusion rule that instructs Defender for IoT to suppress alerts detected by this sensor during the predefined period.
To create an alert exclusion rule:
Sign into your OT sensor and select Alert Exclusion on the left-hand menu.
On the Alert Exclusion page, select the + button at the top-right to add a new rule.
In the Create Exclusion Rule dialog, enter the following details:
Name Description Name Enter a meaningful name for your rule. The name can't contain quotes ( ").By Time Period Select a time zone and the specific time period you want the exclusion rule to be active, and then select ADD.
Use this option to create separate rules for different time zones. For example, you might need to apply an exclusion rule between 8:00 AM and 10:00 AM in three different time zones. In this case, create three separate exclusion rules that use the same time period and the relevant time zone.By Device Address Select and enter the following values, and then select ADD:
- Select whether the designated device is a source, destination, or both a source and destination device.
- Select whether the address is an IP address, MAC address, or subnet
- Enter the value of the IP address, MAC address, or subnet.By Alert Title Select one or more alerts to add to the exclusion rule and then select ADD. To find alert titles, enter all, or part of an alert title and select the one you want from the dropdown list. By Sensor Name Select one or more sensors to add to the exclusion rule and then select ADD. To find sensor names, enter all or part of the sensor name and select the one you want from the dropdown list. Important
Alert exclusion rules are
ANDbased, which means that alerts are only excluded when all rule conditions are met. If a rule condition is not defined, all options are included. For example, if you don't include the name of a sensor in the rule, the rule is applied to all sensors.A summary of the rule parameters is shown at the bottom of the dialog.
Check the rule summary shown at the bottom of the Create Exclusion Rule dialog and then select SAVE
Create alert exclusion rules via API
Use the Defender for IoT API to create alert exclusion rules from an external ticketing system or other system that manage network maintenance processes.
Use the maintenanceWindow (Create alert exclusions) API to define the sensors, analytics engines, start time, and end time to apply the rule.
For more information, see Defender for IoT API reference.