Create OT sites and zones on an on-premises management console (Legacy)
Important
Defender for IoT now recommends using Microsoft cloud services or existing IT infrastructure for central monitoring and sensor management, and plans to retire the on-premises management console on January 1st, 2025.
For more information, see Deploy hybrid or air-gapped OT sensor management.
This article is one in a series of articles describing the deployment path for a Microsoft Defender for IoT on-premises management console for air-gapped OT sensors.

This article describes how to create sites and zones on an on-premises management console, based on the network segments you've identified across your OT environments.
Segmenting your network by sites and zones is an integral part of implementing a Zero Trust security strategy, and assigning sensors to specific sites and zones helps you monitor for unauthorized traffic crossing segments.
Data ingested from sensors in the same site or zone can be viewed together, segmented out from other data in your system.
If there's sensor data that you want to view grouped together in the same site or zone, make sure to assign sensor sites and zones accordingly.
An on-premises management console adds the extra layers of business units and regions to your network segmentation, and also provides an interactive, global map to view all business units, regions, sites, and zones across your network.
Note
Sites and zones created in on an on-premises management console aren't synchronized with sites and zones created in the Azure portal when onboarding OT sensors.
Prerequisites
A clear understanding of where your OT network sensors are placed in your network, and how you want to segment your network into sites and zones.
Customize your global map (optional)
By default, the on-premises management console shows a blank world map for you to build and monitor your business units, regions, sites, and zones.
For example, you may want to highlight specific countries/regions or cities in more detail so that you can zoom in farther.
To change the default map to one of your own:
Sign into the on-premises management console and select System Settings > Change Site Map.
Select UPLOAD SITE MAP and then browse to and select the image you want to use instead.
Create business units
Defender for IoT business units represent the business units in your organization. For example, if your company manufactures both clothing and luggage, you might create two business units: Clothing and Luggage.
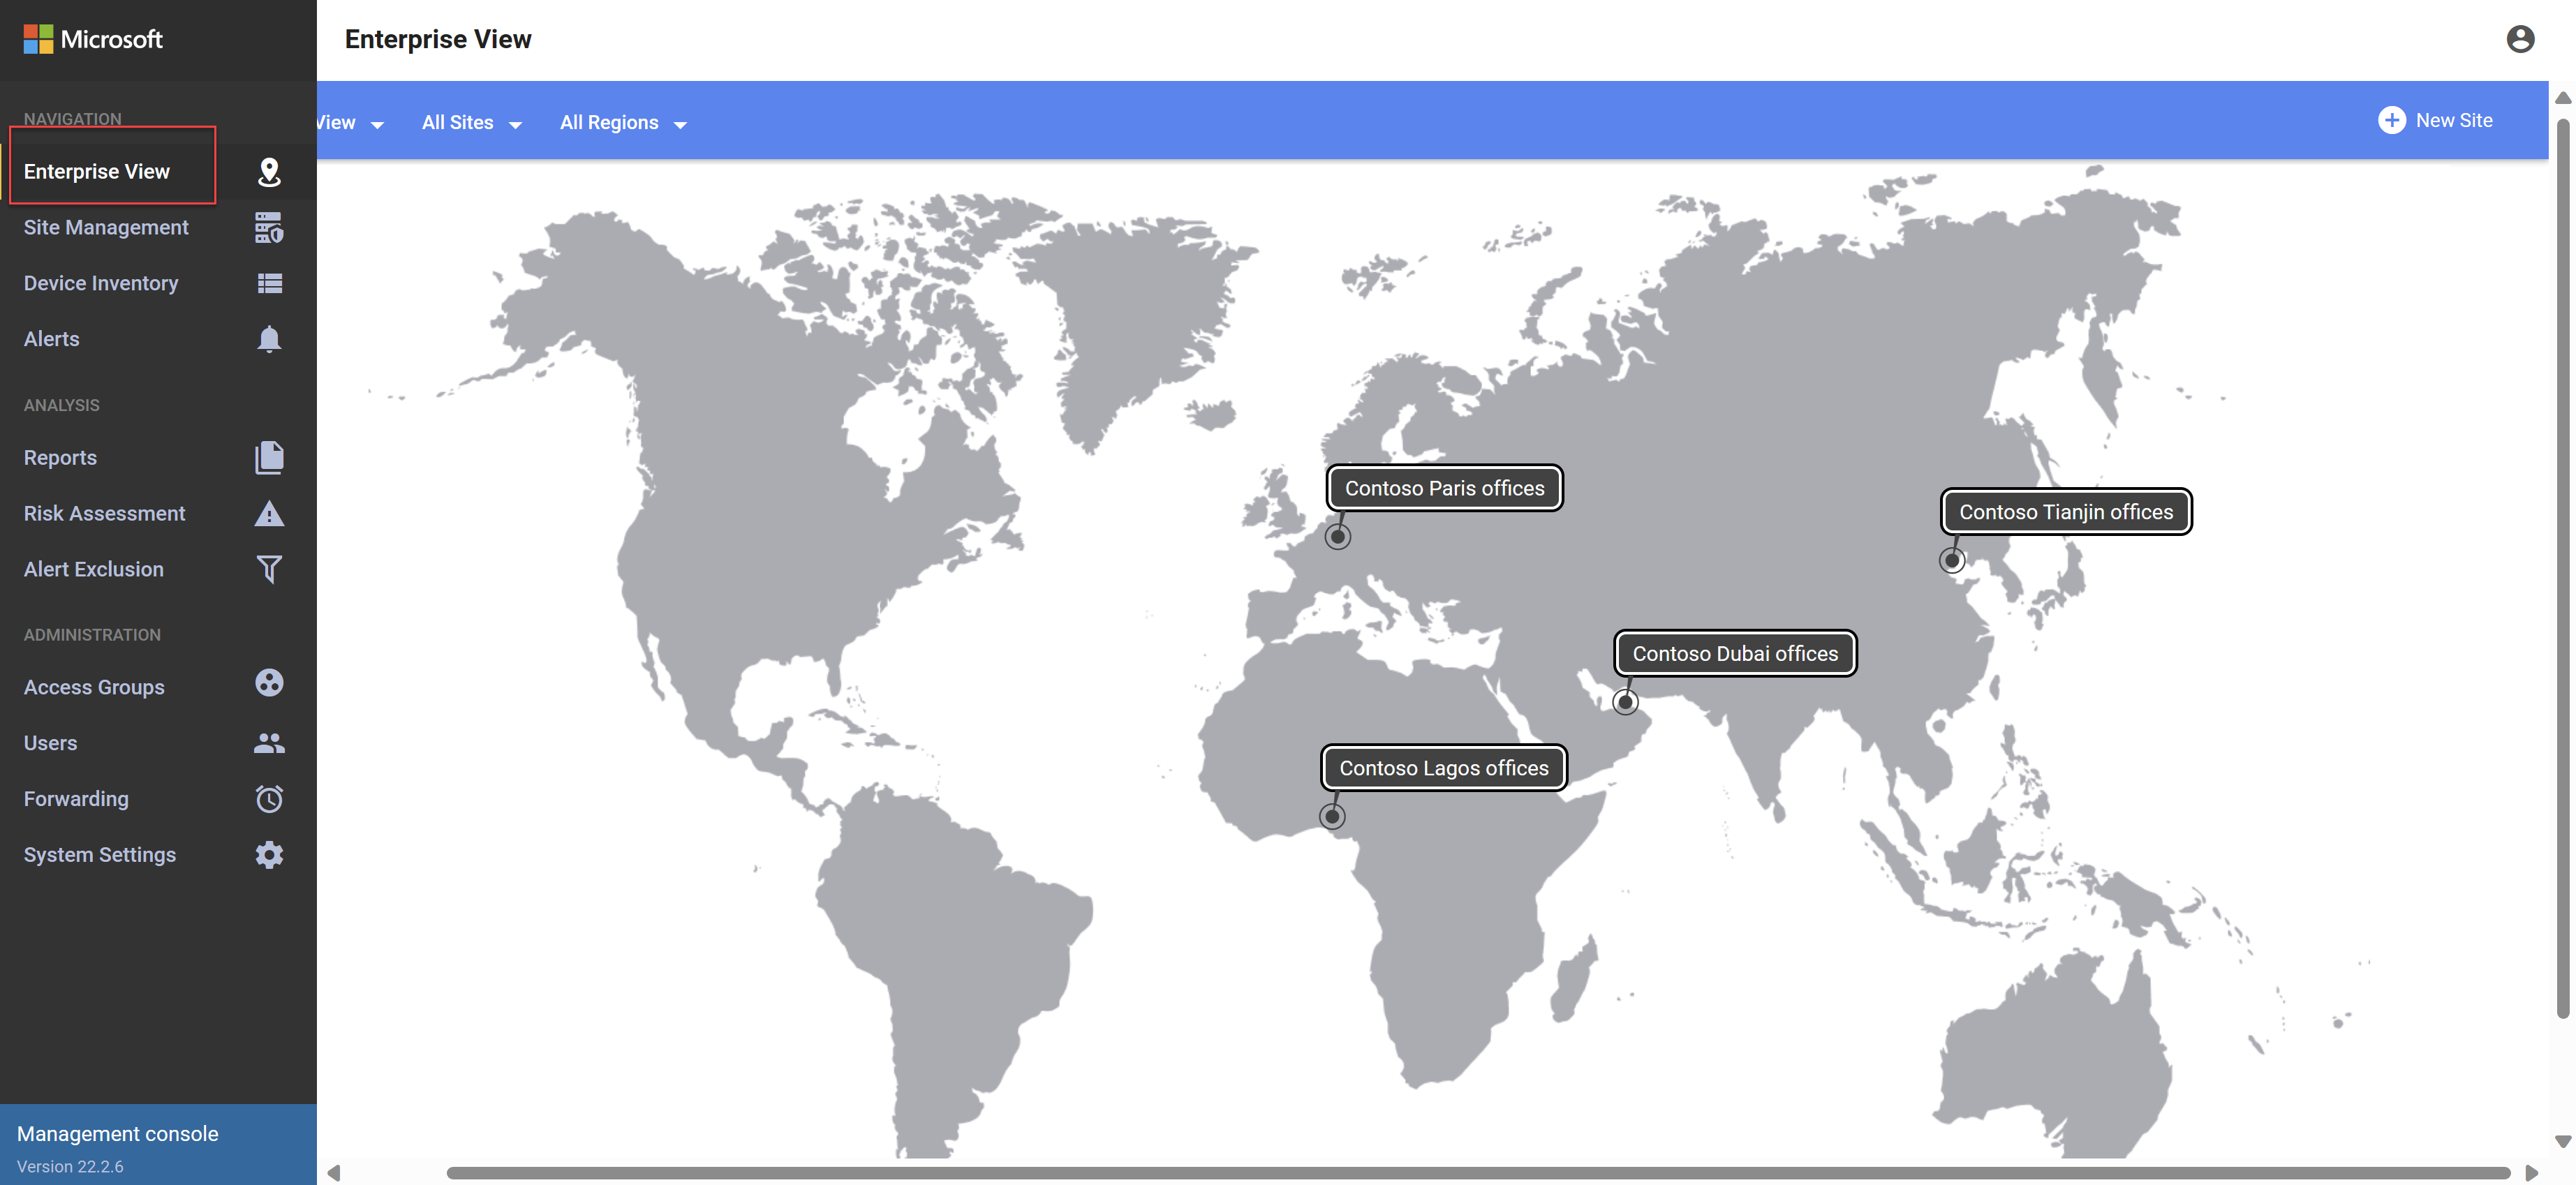
Sign into your on-premises management console, and select Enterprise View.
From the toolbar, select All Sites > Manage Business Units.
In the Manage Business Units dialog, enter the name of a new business unit and then select Add. For example:

Repeat this step for any extra business units you want to create.
When you're finished, select CLOSE to save your changes.

Create regions
Defender for IoT regions represent the global regions where your organization has offices, factories, or other sites connected to the network.
Sign into your on-premises management console, and select Enterprise View.
From the toolbar, select All Regions > Manage Regions.
In the Manage Regions dialog, enter the name of a new region then select Add. For example, if your company has offices all around the world, you might create a region to represent each global region.

Repeat this step for any extra sites you want to create.
When you're finished, select CLOSE to save your changes.

Create sites
Each Defender for IoT site represents a physical location where your organization has an office, factory, or other building or area connected to your network.
For example, if you have multiple offices in the same city, you'd create a separate site for each office.
Sign into your on-premises management console, and select Enterprise View.
At the top right, select + New Site, and then select a location in the map where you want to define your new site.
In the Create New Site dialog, enter and select the following values:
- Site Name: Enter a meaningful name for your site.
- Site Physical Address: Enter the physical address of your site's location.
- Business Units: Select one or more Defender for IoT business units represented at the site you're creating.
- Region: Select the region where your site is located.
For example:

Select Save to save your changes.
Repeat the previous two steps for each of the sites you want to create, populating the map to cover your entire network. For example:


Create zones
Each Defender for IoT zone represents a logical entity in a specific site. For example, you might want to create separate zones for production lines, substations, or device types.
Prerequisites: At least one or more Defender for IoT sites configured on your on-premises management console.
Sign into your on-premises management console, and select Site Management.
For each site, select + Add zone in the upper-right corner. For example:

In the Create New Zone dialog, enter a meaningful name and description for your zone and select Save.

Repeat this procedure to create all of your zones across all of your sites.
Assign your OT sensor to a site and zone
After you've connected your OT sensors to your on-premises management console, you'll see those sensors listed on the on-premises management console's Site Management page as Unassigned sensors.
For example:

If you've also configured sites and zones on your on-premises management, assign your sensors to a site and zone in order to monitor detected data segmented separately.
To assign an OT sensor to a site and zone:
Sign into your on-premises management console and select Site Management.
In the Connectivity column, verify that the sensor is currently connected to the on-premises management console.
Select + ASSIGN for the sensor you want to assign to a zone. Then, in the Assign Sensor dialog, select the business unit, region, site, and zone where you want to assign the sensor.
Select ASSIGN to complete the assignment.
The page takes a few moments to refresh with the updated sensor assignments.
To delete a sensor's zone assignment:
Sign into your on-premises management console and select Site Management.
Locate the sensor who's sensor assignment you want to remove. At the far right of the sensor row, select the Unassign
 button.
In the confirmation message dialog, select CONFIRM.
The page takes a few moments to refresh with the updated sensor assignments.
Manage sites and zones
As your network grows, you may need to have your OT sensors monitor different sites and zones. We recommend reviewing your network periodically and editing your sensors' site and zone assignments as needed.
After you've created sites and zones, you can view, edit, or delete them from both the Enterprise View and the Site Management pages on the on-premises management console.
- On the Enterprise View map, select a site to view all of its zones
- On the Site Management page, expand or collapse each site to its zones
For each site or zone, select the options menu to make changes, or to delete a site or zone. For example:

Next steps
You've now finished deploying your on-premises management console. For more information, see:
Feedback
Coming soon: Throughout 2024 we will be phasing out GitHub Issues as the feedback mechanism for content and replacing it with a new feedback system. For more information see: https://aka.ms/ContentUserFeedback.
Submit and view feedback for