Note
Access to this page requires authorization. You can try signing in or changing directories.
Access to this page requires authorization. You can try changing directories.
Use Microsoft Dev Box with Visual Studio Code (VS Code) to create secure, cloud-based development environments. This article explains how to set up dev tunnels and connect to your Dev Box from VS Code. You learn how to install the required extension, enable secure tunnels, and connect remotely for a streamlined development experience. Follow these steps to get started quickly and work efficiently from anywhere.
Prerequisites
- A dev center configured with at least one project and a dev box pool.
- If you don't have a dev center, create one following these steps:Quickstart: Configure Microsoft Dev Box
- A dev box.
- If you don't have a dev box, create one following these steps: Quickstart: Create and connect to a dev box by using the Microsoft Dev Box developer portal
Enable Dev Tunnels on a Dev Box Pool
Dev Box Dev Tunnels is a feature that allows developers to connect to their Dev Box using Visual Studio Code (VS Code) through secure tunnels. This feature is particularly useful for developers who want to work remotely or from different locations without needing a full remote desktop connection.
Register the Dev Box Tunnels preview feature
While Dev Box Tunnels is in preview, you must register the feature in your Azure subscription.
Sign in to the Azure portal.
Select Subscriptions.
Select the subscription that contains your Dev Box resources.
In the left menu, select Settings > Preview features.
In the Search box, type Dev Box, select Dev Box Dev Tunnels from the results, and then select Register.

In the Do you want to register the selected features? message, select OK.

Enable dev tunnels for a dev box pool
Dev tunnels are enabled on a per-pool basis. To enable tunnels for a dev box pool:
Navigate to the project that contains the dev box pool where you want to enable tunnels.
On the left menu, select Manage > Dev box pools.
For the pool you want to edit, from the dev box operations menu (...), select Edit.

On the Management tab, select Enable opening dev box in VS Code, and then select Save.


Connect to a dev box by using a dev tunnel
Follow these steps to set up a dev tunnel and connect to your dev box using VS Code.
Install VS Code extension
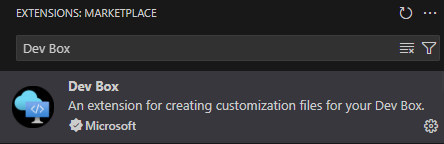
In your local VS Code, install the Dev Box extension from the VS Code Extension Marketplace. Dev tunnels requires version 2.0.0 or later. Make sure you install the extension locally, not on the Dev Box you want to connect to.
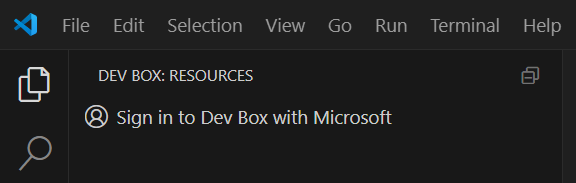
To sign in to the Dev Box extension, select the Dev Box icon in the left sidebar, and select Sign In to Dev Box with Microsoft.
Connect to the Dev Box in VS Code
Once everything is set up, open your dev box in VS Code. From the Manage menu (settings wheel), select Connect.

Explore the remote experience in VS Code
A new VS Code window opens. You can open any folder or workspace on the remote Dev Box using File > Open File/Folder/Workspace just as you would locally.
Connect to Windows Substem for Linux
If you have a Windows Subsystem for Linux (WSL) environment on the Dev Box, connect to it using Remote Explorer.
Select WSL targets from the dropdown to see all the WSL distributions. Open any WSL distribution in the current or a new window.

For more information on the WSL development experience, see Remote - WSL and Set up a WSL development environment.
Frequently asked questions
Why do I need to sign-in to the Dev Box before enabling the tunnel?
This step is required to establish a user session for setting up the tunnel. After the initial sign-in, you can just disconnect from the Dev Box. Then you can enable or connect to the tunnel without logging in again, unless the Dev Box is shut down or restarted.
Why can't I connect to the Dev Box even if the tunnel is enabled?
Refresh the Dev Box extension explorer view with the button in the top right corner to check the latest status of the tunnel. If the tunnel is enabled, but you still can't connect, try disabling the tunnel, signing in to the Dev Box, and then re-enabling the tunnel.