User authentication with Contoso Real Estate
The Contoso Real Estate application contains the reference architecture and components for building enterprise-grade modern composable frontends (or micro-frontends) and cloud-native applications. It is a collection of best practices, architecture patterns, and functional components that can be used to build and deploy modern JavaScript applications to Azure.
The Contoso Real Estate app has two front-end applications: blog and portal. The blob is publicly available, but the portal requires authentication to see Real Estate listings.
The portal application is found in the portal package. The portal is a single-page application (SPA) built with Angular. The portal uses Azure Static Web Apps for hosting and authentication. The portal uses the Azure Functions API for data access.
Use social providers for authentication
The Contoso Real Estate app uses social providers for authentication.

Each social provider has its own authentication flow, which includes granting access to the Contoso Real Estate app. The following consent is specific to Google authentication.

Once authentication is complete, the user has access to a profile page in the portal, which includes social profile data and app-specific data such as saved listings, payment history, and reservations.

Configure social providers
During local development, use the Static Web Apps CLI to mock the social providers.
When deployed to Azure, there's no additional configuration required to turn on social authentication.
Use routes for social providers
To provide user authentication with social providers, the Contoso Real Estate app uses Azure Static Web Apps, which provides built-in authentication to the hosting service. This allows you to get up and running quickly with authentication without having to write any code for the authentication to social providers.
The Static Web Apps built-in authentication provides several routes your front-end application can use to provide authentication to your users, and provides the redirection to the social authentication providers:
Routes for authentication:
/.auth/login/aad- Redirects to Microsoft Entra login page./.auth/login/facebook- Redirects to Facebook login page./.auth/login/github- Redirects to GitHub login page./.auth/login/google- Redirects to Google login page./.auth/logout- Redirects to the logout page.
Add links to use provider routes
The portal's front-end code provides access to these routes with links:
// imports removed for brevity

@Component({
  selector: "app-authentication",
  templateUrl: "./authentication.component.html",
  styleUrls: ["./authentication.component.scss"],
  imports: [CommonModule, MatButtonModule, MatCardModule, MatFormFieldModule, MatInputModule, TextBlockComponent, MatIconModule,FontAwesomeModule],
  standalone: true,
})
export class AuthenticationComponent implements OnInit {

  public constructor(iconRegistry: MatIconRegistry, santizer: DomSanitizer) {
    for (const provider of this.providers) {
      iconRegistry.addSvgIcon(provider.id, santizer.bypassSecurityTrustResourceUrl(`../assets/company-logos/${provider.id}.svg`));
    }
  }

  @Input() redirectURL = "";

  getRedirectURLWithDefault() {
    return this.redirectURL || "/home";
  }

  providers = [
    { name: "Microsoft", id: "microsoft", icon: faMicrosoft },
    { name: "Facebook", id: "facebook", icon: faFacebook },
    { name: "Google", id: "google", icon: faGoogle },
    { name: "GitHub", id: "github", icon: faGithub },
    { name: "Apple", id: "apple", icon: faApple }
  ];
  private router = inject(Router);
  private authService = inject(AuthService);


  async ngOnInit() {
    if (this.isAuthenticated()) {
      this.router.navigate([this.redirectURL]);
    }
  }

  isAuthenticated() {
    return this.authService.isAuthenticated();
  }

  loginWith(provider: string) {
    return `/.auth/login/${provider}?post_login_redirect_uri=${this.getRedirectURLWithDefault()}`;
  }
}
Use Azure Static Web Apps CLI for local development
During local development, use the Static Web Apps CLI to mock the social providers. The CLI allows you to mock and read authentication and authorization credentials.
When you start the SWA emulator with swa start, the Static Web Apps CLI provides a local development environment on port 4280, that mimics the environment in Azure. This allows you to test your application locally before deploying to Azure.
When the user selects a social provider link, the CLI redirects to the mock authentication page.
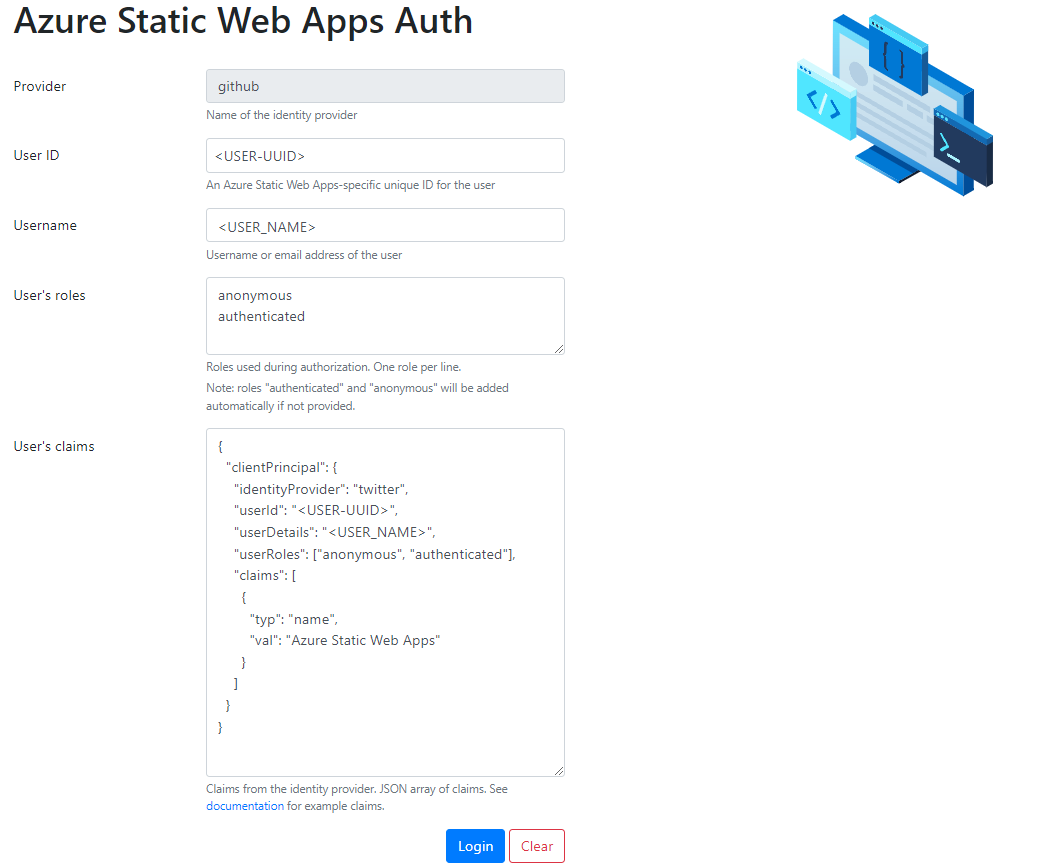
This allows the user to fill in the mock authentication form and select Login. The client app then receives the authentication information from the CLI.
Secure access to API with authentication
To lock down access to the APIs used by the front-end portal, you need to configure the API routes to require authentication in the staticwebapp.config.json. Because the front-end app and API are deployed in the same environment (subdomain), this is enough to lock down access to the API.
{
  "routes": [
    {
      "route": "/api/*",
      "allowedRoles": ["authenticated"]
    }
  ]
}
Get profile information
To get profile information about the user, the front-end app calls the /.auth/me route.
async loadUserSession() {
    const response = await fetch("/.auth/me");
    const payload = await response.json();
    const { clientPrincipal }: { clientPrincipal: UserClientPrincipal } = payload;
    let user = this.guestUser();

    if (clientPrincipal) {
        user = this.authenticatedUser(clientPrincipal);
    }

    this.localStorageService.save("user", user);

    this.userSource.next(user);
    return user;
}
This returns a JSON object with the profile information about the user.
{
  "identityProvider": "github",
  "userId": "d75b260a64504067bfc5b2905e3b8182",
  "userDetails": "username",
  "userRoles": ["anonymous", "authenticated"],
  "claims": [{
    "typ": "name",
    "val": "Azure Static Web Apps"
  }]
}
This information is also sent to the Azure Functions API, /api/users.
  async saveUserSession(user: User) {
    const response = await fetch("/api/users", { method: "POST", body: JSON.stringify(user) });
    const payload = await response.json();

    if (response.status !== 200) {
      // report error but don't block navigation
      console.error("User session not saved", payload.error);
      return user;
    }

    return payload;
  }
The API saves the user information to the Cosmos DB for MongoDB database in the users collection.
{
	"_id" : ObjectId("651c7bc9c086b9b050b38aaa"),
	"id" : "d75b260a64504067bfc5b2905e3b8182",
	"name" : "username",
	"role" : "renter",
	"status" : "active",
	"photo" : "account_circle",
	"address" : "fake address",
	"email" : "username",
	"auth" : {
		"provider" : "github",
		"lastLogin" : {
			"$date" : 1696366067756
		}
	},
	"createdAt" : "1696365512160",
	"__v" : 0
}
In the Contoso application, this information is used to display the user's name in the header and on the profile page.