Note
Access to this page requires authorization. You can try signing in or changing directories.
Access to this page requires authorization. You can try changing directories.
This article shows you how to deploy and run the enterprise chat app sample for Python that's accessible by private endpoints.
This sample implements a chat app by using Python, Azure OpenAI Service, and Retrieval Augmented Generation (RAG) in Azure AI Search to get answers about employee benefits at a fictitious company. The app is seeded with PDF files that include the employee handbook, a benefits document, and a list of company roles and expectations.
By following the instructions in this article, you:
- Deploy a chat app to Azure for public access in a web browser.
- Redeploy a chat app with private endpoints.
After you finish this procedure, you can start modifying the new project with your custom code and redeploy, knowing that your chat app is accessible only through the private network.
Architectural overview
The default deployment creates a chat app with public endpoints.

For chat apps enriched with private data, securing access to your chat app is crucial. This article presents a solution by using a virtual network.

Within the virtual network, there's a separate subnet for the Azure App Service app versus the other back-end Azure services. This structure makes it easy to apply different network security group rules to each subnet.

Within the virtual network, the services use private endpoints to communicate with each other. Each private endpoint is associated with a private Domain Name System (DNS) zone to resolve the private endpoint's name to an IP address within the virtual network.

Deployment steps
We recommend that you deploy the solution twice. Deploy once with public access to validate that the chat app is working correctly. Deploy again with private access to secure your chat app by using a virtual network.
Prerequisites
A development container environment is available with all dependencies that are required to finish this article. You can run the development container in GitHub Codespaces (in a browser) or locally by using Visual Studio Code.
To use this article, you need the following prerequisites.
- An Azure subscription. Create one for free.
- Azure account permissions. Your Azure account must have
Microsoft.Authorization/roleAssignments/writepermissions, such as User Access Administrator or Owner. - A GitHub account.
Usage cost for sample resources
Most resources used in this architecture fall under basic or consumption-based pricing tiers. This means you only pay for what you use, and charges are typically minimal during development or testing.
Deploying with private networking adds extra cost to your deployment. Once you're done evaluating or deploying the app, you can delete all provisioned resources to avoid ongoing charges.
For a detailed breakdown of expected costs, see the Before you begin in the GitHub repository for the sample.
Open development environment
Use the following instructions to deploy a preconfigured development environment containing all required dependencies to complete this article.
GitHub Codespaces runs a development container managed by GitHub with Visual Studio Code for the Web as the user interface. For the most straightforward development environment, use GitHub Codespaces so that you have the correct developer tools and dependencies preinstalled to complete this article.
Important
All GitHub accounts can use GitHub Codespaces for up to 60 hours free each month with two core instances. For more information, see GitHub Codespaces monthly included storage and core hours.
Start the process to create a new GitHub codespace on the
mainbranch of the Azure-Samples/azure-search-openai-demo GitHub repository.Right-click the following button, and select Open link in new windows to have the development environment and the documentation available at the same time.

On the Create codespace page, review the codespace configuration settings, and then select Create codespace.

Wait for the codespace to start. This startup process can take a few minutes.
In the terminal at the bottom of the screen, sign in to Azure with the Azure Developer CLI:
azd auth loginCopy the code from the terminal and then paste it into a browser. Follow the instructions to authenticate with your Azure account.

The remaining tasks in this article take place in the context of this development container.
Custom settings
This solution configures and deploys the infrastructure based on custom settings configured with the Azure Developer CLI. The following table explains the custom settings for this solution.
| Setting | Description |
|---|---|
AZURE_PUBLIC_NETWORK_ACCESS |
Controls the value of public network access on supported Azure resources. Valid values are Enabled or Disabled. |
AZURE_USE_PRIVATE_ENDPOINT |
Controls deployment of private endpoints, which connect Azure resources to the virtual network. The TRUE value means that private endpoints are deployed for connectivity. |
AZURE_USE_VPN_GATEWAY |
Controls deployment of a VPN gateway for the virtual network. If you don't use this and public access is disabled, you need a different way to connect to the virtual network. The TRUE value means that a VPN gateway is deployed for connectivity. |
Deploy the chat app
The first deployment creates the resources and provides a publicly accessible endpoint.
Run the following command to configure this solution for public access:
azd env set AZURE_PUBLIC_NETWORK_ACCESS EnabledWhen you're asked for an environment name, remember that the environment name is used to create the resource group. Enter a meaningful name. If you're on a team or in an organization, include your name, as in
morgan-chat-private-endpoints. Make note of the environment name. You need it later to find the resources in the Azure portal.Run the following command to include provisioning the virtual network resources. Remember that the deployment doesn't restrict access until the second deployment.
azd env set AZURE_USE_PRIVATE_ENDPOINT trueDeploy the solution with the following command:
azd upProvisioning resources is the most time-consuming part of the deployment process. Wait for the deployment to finish before you continue.
At the end of the deployment process, the app endpoint appears. Copy that endpoint into a browser to open the chat app. Select one of the questions on the cards and then wait for the answer.
Make note of the endpoint URL because you need it again later in the article.
Deploy the chat app to Azure with private access
Change the deployment configuration to secure the chat app for private access.
Run the following command to use a VPN gateway for accessing the virtual network:
azd env set AZURE_USE_VPN_GATEWAY trueRun the following command to turn off public access:
azd env set AZURE_PUBLIC_NETWORK_ACCESS DisabledRun the following command to change the resource configuration. This command doesn't redeploy the application code because only the infrastructure configuration changed.
azd provisionAfter the provisioning finishes, open the chat app in a browser again. The chat app is no longer accessible because the public endpoint is disabled.
Access the chat app
To access the chat app, use a tool such as Azure VPN Gateway or Azure Virtual Desktop. Remember that any tool you use to access the app must be secure and compliant with your organization's security policies.
Clean up resources
The following steps walk you through the process of cleaning up the resources you used.
Deleting the GitHub Codespaces environment ensures that you can maximize the amount of free per-core hours entitlement that you get for your account.
Important
For more information about your GitHub account's entitlements, see GitHub Codespaces monthly included storage and core hours.
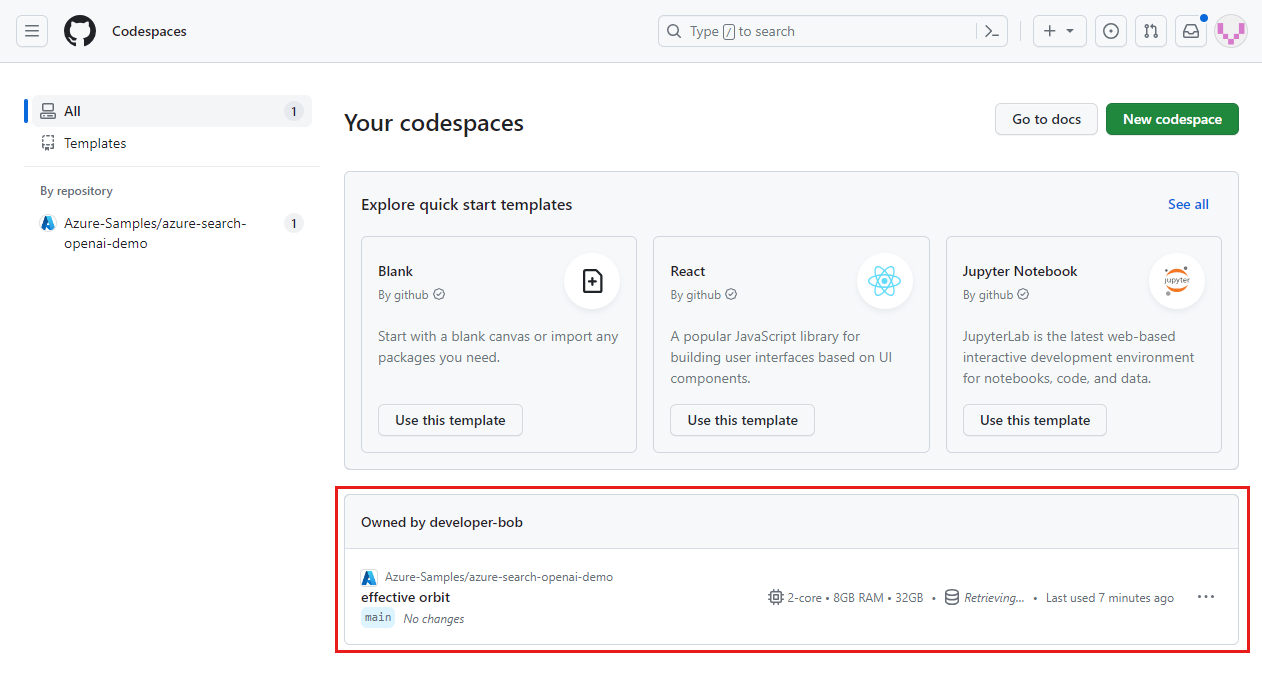
Sign in to the GitHub Codespaces dashboard.
Locate your currently running codespaces that are sourced from the Azure-Samples/azure-search-openai-demo GitHub repository.
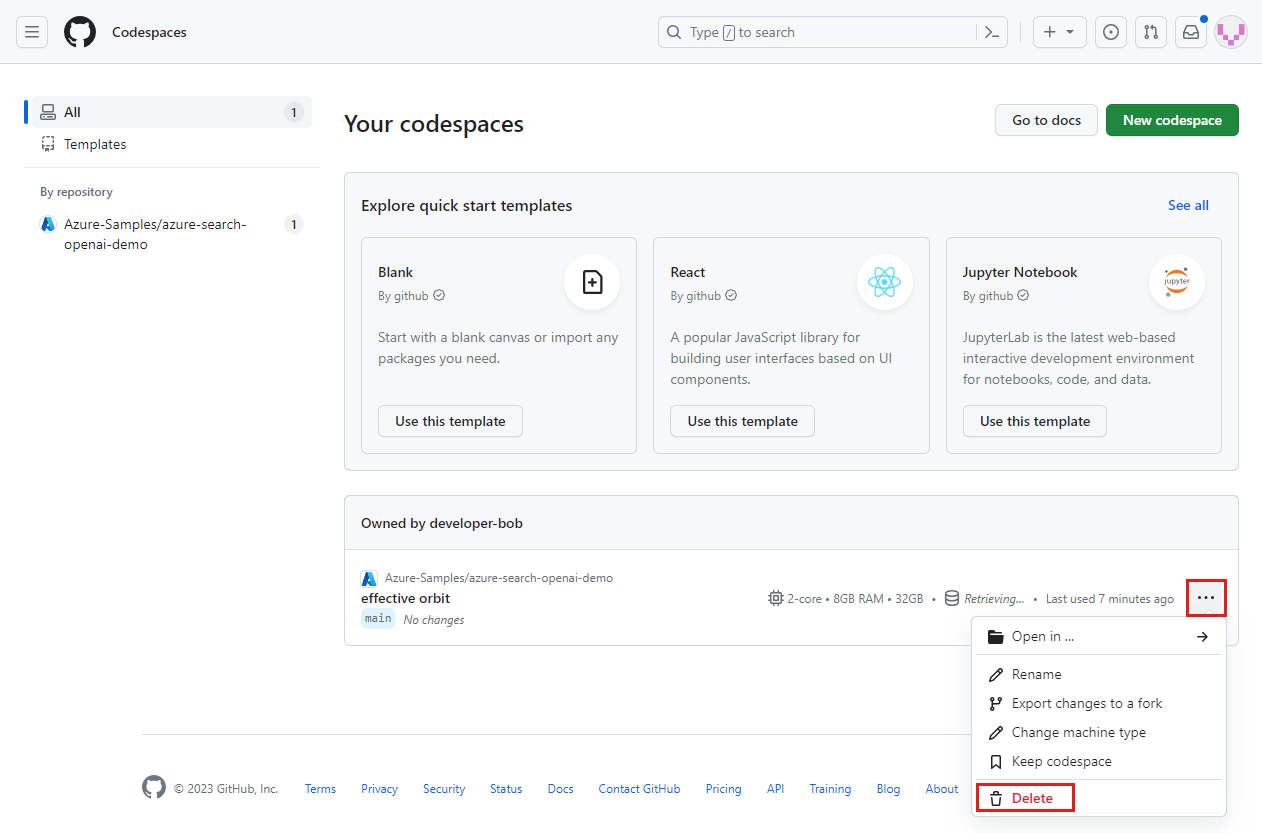
Open the context menu for the codespace and then select Delete.


Get help
This sample repository offers troubleshooting information.
If your issue isn't addressed, add your issue to the repository's Issues webpage.
Related content
- See the enterprise chat app GitHub repository.
- Build a chat app with Azure OpenAI best-practices solution architecture.
- Learn about access control in generative AI apps with Azure AI Search.