Note
Access to this page requires authorization. You can try signing in or changing directories.
Access to this page requires authorization. You can try changing directories.
This article describes how to use the continuous integration and continuous delivery (CI/CD) platform in GitHub Actions to deploy a Python web app to Azure App Service on Linux. Your GitHub Actions workflow automatically builds the code and deploys it to the App Service instance whenever there's a commit to the repository. You can add other automation in your GitHub Actions workflow, such as test scripts, security checks, and multistages deployment.
Create repository for app code
To complete the procedures in this article, you need a Python web app committed to a GitHub repository.
Existing app: To use an existing Python web app, make sure the app is committed to a GitHub repository.
New app: If you need a new Python web app, you can fork and clone the https://github.com/Microsoft/python-sample-vscode-flask-tutorial GitHub repository. The sample code supports the Flask in Visual Studio Code tutorial, and provides a functioning Python application.
Note
If your app uses Django and a SQLite database, it won't work for these procedures. SQLite isn't supported in most cloud-hosted environments due to its local file-based storage limitations. Consider switching to a cloud-compatible database such as PostgreSQL or Azure Cosmos DB. For more information, see Review Django considerations later in this article.
Create target App Service instance
The quickest way to create an App Service instance is to use the Azure command-line interface (CLI) through the interactive Azure Cloud Shell. The Cloud Shell includes Git and the Azure CLI. In the following procedure, you use the az webapp up command to both create the App Service instance and do the initial deployment of your app.
Sign in to the Azure portal at https://portal.azure.com.
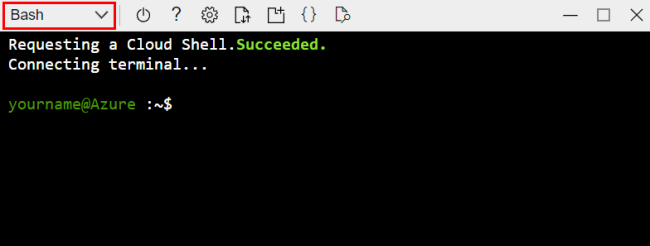
Open the Azure CLI by selecting the Cloud Shell option on the portal toolbar:

In Cloud Shell, select the Bash option from the dropdown menu:
In Cloud Shell, clone your repository by using the git clone command.
Tip
To paste commands or text into Cloud Shell, use the Ctrl+Shift+V keyboard shortcut, or right-click and select Paste from the context menu.
For the Flask sample app, you can use the following command. Replace the
<github-user>portion with the name of the GitHub account where you forked the repo:git clone https://github.com/<github-user>/python-sample-vscode-flask-tutorial.gitIf your app is in a different repo, set up GitHub Actions for the particular repo. Replace the
<github-user>portion with the name of the GitHub account where you forked the repo, and provide the actual repo name in the<repo-name>placeholder:git clone https://github.com/<github-user>/<repo-name>.git
Note
Cloud Shell is backed by an Azure Storage account in a resource group named cloud-shell-storage-<your-region>. That storage account contains an image of the Cloud Shell file system, which stores the cloned repository. There's a small cost for this storage. You can delete the storage account after you complete this article, along with other resources you create.
In Cloud Shell, change directory into the repository folder for your Python app, so the az webapp up command recognizes the app as Python. For the Flask sample app, you use the following command:
cd python-sample-vscode-flask-tutorialIn Cloud Shell, use the az webapp up command to create an App Service instance and do the initial deployment for your app:
az webapp up --name <app-service-name> --runtime "PYTHON:3.12"For the
<app-service-name>placeholder, specify an App Service name that's unique in Azure. The name must be 3-60 characters long and can contain only letters, numbers, and hyphens. The name must start with a letter and end with a letter or number.For a list of available runtimes on your system, use the
az webapp list-runtimescommand.When you enter the runtime value in the command, use the
PYTHON:X.Yformat, whereX.Yis the Python major and minor version.You can also specify the region location of the App Service instance by using the
--locationparameter. For a list of available locations, use theaz account list-locations --output tablecommand.
If your app has a custom startup script, use the az webapp config command to initiate the script.
If your app doesn't have a custom startup script, continue to the next step.
For the Flask sample app, you need to access the startup script in the startup.txt file by running the following command:
az webapp config set \
   --resource-group <resource-group-name> \
   --name <app-service-name> \
   --startup-file startup.txt
Provide your resource group name and App Service instance name in the
<resource-group-name>and<app-service-name>placeholders. To find the resource group name, check the output from the previousaz webapp upcommand. The resource group name includes the Azure account name followed by the _rg suffix, as in <azure-account-name>_rg_.
To view the running app, open a browser and go to the deployment endpoint for your App Service instance. In the following URL, replace the
<app-service-name>placeholder with your App Service instance name:http://<app-service-name>.azurewebsites.netIf you see a generic page, wait a few seconds for the App Service instance to start, and refresh the page.
- If you continue to see a generic page, confirm you deployed from the correct folder.
- For the Flask sample app, confirm you deployed from the python-sample-vscode-flask-tutorial folder. Also check that you set the startup command correctly.
Set up continuous deployment in App Service
In the next procedure, you set up continuous delivery (CD), which means a new code deployment occurs whenever a workflow triggers. The trigger in the article example is any change to the main branch of your repository, such as with a pull request (PR).
In Cloud Shell, confirm you're in the root directory for your system (
~) and not in an app subfolder, such as python-sample-vscode-flask-tutorial.Add GitHub Actions with the az webapp deployment github-actions add command. Replace any placeholders with your specific values:
az webapp deployment github-actions add \
  --repo "<github-user>/<github-repo>" \
  --resource-group <resource-group-name> \
  --branch <branch-name> \
  --name <app-service-name> \
  --login-with-github
The
--login-with-githubparameter uses an interactive method to retrieve a personal access token. Follow the prompts and complete the authentication.If the system encounters an existing workflow file with the same App Service instance name, follow the prompts to choose whether to overwrite the workflow. You can use the
--forceparameter with the command to automatically overwrite any conflicting workflows.
The
addcommand completes the following tasks:- Creates a new workflow file at the .github/workflows/<workflow-name>.yml path in your repo. The file name contains the name of your App Service instance.
- Fetches a publish profile with secrets for your App Service instance and adds it as a GitHub action secret. The name of the secret begins with AZUREAPPSERVICE_PUBLISHPROFILE_. This secret is referenced in the workflow file.
Get the details of a source control deployment configuration with the az webapp deployment source show command. Replace the placeholder parameters with your specific values:
az webapp deployment source show \
  --name <app-service-name> \
  --resource-group <resource-group-name>
In the command output, confirm the values for the
repoUrlandbranchproperties. These values should match the values you specified with theaddcommand.
Examine GitHub workflow and actions
You specify a workflow definition in a YAML (.yml) file in the /.github/workflows/ path in your repository. This YAML file contains the various steps and parameters that make up the workflow, an automated process associated with a GitHub repository. You can build, test, package, release, and deploy any project on GitHub with a workflow.
Each workflow consists of one or more jobs, and each job is a set of steps. Each step is a shell script or an action. Each job has an Action section in the workflow file.
For the workflow that you set up with your Python code for deployment to Azure App Service, the workflow has the following actions:
| Action | Description |
|---|---|
| checkout | Check out the repository on a runner, a GitHub Actions agent. |
| setup-python | Install Python on the runner. |
| appservice-build | Build the web app. |
| webapps-deploy | Deploy the web app by using a publish profile credential to authenticate in Azure. The credential is stored in a GitHub secret. |
The workflow template used to create the workflow is Azure/actions-workflow-samples.
The workflow triggers on push events to the specified branch. You define the event and branch at the beginning of the workflow file. For example, the following code snippet shows the workflow triggers on push events to the main branch:
on:
  push:
    branches:
    - main
OAuth authorized apps
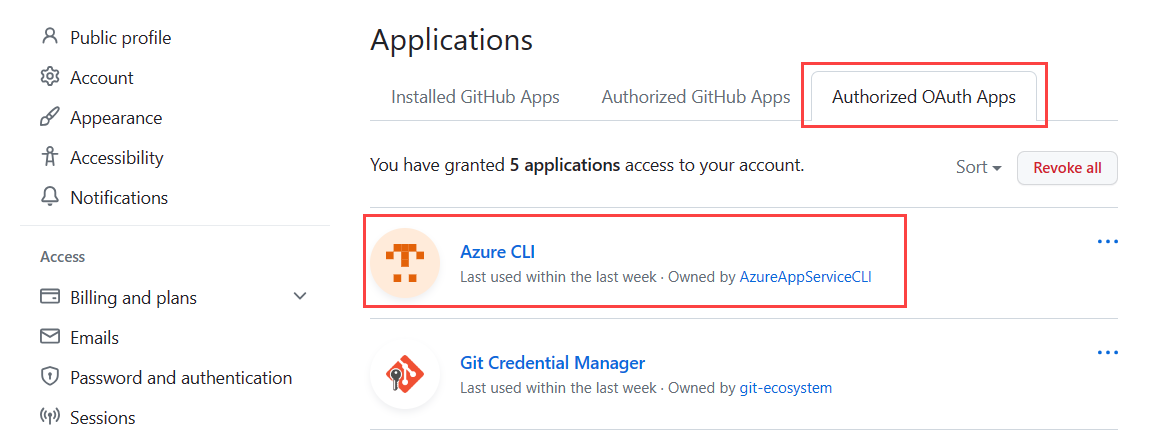
When you set up continuous deployment, you authorize Azure App Service as an authorized OAuth App for your GitHub account. App Service uses the authorized access to create a GitHub action YAML file at the .github/workflows/<workflow-name>.yml path in your repo.
To see your authorized apps and revoke permissions under your GitHub accounts, go to Settings > Integrations/Applications:
Workflow publish profile secret
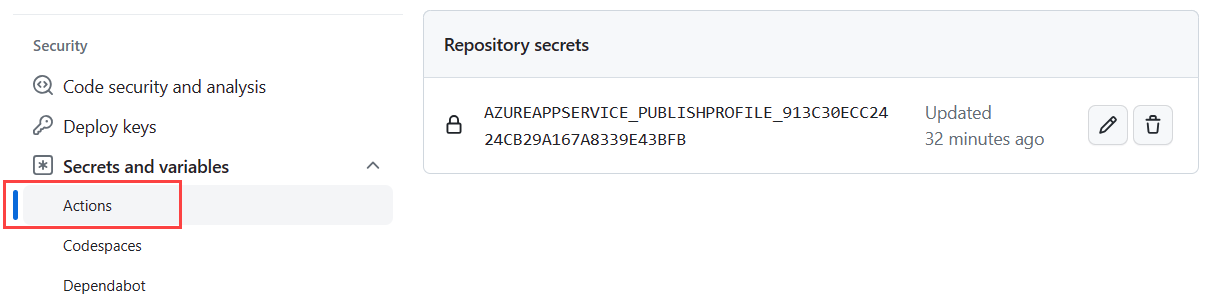
In the .github/workflows/<workflow-name>.yml workflow file you add to your repo, there's a placeholder for publish profile credentials required for the deploy job of the workflow. The repository stores the publish profile information encrypted.
To view the secret, go to Settings > Security > Secret and variables > Actions:
In this article, the GitHub action authenticates by using a publish profile credential. Other ways to authenticate include using a service principal or OpenID Connect. For more information, see Deploy to App Service using GitHub Actions.
Run and test workflow
The last step is to test the workflow by making a change to the repo.
In a browser, go to your fork of the sample repository (or the repository you used), and select the branch you set as part of the trigger:

Make a small change to your Python web app.
For the Flask tutorial, here's a simple change:
- Go to the /hello-app/templates/home.html file of the trigger branch.
- Select Edit (pencil).
- In the Editor, locate the print
<p>statement, and add the text "Redeployed!"
Commit the change directly to the branch you're working in.
- In the Editor, select Commit changes at the top right. The Commit changes window opens.
- In the Commit changes window, modify the commit message as desired, and select Commit changes.
The commit process triggers the GitHub Actions workflow.
You can also trigger the workflow manually:
Go to the Actions tab of the repo set up for continuous deployment.
Select the workflow in the list of workflows, and then select Run workflow.
Troubleshoot failed workflow
You can check the status of a workflow on the Actions tab for the app repo. When you examine the workflow file created in this article, you see two jobs: build and deploy. As a reminder, the workflow is based on the Azure/actions-workflow-samples template.
For a failed job, look at the output of job tasks for an indication of the failure.
Here are some common issues to investigate:
If the app fails because of a missing dependency, the deployment process didn't handle your requirements.txt file. This behavior happens if you created the web app directly on the portal rather than by using the
az webapp upcommand as shown in this article.If you provisioned the app service through the portal, the build action
SCM_DO_BUILD_DURING_DEPLOYMENTsetting might not be set. This setting must be set totrue. Theaz webapp upcommand sets the build action automatically.If you see an error message regarding "TLS handshake timeout," run the workflow manually by selecting Trigger auto deployment under the Actions tab of the app repo. You can determine if the timeout is a temporary issue.
If you set up continuous deployment for the container app as shown in this article, the initial workflow file .github/workflows/<workflow-name>.yml is created automatically for you. If you modified the file, remove the modifications to see if they're causing the failure.
Run post-deployment script
A post-deployment script can complete several tasks, such as defining environment variables expected by the app code. You add the script as part of the app code and execute the script by using the startup command.
To avoid hard-coding variable values in your workflow YAML file, consider configuring the variables in GitHub and referring to the variable names in the script. You can create encrypted secrets for a repository or for an environment (account repository). For more information, see Using secrets in GitHub Actions.
Review Django considerations
As noted earlier in this article, you can use GitHub Actions to deploy Django apps to Azure App Service on Linux, if you use a separate database. You can't use a SQLite database because App Service locks the db.sqlite3 file, which prevents both reads and writes. This behavior doesn't affect an external database.
The Configure Python app on App Service - Container startup process article describes how App Service automatically looks for a wsgi.py file within your app code, which typically contains the app object. When you used the webapp config set command to set the startup command, you used the --startup-file parameter to specify the file that contains the app object. The webapp config set command isn't available in the webapps-deploy action. Instead, you can use the startup-command parameter to specify the startup command. For example, the following code shows how to specify the startup command in the workflow file:
startup-command: startup.txt
When you use Django, you typically want to migrate the data models by using the python manage.py migrate command after you deploy the app code. You can run the migrate command in a post-deployment script.
Disconnect GitHub Actions
Disconnecting GitHub Actions from your App Service instance allows you to reconfigure the app deployment. You can choose what happens to your workflow file after you disconnect, and whether to save or delete the file.
Disconnect GitHub Actions with the following Azure CLI az webapp deployment github-actions remove command. Replace any placeholders with your specific values:
az webapp deployment github-actions remove \
  --repo "<github-username>/<github-repo>" \
  --resource-group <resource-group-name> \
  --branch <branch-name> \
  --name <app-service-name> \
  --login-with-github

Clean up resources
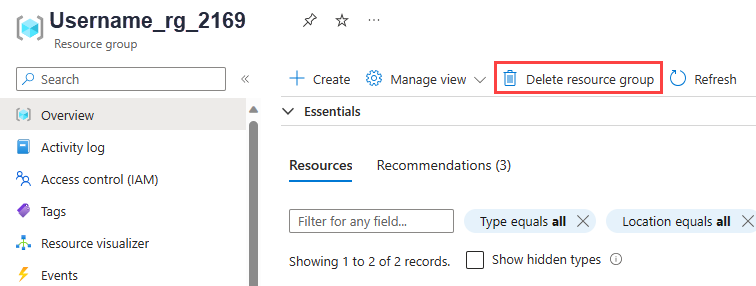
To avoid incurring charges on the Azure resources created in this article, delete the resource group that contains the App Service instance and the App Service Plan.
Anywhere the Azure CLI is installed, including the Azure Cloud Shell, you can use the az group delete command to delete a resource group:
az group delete --name <resource-group-name>
Delete storage account
To delete the storage account that maintains the file system for Cloud Shell, which incurs a small monthly charge, delete the resource group that begins with cloud-shell-storage-. If you're the only user of the group, it's safe to delete the resource group. If there are other users, you can delete a storage account in the resource group.
Update GitHub account and repo
If you delete the Azure resource group, consider making the following modifications to the GitHub account and repo that you connected for continuous deployment:
- In the app repository, remove the .github/workflows/<workflow-name>.yml file.
- In the app repository settings, remove the AZUREAPPSERVICE_PUBLISHPROFILE_ secret key created for the workflow.
- In the GitHub account settings, remove Azure App Service as an authorized Oauth App for your GitHub account.