Note
Access to this page requires authorization. You can try signing in or changing directories.
Access to this page requires authorization. You can try changing directories.
In this article, you learn how to use the Azure client libraries in Python application code to upload a file to an Azure Blob storage container. The article assumes you created the resources shown in Example: Create Azure Storage.
All the commands in this article work the same in Linux/macOS bash and Windows command shells unless noted.
1. Set up your local development environment
If you haven't already, set up an environment where you can run the code. Here are some options:
Configure a Python virtual environment using
venvor your tool of choice. To start using the virtual environment, be sure to activate it. To install python, see Install Python.#!/bin/bash # Create a virtual environment python -m venv .venv # Activate the virtual environment source .venv/Scripts/activate # only required for Windows (Git Bash)Use a conda environment. To install Conda, see Install Miniconda.
Use a Dev Container in Visual Studio Code or GitHub Codespaces.
2. Install library packages
In your requirements.txt file, add lines for the client library package you need and save the file.
azure-storage-blob
azure-identity
Then, in your terminal or command prompt, install the requirements.
pip install -r requirements.txt
3. Create a file to upload
Create a source file named sample-source.txt. This file name is what the code expects.
Hello there, Azure Storage. I'm a friendly file ready to be stored in a blob.
4. Use blob storage from app code
This section demonstrates two ways to access data in the blob container that you created in Example: Create Azure Storage. To access data in the blob container, your app must be able to authenticate with Azure and be authorized to access data in the container. This section presents two ways of doing this:
The Passwordless (Recommended) method authenticates the app by using
DefaultAzureCredential.DefaultAzureCredentialis a chained credential that can authenticate an app (or a user) using a sequence of different credentials, including developer tool credentials, application service principals, and managed identities.The Connection string method uses a connection string to access the storage account directly.
For the following reasons and more, we recommend using the passwordless method whenever possible:
A connection string authenticates the connecting agent with the Storage account rather than with individual resources within that account. As a result, a connection string grants broader authorization than might be needed. With
DefaultAzureCredentialyou can grant more granular, least privileged permissions over your storage resources to the identity your app runs under using Azure RBAC.A connection string contains access info in plain text and therefore presents potential vulnerabilities if not properly constructed or secured. If such a connection string is exposed, it can be used to access a wide range of resources within the Storage account.
A connection string is usually stored in an environment variable, which makes it vulnerable to compromise if an attacker gains access to your environment. Many of the credential types supported by
DefaultAzureCredentialdon't require storing secrets in your environment.
DefaultAzureCredential is an opinionated, preconfigured chain of credentials. DefaultAzureCredential supports many environments, along with the most common authentication flows and developer tools. An instance of DefaultAzureCredential determines which credential types to try to get a token for based on a combination of its runtime environment, the value of certain well-known environment variables, and, optionally, parameters passed into its constructor.
In the following steps, you configure an application service principal as the application identity. Application service principals are suitable for use both during local development and for apps hosted on-premises. To configure DefaultAzureCredential to use the application service principal, you set the following environment variables: AZURE_CLIENT_ID, AZURE_TENANT_ID, and AZURE_CLIENT_SECRET.
Notice that a client secret is configured. A client secret is necessary for an application service principal, but, depending on your scenario, you can also configure DefaultAzureCredential to use credentials that don't require setting a secret or password in an environment variable.
For example, in local development, if DefaultAzureCredential can't get a token using configured environment variables, it tries to get one using the user (already) signed into development tools like Azure CLI; for an app hosted in Azure, DefaultAzureCredential can be configured to use a managed identity. In all cases, the code in your app remains the same, only the configuration and/or the runtime environment changes.
Create a file named use_blob_auth.py with the following code. The comments explain the steps.
import os
import uuid

from azure.identity import DefaultAzureCredential

# Import the client object from the SDK library
from azure.storage.blob import BlobClient

credential = DefaultAzureCredential()

# Retrieve the storage blob service URL, which is of the form
# https://<your-storage-account-name>.blob.core.windows.net/
storage_url = os.environ["AZURE_STORAGE_BLOB_URL"]

# Create the client object using the storage URL and the credential
blob_client = BlobClient(
    storage_url,
    container_name="blob-container-01",
    blob_name=f"sample-blob-{str(uuid.uuid4())[0:5]}.txt",
    credential=credential,
)

# Open a local file and upload its contents to Blob Storage
with open("./sample-source.txt", "rb") as data:
    blob_client.upload_blob(data)
    print(f"Uploaded sample-source.txt to {blob_client.url}")
Reference links:
Create an environment variable named
AZURE_STORAGE_BLOB_URL:Replace "pythonazurestorage12345" with the name of your storage account.
The
AZURE_STORAGE_BLOB_URLenvironment variable is used only by this example. It isn't used by the Azure libraries.Use the az ad sp create-for-rbac command to create a new service principal for the app. The command creates the app registration for the app at the same time. Give the service principal a name of your choosing.
az ad sp create-for-rbac --name <service-principal-name>The output of this command looks like the following JSON snippet. Make note of these values or keep this window open as you'll need these values in the next step and won't be able to view the password (client secret) value again. You can, however, add a new password later without invalidating the service principal or existing passwords if needed.
{
  "appId": "00001111-aaaa-2222-bbbb-3333cccc4444",
  "displayName": "<service-principal-name>",
  "password": "Aa1Bb~2Cc3.-Dd4Ee5Ff6Gg7Hh8Ii9_Jj0Kk1Ll2",
  "tenant": "aaaabbbb-0000-cccc-1111-dddd2222eeee"
}
Azure CLI commands can be run in the Azure Cloud Shell or on a workstation with the Azure CLI installed.
Create environment variables for the application service principal:
Create the following environment variables with the values from the output of the previous command. These variables tell
DefaultAzureCredentialto use the application service principal.AZURE_CLIENT_ID→ The app ID value.AZURE_TENANT_ID→ The tenant ID value.AZURE_CLIENT_SECRET→ The password/credential generated for the app.
Attempt to run the code (which fails intentionally):
python use_blob_auth.pyObserve the error "This request is not authorized to perform this operation using this permission." The error is expected because the local service principal that you're using doesn't yet have permission to access the blob container.
Grant Storage Blob Data Contributor permissions on the blob container to the service principal using the az role assignment create Azure CLI command:
az role assignment create --assignee <AZURE_CLIENT_ID> \
    --role "Storage Blob Data Contributor" \
    --scope "/subscriptions/<AZURE_SUBSCRIPTION_ID>/resourceGroups/PythonAzureExample-Storage-rg/providers/Microsoft.Storage/storageAccounts/pythonazurestorage12345/blobServices/default/containers/blob-container-01"
The
--assigneeargument identifies the service principal. Replace <AZURE_CLIENT_ID> placeholder with the app ID of your service principal.The
--scopeargument identifies where this role assignment applies. In this example, you grant the "Storage Blob Data Contributor" role to the service principal for the container named "blob-container-01".Replace
PythonAzureExample-Storage-rgandpythonazurestorage12345with the resource group that contains your storage account and the exact name of your storage account. Also, adjust the name of the blob container, if necessary. If you use the wrong name, you see the error, "Cannot perform requested operation on nested resource. Parent resource 'pythonazurestorage12345' not found."Replace the <AZURE_SUBSCRIPTION_ID> place holder with your Azure subscription ID. (You can run the az account show command and get your subscription ID from the
idproperty in the output.)
Tip
If the role assignment command returns an error "No connection adapters were found" when using bash shell, try setting
export MSYS_NO_PATHCONV=1to avoid path translation. For more information, see this issue.Wait a minute or two for the permissions to propagate, then run the code again to verify that it now works. If you see the permissions error again, wait a little longer, then try the code again.
For more information on role assignments, see How to assign role permissions using the Azure CLI.
Important
In the preceding steps, your app ran under an application service principal. An application service principal requires a client secret in its configuration. However, you can use the same code to run the app under different credential types that don't require you to explicitly configure a password or secret in the environment. For example, during development, DefaultAzureCredential can use developer tool credentials like the credentials you use to sign in via the Azure CLI; or, for apps hosted in Azure, it can use a managed identity. To learn more, see Authenticate Python apps to Azure services by using the Azure SDK for Python.
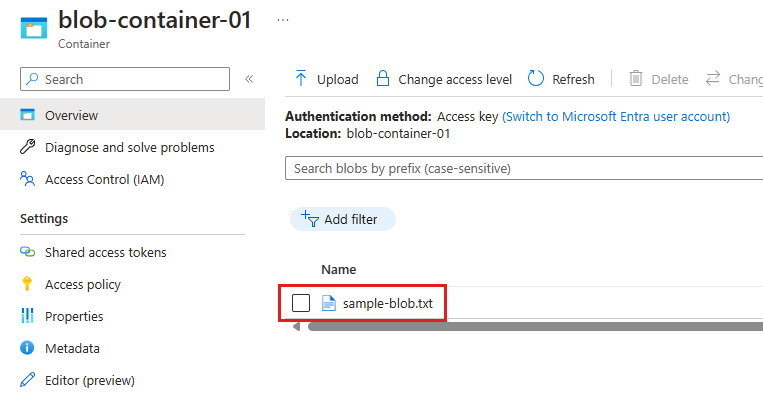
5. Verify blob creation
After running the code of either method, go to the Azure portal, navigate into the blob container to verify that a new blob exists named sample-blob-{random}.txt with the same contents as the sample-source.txt file:
If you created an environment variable named AZURE_STORAGE_CONNECTION_STRING, you can also use the Azure CLI to verify that the blob exists using the az storage blob list command:
az storage blob list --container-name blob-container-01
If you followed the instructions to use passwordless authentication, you can add the --connection-string parameter to the preceding command with the connection string for your storage account. To get the connection string, use the az storage account show-connection-string command.
az storage account show-connection-string --resource-group PythonAzureExample-Storage-rg --name pythonazurestorage12345 --output tsv
Use the entire connection string as the value for the --connection-string parameter.
Note
If your Azure user account has the "Storage Blob Data Contributor" role on the container, you can use the following command to list the blobs in the container:
az storage blob list --container-name blob-container-01 --account-name pythonazurestorage12345 --auth-mode login
6. Clean up resources
Run the az group delete command if you don't need to keep the resource group and storage resources used in this example. Resource groups don't incur any ongoing charges in your subscription, but resources, like storage accounts, in the resource group might continue to incur charges. It's a good practice to clean up any group that you aren't actively using. The --no-wait argument allows the command to return immediately instead of waiting for the operation to finish.
az group delete -n PythonAzureExample-Storage-rg --no-wait
You can also use the ResourceManagementClient.resource_groups.begin_delete method to delete a resource group from code. The code in Example: Create a resource group demonstrates usage.
If you followed the instructions to use passwordless authentication, it's a good idea to delete the application service principal you created. You can use the az ad app delete command. Replace the <AZURE_CLIENT_ID> placeholder with the app ID of your service principal.
az ad app delete --id <AZURE_CLIENT_ID>
See also
- Quickstart: Azure Blob Storage client library for Python
- Example: Create a resource group
- Example: List resource groups in a subscription
- Example: Create a web app and deploy code
- Example: Create Azure Storage
- Example: Create and query a database
- Example: Create a virtual machine
- Use Azure Managed Disks with virtual machines
- Complete a short survey about the Azure SDK for Python