Note
Access to this page requires authorization. You can try signing in or changing directories.
Access to this page requires authorization. You can try changing directories.
Azure DevOps Services
In this article, learn how to change the visibility of your project to public or private.
When you switch a private project to public visibility, all its contents become public. It's not possible to selectively keep certain repositories, area paths, or build folders private.
Security
When you switch a private project to public, project members experience the following changes:
- Permissions: Permissions marked Deny aren't recognized. Nonmembers are automatically given a minimum level of capabilities that can be assigned to any project member.
- Build pipelines: If a build pipeline is set to Project Collection scope, it runs with a Project scope instead, reducing the risk of malicious users gaining access to the build service's authentication token.
- Stakeholders:
- Repos: Stakeholders have full access to these features in public projects but have no access in private projects.
- Boards: Stakeholders have full access in public projects but only partial access in private projects. For more information, see Stakeholder access quick reference.
- Basic + Test Plans users: Basic + Test Plans users can view and run tests from Test Plans. Basic users can upgrade their access level to Basic + Test Plans to gain full access, including the capability to create test plans and add test cases.
Access
Access is restricted for users who aren't signed in (anonymous/public users) and users who are signed in, but aren't members of a project (nonproject members). Both categories of users, referred to as nonmembers, are given limited, read-only access as outlined in the following table.
| Hub / Settings | Nonmember access | Stakeholder access | Basic access | Reader access | Contributor access | Project administrator access |
|---|---|---|---|---|---|---|
| Dashboards | read, + many widgets aren't available | partial | full | read | read-write | read-write-administer |
| Wiki | read | full | full | read | read-write | read-write-administer |
| Boards | read | partial | full | read | read-write | read-write-administer |
| Repos | read | full | full | read | read-write | read-write-administer |
| Pipelines | read | full | full | read | read-write | read-write-administer |
| Test Plans | no access | no access | partial access | read | read-write | read-write-administer |
| Notifications | no access | full | full | read | read-write | read-write-administer |
| Search | full | full | full | full | full | full |
| Settings | no access | full | full | read | read | read-write-administer |
Prerequisites
| Category | Requirements |
|---|---|
| Permissions | Member of the Project Collection Administrators group. Organization owners are automatically members of this group. |
| Organization | An organization. |
| Tasks | - Understand access levels and unavailable features for public projects. - Awareness of partial migration options. - Review items in the migration checklist. |
Migration checklist
Most private projects contain a large amount of historical data. Old work items, early commits, and previous build pipelines might contain information you don't want to share publicly.
The following checklist indicates those items you might want to review before you make a project public. It also provides tips for migrating work items or files to a new project so that you can expose only current and future content.
Category
Guidance
Organization identities and settings
![]() Understand that a user gains access to the following resources and details about the organization:
Understand that a user gains access to the following resources and details about the organization:
- Identities: List of all members added to the organization and email address for each member.
- Settings: Read-only view of all organization and project settings.
- Process metadata: All picklist values in all projects in the organization.
- Builds and releases: Names of people who triggered them, plus identities, including email addresses embedded in Git commits.
- Commits and work items: Embedded information, such as first name, last name, and email address.
Cross-project object links
![]() Check whether links exist between projects, as details about the linked artifact in the private project are visible within the public project. You can use the following link types: branch, build, changeset, commit, found in build, integrated in build, pull request, and versioned item. Titles and names are exposed in the following links types: versioned item, branch, wiki page, pull request, and work item.
Check whether links exist between projects, as details about the linked artifact in the private project are visible within the public project. You can use the following link types: branch, build, changeset, commit, found in build, integrated in build, pull request, and versioned item. Titles and names are exposed in the following links types: versioned item, branch, wiki page, pull request, and work item.
Agile tools and work items
![]() Confirm that your work items, even closed ones, don't contain sensitive details: undisclosed security flaws, credentials, and customer data. Work-items maintain their history when they're migrated from a private to public project. All discussions and descriptions are available. Check that none contains problematic speech.
Confirm that your work items, even closed ones, don't contain sensitive details: undisclosed security flaws, credentials, and customer data. Work-items maintain their history when they're migrated from a private to public project. All discussions and descriptions are available. Check that none contains problematic speech.
![]() Confirm that none of your area paths have special locked-down security settings. Denied permissions aren't enforced in a public project, so restricted area paths become public.
Confirm that none of your area paths have special locked-down security settings. Denied permissions aren't enforced in a public project, so restricted area paths become public.
Code
![]() Confirm that you have no sensitive details in your repositories' history: unpatched security bugs, credentials, and code you don't have the right to distribute.
Confirm that you have no sensitive details in your repositories' history: unpatched security bugs, credentials, and code you don't have the right to distribute.
![]() All file contents and commit messages are available. Check that none contains problematic speech. If you aren't comfortable exposing an entire repository, you can migrate the tip to another project.
For more information, see Instructions for a tip migration.
All file contents and commit messages are available. Check that none contains problematic speech. If you aren't comfortable exposing an entire repository, you can migrate the tip to another project.
For more information, see Instructions for a tip migration.
Build and release
![]() Confirm that none of your pipelines expose sensitive data: credentials/secrets, obscure URLs, and private environment names.
Confirm that none of your pipelines expose sensitive data: credentials/secrets, obscure URLs, and private environment names.
![]() Confirm that nonmembers don't require access to your private feeds. Builds can still access feeds, but nonmembers can't. If you need to migrate build pipelines to a new project, you can import and export them using YAML.
Confirm that nonmembers don't require access to your private feeds. Builds can still access feeds, but nonmembers can't. If you need to migrate build pipelines to a new project, you can import and export them using YAML.
Test
![]() Understand that manual and cloud load testing features aren't available to nonmembers in a public project.
Understand that manual and cloud load testing features aren't available to nonmembers in a public project.
Analytics and dashboards
![]() Consider building a dashboard intended for the public. Some widgets are unavailable to nonmembers.
Consider building a dashboard intended for the public. Some widgets are unavailable to nonmembers.
Artifacts
![]() Confirm that none of the packages in any of the feeds that are scoped to the project have privacy concerns. All packages in the feeds that are scoped to the project become public. All existing upstream settings of the feeds that are scoped to the project are disabled once the project becomes public.
Confirm that none of the packages in any of the feeds that are scoped to the project have privacy concerns. All packages in the feeds that are scoped to the project become public. All existing upstream settings of the feeds that are scoped to the project are disabled once the project becomes public.
Extensions
![]() Confirm whether there are any extensions vital to your project's experience. For instance, do you have a control on your work item form that renders data in a particular way? Are there custom extensions that expose important details?
Confirm whether there are any extensions vital to your project's experience. For instance, do you have a control on your work item form that renders data in a particular way? Are there custom extensions that expose important details?
![]() Confirm that each extension's author made it available for nonmembers by testing it.
If not, ask the extension author to add support for nonmembers.
Confirm that each extension's author made it available for nonmembers by testing it.
If not, ask the extension author to add support for nonmembers.
1. Enable anonymous access to projects
Before changing a private project to a public project, enable anonymous access for your organization by doing the following steps:
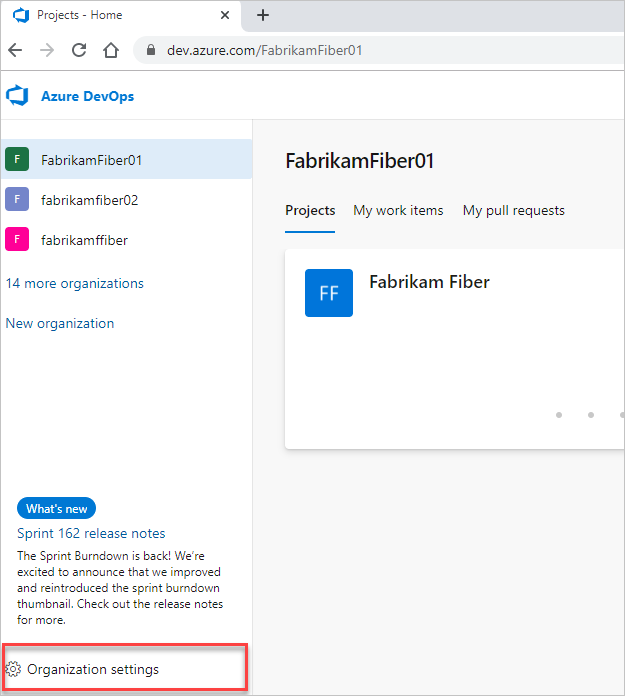
Sign in to your organization (
https://dev.azure.com/{yourorganization}).Select Organization settings.
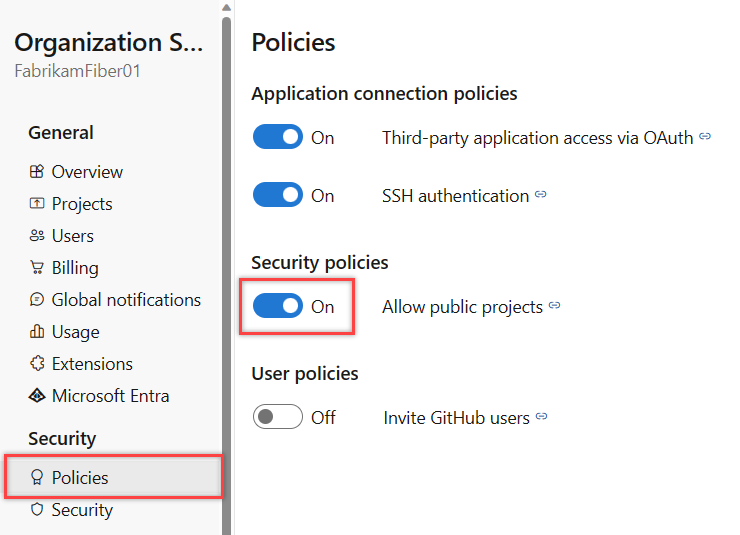
Select Policies, and then turn on the Allow public projects security policy.
2. Set project visibility
Sign in to your project (
https://dev.azure.com/{Your_Oganization}{Your_Project}).Select Project settings > Overview > the Visibility dropdown menu, choose Public or Private, and then Save.

Limited UI elements for public projects
The following user interface elements are hidden for nonmembers.
Service
Hidden UI elements
Boards
Work items are available, but Backlogs, Boards, Sprints, Queries, and Plans are hidden.
Repos
Team Foundation Version Control (TFVC) repositories are hidden.
Pipelines
Builds and Releases are available, but Library, Task Groups, Deployment Groups, Packages, and XAML build system are hidden. Pipeline and task editors for build and release pipelines are unavailable. Only the new Releases page, which is in Public preview, is available.
Test Plans
Test Plans and the associated manual and cloud load testing features are hidden.
Analytics
Analytics views are hidden, and the Analytics OData feed isn't supported for nonmembers. Power BI integration in general isn't supported.
Settings
Settings and administrative pages are hidden.
Nonmembers can't do the following tasks:
- Edit or create artifacts, such as files, work items, and pipelines.
- Favorite and follow existing artifacts.
- View project members' email addresses and other contact information; nonmembers can only see names and pictures. Also, filter lists of artifacts by identity.
- Switch between two public projects in the same organization; nonmembers can only go directly to a public project using a URL.
- Perform code or work item searches across an organization.
Add contributors to a public project
To contribute to a public project, get added as a member and assigned either Stakeholder, Basic, or Basic + Test Plans access. For more information, see About access levels.
You add project members the same way you do for private projects. Ensure you understand the implications of inviting an external user. If you created the project, you're automatically assigned to the Project Administrators group.
Partial migration
If your organization contains sensitive material, you shouldn't turn on the public projects policy. We recommend that you create an entirely separate organization to host your public projects.
Move work items to a private project
If any work items are sensitive, you can move them into a separate, private project. Cross-project links continue to work for members, but nonmembers don't have access to the content since it resides in a private project.
If you have a large number of sensitive work items, consider keeping your current project private. Instead, create a new public project in another organization. Migrating work items can be accomplished using the open source WiMigrator maintained by Microsoft.
Migrate Git tip only
If a repository can't be shared due to problematic history, consider doing a tip-only migration to a new repository in a different project. Keep the project containing the problematic repository private. Create the new repository in a project that you don't mind making public.
Warning
- The new repository doesn't connect to the old one.
- You can't easily migrate changes between them in the future.
- Your pull request history doesn't migrate.
Do the following steps to migrate the Git tip only:
- Clone the existing repository:
git clone <clone_URL>. - Make sure you're in the root of the repository:
cd <reponame>. - Ensure you're on the tip of the branch you want to start from:
git checkout main. - Delete the Git data:
rmdir /s .giton Windows,rm -rf .giton macOS or Linux. - Initialize a new Git repository:
git init. - Create a new, empty repository in your public project.
- Add the new repository as your origin remote:
git remote add origin <new_clone_URL>. - Push your new repository:
git push --set-upstream origin main.