Note
Access to this page requires authorization. You can try signing in or changing directories.
Access to this page requires authorization. You can try changing directories.
Azure DevOps Services | Azure DevOps Server 2022 | Azure DevOps Server 2020
You can change a project based on the Scrum process to use an inherited Agile process. This article provides the steps needed to make this change.
Prior to making this change, we recommend you familiarize yourself with the process you are changing to. The Task, Bug, Feature, and Epic work item types are the same for both Scrum and Agile processes. Some State and Reason field values, however, are different.
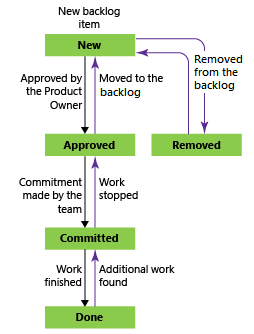
| Process | Work item types | Workflow |
|---|---|---|
| Scrum | 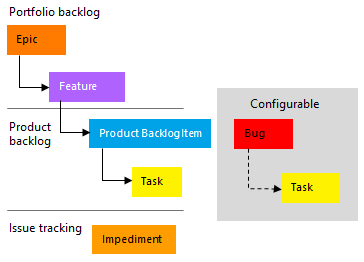 |
 |
| Agile | 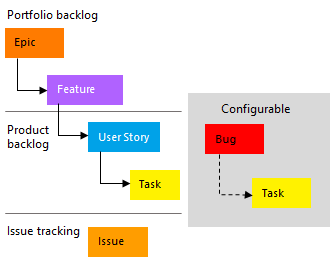 |
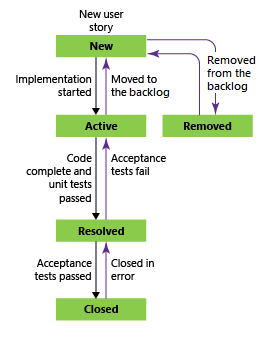 |
For more information, see About processes and process templates.
Reasons you might want to change your process from Scrum to Agile:
- You want to use User Story and Story Points instead of Product Backlog Item and Effort.
- Your organization is requiring everyone to standardize their tracking with a customized inherited process based on the Agile process.
Warning
If you have existing work items, this process requires manual updates to work items and board configuration. Make sure you follow the steps provided in this article to ensure you address the manual steps required after you change the process used by a project.
Prerequisites
| Category | Requirements |
|---|---|
| Permissions | - To create, delete, or edit a process: Member of the Project Collection Administrators group or specific collection-level permissions Create process, Delete process, Edit process, or Delete a field from organization. For more information, see Set permissions and access for work tracking, Customize an inherited process. - To update boards: Team Administrator or a member of the Project Administrators group. |
| Access | - Even if you have Basic or lower access, you can still change a process if someone gives you permissions to do so. - To update and change the type of your existing work items: Project member. |
Open Settings>Process
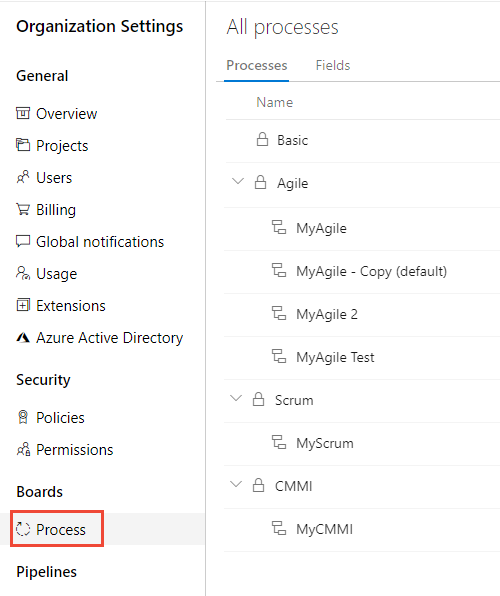
You create, manage, and make customizations to processes from Organization settings>Process.
Choose the
 Azure DevOps logo to open Projects. Then choose Organization settings.
Then, choose Process.
Important
If you don't see Process, then you're working from TFS-2018 or earlier version. The Process page isn't supported. You must use the features supported for the On-premises XML process model.
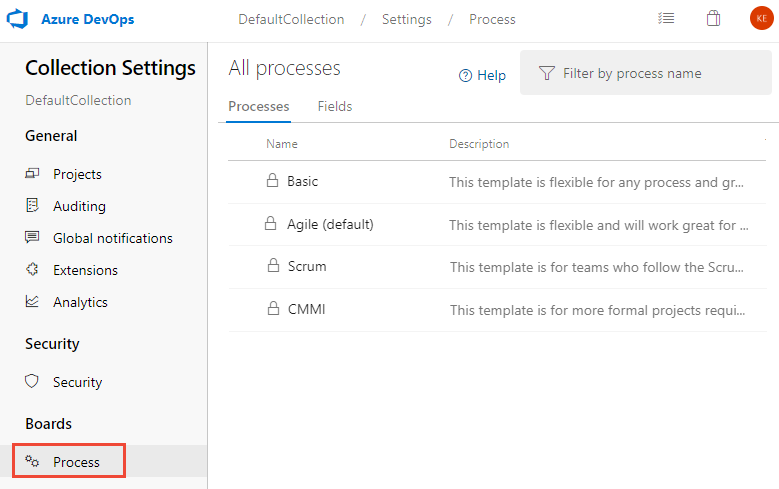
You create, manage, and make customizations to processes from Collection Settings>Process.
Choose the
Azure DevOps logo to open Projects. Choose the project collection whose processes you want to customize, and then choose Collection Settings.
Then, choose Process.
Create and customize an Agile inherited process
Create a custom process under Agile called "Agile - Inherited".
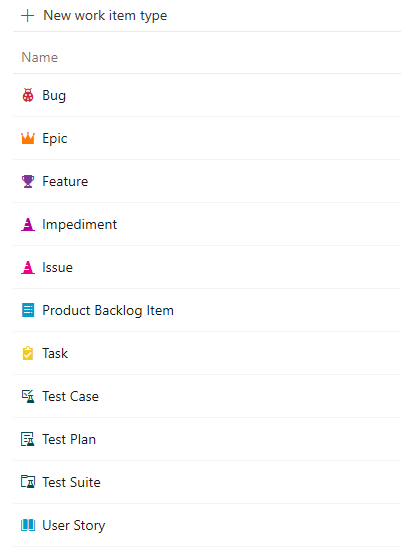
If the Product Backlog Item and Impediment work item types are used in your current Scrum-based project, you need to add these work item types to the "Agile - Inherited" process.
You don't have to add any details to these work item types as you'll be changing them later to User Story and Issue. However, if you have captured details within a field—such as Effort, Priority, or other field—then add those fields to the work item types.
When you are finished, your work item types list should appear as follows.
Change the process
Choose the process that contains the project you want to change. To change from Scrum to Agile, choose Scrum or a custom process based on Scrum.

Choose Projects, and then choose the
 actions icon for the project you want to change, and select Change process. Here we choose the Fabrikam Fiber PB project.
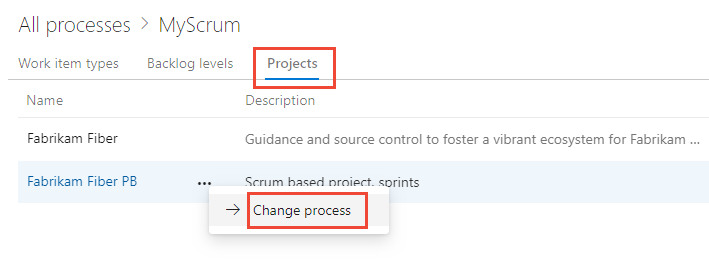
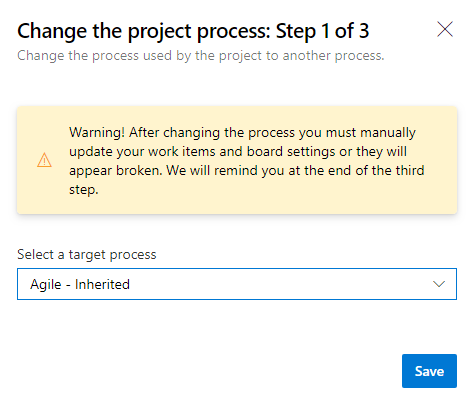
Follow the steps in the wizard.
Choose the Agile - Inherited process that you created earlier and then choose Save.
If you skipped step 2 of Create and customize an Agile inherited process, you'll receive the following message to add the missing work item types.
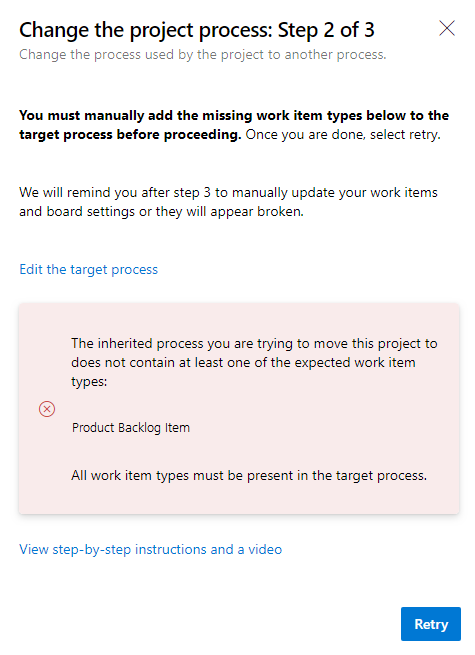
Close the wizard dialog and add the missing work item types now. See Add and manage work item types.
Upon successful completion, the wizard displays the following information. Make a note of the steps to follow and then choose Close.

Steps to manually update your work items and board settings:
- Update the column to state mapping for each team board
- Update existing work items using the work item types set by the target process
- Update existing work items using the correct state model of the target process.
Update board column-to-state settings
You can customize boards to display intermediate columns. For each column added, you must choose a valid workflow state for the work item types displayed on the board. For more information, see Workflow states & state categories.
For each team, open your board.
Choose the Correct this now link or the
 gear icon to configure the board settings.
The Settings dialog opens. Those tabs that display a
 required icon need correction.
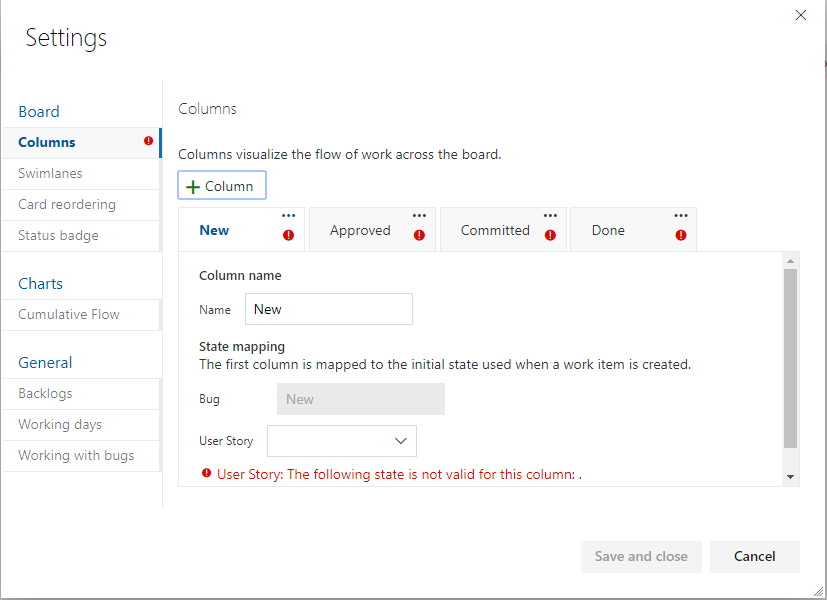
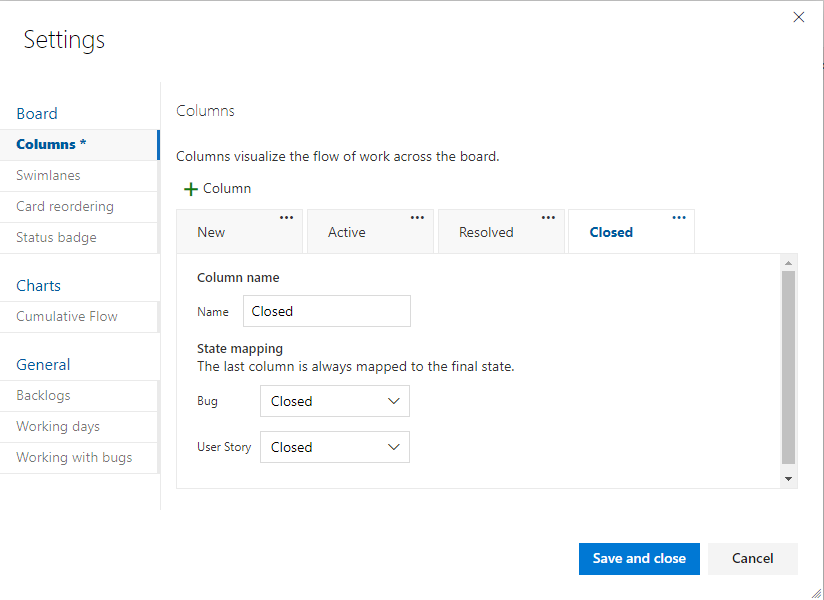
Rename each column and choose the correct state for each column so that the column-to-state mapping is correct. As needed, add one or more columns. When done, choose Save and close.
Update work items
Your next step is to bulk update work items. The recommended sequence is:
- Create a work item query that displays all work items that need update.
- Perform a bulk update to change the work item type of Product Backlog Item work items to User Story.
- Perform a bulk update on all States to change from Scrum states—Approved, Committed, and Done—to Agile process states—Active, Resolved, and Closed.
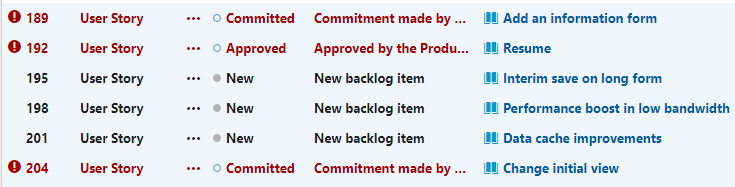
Create a query to get a list of all Product Backlog Items, Impediments, Features, Tasks, and Epics. You will need to change the work item type of the first two work item types, and the State and Reason fields for all items.

Choose the
actions icon and then select Column options. Choose to show the State and Reason fields. Choose the Sort tab, and set it to sort the list by work item type and state value.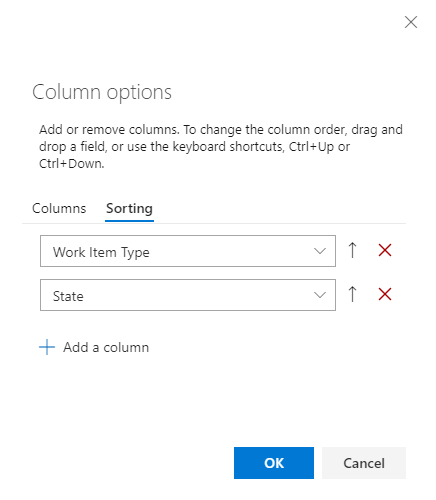
Choose Results to just show the list of work items.
Highlight all User Stories, choose the
actions icon, select Change type, and change the type to Product Backlog Item.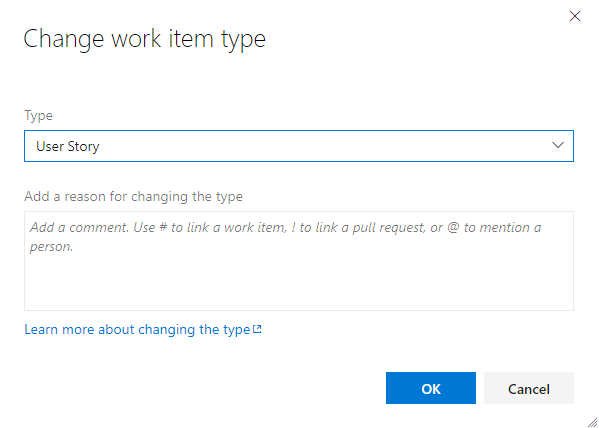
For more details, see Move, change, or delete work items, Change the work item type.
It's possible that you will receive errors where the work item type and the state are mismatched. In that case, you can't save your changes until you update the state as described in the next step.
Highlight all work items of the same State, such as Resolved, choose the
actions icon, and then select Edit. Add the State field and select Committed or a valid value for the Product Backlog Item. You may also need to update the Reason field. For details, see Bulk edit work items.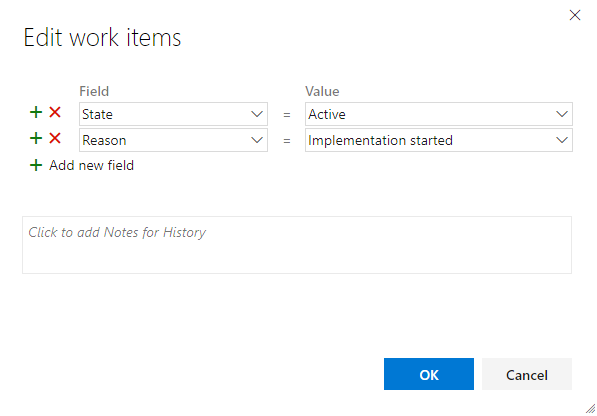
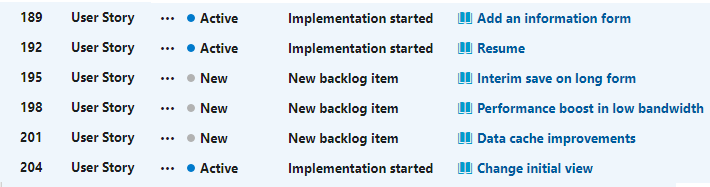
This should result in an updated list without errors.
To save your changes, choose the
actions icon and select Save items.Repeat the above steps to change the work item type for Impediment to Issue, and update the states to valid states for the work item types.
When done, make sure you choose the
actions icon and select Save items.
Tip
If you have a number of field value changes, such as populating the Story Points field with the value held in Effort, you can do that using Excel. See Bulk add or modify work items with Excel.
Verify your changes
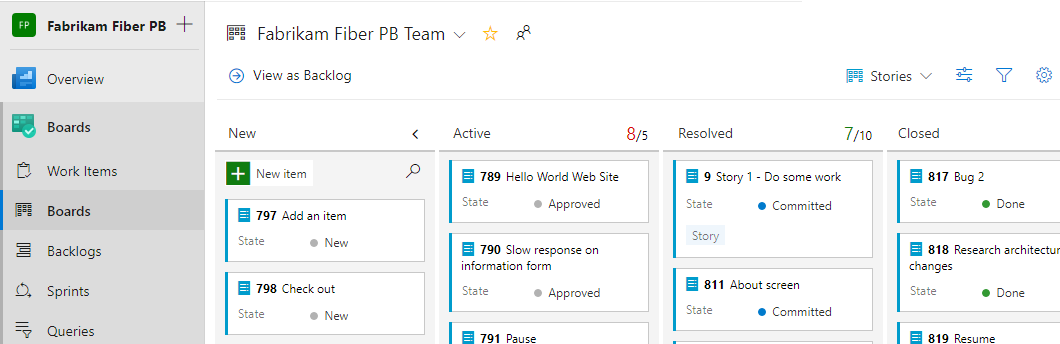
Go to your team backlog and verify that the backlog items appear as expected.

Go to your team board and verify that the column settings are valid.
To add columns or change column names, see Add columns to your board.
Optional updates
After changing the process, you may want to make additional updates as follows:
- Change the project name
- Update your project summary or vision
- Disable or delete the work item types that won't be used going forward. See Customize a work item type for an inherited process