Cache NuGet packages
Azure DevOps Services
With pipeline caching, you can reduce your build time by caching your dependencies to be reused in later runs. In this article, you'll learn how to use the Cache task to cache and restore your NuGet packages.
Lock dependencies
To set up the cache task, we must first lock our project's dependencies and create a package.lock.json file. We'll use the hash of the content of this file to generate a unique key for our cache.
To lock your project's dependencies, set the RestorePackagesWithLockFile property in your csproj file to true. NuGet restore generates a lock file packages.lock.json at the root directory of your project. Make sure you check your packages.lock.json file into your source code.
<PropertyGroup>
  <RestorePackagesWithLockFile>true</RestorePackagesWithLockFile>
</PropertyGroup>
Cache NuGet packages
We'll need to create a pipeline variable to point to the location of our packages on the agent running the pipeline.
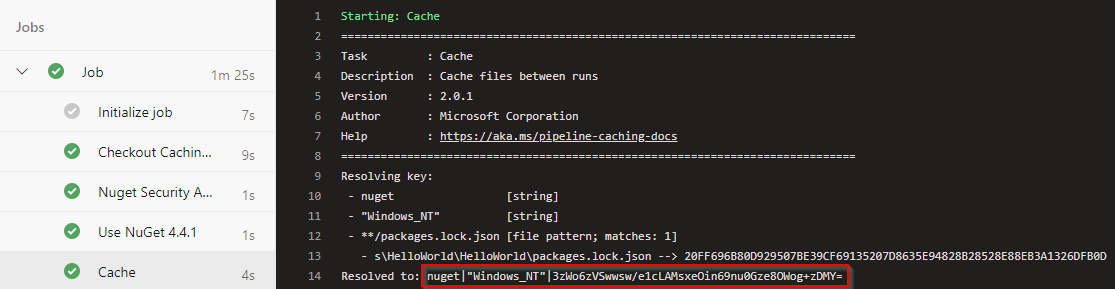
In this example, the content of the packages.lock.json will be hashed to produce a dynamic cache key. This ensures that every time the file is modified, a new cache key is generated.
variables:
  NUGET_PACKAGES: $(Pipeline.Workspace)/.nuget/packages

- task: Cache@2
  displayName: Cache
  inputs:
    key: 'nuget | "$(Agent.OS)" | **/packages.lock.json,!**/bin/**,!**/obj/**'
    restoreKeys: |
       nuget | "$(Agent.OS)"
       nuget
    path: '$(NUGET_PACKAGES)'
    cacheHitVar: 'CACHE_RESTORED'
Note
Caches are immutable, once a cache is created, its contents cannot be modified.
Restore cache
This task will only run if the CACHE_RESTORED variable is false.
- task: NuGetCommand@2
  condition: ne(variables.CACHE_RESTORED, true)
  inputs:
    command: 'restore'
    restoreSolution: '**/*.sln'
If you encounter the error message "project.assets.json not found" during your build task, you can resolve it by removing the condition condition: ne(variables.CACHE_RESTORED, true) from your restore task. By doing so, the restore command will be executed, generating your project.assets.json file. The restore task will not download packages that are already present in your corresponding folder.
Note
A pipeline can contain one or more caching tasks, and jobs and tasks within the same pipeline can access and share the same cache.
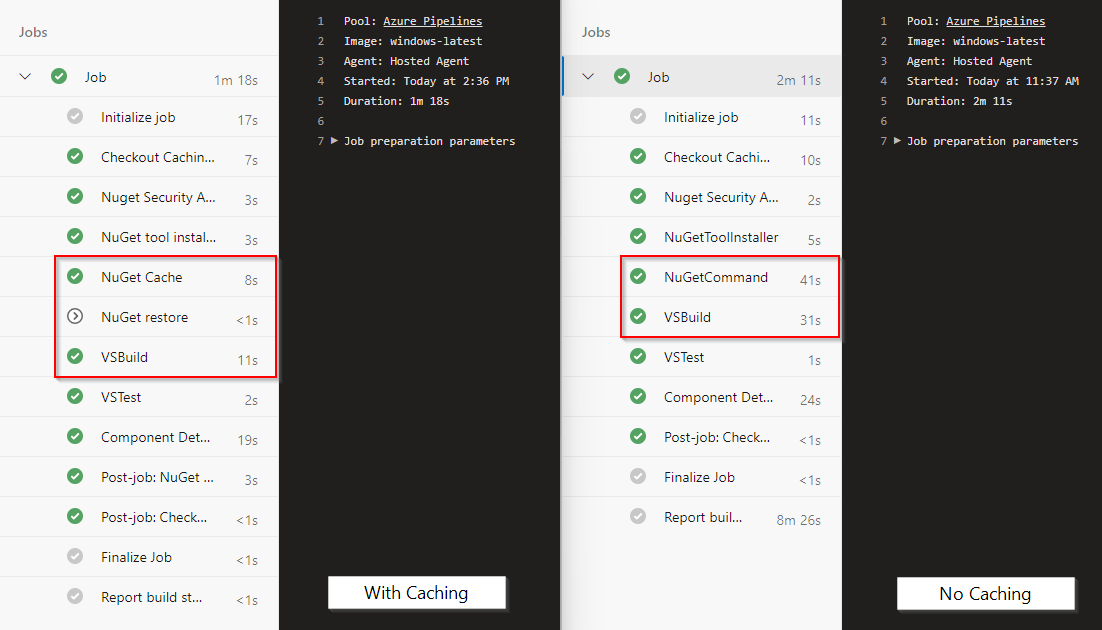
Performance comparison
Pipeline caching is a great way to speed up your pipeline execution. Here's a side-by-side performance comparison for two different pipelines. Before adding the caching task (right), the restore task took approximately 41 seconds. We added the caching task to a second pipeline (left) and configured the restore task to run when a cache miss is encountered. The restore task in this case took 8 seconds to complete.
Below is the full YAML pipeline for reference:
pool:
  vmImage: 'windows-latest'

variables:
  solution: '**/*.sln'
  buildPlatform: 'Any CPU'
  buildConfiguration: 'Release'
  NUGET_PACKAGES: $(Pipeline.Workspace)/.nuget/packages

steps:
- task: NuGetToolInstaller@1
  displayName: 'NuGet tool installer'

- task: Cache@2
  displayName: 'NuGet Cache'
  inputs:
    key: 'nuget | "$(Agent.OS)" | **/packages.lock.json,!**/bin/**,!**/obj/**'
    restoreKeys: |
       nuget | "$(Agent.OS)"
       nuget
    path: '$(NUGET_PACKAGES)'
    cacheHitVar: 'CACHE_RESTORED'

- task: NuGetCommand@2
  displayName: 'NuGet restore'
  condition: ne(variables.CACHE_RESTORED, true)
  inputs:
    command: 'restore'
    restoreSolution: '$(solution)'

- task: VSBuild@1
  displayName: 'Visual Studio Build'
  inputs:
    solution: '$(solution)'
    platform: '$(buildPlatform)'
    configuration: '$(buildConfiguration)'
Related articles
Feedback
Coming soon: Throughout 2024 we will be phasing out GitHub Issues as the feedback mechanism for content and replacing it with a new feedback system. For more information see: https://aka.ms/ContentUserFeedback.
Submit and view feedback for