Build and publish Docker images to Azure Container Registry
Azure DevOps Services | Azure DevOps Server 2022
Using Azure Pipelines, you can set up a pipeline workflow to build and publish your Docker images to Azure Container Registry. In this article, you will learn how to:
- Create an Azure Container Registry
- Set up a self-hosted agent on an Azure VM
- Set up the managed service identity
- Create a Docker Registry service connection
- Build and publish your image to Azure Container Registry
Prerequisites
A GitHub account. sign up for free, if you don't have one already.
The Administrator role for service connections in your Azure DevOps project.
An Azure account with an active subscription. Sign up for free if you don't have one already.
Get the code
Fork or clone the sample app to follow along with this tutorial.
https://github.com/MicrosoftDocs/pipelines-javascript-docker
Create an Azure Container Registry
Navigate to Azure portal.
Select Create a resource from the left navigation panel, and then select Containers then Container Registry.
Select your Subscription and then select your Resource group or create a new one.
Enter a Registry name for your container registry. The registry name must be unique within Azure and must contain at least 5 characters.
Select your preferred Location and SKU and then select Review + create.
Review your settings and then select Create when you're done.
Set up a self-hosted agent VM
To use Managed Service Identity with Azure Pipelines to publish Docker images to Azure Container Registry, we must set up our own self-hosted agent on an Azure VM.
Create a VM
Navigate to Azure portal.
Select Create a resource from the left navigation panel, and then select Virtual machine -> Create.
Select your Subscription and then select the Resource group you used to create your container registry.
Give your virtual machine a name and choose an Image.
Enter your Username and Password, and then select Review + create.
Review your settings, and then select Create when you're done.
Select Go to resource when the deployment is complete.
Create an agent pool
From your Azure DevOps project, select the gear icon
 to navigate to your Project settings.
Select Agent pools, and then select Add pool.
Select New, and then select Self-hosted from the Pool type dropdown menu.
Give your pool a name, and then check Grant access permission to all pipelines checkbox.
Select Create when you're done.
Now select the pool you just created, and then select New agent.
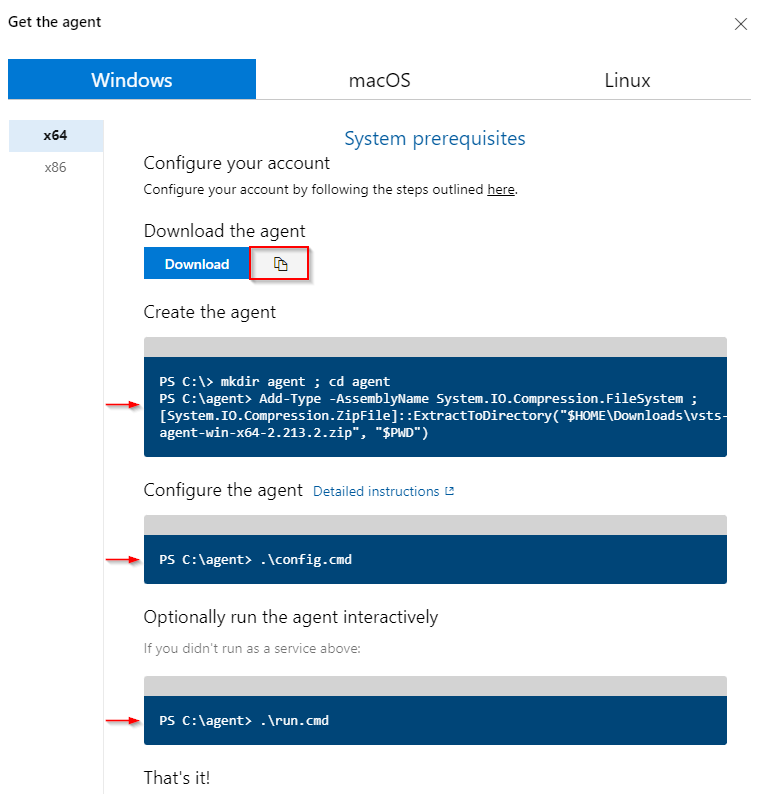
We will be using the instructions in this window to set up your agent in the VM you created earlier. Select the Copy button to copy the download link to your clipboard.
Create a personal access token
From your Azure DevOps project, select User Settings, and then select Personal Access Tokens.
Select New Token to create a new Personal Access Token.
Enter a name for your PAT, and then choose an expiration date.
Select Custom defined in Scopes, and then select Show all scopes.
Select Agent Pools -> Read & manage, and Deployment Groups -> Read & manage.
Select Create when you're done, and save your PAT in a safe location.
Set up a self-hosted agent
In Azure portal, connect to your VM.
In an elevated PowerShell command prompt, run the following command to download the agent.
Invoke-WebRequest -URI <YOUR_AGENT_DOWNLOAD_LINK> -UseBasicParsing  -OutFile <FILE_PATH>
##Example: Invoke-WebRequest -URI https://vstsagentpackage.azureedge.net/agent/2.213.2/vsts-agent-win-x64-2.213.2.zip -OutFile C:\vsts-agent-win-x64-2.213.2.zip
Run the following command to extract and create your agent.
mkdir agent ; cd agent
Add-Type -AssemblyName System.IO.Compression.FileSystem ; [System.IO.Compression.ZipFile]::ExtractToDirectory("<FILE_PATH>", "$PWD")
Run the following command to start configuring your agent.
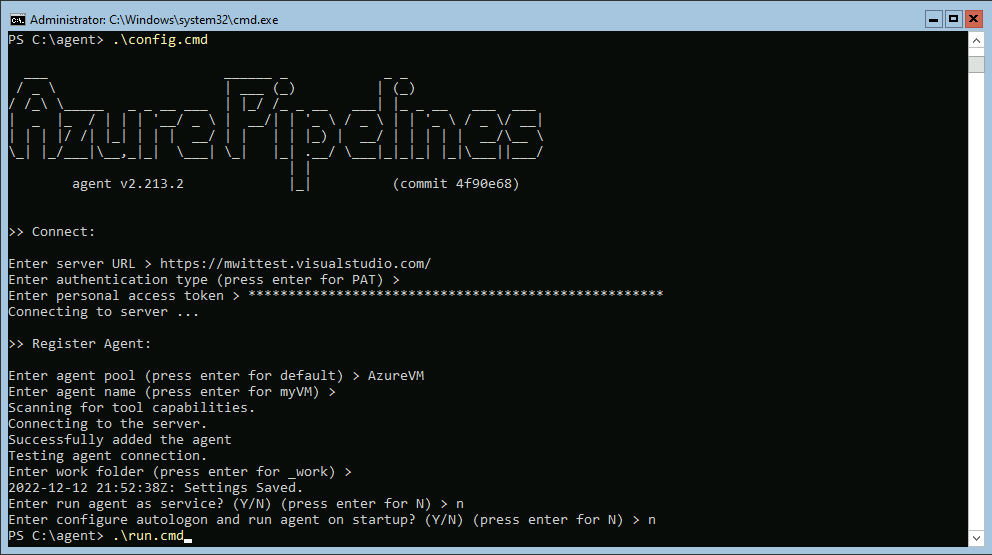
.\config.cmdEnter your server URL when asked for input. Example: https://dev.azure.com/fabrikamFiber
Press Enter when prompted for the authentication type to choose PAT authentication.
Paste your personal access token that you created earlier and then press enter.
Enter the name of your agent pool, and then enter your agent name.
Leave the default value for work folder, and then enter Y if you want to run your agent as a service.
Now that the agent is ready to start listening for jobs, let's install Docker on our VM. Run the following command to download Docker.
Invoke-WebRequest -URI https://desktop.docker.com/win/main/amd64/Docker%20Desktop%20Installer.exe -OutFile <DOWNLOAD_PATH>Navigate to your download path, and then run the following command to install and start Docker.
Start-Process 'Docker%20Desktop%20Installer.exe' -Wait installNow navigate back to your agent folder, and run the cmd file to run the agent on your Azure VM.
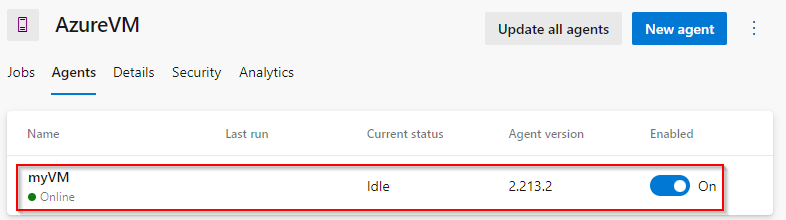
.\run.cmdYour agent should be listed now in your Agent pool -> Agents in the Azure DevOps portal.
Set up the managed identity
In Azure portal, navigate to the VM you created earlier.
Select Identity from the left navigation panel, and then enable the System assigned identity.
Select Save when you're done and then confirm your choice.

Select Azure role assignments, and then select Add role assignment.
Select Resource group from the Scope dropdown menu.
Select your Subscription and your Resource group, and then select the AcrPush role.
Repeat the steps 5 & 6 to add the AcrPull role.

Create a Docker registry service connection
From your Azure DevOps project, select the gear icon
to navigate to your Project settings.Select Service connections from the left pane.
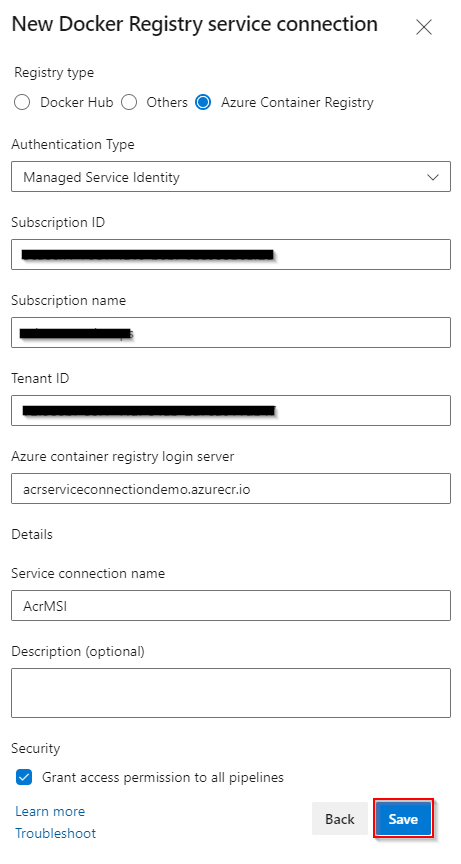
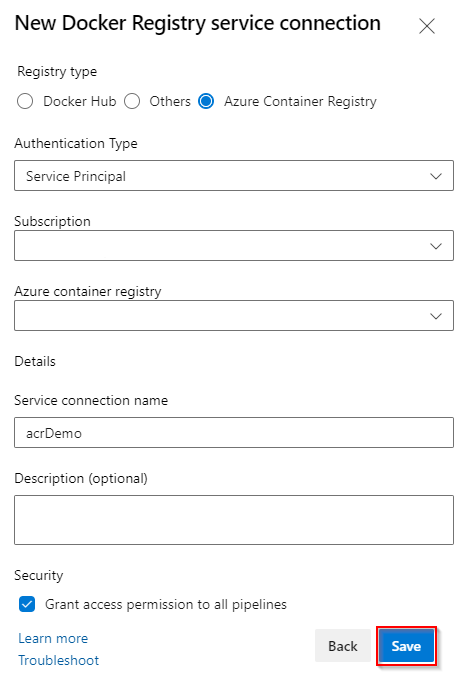
Select New service connection, and then select Docker Registry then Next.
Select Azure Container Registry, and then select Managed Service Identity as your Authentication Type.
Enter your Subscription ID Subscription name, and your Azure container registry login server. Paste your VM's system assigned Object ID that you created in the previous step in the Tenant ID text field.
Enter a name for your service connection, and then check the Grant access permission to all pipelines checkbox. To select this option, you'll need the service connection Administrator role.
Select Save when you are done.
Build and publish to Azure Container Registry
From your Azure DevOps project, select Pipelines and then select Create Pipeline.
Select the service hosting your source code (Azure Repos, GitHub etc.).
Select your repository, and then select Starter pipeline.
Delete the default yaml pipeline and use the following snippet:
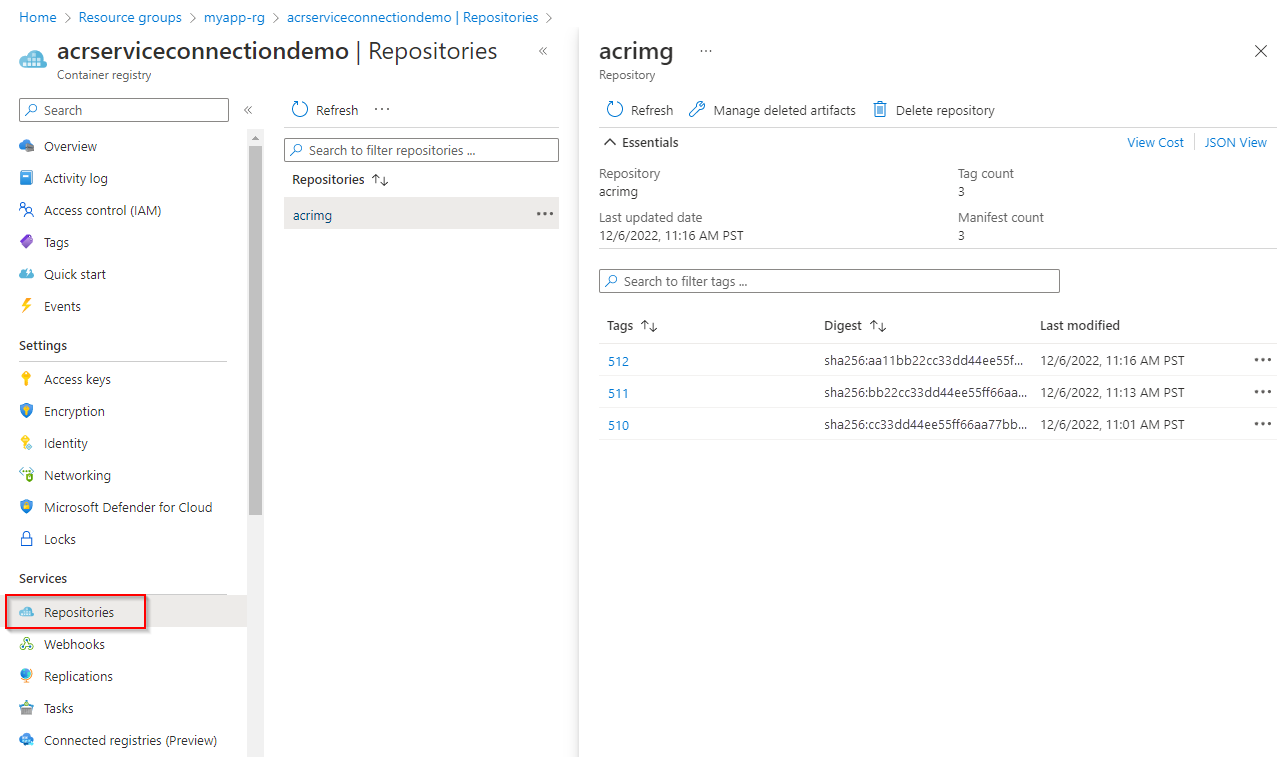
trigger:
- main

variables:
  dockerRegistryServiceConnection: '<SERVICE_CONNECTION_NAME>'
  imageRepository: '<IMAGE_NAME>'
  dockerfilePath: '$(Build.SourcesDirectory)/app/Dockerfile'
  tag: '$(Build.BuildId)'

stages:
- stage: Build
  displayName: Build and publish stage
  jobs:
  - job: Build
    displayName: Build job
    pool:
      name: '<YOUR_AGENT_POOL_NAME>'
    steps:
    - task: DockerInstaller@0
      inputs:
        dockerVersion: '17.09.0-ce'

    - task: Docker@2
      displayName: Build and publish image to Azure Container Registry
      inputs:
        command: buildAndPush
        containerRegistry: $(dockerRegistryServiceConnection)
        repository: $(imageRepository)
        dockerfile: $(dockerfilePath)
        tags: |
          $(tag)
Once the pipeline run is complete, you can verify your image in Azure. Navigate to your Azure Container Registry in Azure portal, and then select Repositories.
Clean up resources
If you don't plan to continue using this application, delete the resource group to avoid incurring ongoing charges.
az group delete --name myapp-rg
Related articles
Feedback
Coming soon: Throughout 2024 we will be phasing out GitHub Issues as the feedback mechanism for content and replacing it with a new feedback system. For more information see: https://aka.ms/ContentUserFeedback.
Submit and view feedback for