Note
Access to this page requires authorization. You can try signing in or changing directories.
Access to this page requires authorization. You can try changing directories.
Azure DevOps Services
Azure Pipelines lets you manage your CI/CD process as code, making it easier to track changes, compare versions, annotate, and more.
When you convert a Classic pipeline, you’ll end up with two pipelines: a new YAML pipeline and the original Classic one, which can then be retired. Your Classic pipeline's run history remains in the Classic pipeline.
Note
You can only export a YAML file from a Classic pipeline created using the classic build designer. If you don’t see an option to export to YAML or JSON, your pipeline likely doesn’t support exporting. Classic release pipelines don’t support YAML export, you’ll need to export each task individually.
Prerequisites
| Product | Requirements |
|---|---|
| Azure | - An Azure account with an active subscription. |
| Azure DevOps | - An Azure DevOps organization. - An Azure DevOps project. - Allow Azure Artifacts Domain URLs and IP addresses if your organization is using a firewall or a proxy server. - A working Classic pipeline. |
Create a sample YAML pipeline
Follow these steps to create a starter YAML pipeline, which you’ll later update with code exported from the Classic UI editor:
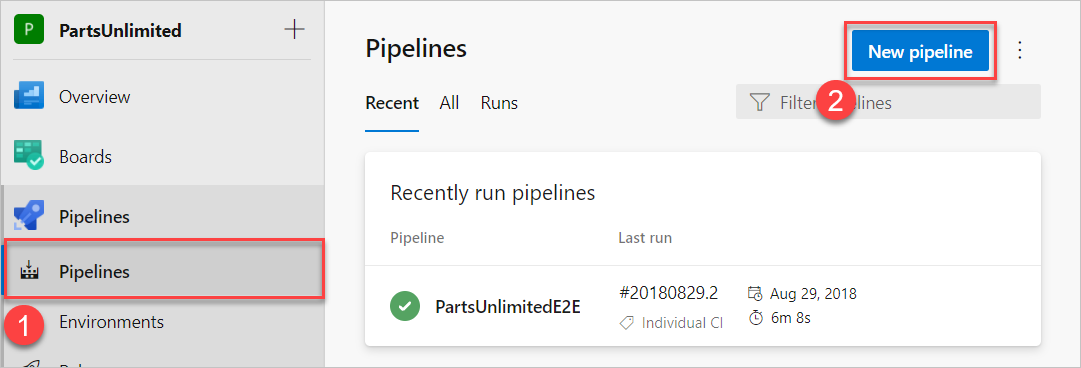
Sign in to your organization, and navigate to your project.
Select Pipelines, and then select New pipeline.
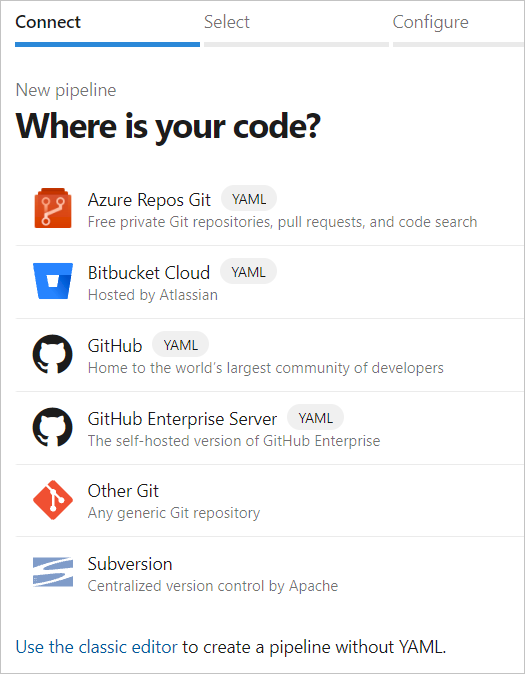
Select your source code location either GitHub or Azure Repos Git, and then select your repository.
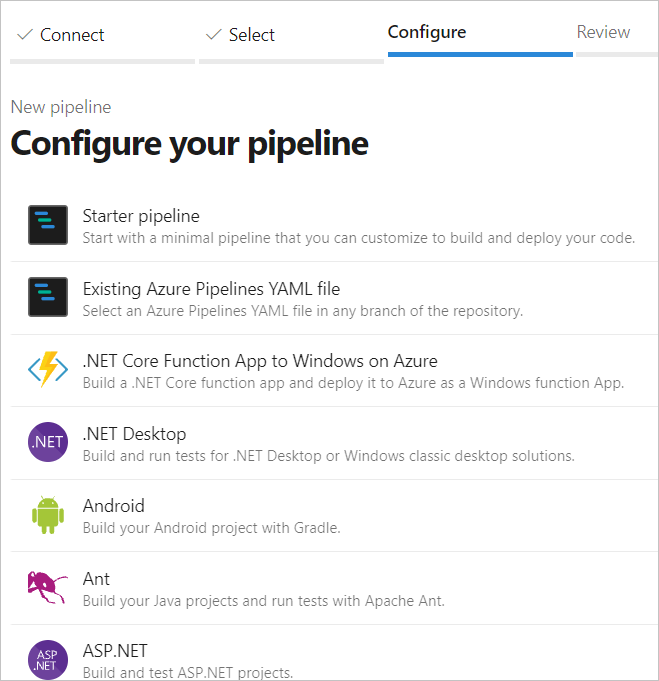
On the Configure your pipeline page, select the Starter pipeline.
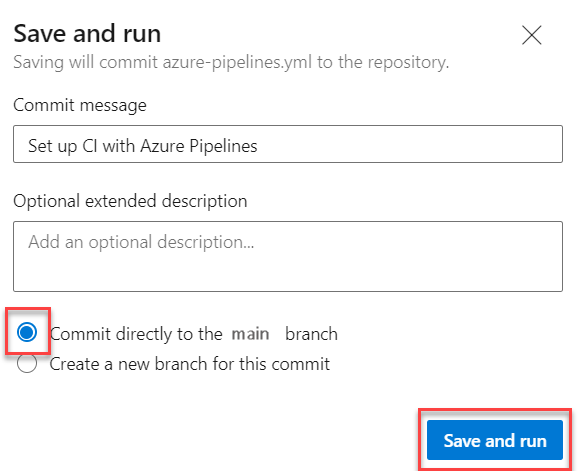
Select Save and run, and then enter your commit message. Select Commit directly to the main branch, and then select Save and run once more. This will start a new run and commit the yaml pipeline to your repository.
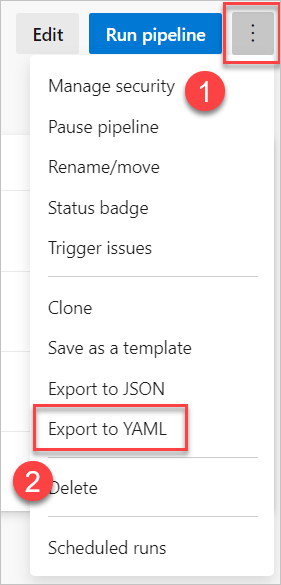
Export a Classic pipeline to YAML
Sign in to your Azure DevOps organization, and navigate to your project.
Select Pipelines > Pipelines.
Find your Classic pipeline, select the ellipses (...) next to it, and then select Export to YAML. Make sure you're in the pipeline definition view, not a specific run, to see the Export to YAML option.
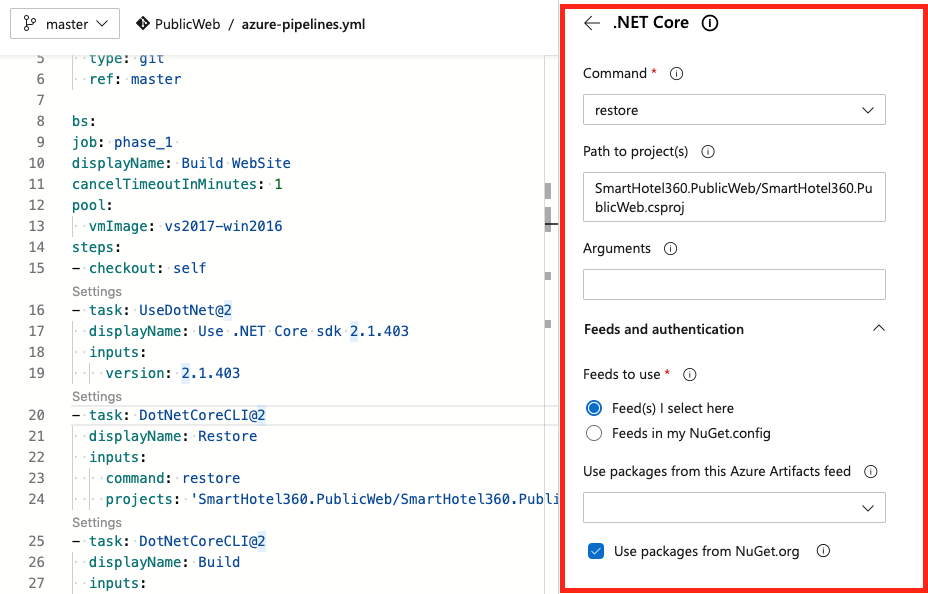
Open the downloaded YAML file in your code editor.
If your Classic pipeline used variables defined in the Classic UI editor, you’ll need to redefine them either in the YAML file or in the pipeline settings. See Define variables for more details.
Review any
cronschedules in your YAML file. YAML schedules use UTC by default, while Classic pipelines use your organization’s local time zone. See Configure schedules for pipelines for more details.Use the Task Assistant (the pane on the right side of the editor) to help you add or modify steps in your YAML file.
Select Save and run once you're done.