Note
Access to this page requires authorization. You can try signing in or changing directories.
Access to this page requires authorization. You can try changing directories.
Azure DevOps Services | Azure DevOps Server 2022 - Azure DevOps Server 2019
Learn how to access Analytics data through the Power BI Desktop OData feed.
Important
The method demonstrated in this article works for small organizations, because it always pulls in all the data into Power BI. Most of the filtering that's specified in the Power Query Editor is done client-side. For information about other approaches, see Power BI integration Overview.
Prerequisites
| Category | Requirements |
|---|---|
| Access levels | - Project member. - At least Basic access. |
| Permissions | By default, project members have permission to query Analytics and create views. For more information about other prerequisites regarding service and feature enablement and general data tracking activities, see Permissions and prerequisites to access Analytics. |
| Tools | Power BI Desktop |
Access the Analytics OData feed
Open Power BI Desktop.
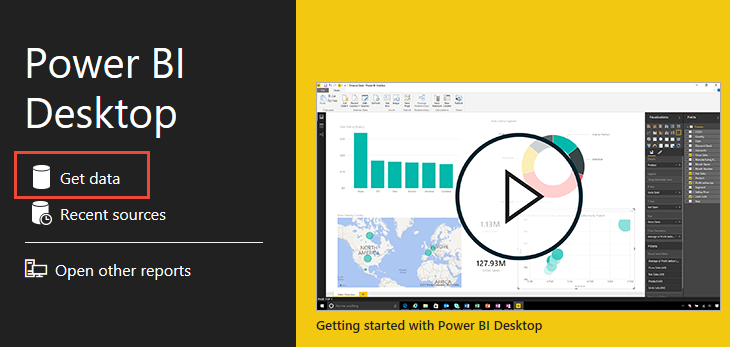
On the Power BI Desktop welcome page or home ribbon, select Get data.
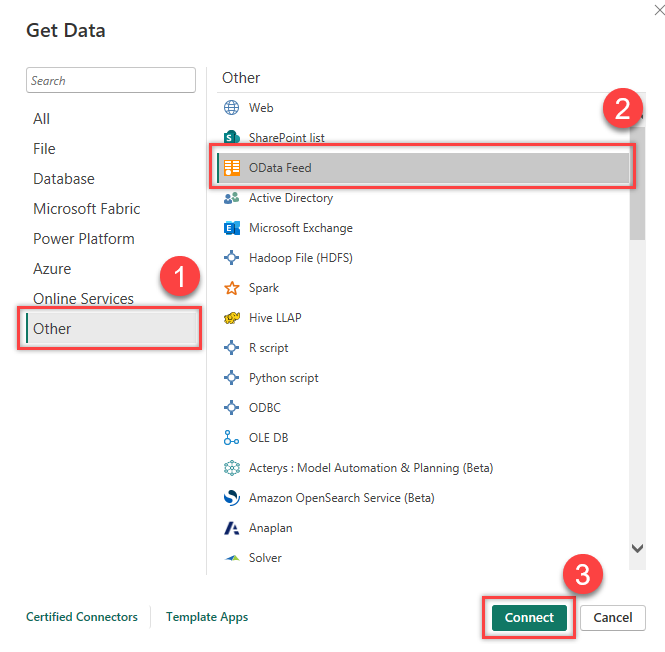
Select Other > OData Feed > Connect.
In a supported browser, enter the URL in the following format
https://analytics.dev.azure.com/{OrganizationName}/_odata/{version}/.For example, if {OrganizationName} is fabrikam and {version} is v1.0, the URL is
https://analytics.dev.azure.com/fabrikam/_odata/v1.0/. The version you should use depends on the latest supported version for Analytics OData.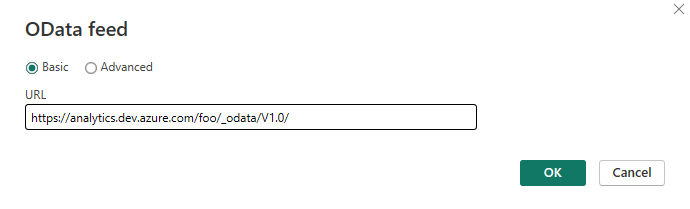
Note
- Alternatively, you can enter the URL with the ProjectName specified, as shown in the following example:
https://analytics.dev.azure.com/{OrganizationName}/{ProjectName}/_odata/{version}/Using this format trims the results by the specified project across all entities related to that project. - The data scope is always at the project level by design, so you can't connect at the organization level. If you want to get all the data for all your projects, you must connect to one at a time.
- Alternatively, you can enter the URL with the ProjectName specified, as shown in the following example:
At the prompt, authenticate against the service.
Select the check boxes next to the entities whose data you want to retrieve.
Important
Do not select entities whose name includes Snapshot. Such entities contain the state of every work item on each day since the work item was created. For repositories of any size, selecting these entities causes tens to hundreds of millions of work items to fail to load. Snapshot tables are intended only for aggregation queries.
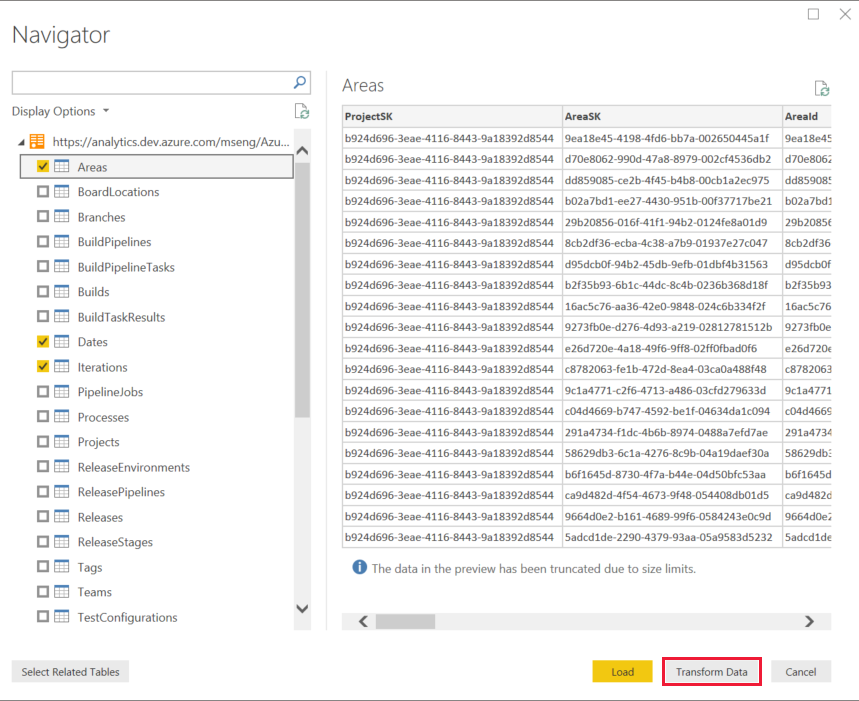
Select Transform Data. Don't select Load.
Important
For each entity that you've selected, Power Query creates a query. You must manually update each query to prevent throttling errors. Power Query attempts to resolve null values as errors by generating an additional query for every null value it encounters. This action can result in thousands of queries, which can quickly exceed your usage threshold, beyond which your user account gets throttled.
To prevent this issue:
- Instruct Power BI to reference OData v4.
- Instruct the Analytics service to omit any values that are null, which improves query performance.
For each entity that you selected in the preceding steps, do the following steps:
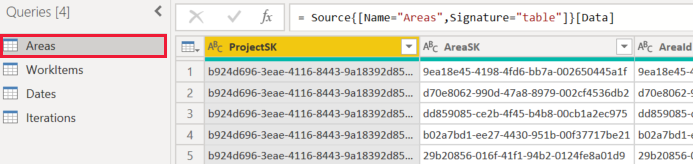
a. In the Queries list, select an entity whose query you want to. In this example, Areas is selected.
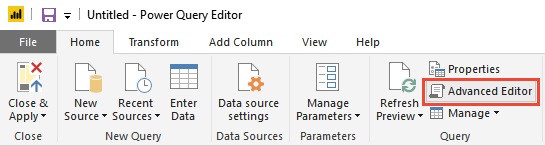
b. In the ribbon, select Advanced Editor.
c. In the Query pane, scroll horizontally to view the
[Implementation="2.0"]parameter.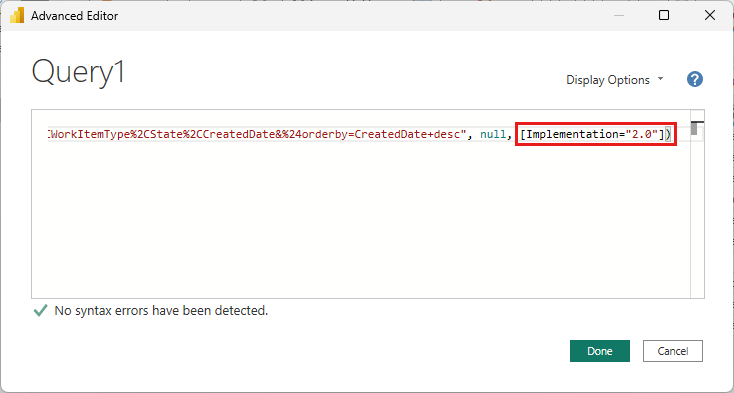
d. Replace
[Implementation="2.0"]with the following string:[Implementation="2.0",OmitValues = ODataOmitValues.Nulls,ODataVersion = 4]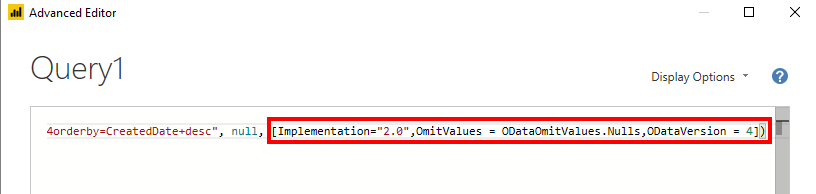
Select Close & Apply.