Tutorial: Create an Azure Digital Twins graph using a sample client app
In this tutorial, you'll build a graph in Azure Digital Twins using models, twins, and relationships. The tool for this tutorial is the sample command-line client application for interacting with an Azure Digital Twins instance. The client app is similar to the one written in Code a client app.
You can use this sample to perform essential Azure Digital Twins actions such as uploading models, creating and modifying twins, and creating relationships. You can also look at the code of the sample to learn about the Azure Digital Twins APIs, and practice implementing your own commands by modifying the sample project however you want.
In this tutorial, you will...
- Model an environment
- Create digital twins
- Add relationships to form a graph
- Query the graph to answer questions
Prerequisites
Before beginning this tutorial, start with these prerequisites:
- If you don't have an Azure subscription, create a free account before you begin.
- This tutorial uses .NET. You can download the latest version of the .NET SDK for multiple platforms from Download .NET.
Then, continue through the rest of this section to set up the remaining prerequisites.
Get sample resources
The tutorial is driven by an Azure Digital Twins end-to-end sample project written in C#. Get the sample project on your machine by navigating to the sample link, and selecting the Browse code button underneath the title.
This will take you to the GitHub repo for the samples, which you can download as a .zip by selecting the Code button followed by Download ZIP.

This will download a .zip folder to your machine as digital-twins-samples-main.zip. Unzip the folder and extract the files.
Prepare an Azure Digital Twins instance
To work with Azure Digital Twins in this article, you'll need an Azure Digital Twins instance and the required permissions for using it. If you already have an Azure Digital Twins instance set up, you can use that instance and skip to the next section. Otherwise, follow the instructions in Set up an instance and authentication. The instructions contain information to help you verify that you've completed each step successfully.
After you set up your instance, make a note of the instance's host name. You can find the host name in the Azure portal.
Configure the sample project
Next, set up a sample client application that will interact with your Azure Digital Twins instance.
Navigate on your machine to the folder you downloaded earlier from Azure Digital Twins end-to-end samples (and unzip it if you haven't already).
Once inside the folder, navigate into digital-twins-samples-main\AdtSampleApp\SampleClientApp and open the appsettings.json file. This JSON file contains a configuration variable that's necessary to run the project.
In the file body, change the instanceUrl to your Azure Digital Twins instance host name URL (by adding https:// in front of the host name, as shown below).
{
  "instanceUrl": "https://<your-Azure-Digital-Twins-instance-host-name>"
}
Save and close the file.
Set up local Azure credentials
This sample uses DefaultAzureCredential (part of the Azure.Identity library) to authenticate users with the Azure Digital Twins instance when you run it on your local machine. For more information on different ways a client app can authenticate with Azure Digital Twins, see Write app authentication code.
With DefaultAzureCredential, the sample will search for credentials in your local environment, like an Azure sign-in in a local Azure CLI or in Visual Studio or Visual Studio Code. For this reason, you should sign in to Azure locally through one of these mechanisms to set up credentials for the sample.
If you're using Visual Studio or Visual Studio Code to run code samples, make sure you're signed in to that editor with the same Azure credentials that you want to use to access your Azure Digital Twins instance. If you're using a local CLI window, run the az login command to sign in to your Azure account. After this, when you run your code sample, you should be authenticated automatically.
Run the sample project
Now that the app and authentication are set up, open a local console window that you'll use to run the project. Navigate in the console to the digital-twins-samples-main\AdtSampleApp\SampleClientApp folder, and run the project with this dotnet command:
dotnet run
The project will start running, carry out authentication, and wait for a command.
Here's a screenshot of what the project console looks like:

Tip
For a list of all the possible commands you can use with this project, enter help in the project console and press return.
Once you've confirmed the app is running successfully, you can stop running the project. You'll run it again later in the tutorial.
Model a physical environment with DTDL
Now that the Azure Digital Twins instance and sample app are set up, you can begin building a graph of a scenario.
The first step in creating an Azure Digital Twins solution is defining twin models for your environment.
Models are similar to classes in object-oriented programming languages; they're user-defined templates that you can instantiate to create digital twins. Models for Azure Digital Twins are written in a JSON-like language called Digital Twins Definition Language (DTDL), and they define a type of twin in terms of its properties, relationships, and components.
Note
DTDL also allows for the definition of commands on digital twins. However, commands are not currently supported in the Azure Digital Twins service.
In the sample project folder that you downloaded earlier, navigate into the digital-twins-samples-main\AdtSampleApp\SampleClientApp\Models folder. This folder contains sample models.
Open Room.json for editing, and make the following changes to the code:
Update the version number, to indicate that you are providing a more-updated version of this model. Do this by changing the 1 at the end of the
@idvalue to a 2. Any number greater than the current version number will also work.Edit a property. Change the name of the
Humidityproperty to HumidityLevel (or something different if you want. If you use something different than HumidityLevel, remember what you used and continue using that instead of HumidityLevel throughout the tutorial).Add a property. Underneath the
HumidityLevelproperty that ends on line 15, paste the following code to add aRoomNameproperty to the room:,{ "@type": "Property", "name": "RoomName", "schema": "string" }Add a relationship. Underneath the
RoomNameproperty that you just added, paste the following code to add the ability for this type of twin to formcontainsrelationships with other twins:,{ "@type": "Relationship", "name": "contains" }
When you are finished, the updated model should match this:
{
"@id": "dtmi:example:Room;2",
"@type": "Interface",
"displayName": "Room",
"contents": [
{
"@type": "Property",
"name": "Temperature",
"schema": "double"
},
{
"@type": "Property",
"name": "HumidityLevel",
"schema": "double"
}
,{
  "@type": "Property",
  "name": "RoomName",
  "schema": "string"
}
,{
  "@type": "Relationship",
  "name": "contains"
}
],
"@context": "dtmi:dtdl:context;3"
}
Make sure to save the file before moving on.
Upload models to Azure Digital Twins
After designing models, you need to upload them to your Azure Digital Twins instance. Doing so configures your Azure Digital Twins service instance with your own custom domain vocabulary. Once you've uploaded the models, you can create twin instances that use them.
Return to your console window that's open to the digital-twins-samples-main\AdtSampleApp\SampleClientApp folder, and run the console app again with
dotnet run.In the project console window, run the following command to upload your updated Room model along with a Floor model that you'll also use in the next section to create different types of twins.
CreateModels Room FloorThe output should indicate the models were created successfully.
Verify the models were created by running the command
GetModels true. This command will print the full information for all the models that have been uploaded to your Azure Digital Twins instance. Look for the edited Room model in the results: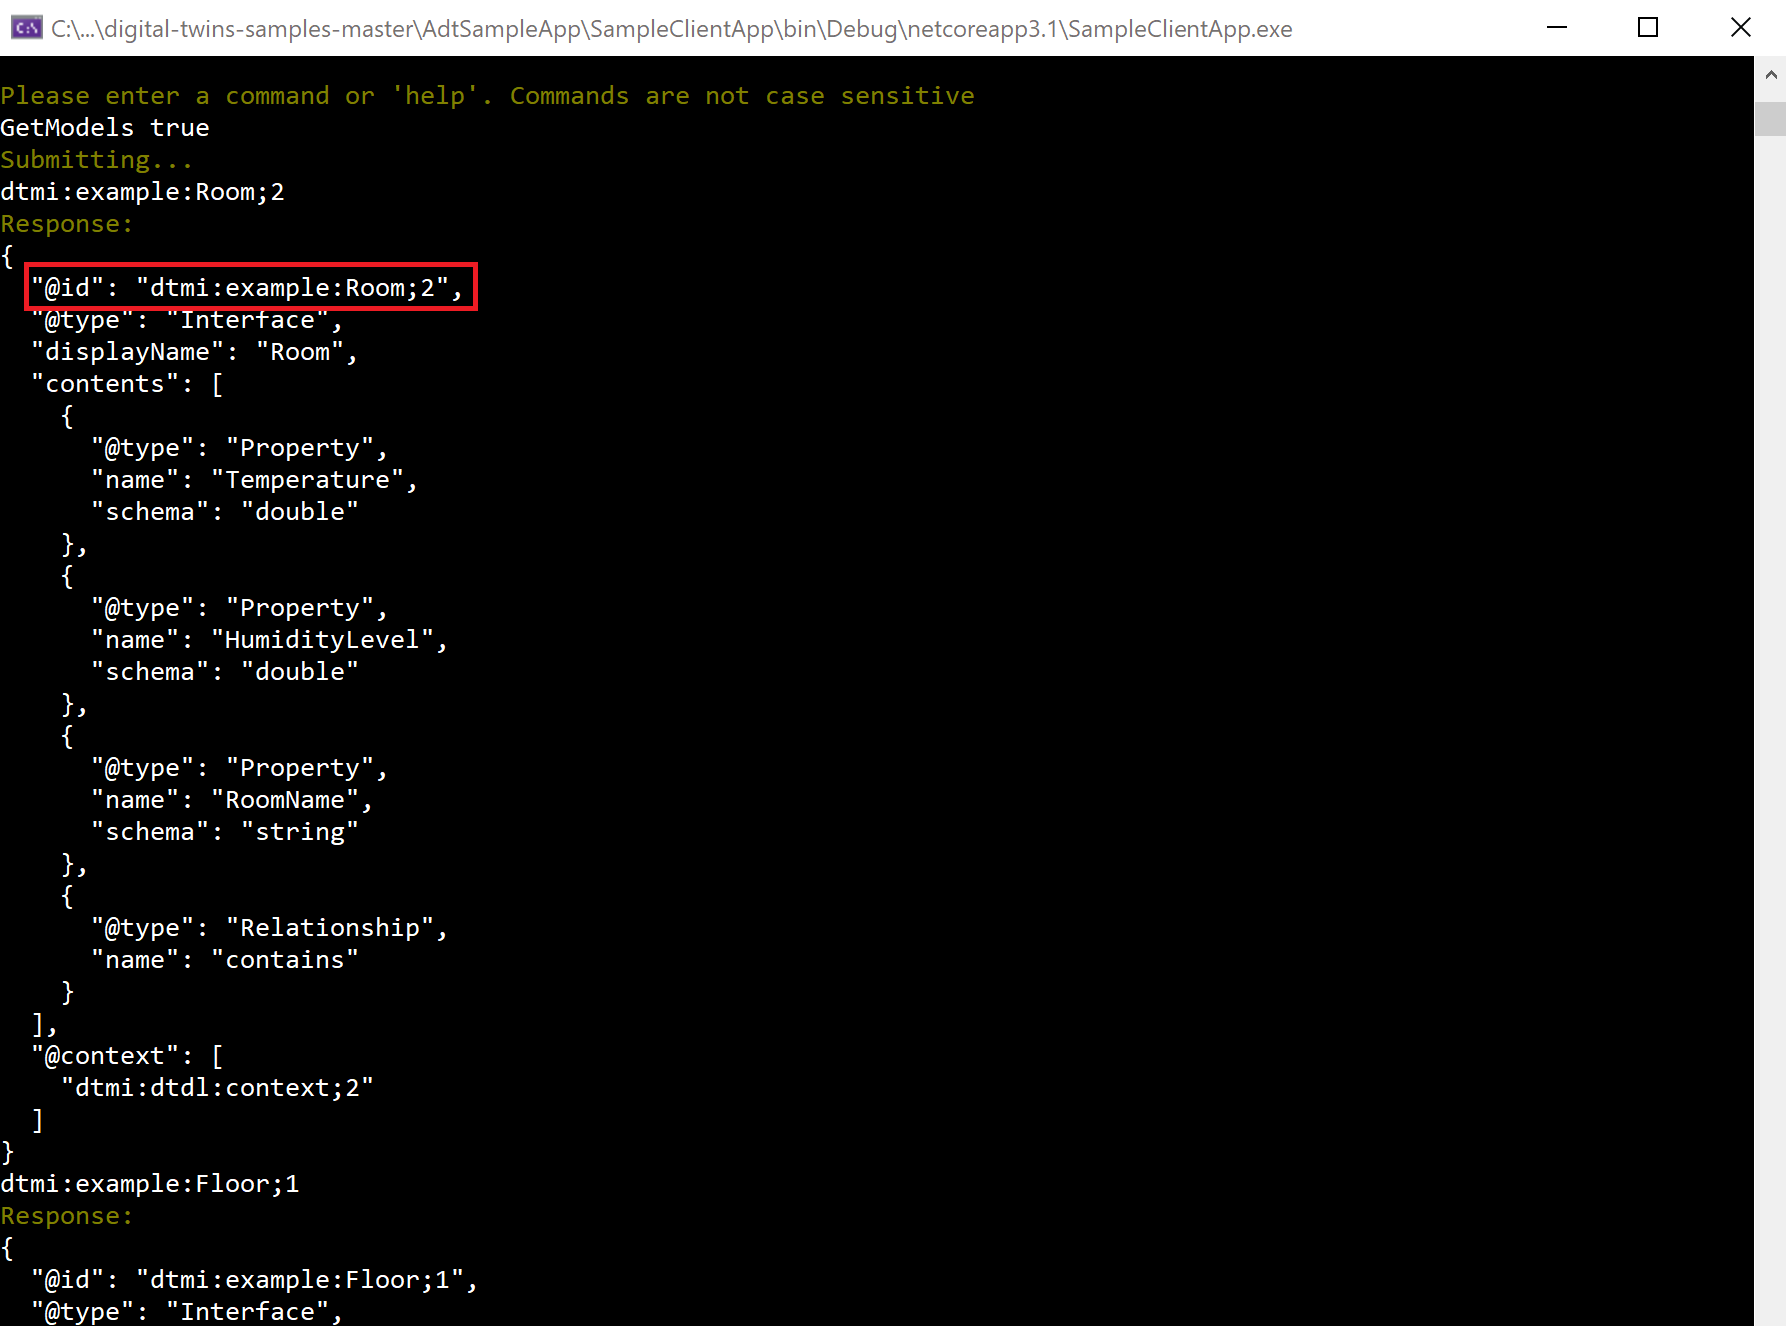

Keep the console app running for the next steps.
Errors
The sample application also handles errors from the service.
To test this, rerun the CreateModels command to try re-uploading the Room model that you've already uploaded:
CreateModels Room
As models cannot be overwritten, this command will now return a service error indicating that some of the model IDs you are trying to create already exist.
For the details on how to delete existing models, see Manage DTDL models.
Create digital twins
Now that some models have been uploaded to your Azure Digital Twins instance, you can create digital twins based on the model definitions. Digital twins represent the entities within your business environment—things like sensors on a farm, rooms in a building, or lights in a car.
To create a digital twin, you use the CreateDigitalTwin command. You must reference the model that the twin is based on, and can optionally define initial values for any properties in the model. You don't have to pass any relationship information at this stage.
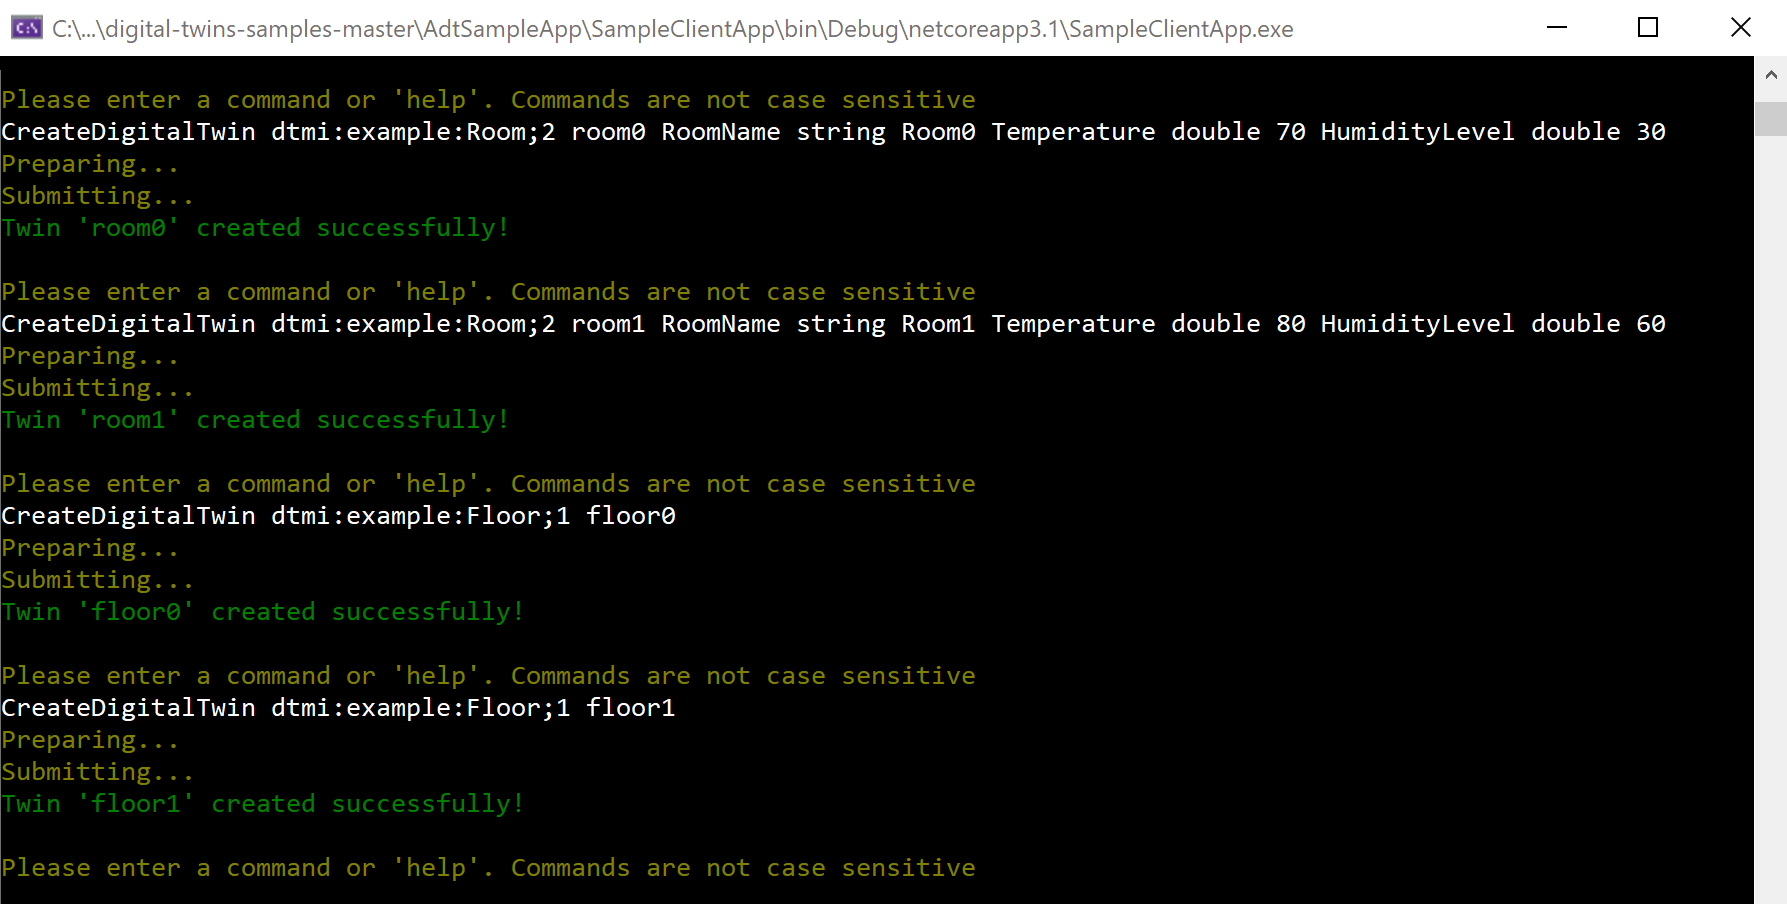
Run this code in the running project console to create several twins, based on the Room model you updated earlier and another model, Floor. Recall that Room has three properties, so you can provide arguments with the initial values for these properties. (Initializing property values is optional in general, but they're needed for this tutorial.)
CreateDigitalTwin dtmi:example:Room;2 room0 RoomName string Room0 Temperature double 70 HumidityLevel double 30
CreateDigitalTwin dtmi:example:Room;2 room1 RoomName string Room1 Temperature double 80 HumidityLevel double 60
CreateDigitalTwin dtmi:example:Floor;1 floor0
CreateDigitalTwin dtmi:example:Floor;1 floor1
The output from these commands should indicate the twins were created successfully.
You can verify that the twins were created by running the
Querycommand. This command queries your Azure Digital Twins instance for all the digital twins it contains. Look for the room0, room1, floor0, and floor1 twins in the results.

Note
After making a change to the data in your graph, there may be a latency of up to 10 seconds before the changes will be reflected in queries.
The DigitalTwins API reflects changes immediately, so if you need an instant response, use an API request (DigitalTwins GetById) or an SDK call (GetDigitalTwin) to get twin data instead of a query.
Modify a digital twin
You can also modify the properties of a twin you've created.
Note
The underlying REST API uses JSON Patch format to define updates to a twin. The command-line app also uses this format, to give a truer experience with what the underlying APIs expect.
Run this command to change room0's RoomName from "Room0" to "PresidentialSuite":
UpdateDigitalTwin room0 add /RoomName string PresidentialSuiteThe output should indicate the twin was updated successfully.
You can verify the update succeeded by running this command to see room0's information:
GetDigitalTwin room0The output should reflect the updated name.
Create a graph by adding relationships
Next, you can create some relationships between these twins, to connect them into a twin graph. Twin graphs are used to represent an entire environment.
The types of relationships that you can create from one twin to another are defined within the models that you uploaded earlier. The model definition for Floor specifies that floors can have a type of relationship called contains, which makes it possible to create a contains-type relationship from each Floor twin to the corresponding room that it contains.
To add a relationship, use the CreateRelationship command. Specify the twin that the relationship is coming from, the type of relationship, and the twin that the relationship is connecting to. Lastly, give the relationship a unique ID.
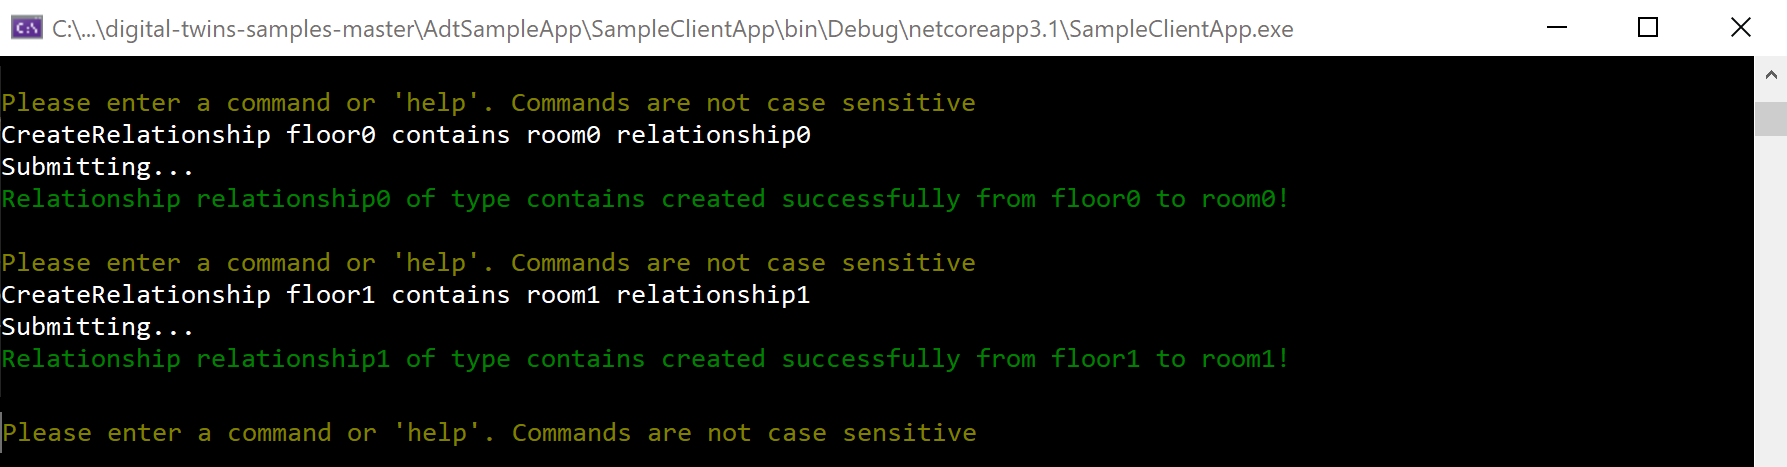
Run the following commands to add a
containsrelationship from each of the Floor twins you created earlier to a corresponding Room twin. The relationships are named relationship0 and relationship1.CreateRelationship floor0 contains room0 relationship0 CreateRelationship floor1 contains room1 relationship1Tip
The
containsrelationship in the Floor model was also defined with two string properties,ownershipUserandownershipDepartment, so you can also provide arguments with the initial values for these when you create the relationships. Here's an alternate version of the command above to create relationship0 that also specifies initial values for these properties:CreateRelationship floor0 contains room0 relationship0 ownershipUser string MyUser ownershipDepartment string myDepartmentThe output from these commands confirms that the relationships were created successfully:
You can verify the relationships with any of the following commands, which will print the relationships in your Azure Digital Twins instance.
- To see all relationships coming off of each floor (viewing the relationships from one side):
GetRelationships floor0 GetRelationships floor1 - To see all relationships arriving at each room (viewing the relationship from the "other" side):
GetIncomingRelationships room0 GetIncomingRelationships room1 - To look for these relationships individually, by ID:
GetRelationship floor0 relationship0
GetRelationship floor1 relationship1
- To see all relationships coming off of each floor (viewing the relationships from one side):

The twins and relationships you have set up in this tutorial form the following conceptual graph:

Query the twin graph to answer environment questions
A main feature of Azure Digital Twins is the ability to query your twin graph easily and efficiently to answer questions about your environment.
Note
After making a change to the data in your graph, there may be a latency of up to 10 seconds before the changes will be reflected in queries.
The DigitalTwins API reflects changes immediately, so if you need an instant response, use an API request (DigitalTwins GetById) or an SDK call (GetDigitalTwin) to get twin data instead of a query.
Run the following commands in the running project console to answer some questions about the sample environment.
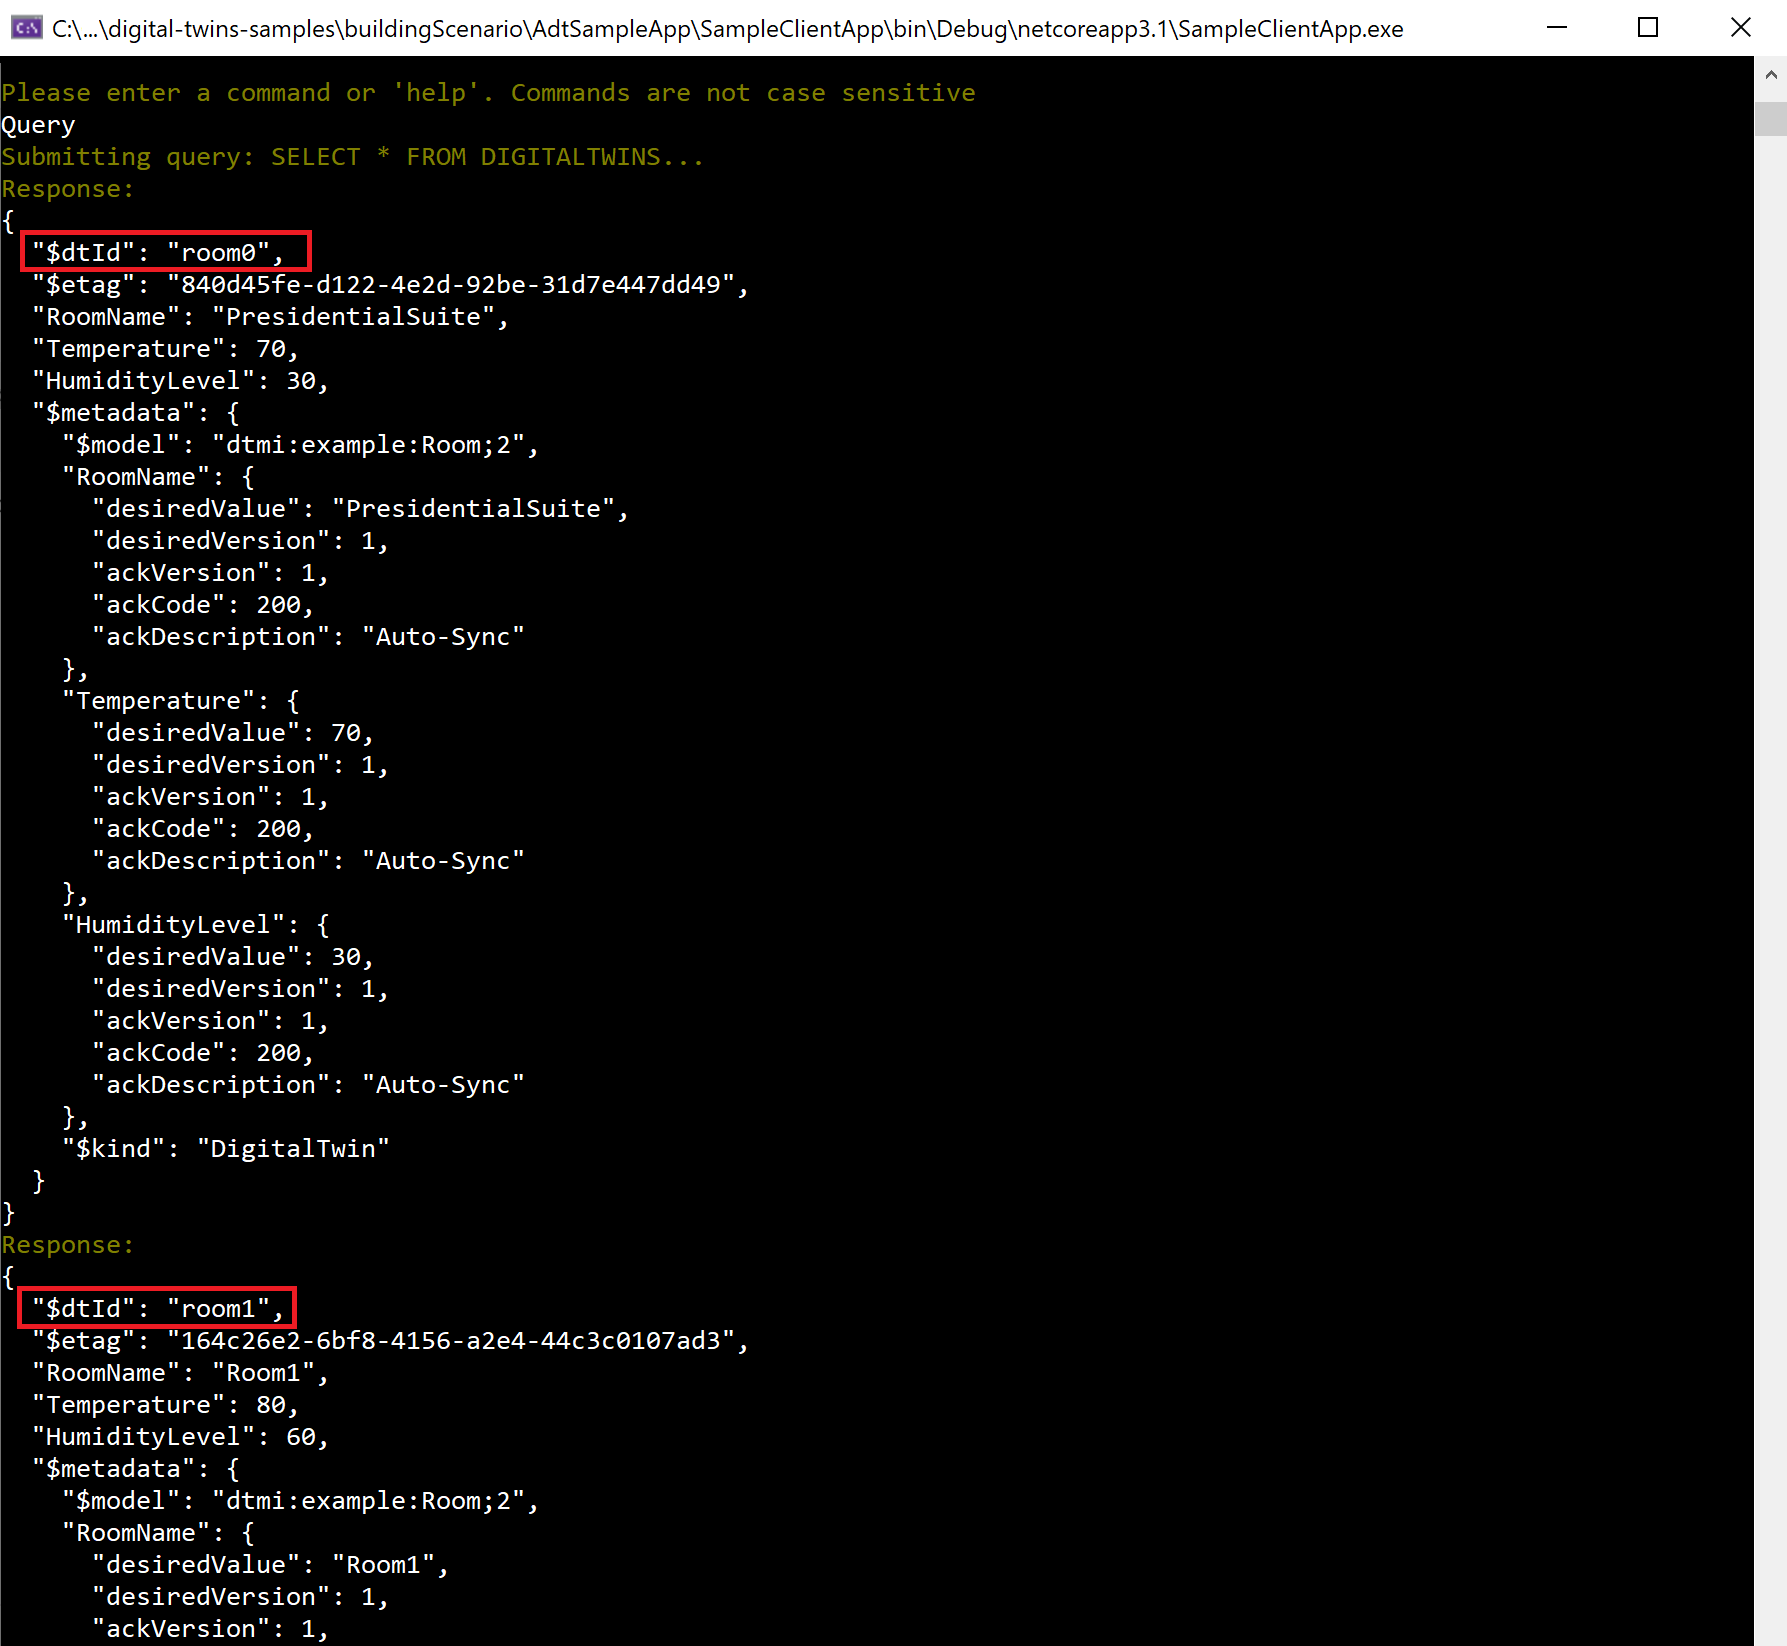
What are all the entities from my environment represented in Azure Digital Twins? (query all)
QueryThis command allows you to take stock of your environment at a glance, and make sure everything is represented as you want it to be within Azure Digital Twins. The result of this command is an output containing each digital twin with its details. Here's an excerpt:
Tip
In the sample project, the command
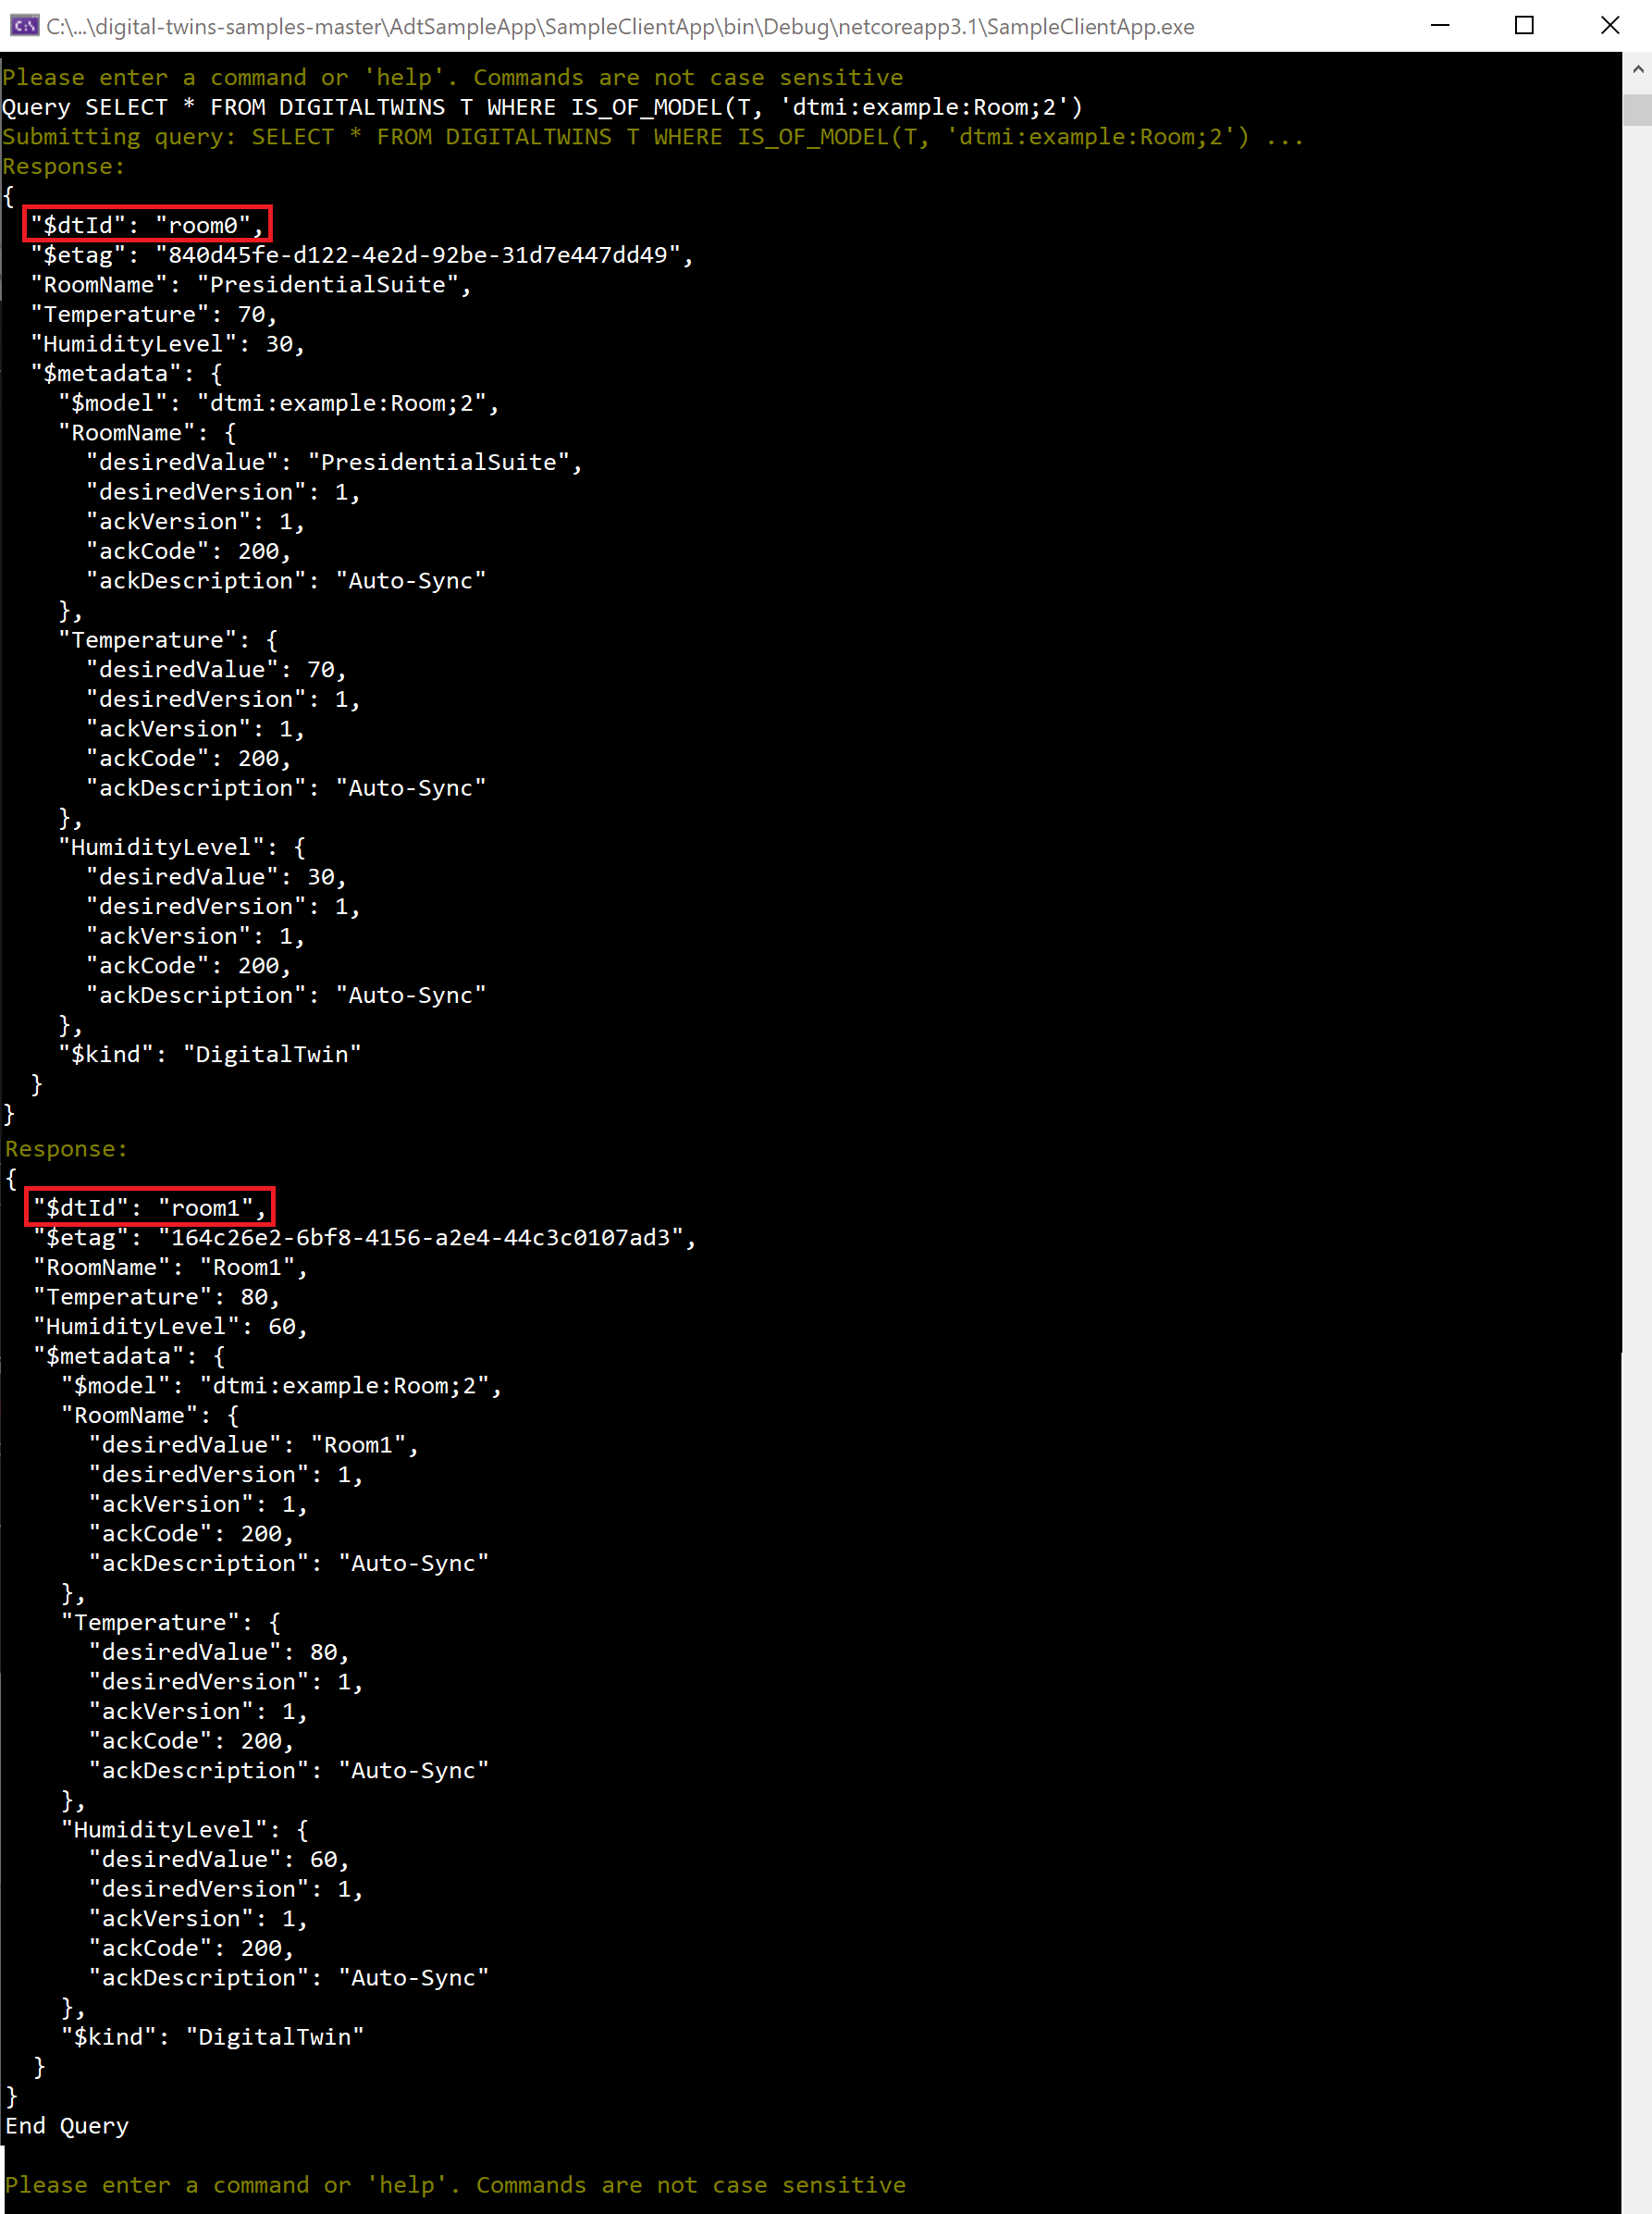
Querywithout any additional arguments is the equivalent ofQuery SELECT * FROM DIGITALTWINS. To query all the twins in your instance using the Query APIs or the CLI commands, use the longer (complete) query.What are all the rooms in my environment? (query by model)
Query SELECT * FROM DIGITALTWINS T WHERE IS_OF_MODEL(T, 'dtmi:example:Room;2')You can restrict your query to twins of a certain type, to get more specific information about what's represented. The result of this shows room0 and room1, but doesn't show floor0 or floor1 (since they're floors, not rooms).
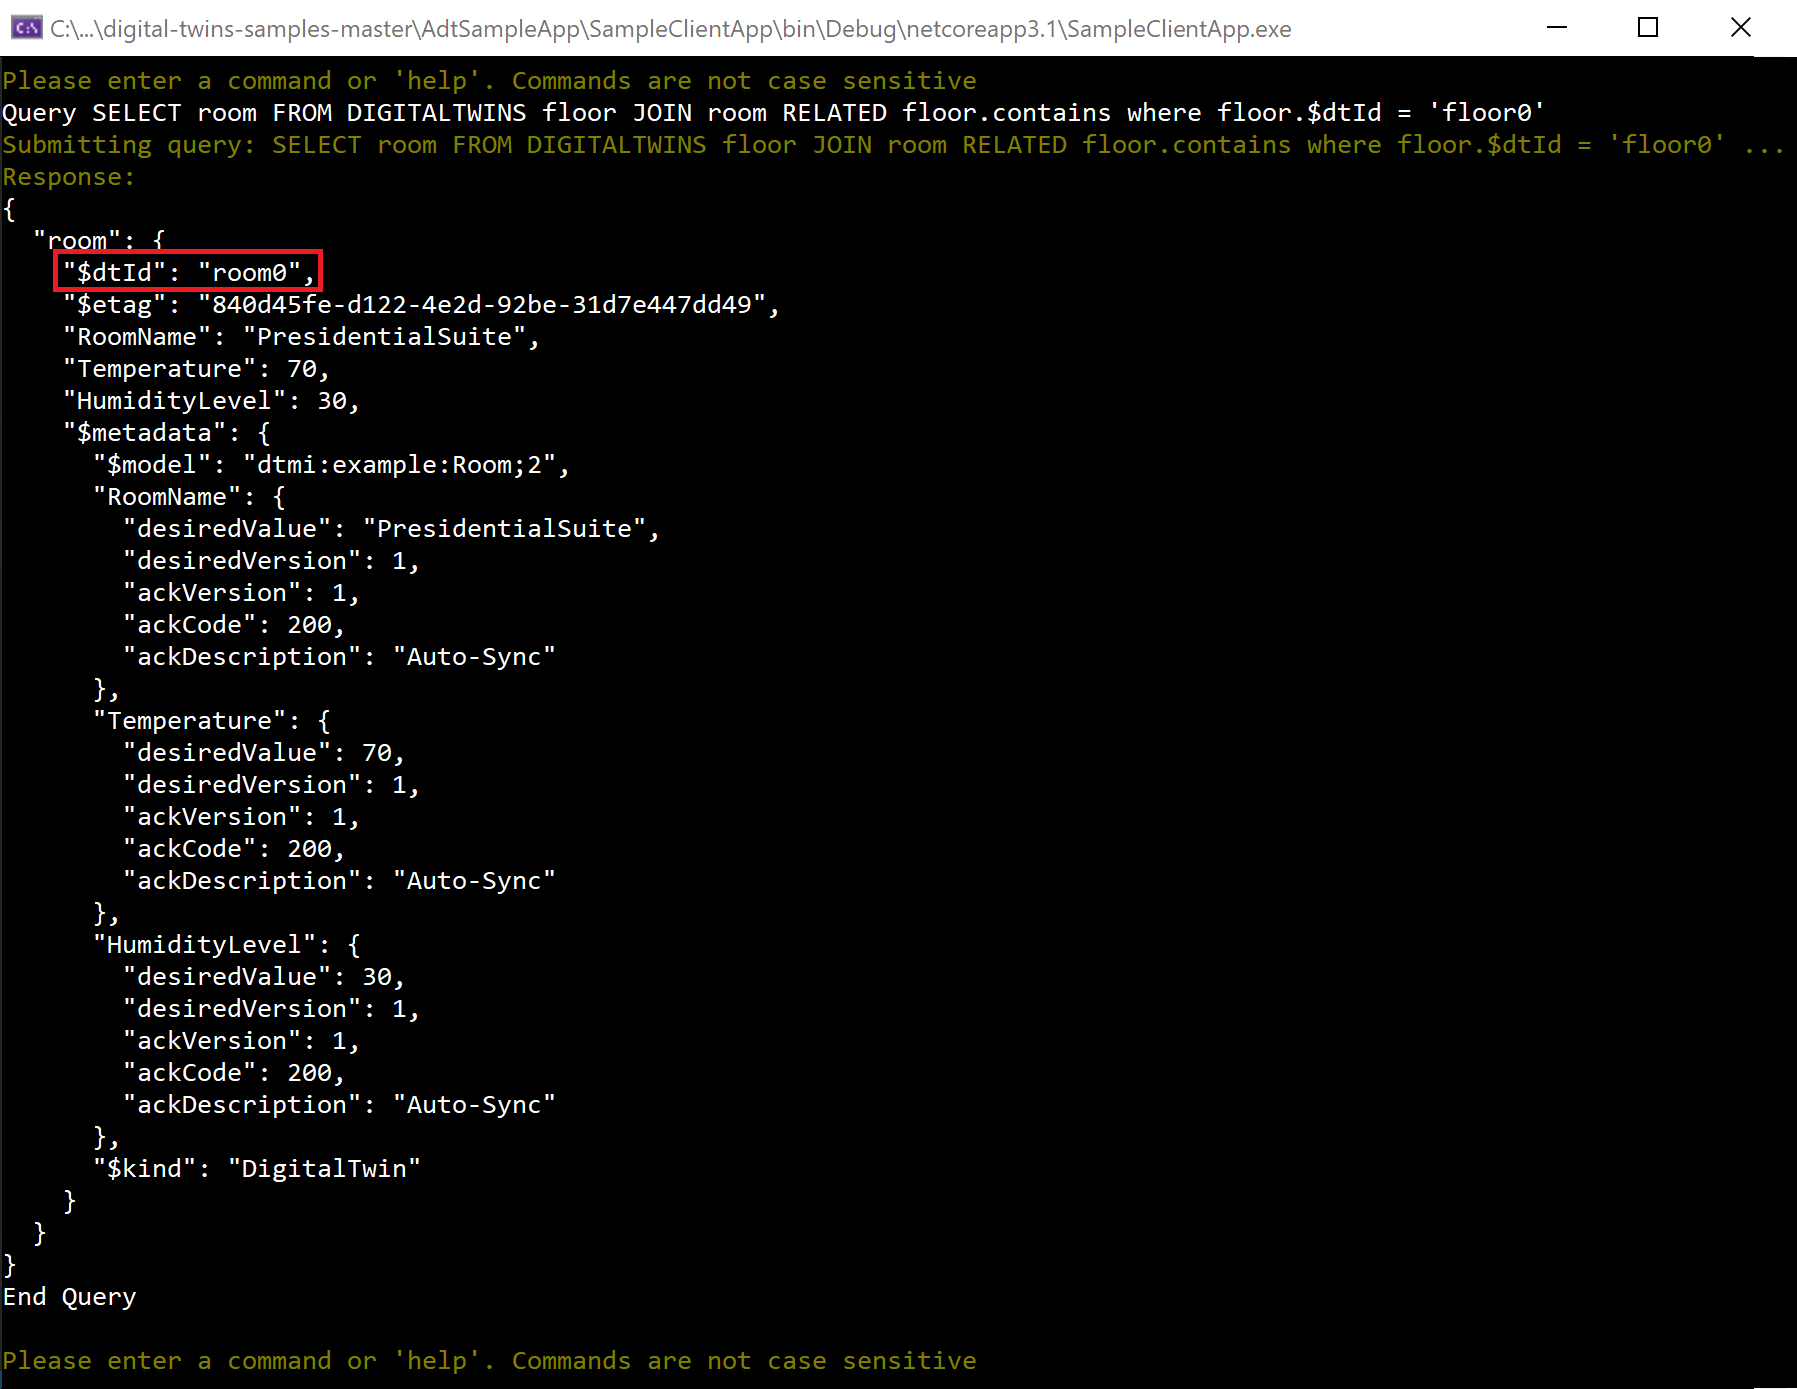
What are all the rooms on floor0? (query by relationship)
Query SELECT room FROM DIGITALTWINS floor JOIN room RELATED floor.contains where floor.$dtId = 'floor0'You can query based on relationships in your graph, to get information about how twins are connected or to restrict your query to a certain area. Only room0 is on floor0, so it's the only room in the result.
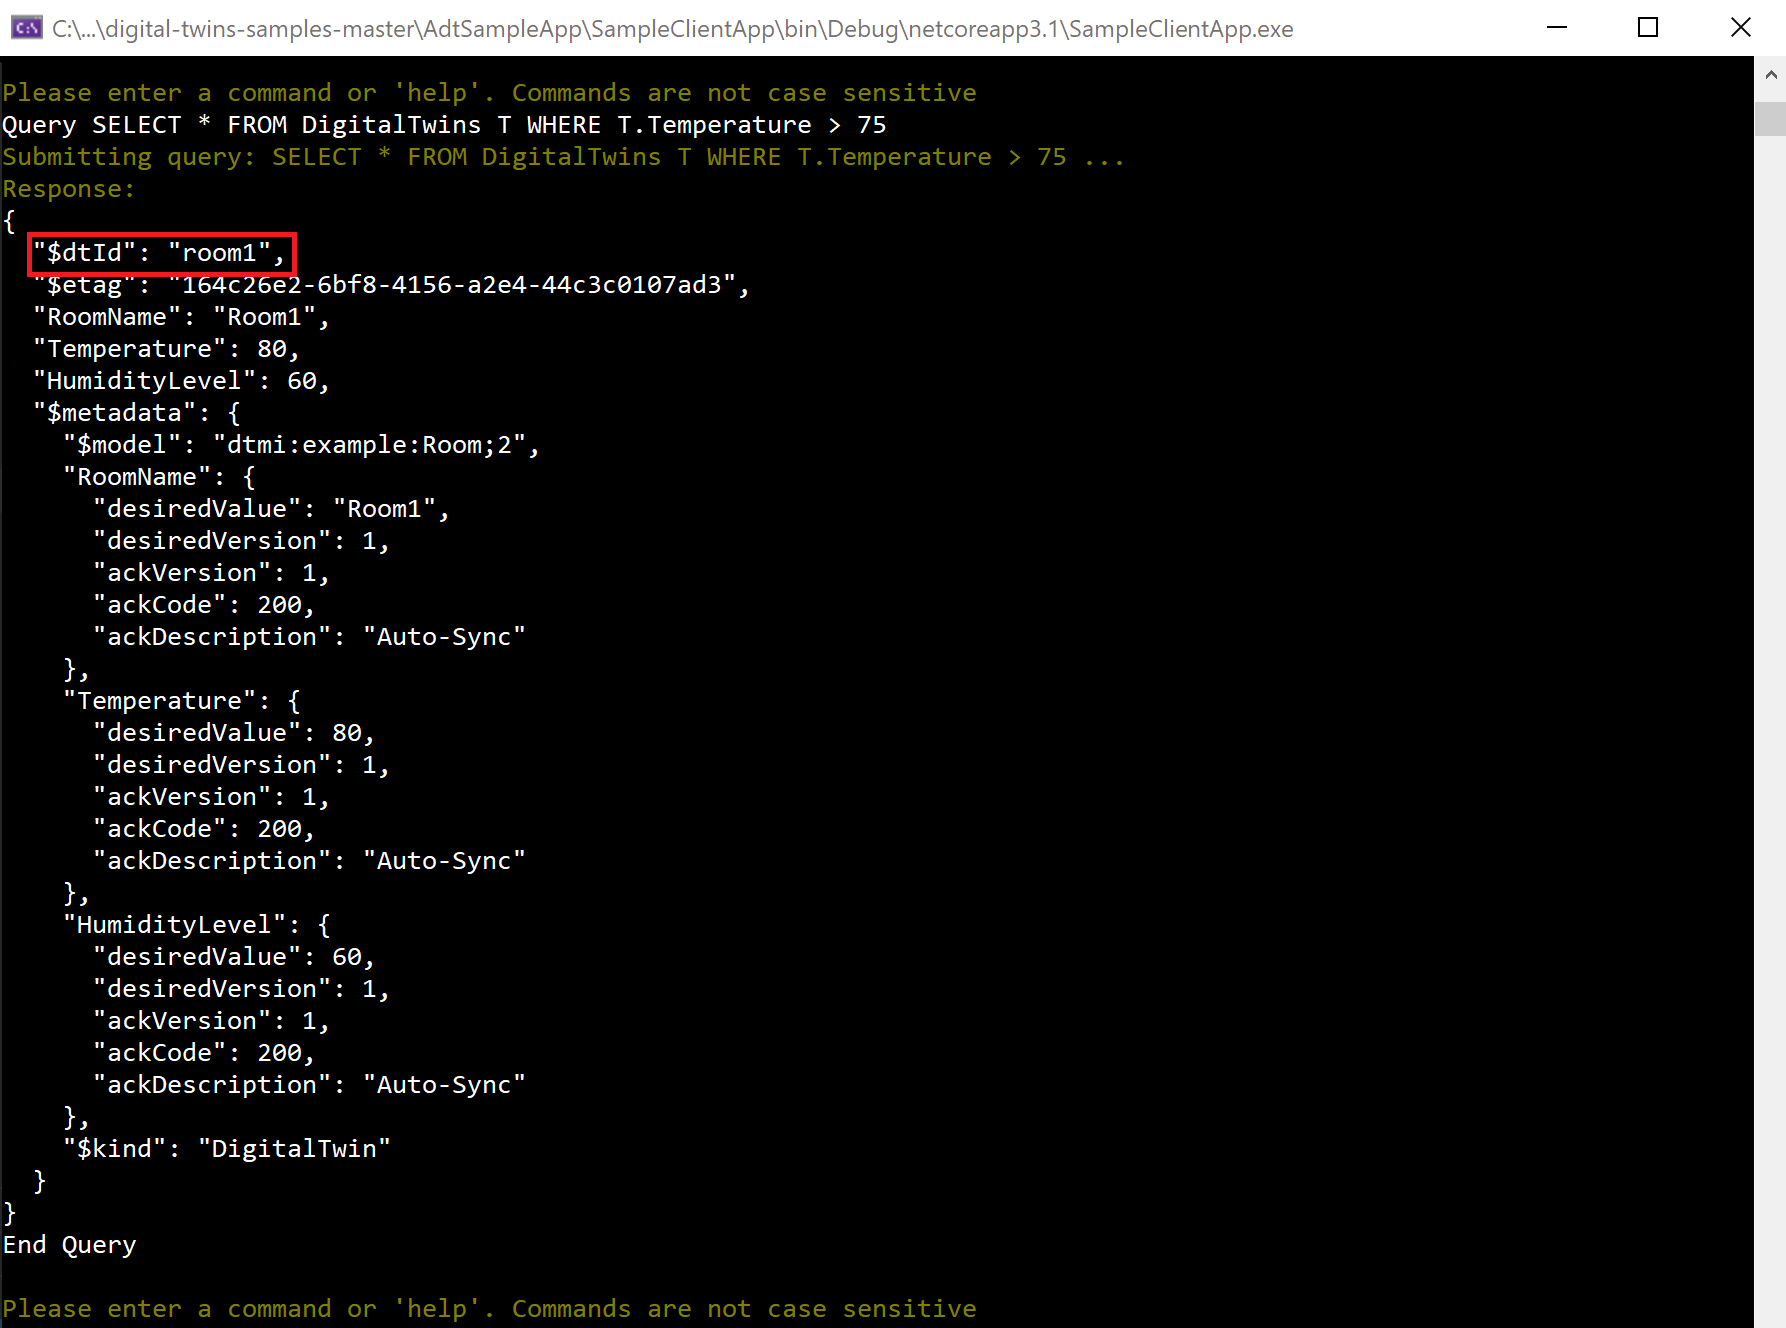
What are all the twins in my environment with a temperature above 75? (query by property)
Query SELECT * FROM DigitalTwins T WHERE T.Temperature > 75You can query the graph based on properties to answer various questions, including finding outliers in your environment that might need attention. Other comparison operators (<,>, =, or !=) are also supported. room1 shows up in the results here, because it has a temperature of 80.
What are all the rooms on floor0 with a temperature above 75? (compound query)
Query SELECT room FROM DIGITALTWINS floor JOIN room RELATED floor.contains where floor.$dtId = 'floor0' AND IS_OF_MODEL(room, 'dtmi:example:Room;2') AND room.Temperature > 75You can also combine the earlier queries like you would in SQL, using combination operators such as
AND,OR,NOT. This query usesANDto make the previous query about twin temperatures more specific. The result now only includes rooms with temperatures above 75 that are on floor0—which in this case, is none of them. The result set is empty.

Now that you've run several queries on the scenario you set up, the tutorial is complete. Stop running the project and close the console window.
Clean up resources
After completing this tutorial, you can choose which resources you want to remove, depending on what you want to do next.
If you plan to continue to the next tutorial, you can keep the resources you set up here to continue using this Azure Digital Twins instance and configured sample app for the next tutorial
If you want to continue using the Azure Digital Twins instance, but clear out all of its models, twins, and relationships, you can use the sample app's
DeleteAllTwinsandDeleteAllModelscommands to clear the twins and models in your instance, respectively.
If you do not need any of the resources you created in this tutorial, you can delete the Azure Digital Twins instance and all other resources from this article with the az group delete CLI command. This deletes all Azure resources in a resource group, as well as the resource group itself.
Important
Deleting a resource group is irreversible. The resource group and all the resources contained in it are permanently deleted. Make sure that you don't accidentally delete the wrong resource group or resources.
Open Azure Cloud Shell or a local CLI window, and run the following command to delete the resource group and everything it contains.
az group delete --name <your-resource-group>
You may also want to delete the downloaded project folder from your local machine.
Next steps
In this tutorial, you got started with Azure Digital Twins by building a graph in your instance using a sample client application. You created models, digital twins, and relationships to form a graph. You also ran some queries on the graph, to get an idea of what kinds of questions Azure Digital Twins can answer about an environment.
Continue to the next tutorial to combine Azure Digital Twins with other Azure services to complete a data-driven, end-to-end scenario:
Feedback
Coming soon: Throughout 2024 we will be phasing out GitHub Issues as the feedback mechanism for content and replacing it with a new feedback system. For more information see: https://aka.ms/ContentUserFeedback.
Submit and view feedback for