Note
Access to this page requires authorization. You can try signing in or changing directories.
Access to this page requires authorization. You can try changing directories.
You can use Azure Database Migration Service and the Azure SQL Migration extension to assess, get right-sized Azure recommendations and migrate databases from an on-premises SQL Server to Azure SQL. As part of the post-migration tasks, we're introducing a new user experience with an independent workflow you can use to migrate logins (preview) and server roles from your on-premises source SQL Server to the Azure SQL target.
This login migration experience automates manual tasks such as the synchronization of logins with their corresponding user mappings and replicating server/securable permissions and server roles.
Currently, only Azure SQL Managed Instance and SQL Server on Azure Virtual Machines targets are supported.
Completing the database migrations of your on-premises databases to Azure SQL before starting the login migration is recommended. It will ensure that the database-level users have already been migrated to the target; therefore the login migration process will perform the user-login mappings synchronization.
In this tutorial, learn how to migrate a set of different SQL Server logins from an on-premises SQL Server to Azure SQL Managed Instance, by using the Azure SQL Migration extension for Azure Data Studio.
Note
You can use the Azure SQL Migration extension for Azure Data Studio, PowerShell or Azure CLI for starting the login migration process.
In this tutorial, you learn how to:
- Open the Migrate to Azure SQL wizard in Azure Data Studio
- Start the SQL Server login migration wizard
- Select your logins from the source SQL Server instance
- Select and connect to your Azure SQL target
- Start your SQL Server login migration and monitor progress to completion
Note
Windows account migrations are supported only for Azure SQL Managed Instance targets.
Prerequisites
Before you begin the tutorial:
Install the Azure SQL Migration extension from Azure Data Studio Marketplace.
Create a target instance of Azure SQL Managed Instance or SQL Server on Azure Virtual Machines.
The machine in which the client such as Azure Data Studio, PowerShell or Azure CLI runs login migrations should have connectivity to both sources and target SQL servers.
Ensure that the login that you use to connect to the source and target SQL Server instance are members of the sysadmin server role.
As an optional step. You can migrate your on-premises databases to your selected Azure SQL target using one of the following tutorials:
Migration scenario Migration mode SQL Server to Azure SQL Managed Instance Online / Offline SQL Server to SQL Server on an Azure virtual machine Online / Offline If you haven't completed the database migration and the login migration process is started, the migration of logins and server roles will still happen, but login/role mappings won't be performed correctly.
Nevertheless, the login migration process can be performed at any time, to update the user mapping synchronization for recently migrated databases.
For Windows accounts, ensure that the target SQL managed instance has Microsoft Entra read access. This option can be configured via the Azure portal by a user with the Privileged Role Administrator role. For more information, see Provision Microsoft Entra admin (SQL Managed Instance).
Domain federation between local Active Directory Domain Services (AD DS) and Microsoft Entra ID has to be set up by an administrator. This configuration is required so that the on-premises Windows users can be synced with the company Microsoft Entra ID. The login migrations process would then be able to create an external login for the corresponding Microsoft Entra user in the target managed instance.
In case the domain federation hasn't been set up yet in your Microsoft Entra tenant, the administrator can refer to the following links to get started:
Windows account migrations are supported only for Azure SQL Managed Instance targets. The Login Migration wizard will show you a prompt, where you have to enter the Microsoft Entra domain name to convert the Windows users to their Microsoft Entra versions.
For example, if the Windows user is
contoso\username, and the Microsoft Entra domain name iscontoso.com, then the converted Microsoft Entra username will beusername@contoso.com. For this conversion to happen correctly, the domain federation between the local Active Directory and Microsoft Entra ID should be set up.For large number of logins, we recommend using automation. With PowerShell or Azure CLI you can use the
CSVFilePathswitch, that allows you to pass a CSV file type as a list of logins to be migrated.Bulk login migrations might be time-consuming using Azure Data Studio, as you need to manually select each login to migrate on the login selection screen.
Open the Login Migration wizard in Azure Data Studio
To open the Login Migration wizard:
In Azure Data Studio, go to Connections. Select and connect to your on-premises instance of SQL Server. You also can connect to SQL Server on an Azure virtual machine.
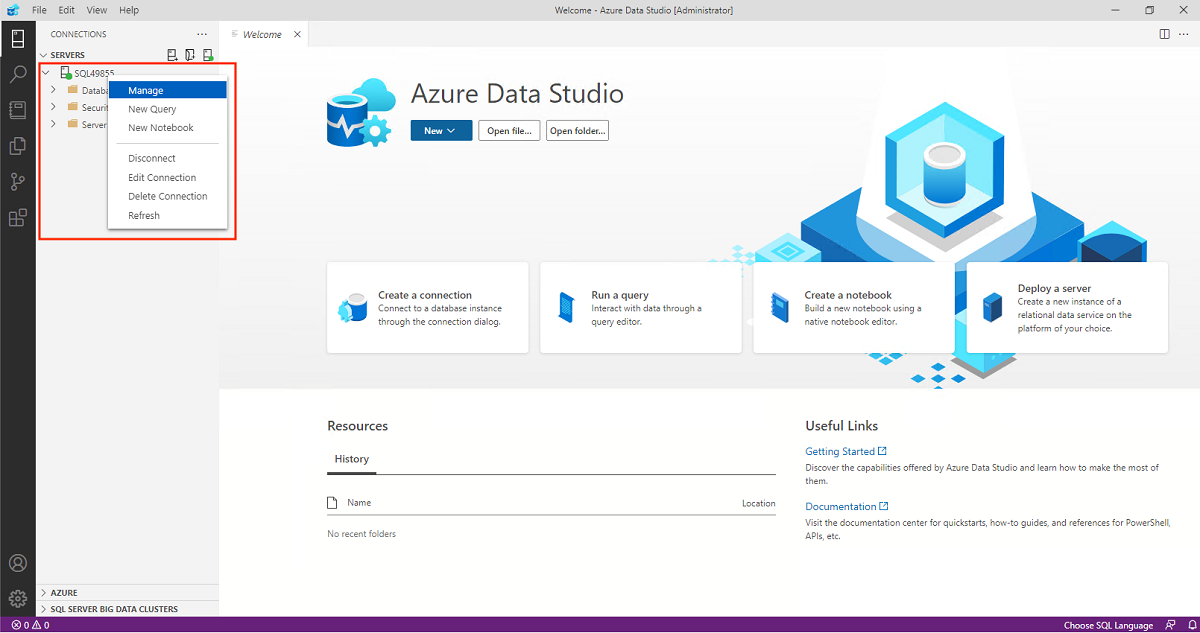
Right-click the server connection and select Manage.
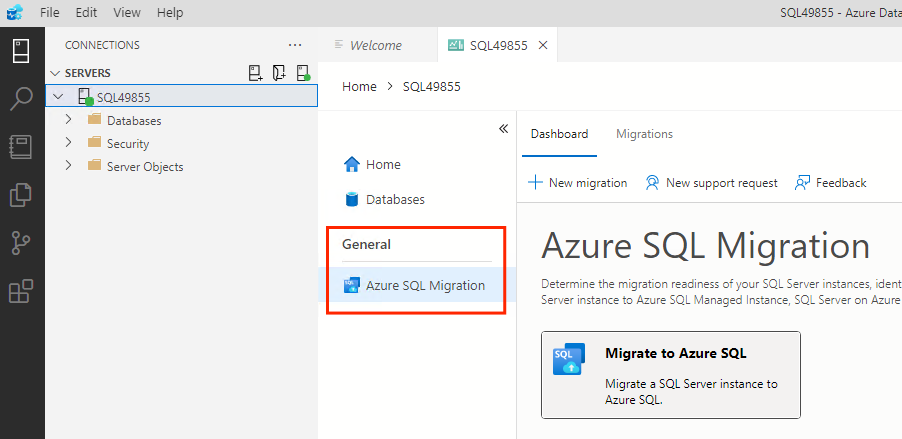
In the server menu under General, select Azure SQL Migration.
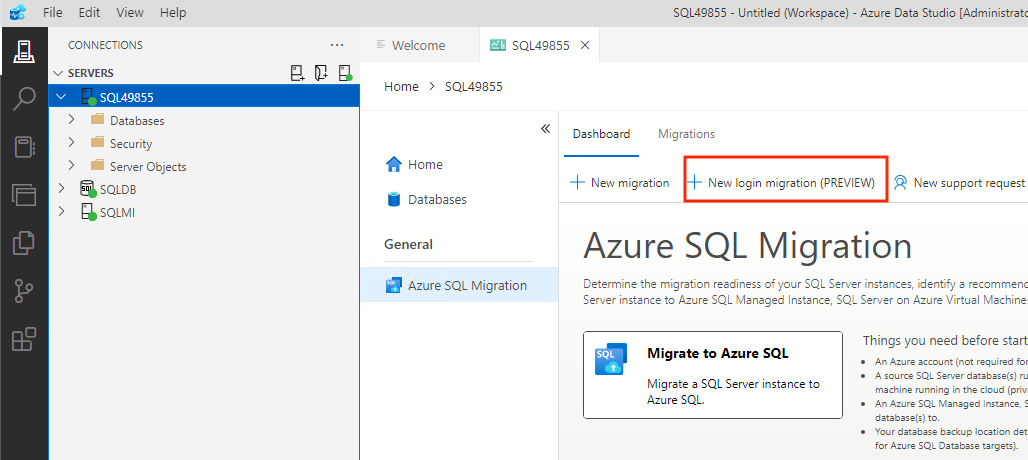
In the Azure SQL Migration dashboard, select New login migration button to open the login migration wizard.
Configure login migration settings
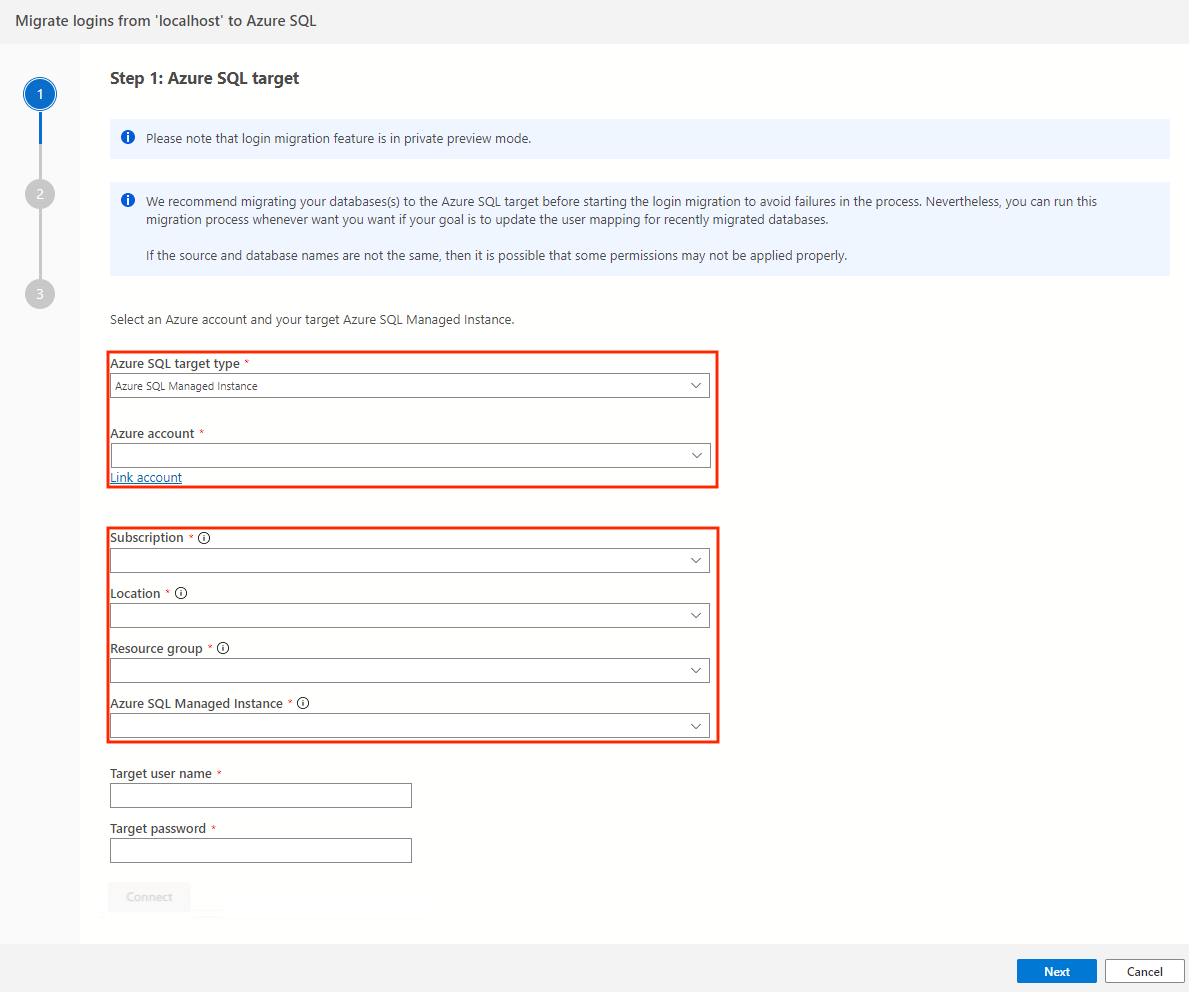
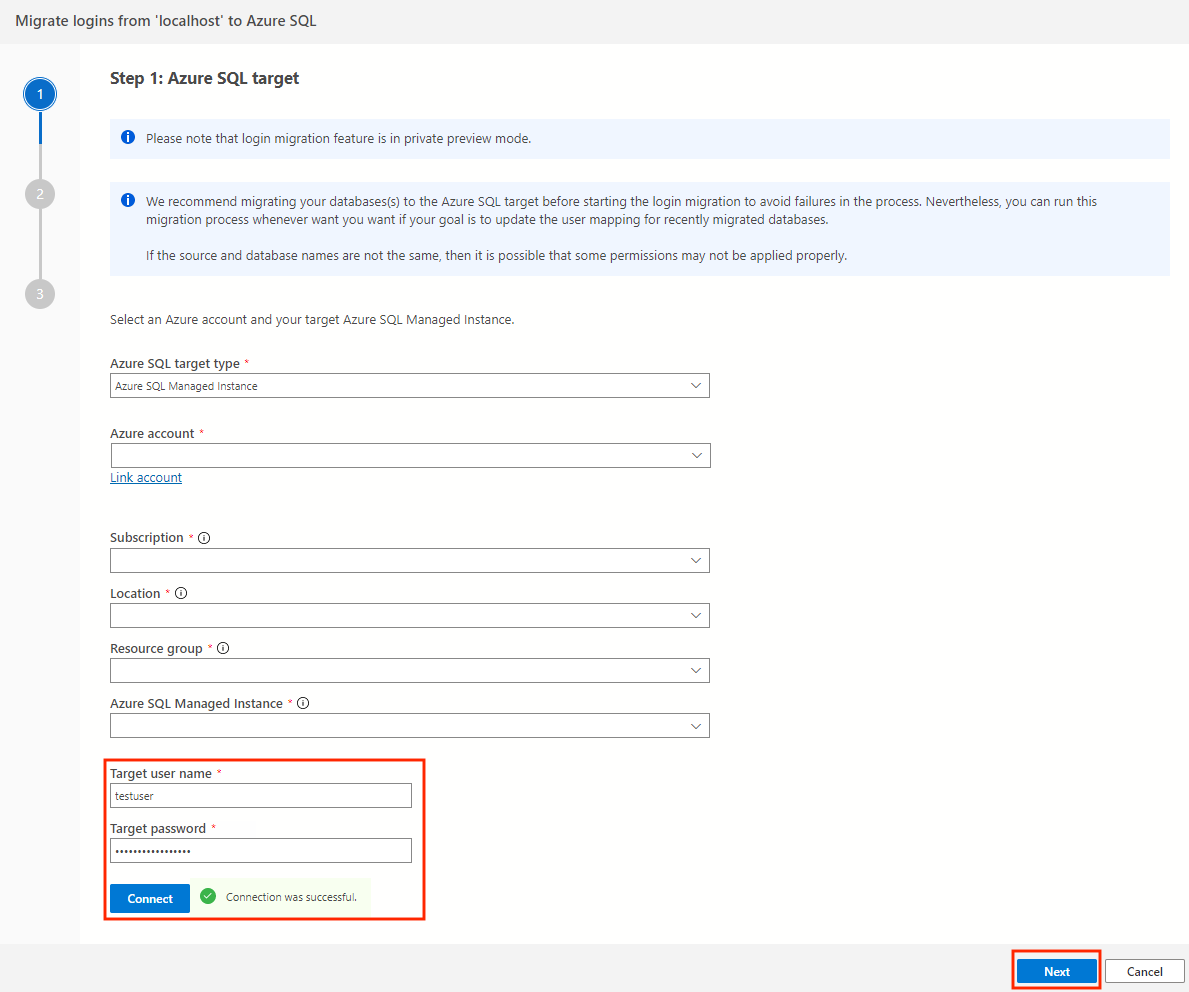
In Step 1: Azure SQL target on the New login migration wizard, complete the following steps:
Select your Azure SQL target type and Azure account. Then in the next section, select your Azure subscription, the Azure region or location, and the resource group that contains the target Azure SQL target.
Use your SQL login username and password in connecting to the target managed instance. Select Connect to verify if the connection to the target is successful. Then, select Next.
In Step 2: Select logins to migrate, select the logins that you wish to migrate from the source SQL server to the Azure SQL target. For Windows accounts, you'll be prompted to enter the associated Microsoft Entra domain name. Then select Migrate to start the login migration process.
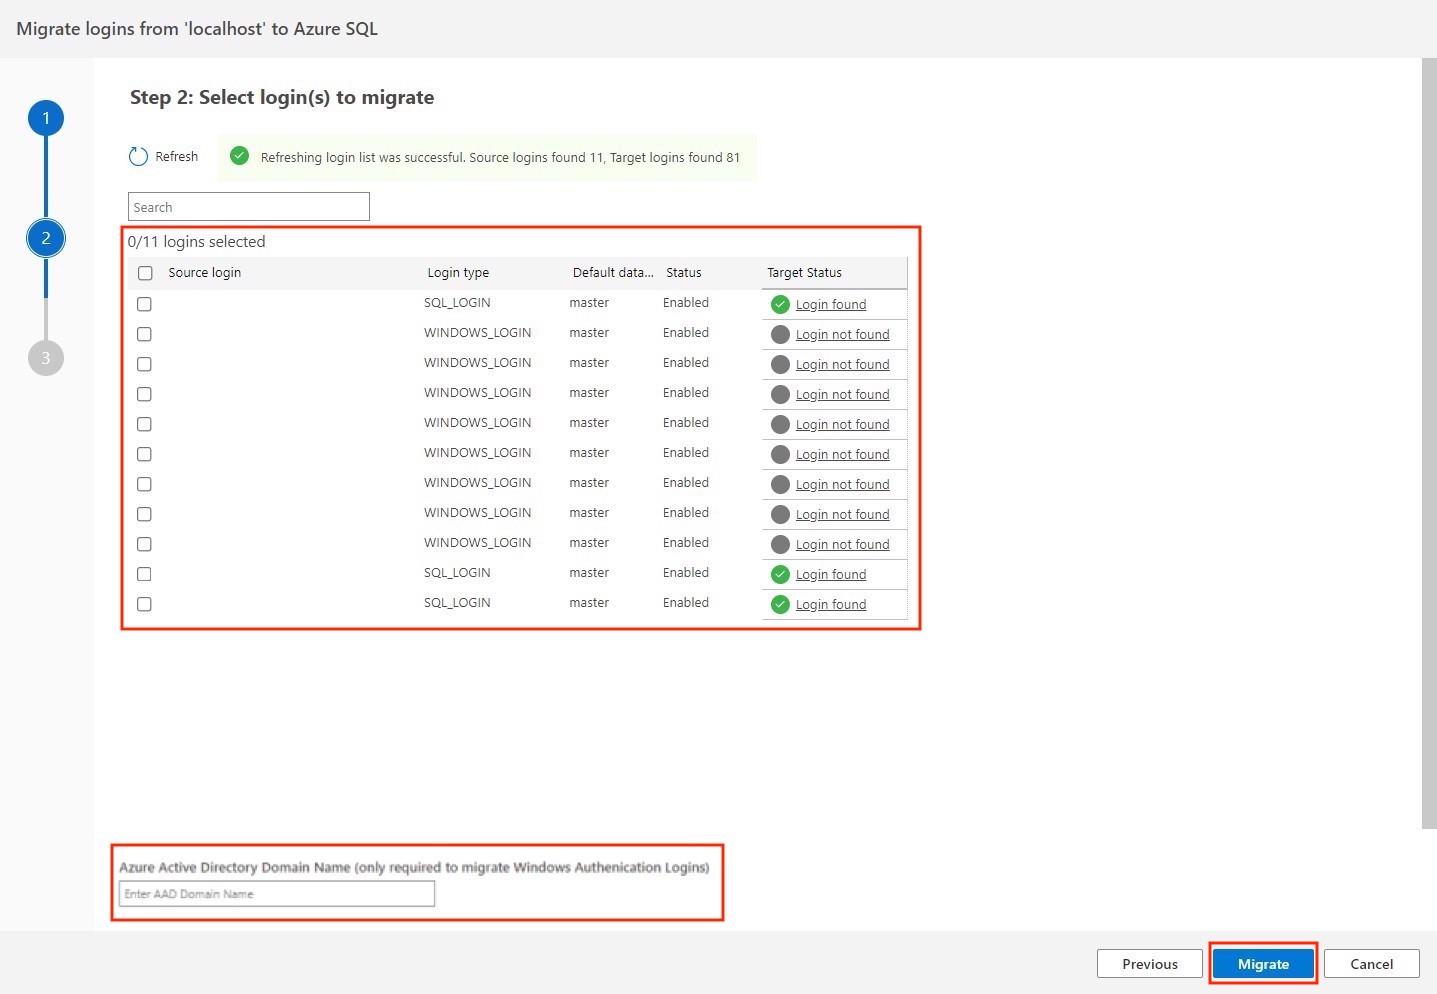
Start the login migration process
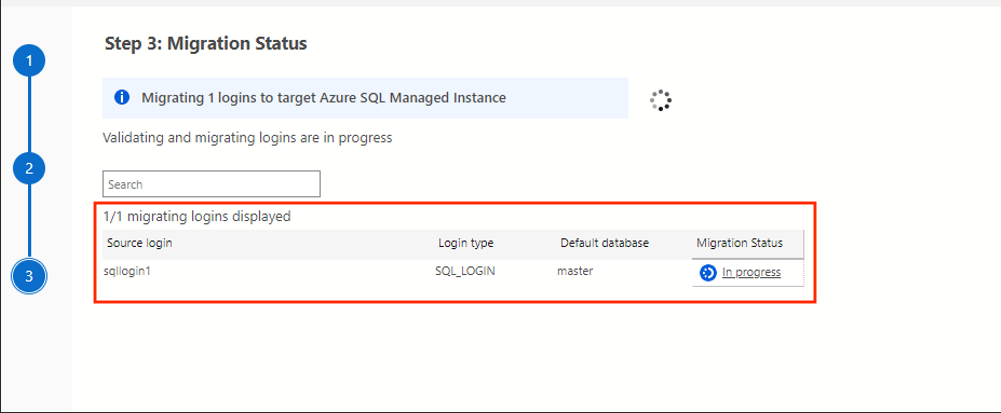
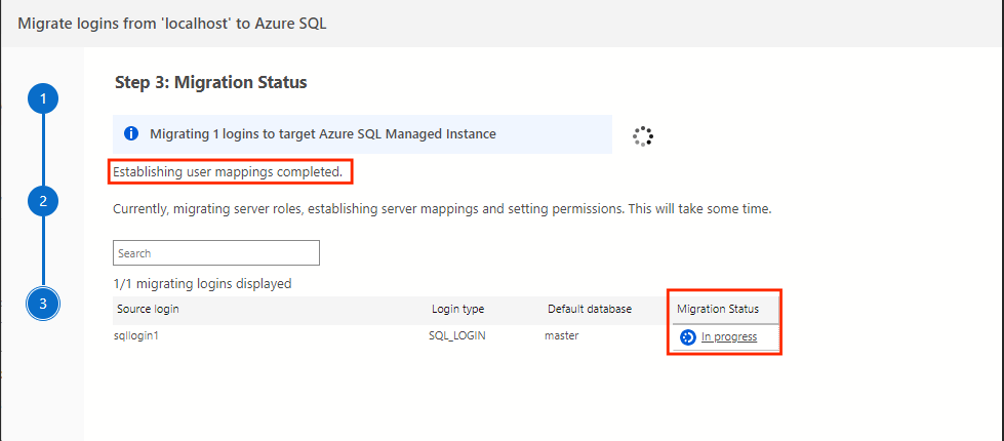
In Step 3: Migration Status, the login migrations will proceed, along with other steps in the process such as validations, mappings and permissions.
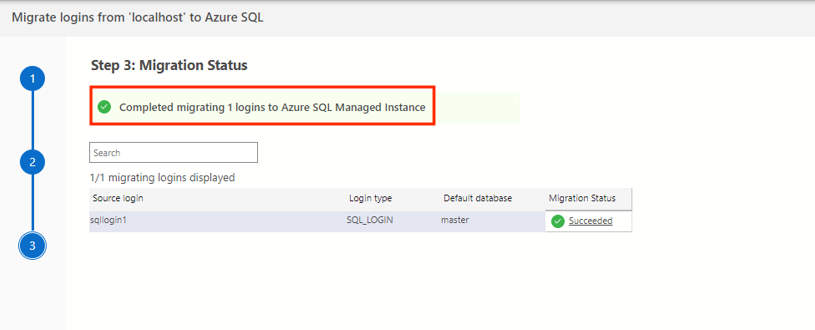
Once the login migration is successfully completed (or if it has failures), the page displays the relevant updates.
Monitor your migration
You can monitor the process for each login by selecting the link under the login's Migration Status.
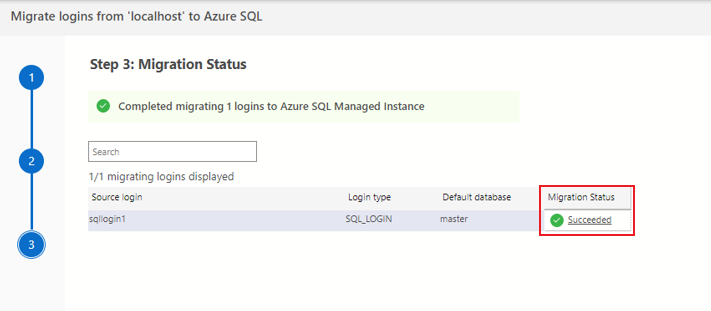
In the dialog that opens, you can monitor individual steps of the process, and selecting any of them will populate Step details with the following relevant details.
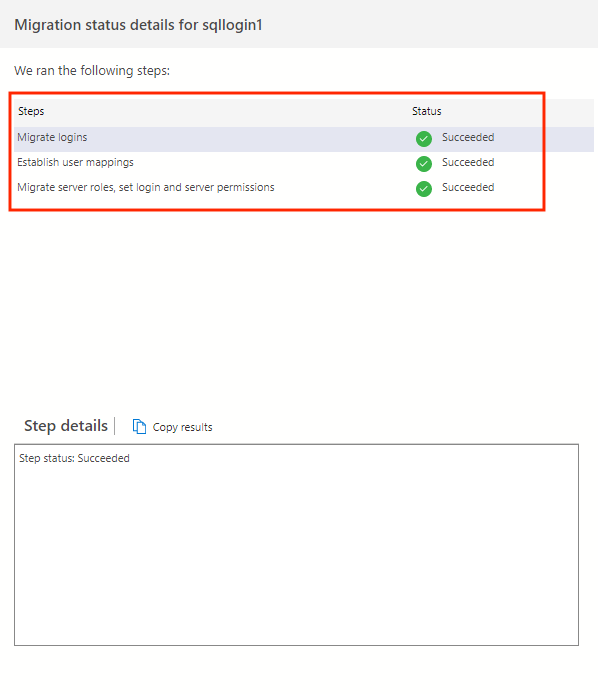
The migration details page displays the different stages involved in the login migration process:
| Status | Description |
|---|---|
| Migration of logins | Migrating logins that have been selected by the user to the target |
| Migration of server roles | All server roles will be migrated from source to target |
| User-login mappings | Synchronization between users of the databases and migrated logins |
| Login-server role mappings | Server role membership of logins and membership between roles will be set in the target |
| Establish server and object (securable) | Level permissions for logins in target |
| Establish server and object (securable) | Level permissions for server roles in target |
Post-migration steps
Your target Azure SQL should now have the logins you selected to migrate, in addition to all the server roles from the source SQL Server, the associated user mappings, role memberships and permissions copied over.
You can verify by logging into the target Azure SQL using one of the logins migrated, by entering the same password as it had on the source SQL Server instance.
If you have also migrated Windows accounts, make sure to check the option of Microsoft Entra ID - Password while logging into the target managed instance using the same password that the Windows account had on the source SQL Server.
The username should be in the format of
username@contoso.com(the Microsoft Entra domain name provided in Step 2 of the login migration wizard).
Limitations
The following table describes the current status of the Login migration support by Azure SQL target by Login type:
| Target | Login type | Support | Status |
|---|---|---|---|
| Azure SQL Database | SQL login | No | |
| Azure SQL Database | Windows account | No | |
| Azure SQL Managed Instance | SQL login | Yes | Preview |
| Azure SQL Managed Instance | Windows account | Yes | Preview |
| SQL Server on Azure VM | SQL login | Yes | Preview |
| SQL Server on Azure VM | Windows account | No |
SQL Server on Azure Virtual Machines
Windows account migrations aren't supported for this Azure SQL target
Only the SQL Server default port (1433) with no option to override is supported in Azure Data Studio. An alternative is to use PowerShell or Azure CLI to complete this type of migration.
Only the primary IP address with no option to override is supported in Azure Data Studio. An alternative is to use PowerShell or Azure CLI to complete this type of migration.
