Note
Access to this page requires authorization. You can try signing in or changing directories.
Access to this page requires authorization. You can try changing directories.
In this quickstart, you create an Azure Data Manager for Energy instance by using the Azure portal on a web browser. You first register an Azure application in Microsoft Entra ID. Then you use the application ID to create an Azure Data Manager for Energy instance in your chosen Azure subscription and region.
You use a simple interface in the Azure portal to set up your Azure Data Manager for Energy instance. The process takes about 50 minutes to complete.
Azure Data Manager for Energy is a managed platform as a service (PaaS) offering from Microsoft that builds on top of the OSDU® Data Platform. When you connect your consuming internal or external applications to Azure Data Manager for Energy, you can use the service to ingest, transform, and export subsurface data.
OSDU® is a trademark of The Open Group.
Prerequisites
| Prerequisite | Details |
|---|---|
| Active Azure subscription | You need the Azure subscription ID in which you want to install Azure Data Manager for Energy. You need appropriate permissions to create Azure resources in this subscription. |
| Application ID | You need an application ID (often called an app ID or a client ID). This application ID is used for authentication to Microsoft Entra ID and is associated with your Azure Data Manager for Energy instance. You can create an application ID by going to Microsoft Entra ID and selecting App registrations > New registration. |
| Client secret | Sometimes called an application password, a client secret is a string value that your app can use in place of a certificate to identity itself. You can create a client secret by selecting Certificates & secrets > Client secrets > New client secret. Record the secret's value for use in your client application code. This value is never displayed again after you leave this page. |
Create an Azure Data Manager for Energy instance
Save your application (client) ID and client secret from Microsoft Entra ID to refer to them later in this quickstart.
Sign-in to Microsoft Azure Marketplace.
If you have access to multiple tenants, use the Directories + subscriptions filter on the top menu to switch to the tenant in which you want to install Azure Data Manager for Energy.
On the search bar in Azure Marketplace (not the global Azure search bar on the top of the screen), enter Azure Data Manager for Energy.
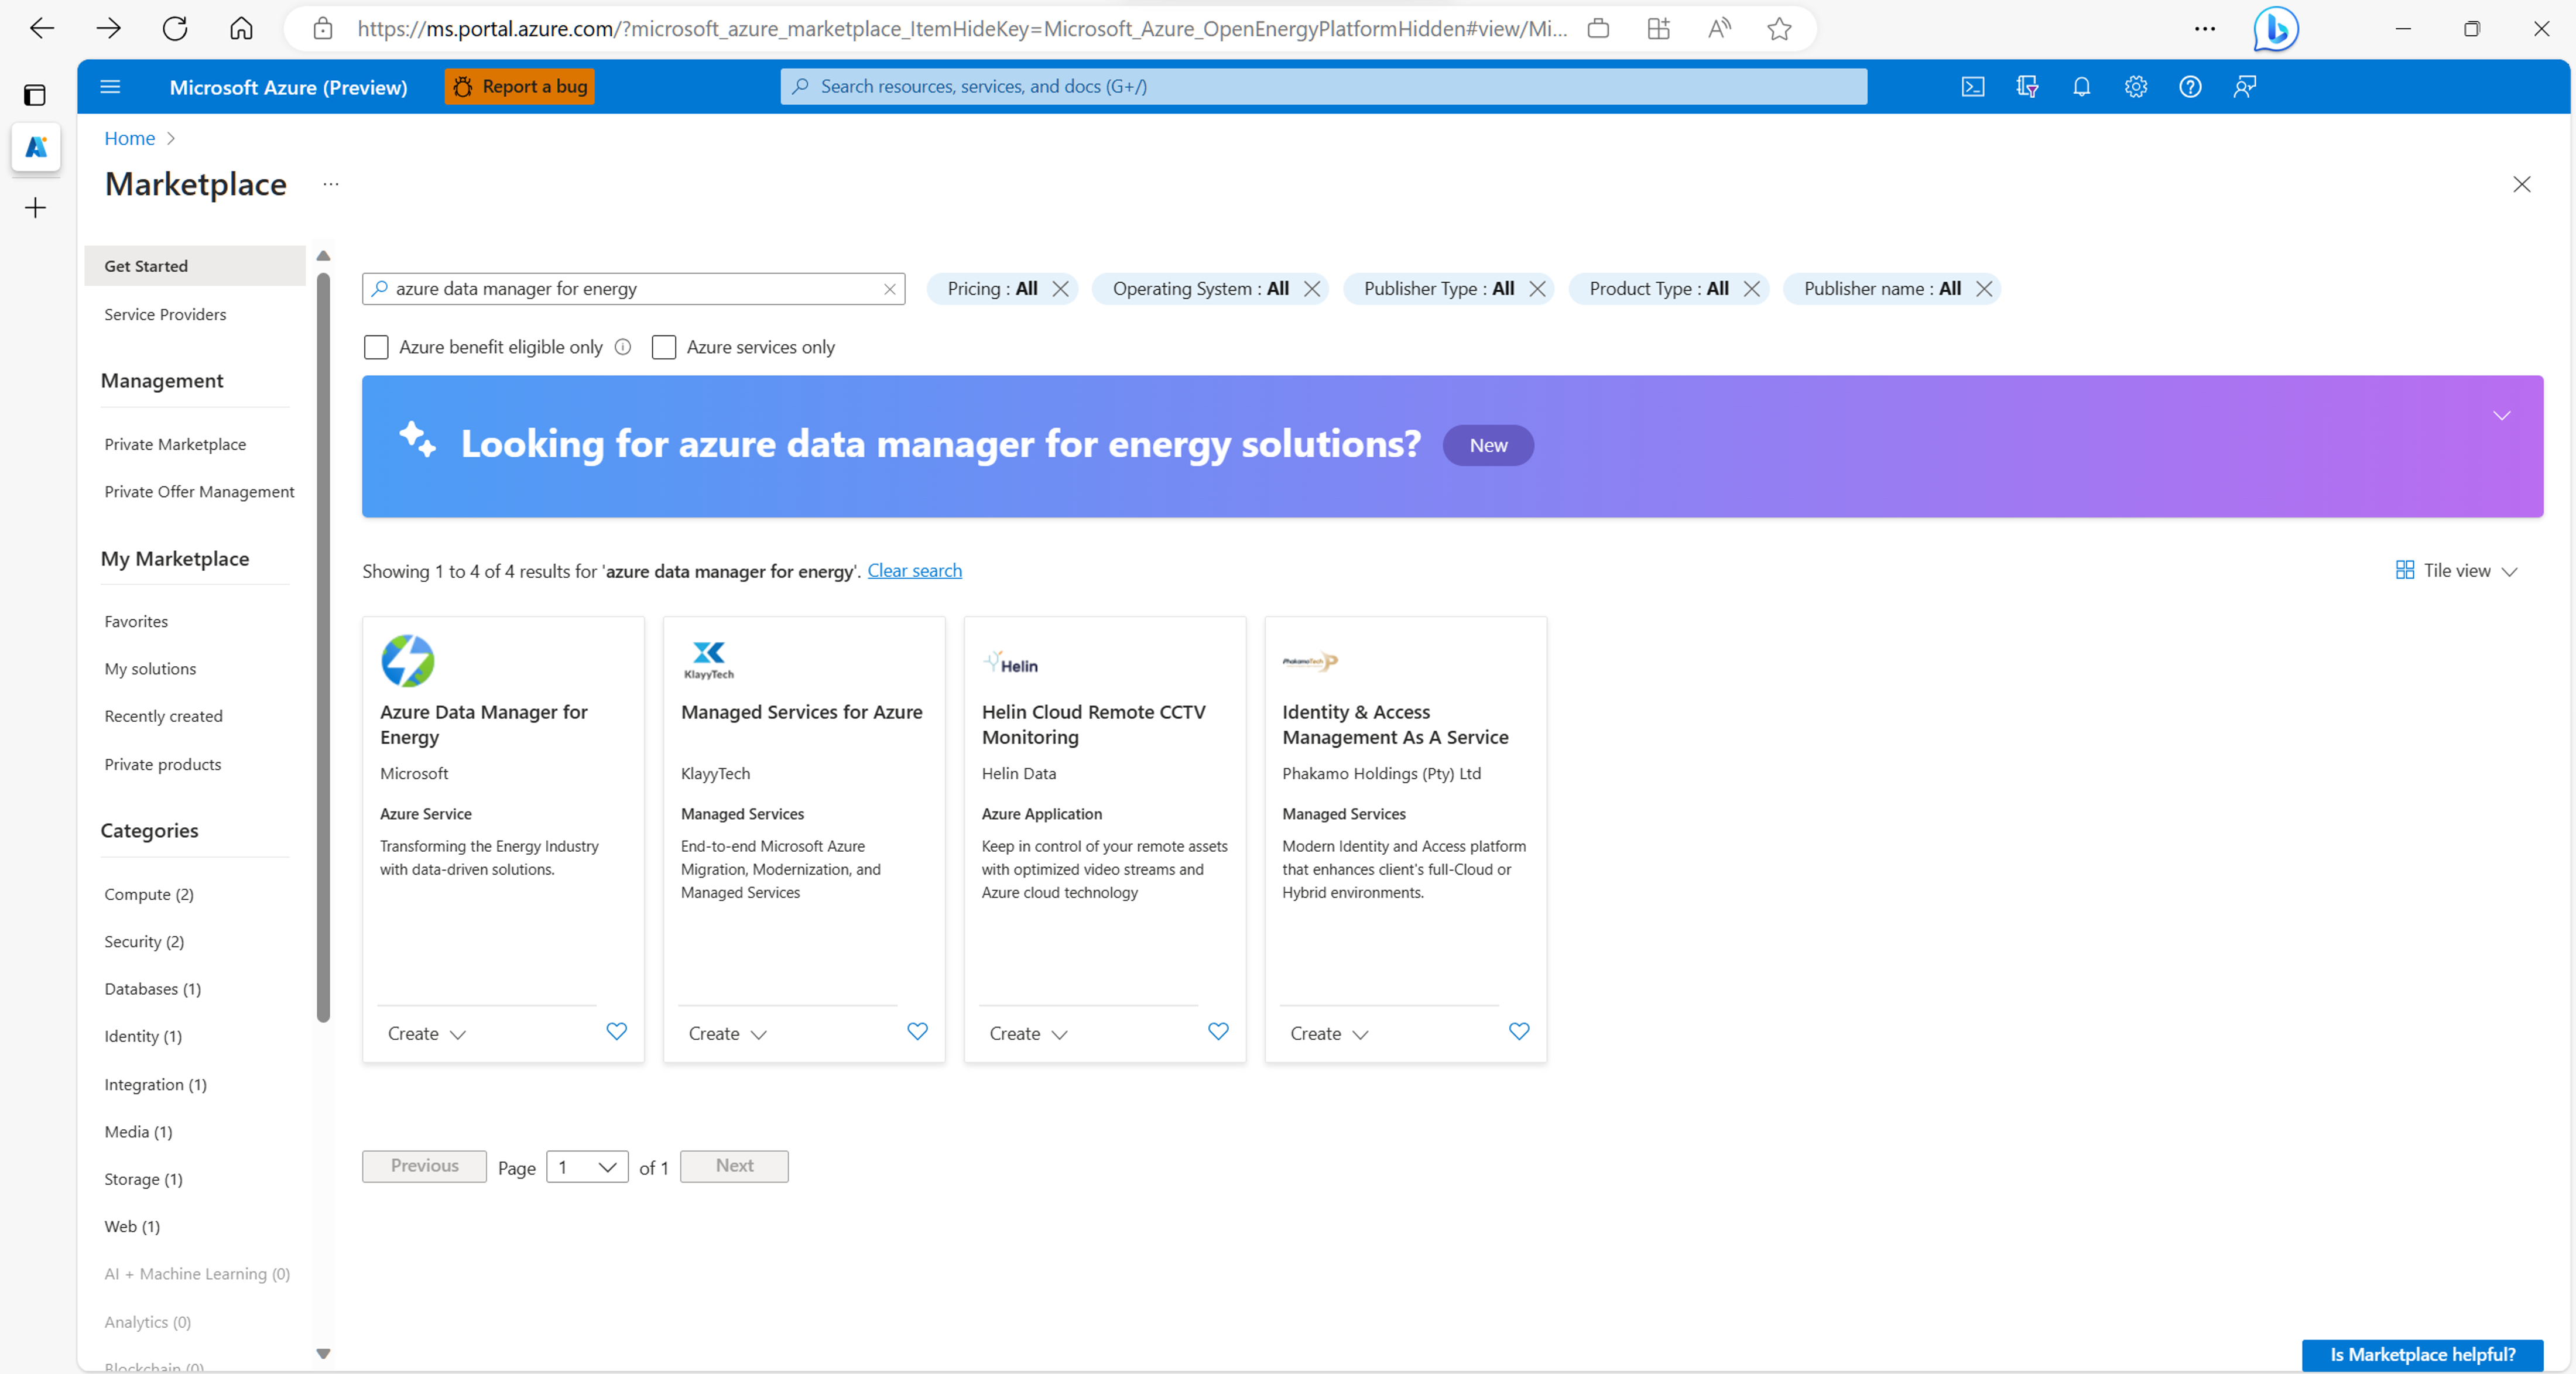
In the search results, on the Azure Data Manager for Energy card, select Create.
A new window appears. Complete the Basics tab by choosing the subscription, resource group, and tier, along with the region in which you want to create your Azure Data Manager for Energy instance.
The default tier is currently Standard. You can use the dropdown list to change your tier selection. Learn more about Azure Data Manager for Energy tiers.
You can also use this tab to configure up to five data partitions.
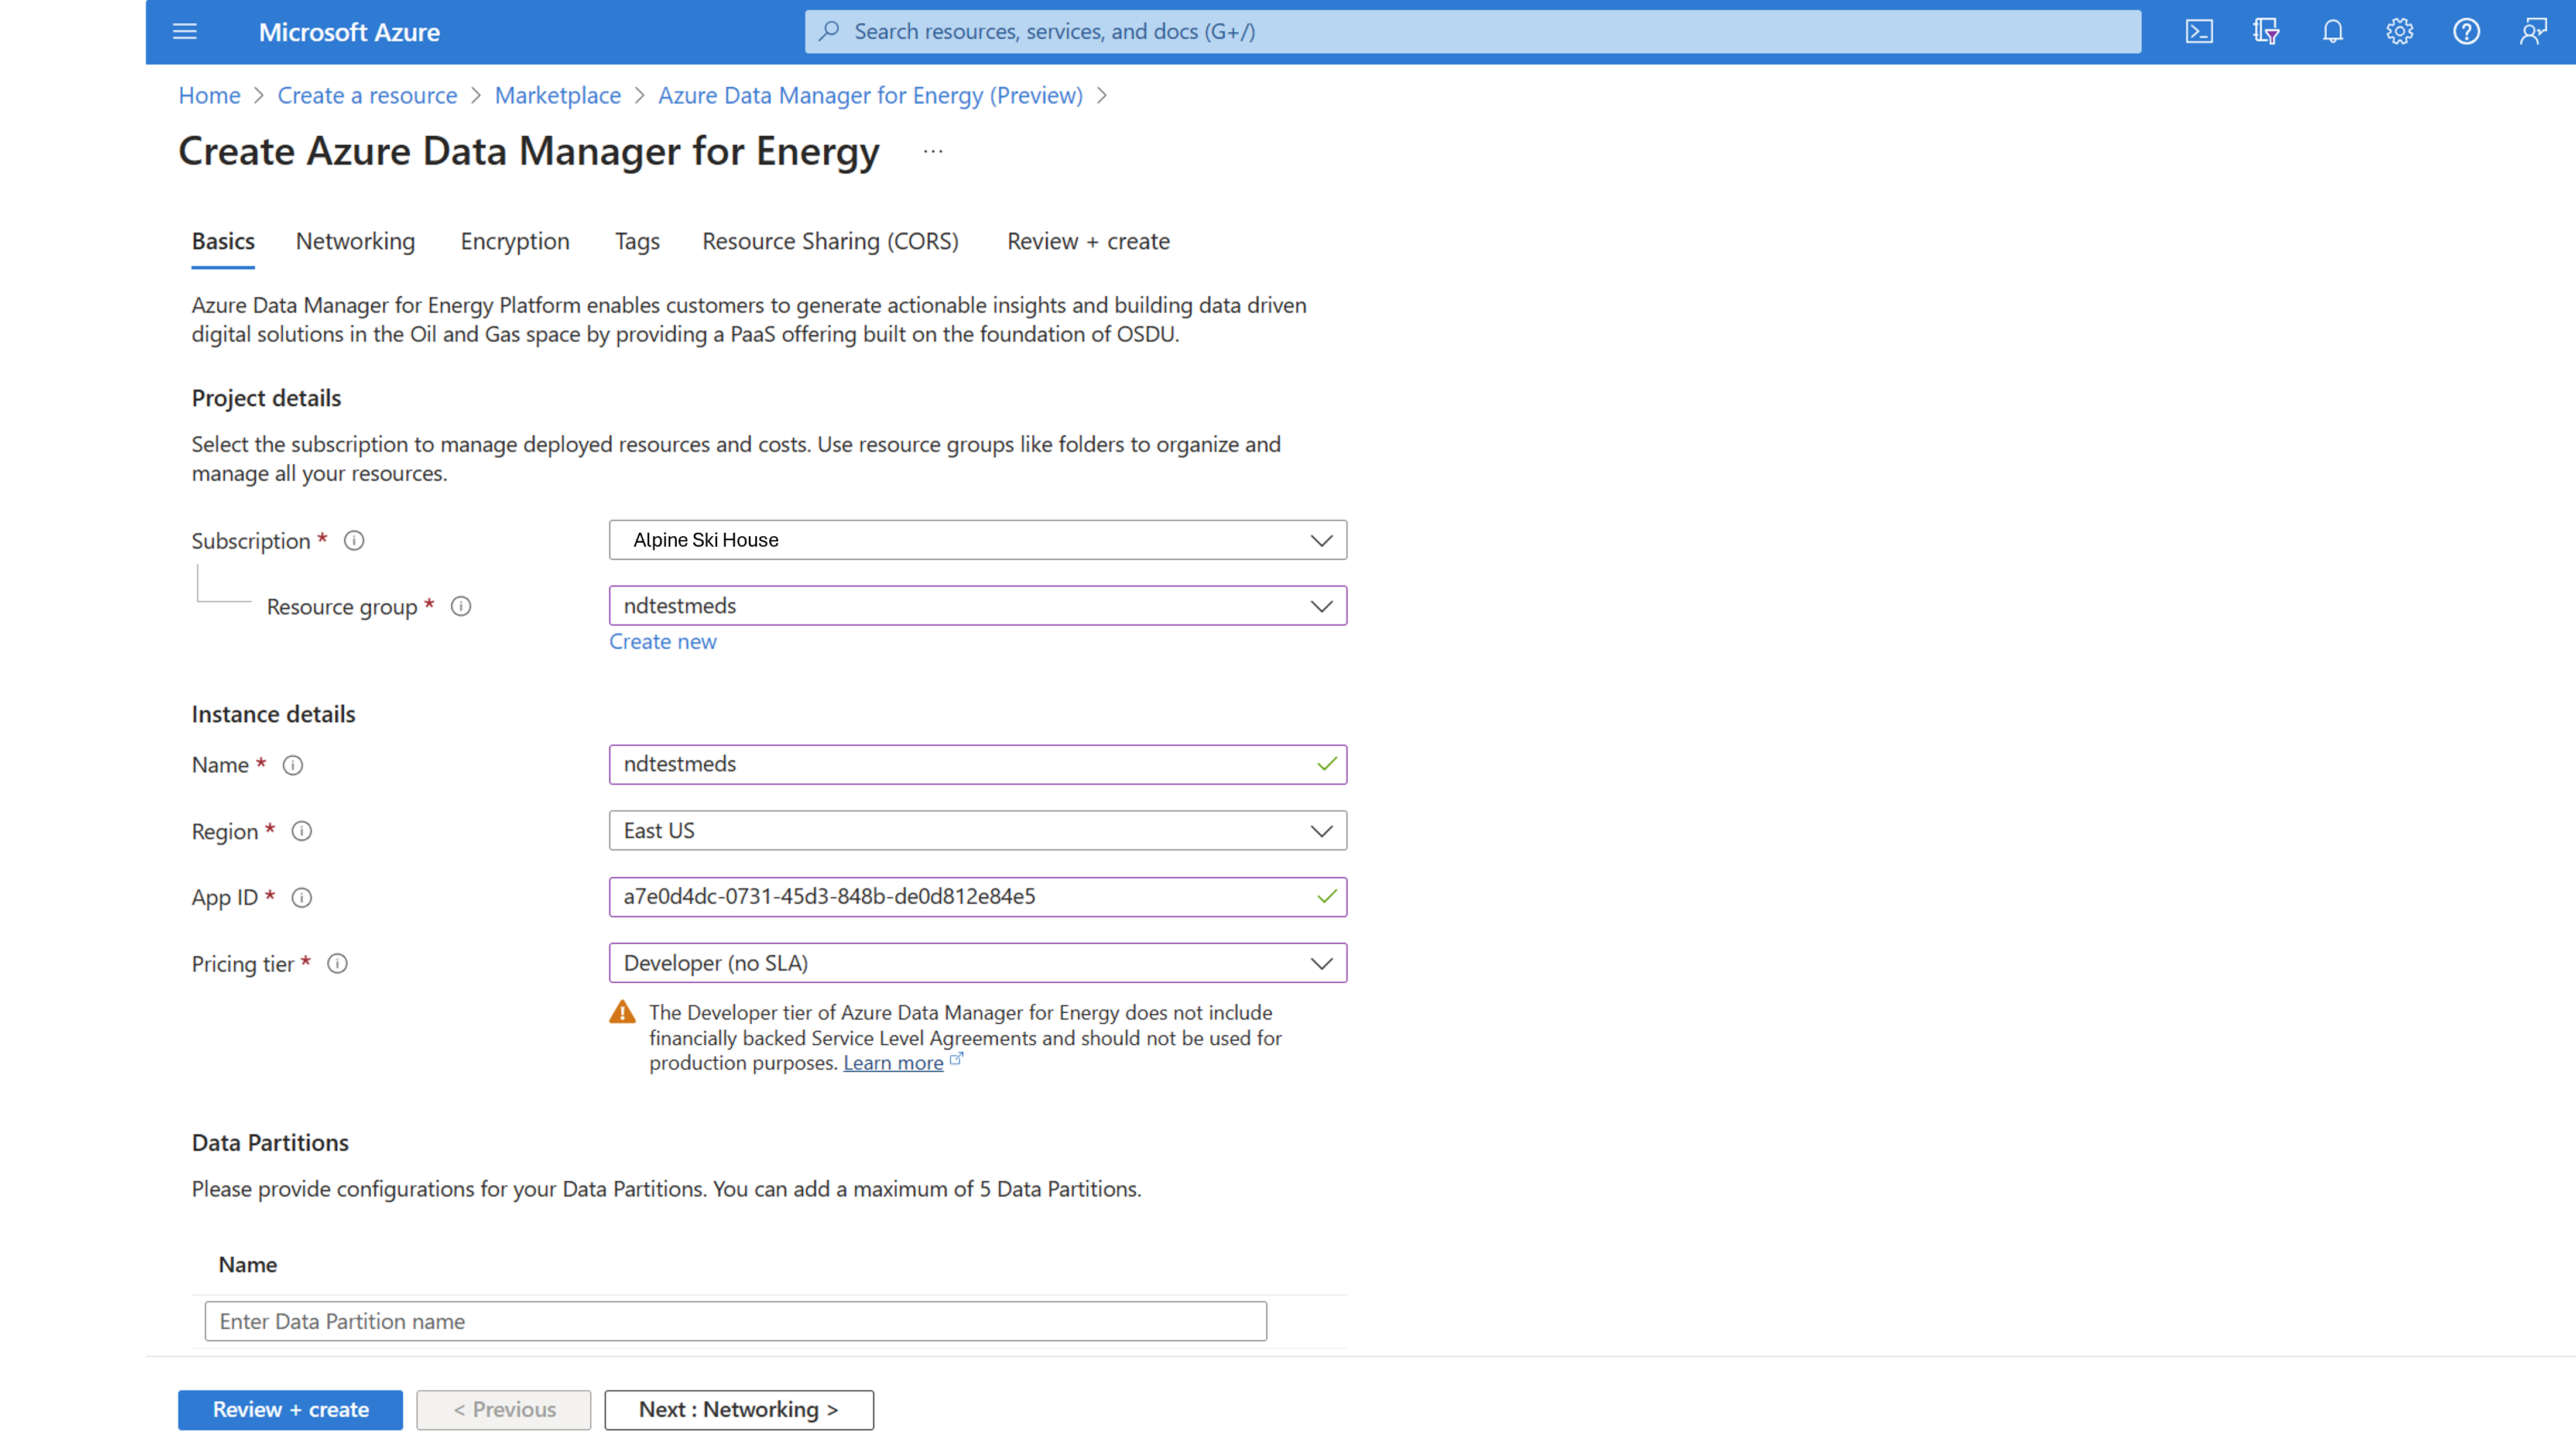
Here are some naming conventions to guide you at this step:
Field Requirements Instance details > Name Only alphanumeric characters are allowed, and the value must be 1 to 15 characters. The name isn't case-sensitive. One resource group can't have two instances with the same name. Instance details > App ID Enter the valid application ID that you generated and saved in the last section. Data Partitions > Name Each name must be 1 to 10 characters and consist of lowercase alphanumeric characters and hyphens. It must start with an alphanumeric character and not contain consecutive hyphens. Data partition names that you choose are automatically prefixed with your Azure Data Manager for Energy instance name. Application and API calls use these compound names to refer to your data partitions. Note
After you create names for your Azure Data Manager for Energy instance and data partitions, you can't change them later.
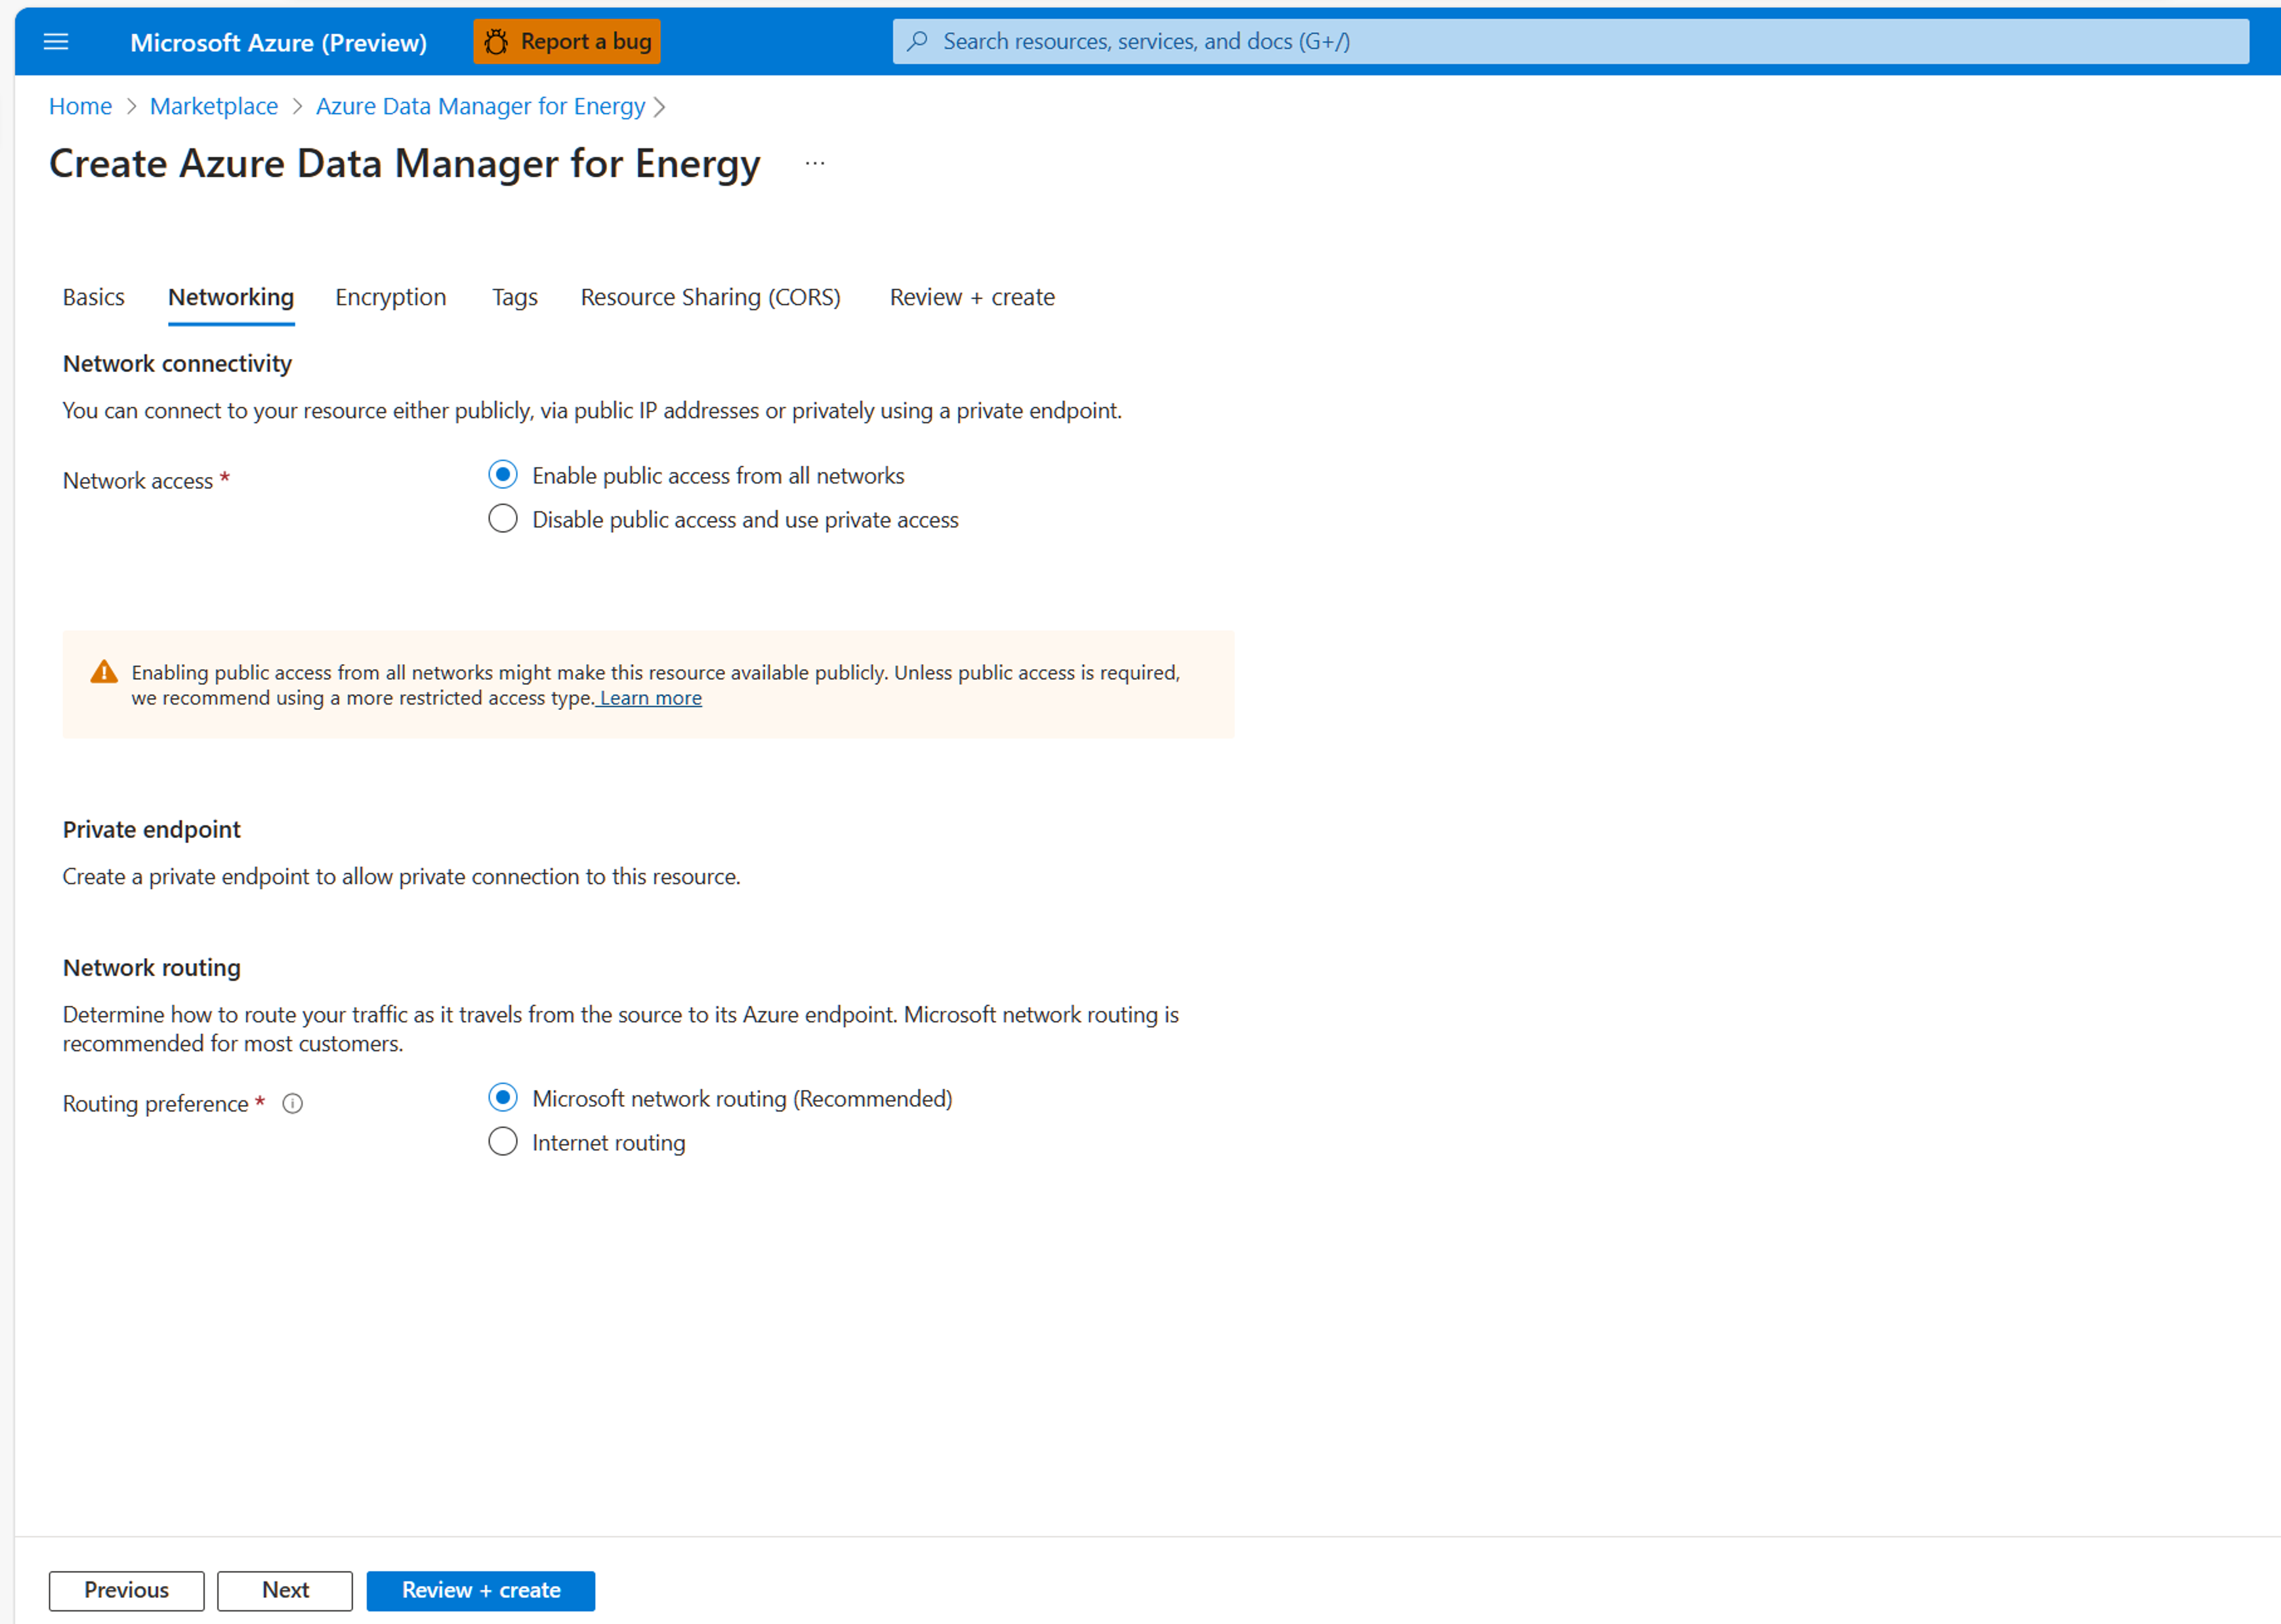
Move to the Networking tab and configure as needed. On this tab, you can choose to disable private access to your Azure Data Manager for Energy instance. Learn more about setting up a private endpoint in Azure Data Manager for Energy.
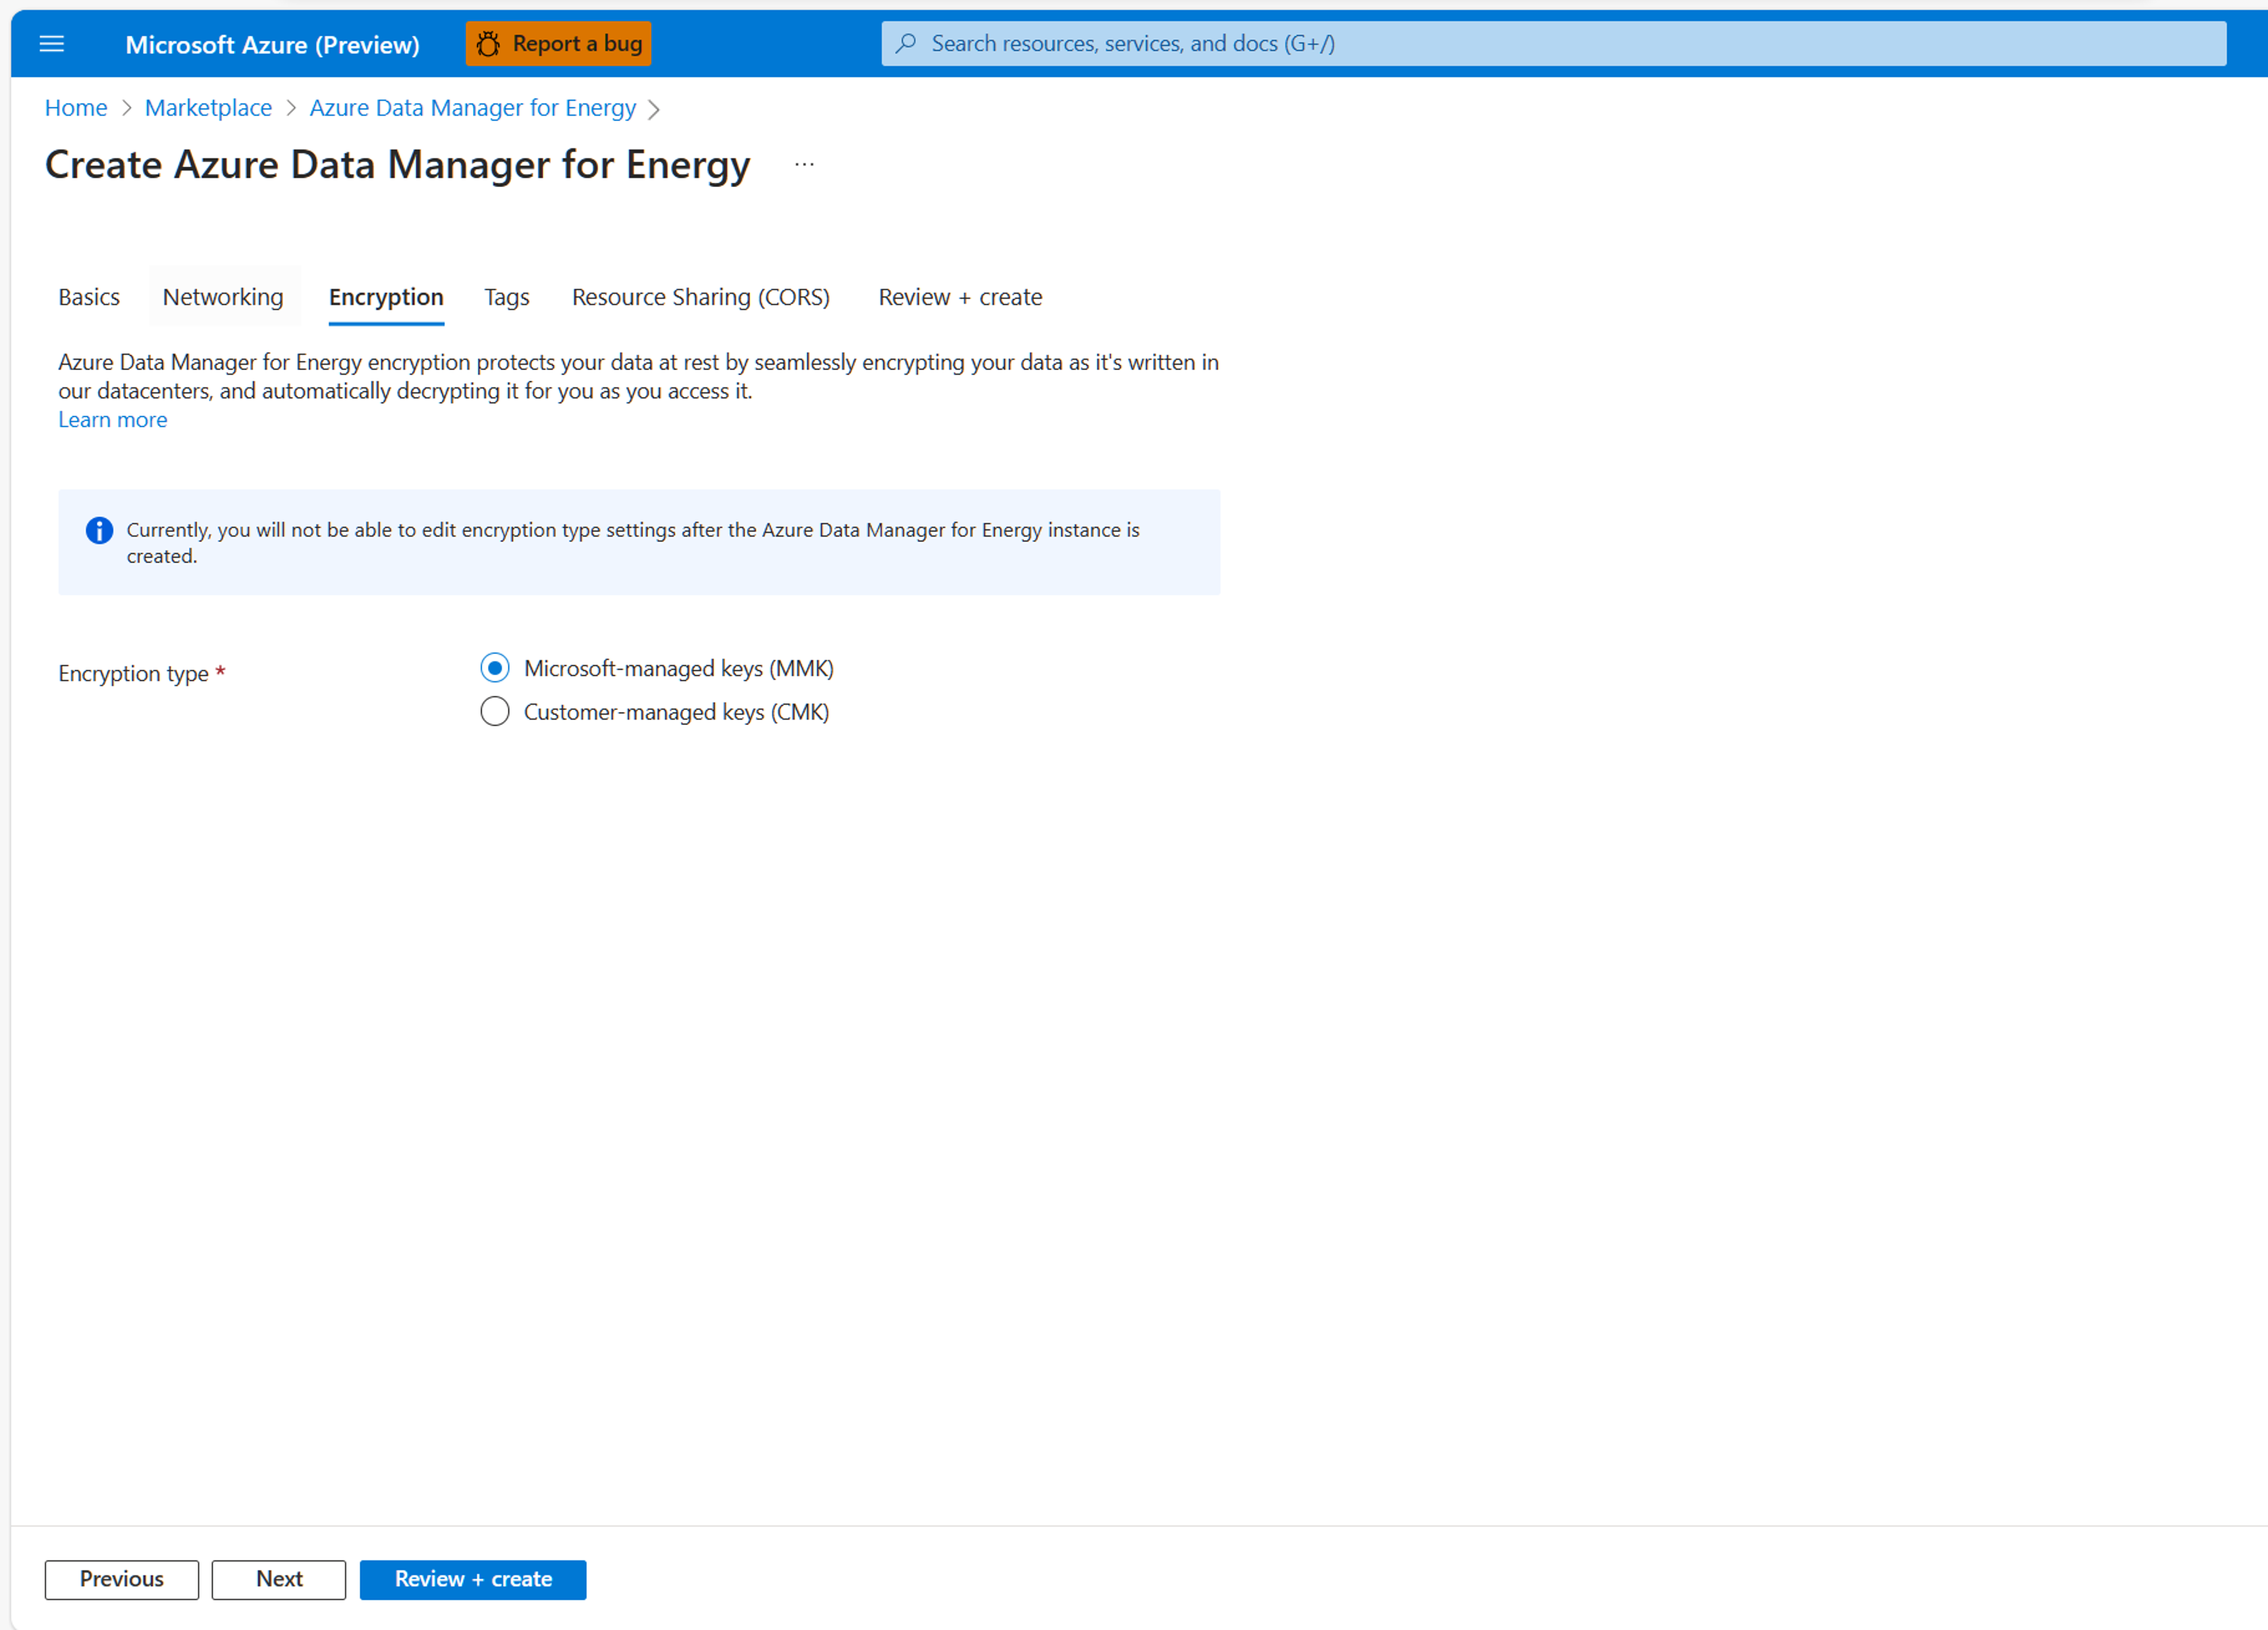
Move to the Encryption tab and configure as needed. You have two options for data encryption: Microsoft-managed keys or customer-managed keys. Learn how to encrypt your data with customer-managed encryption keys. Learn how to manage data security by using managed identities in Azure Data Manager for Energy.
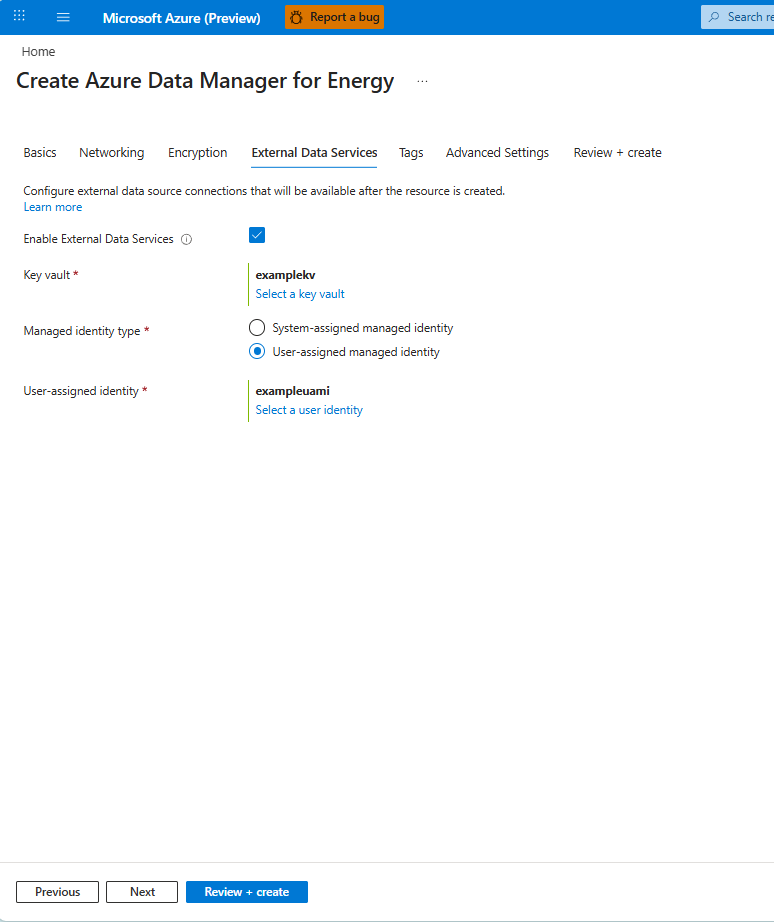
Move to the External Data Services tab. If you want to configure external data source connections, select the Enable External Data Services checkbox.
After it's enabled, select Select a key vault and choose one of the key vaults in the selected subscription.
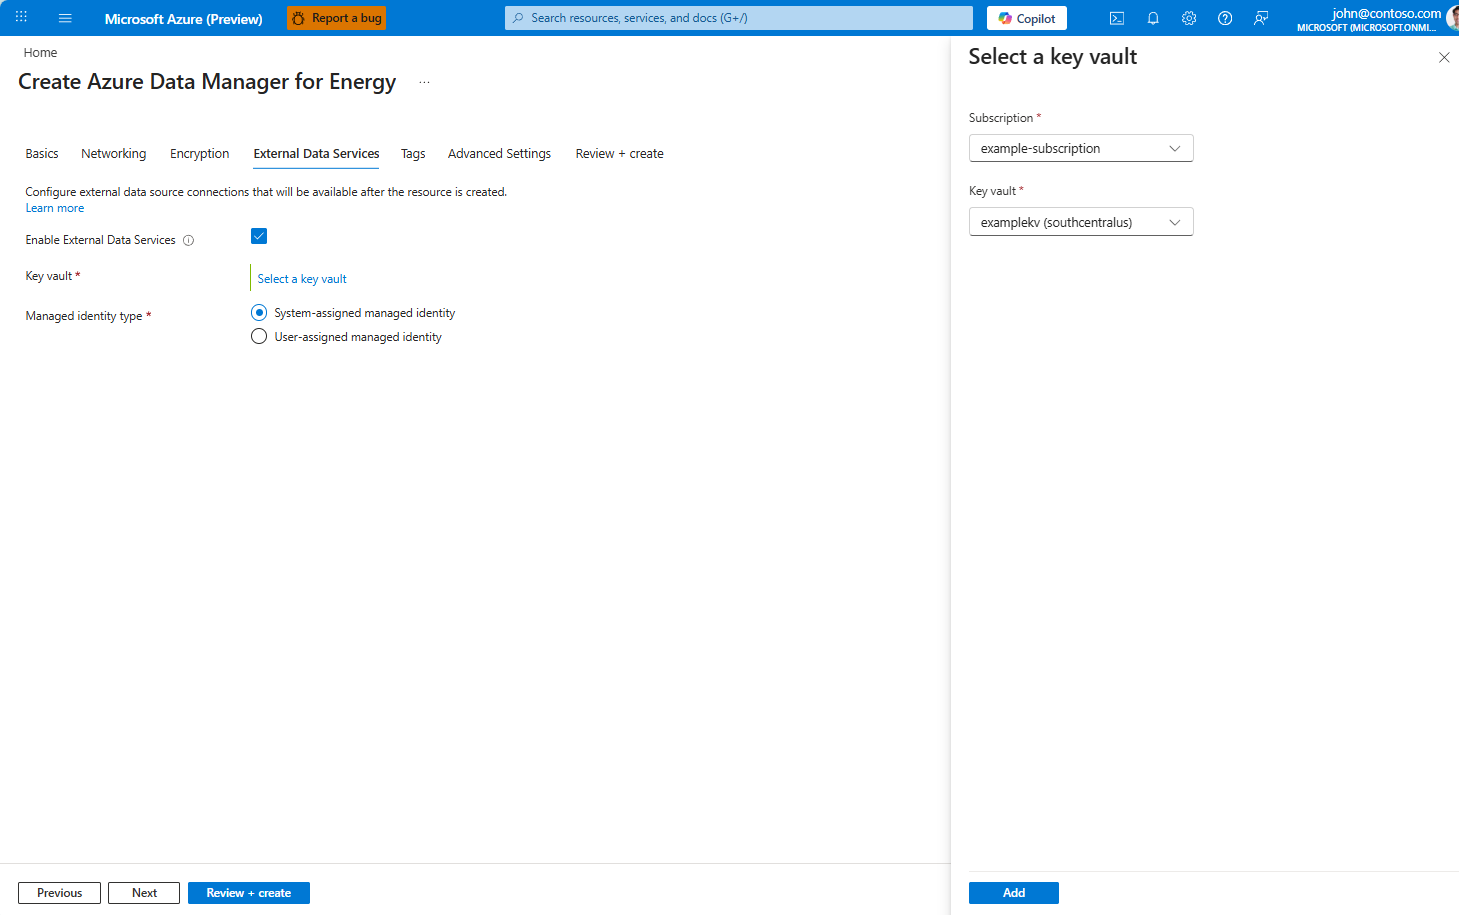
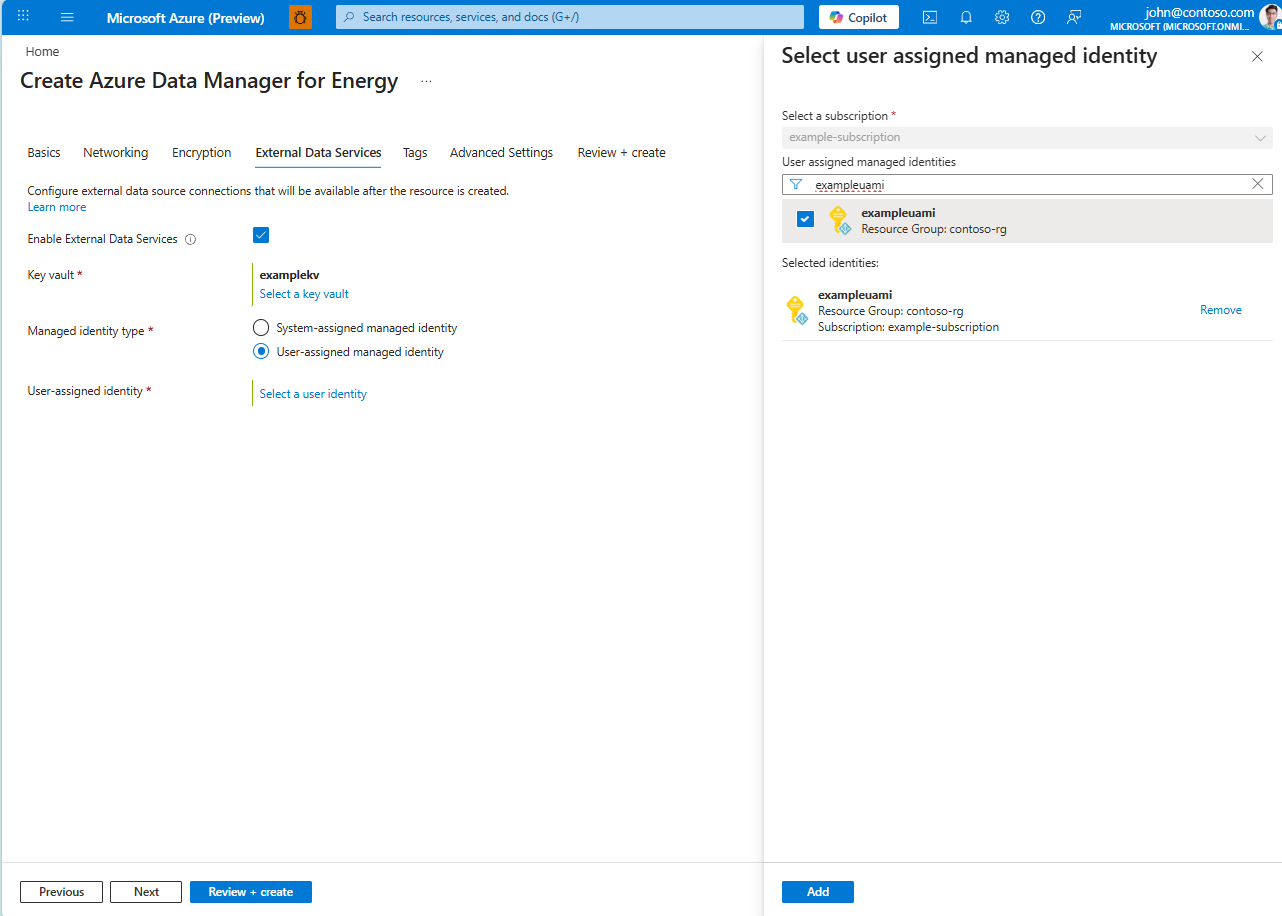
Under Managed Identity Type, choose either System-assigned managed identity or User-assigned managed identity.
Note
A system-assigned managed identity is created during Azure Data Manager for Energy instance provisioning. You must wait until instance creation is complete before granting this identity access to the external data source's secret.
If you choose User-assigned managed identity, select Select a user identity and choose one of the previously created user-assigned managed identities in the selected subscription.
Your final selection looks like the following screenshot:
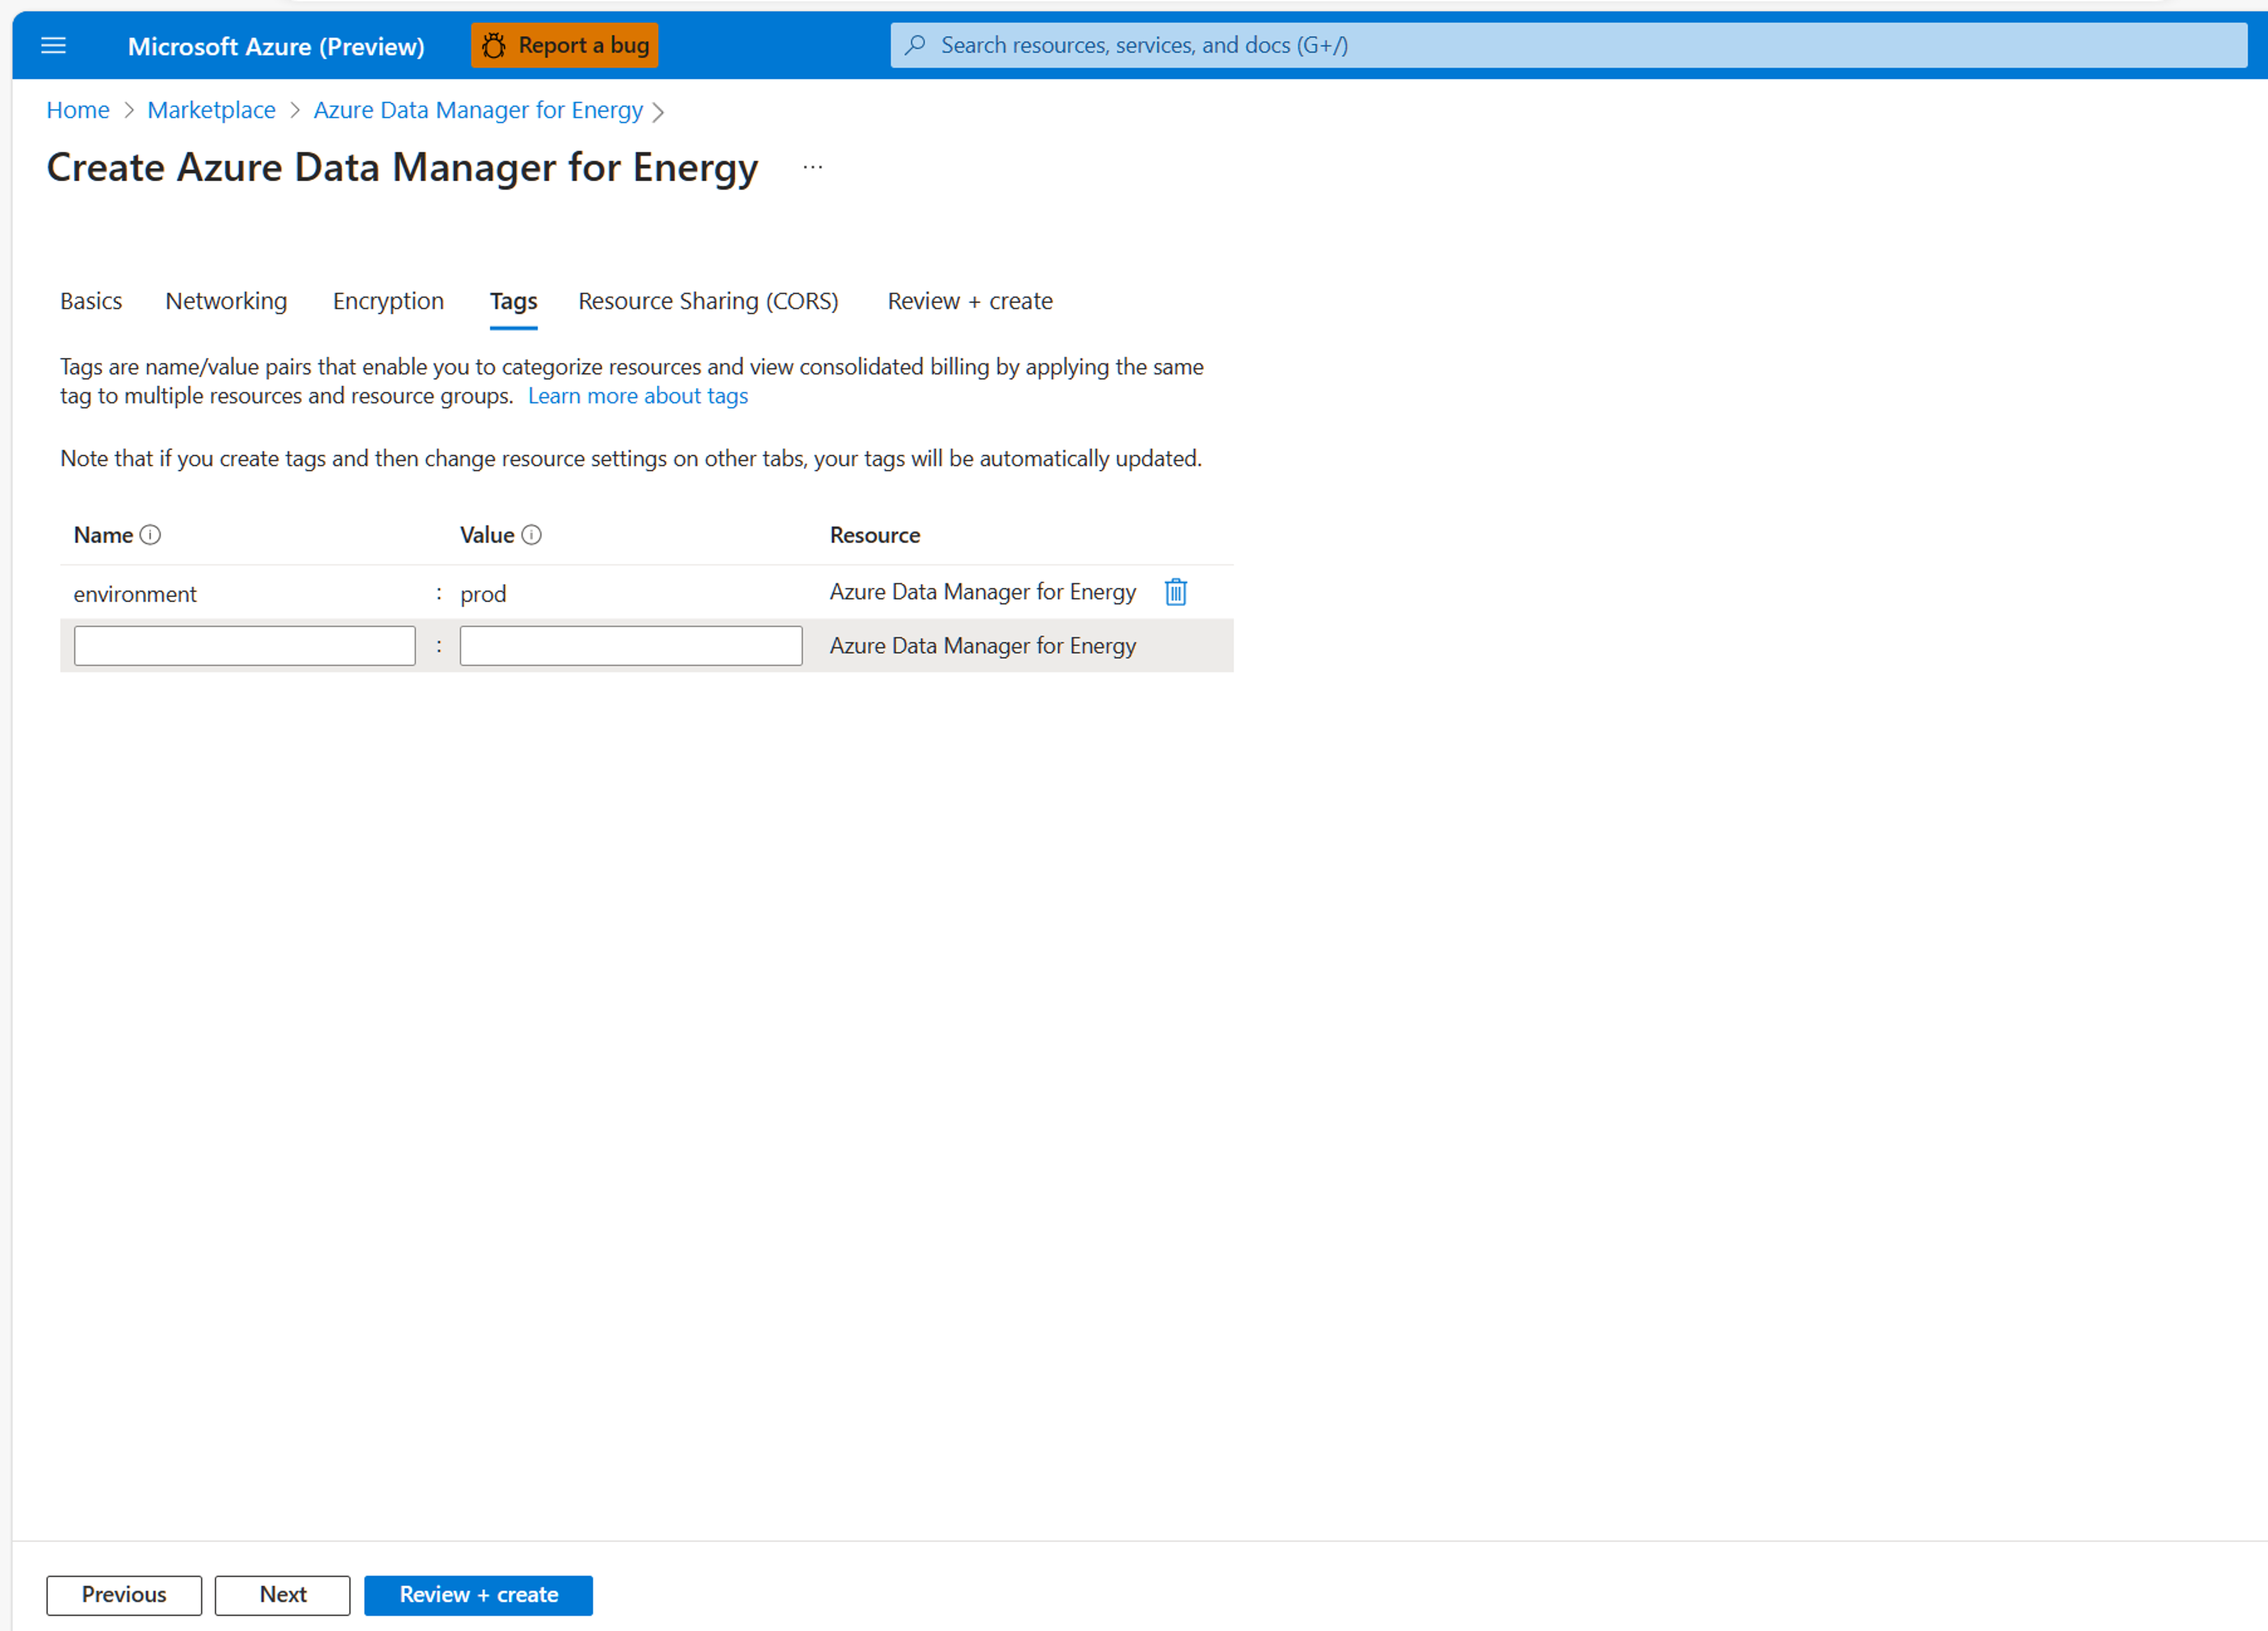
Move to the Tags tab and enter any tags that you want to specify. If you don't want to specify tags, leave the boxes blank.
Move to the Advanced Settings tab to configure cross-origin resource sharing, upgrade settings, and, if available to you as a customer in the limited preview for the feature, reference data values settings. To learn more about cross-origin resource sharing (CORS), see Use CORS for resource sharing in Azure Data Manager for Energy. To learn more about reference data values, see Syncing Reference Data Values. To learn more about upgrade settings, see Manage upgrade settings.
In the Upgrade Settings section, select either Automatic or Deferred for the Upgrade Policy. When set to Deferred, you have up to 30 days to validate new milestone releases before your instance is upgraded.

Move to the Review + create tab.
Validation takes a few seconds. After your configuration passes the basic validation tests, review the terms and configuration details.
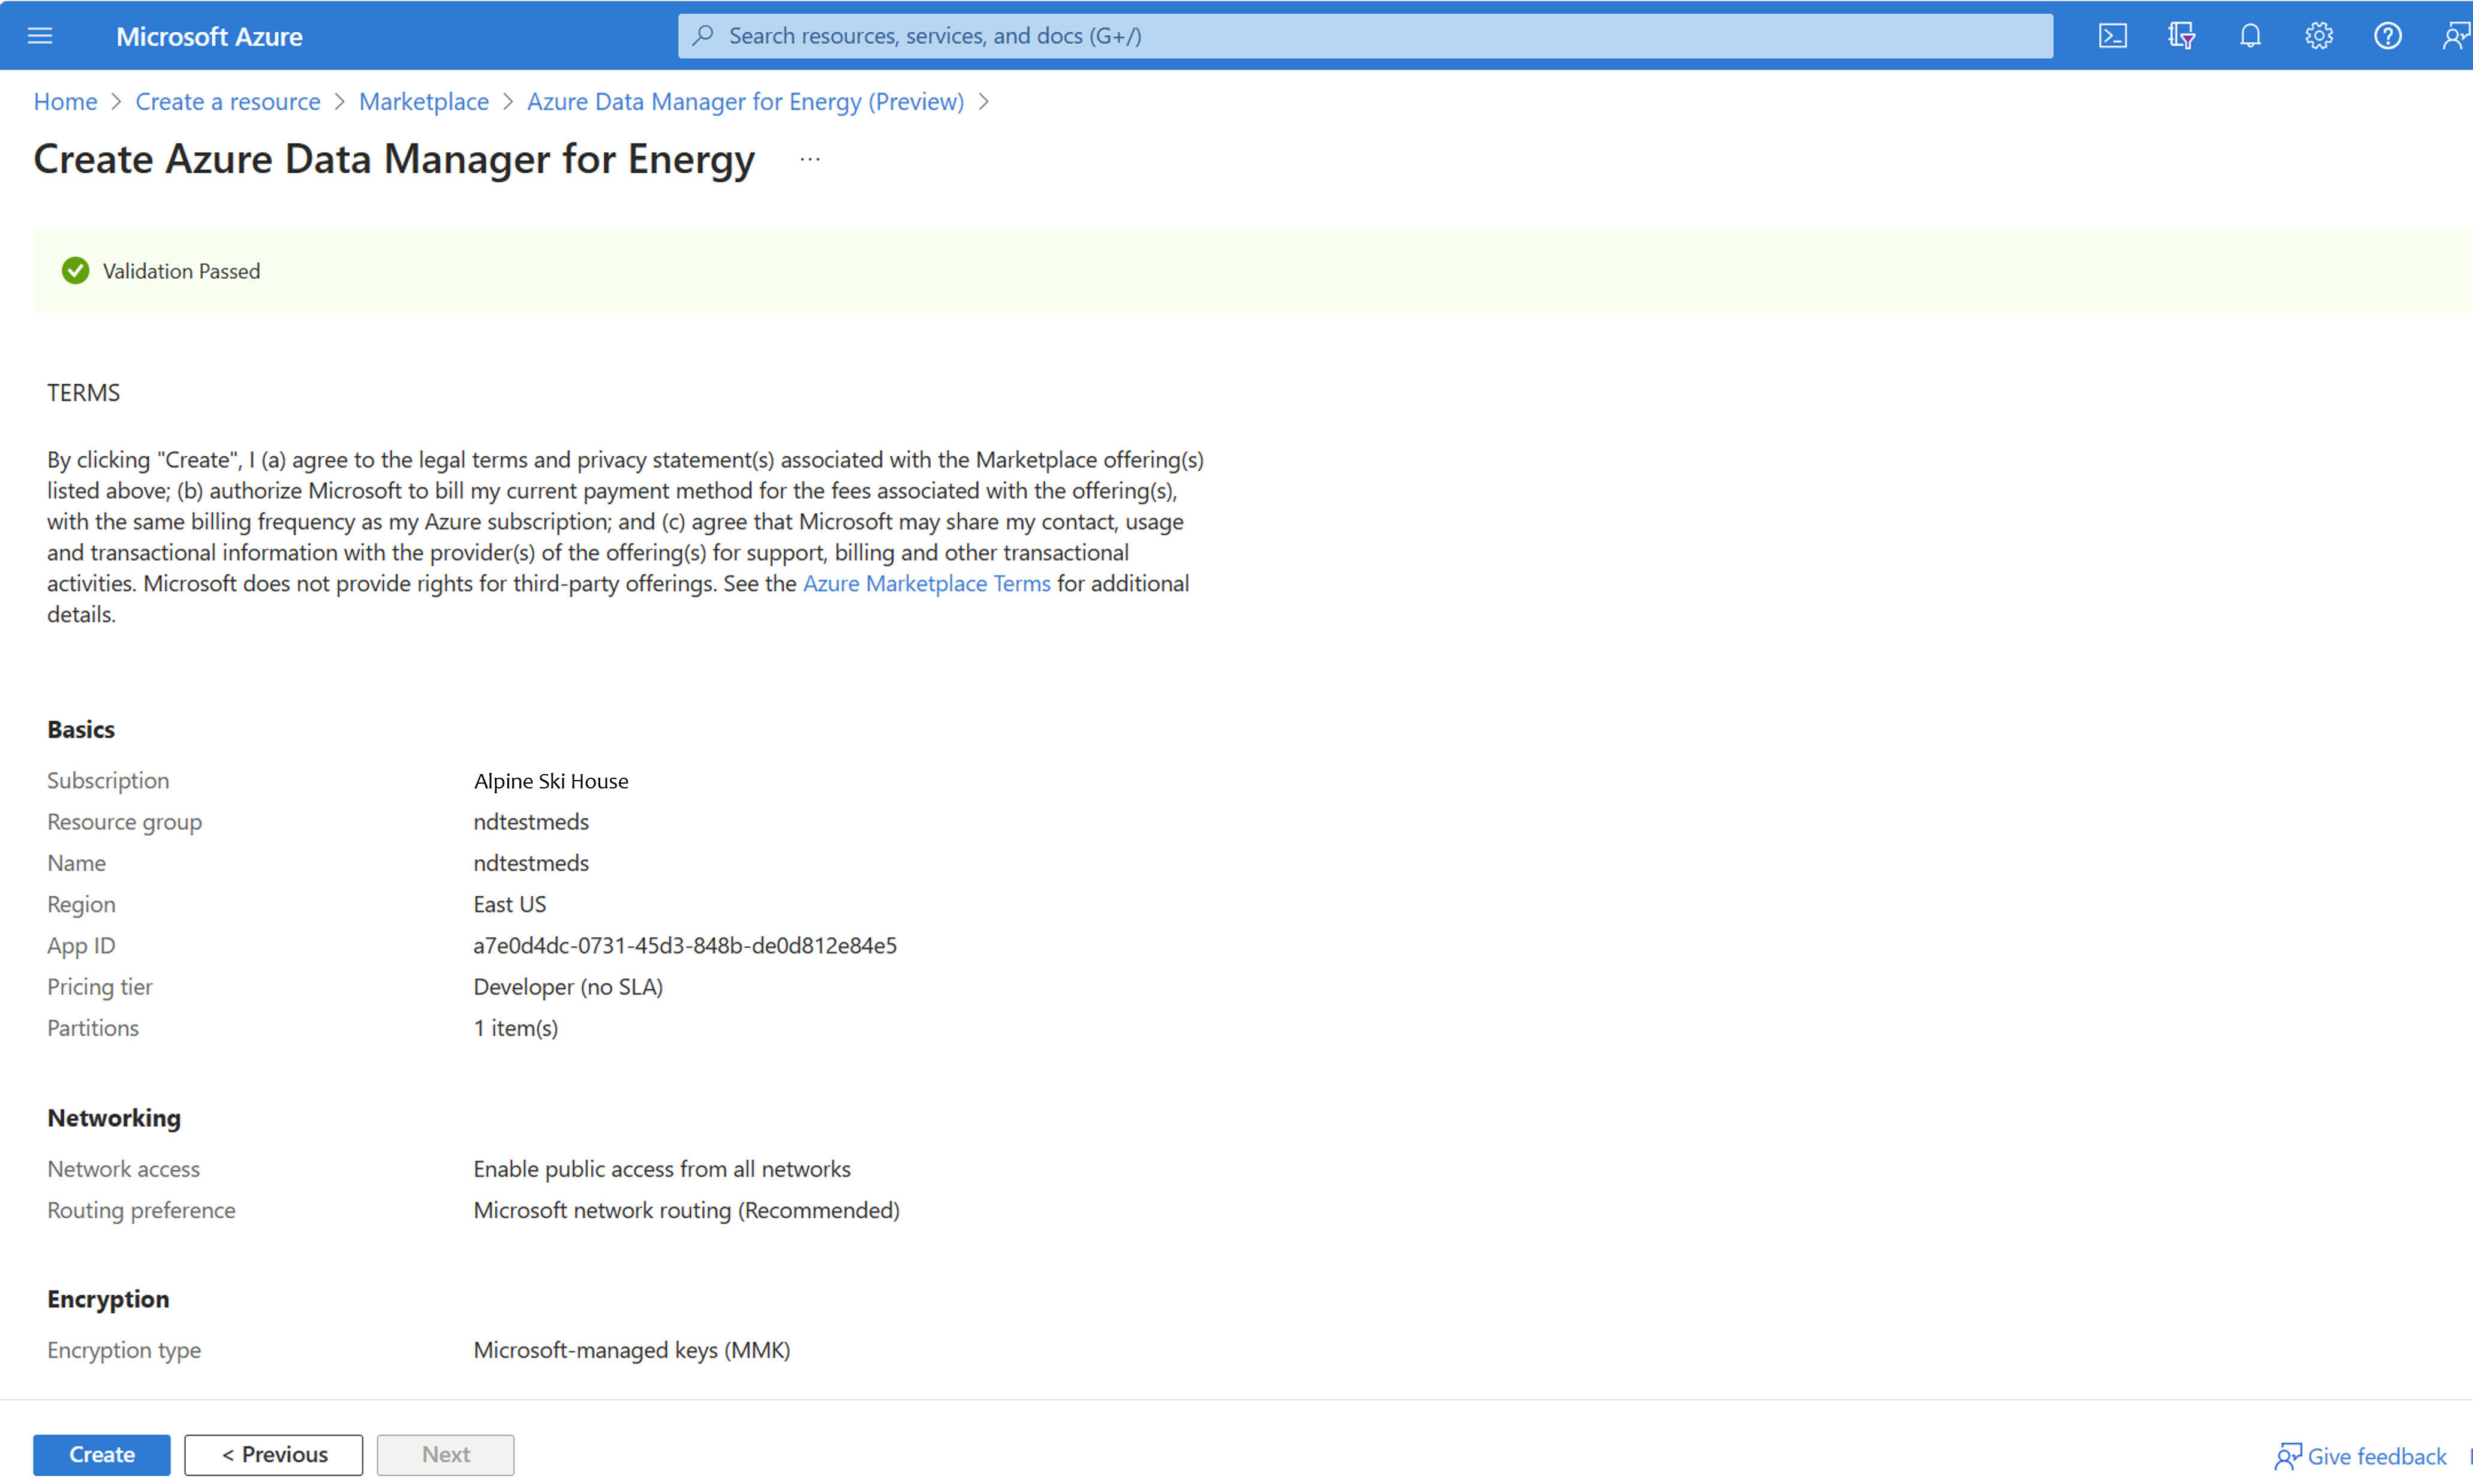
Optional step: On the Review + create tab, you can download an Azure Resource Manager template and use it for automated deployments of Azure Data Manager for Energy in the future. Select View automation template.
Select Create to start the deployment.
Wait while the deployment happens in the background. Options are available to view details of the created instance.
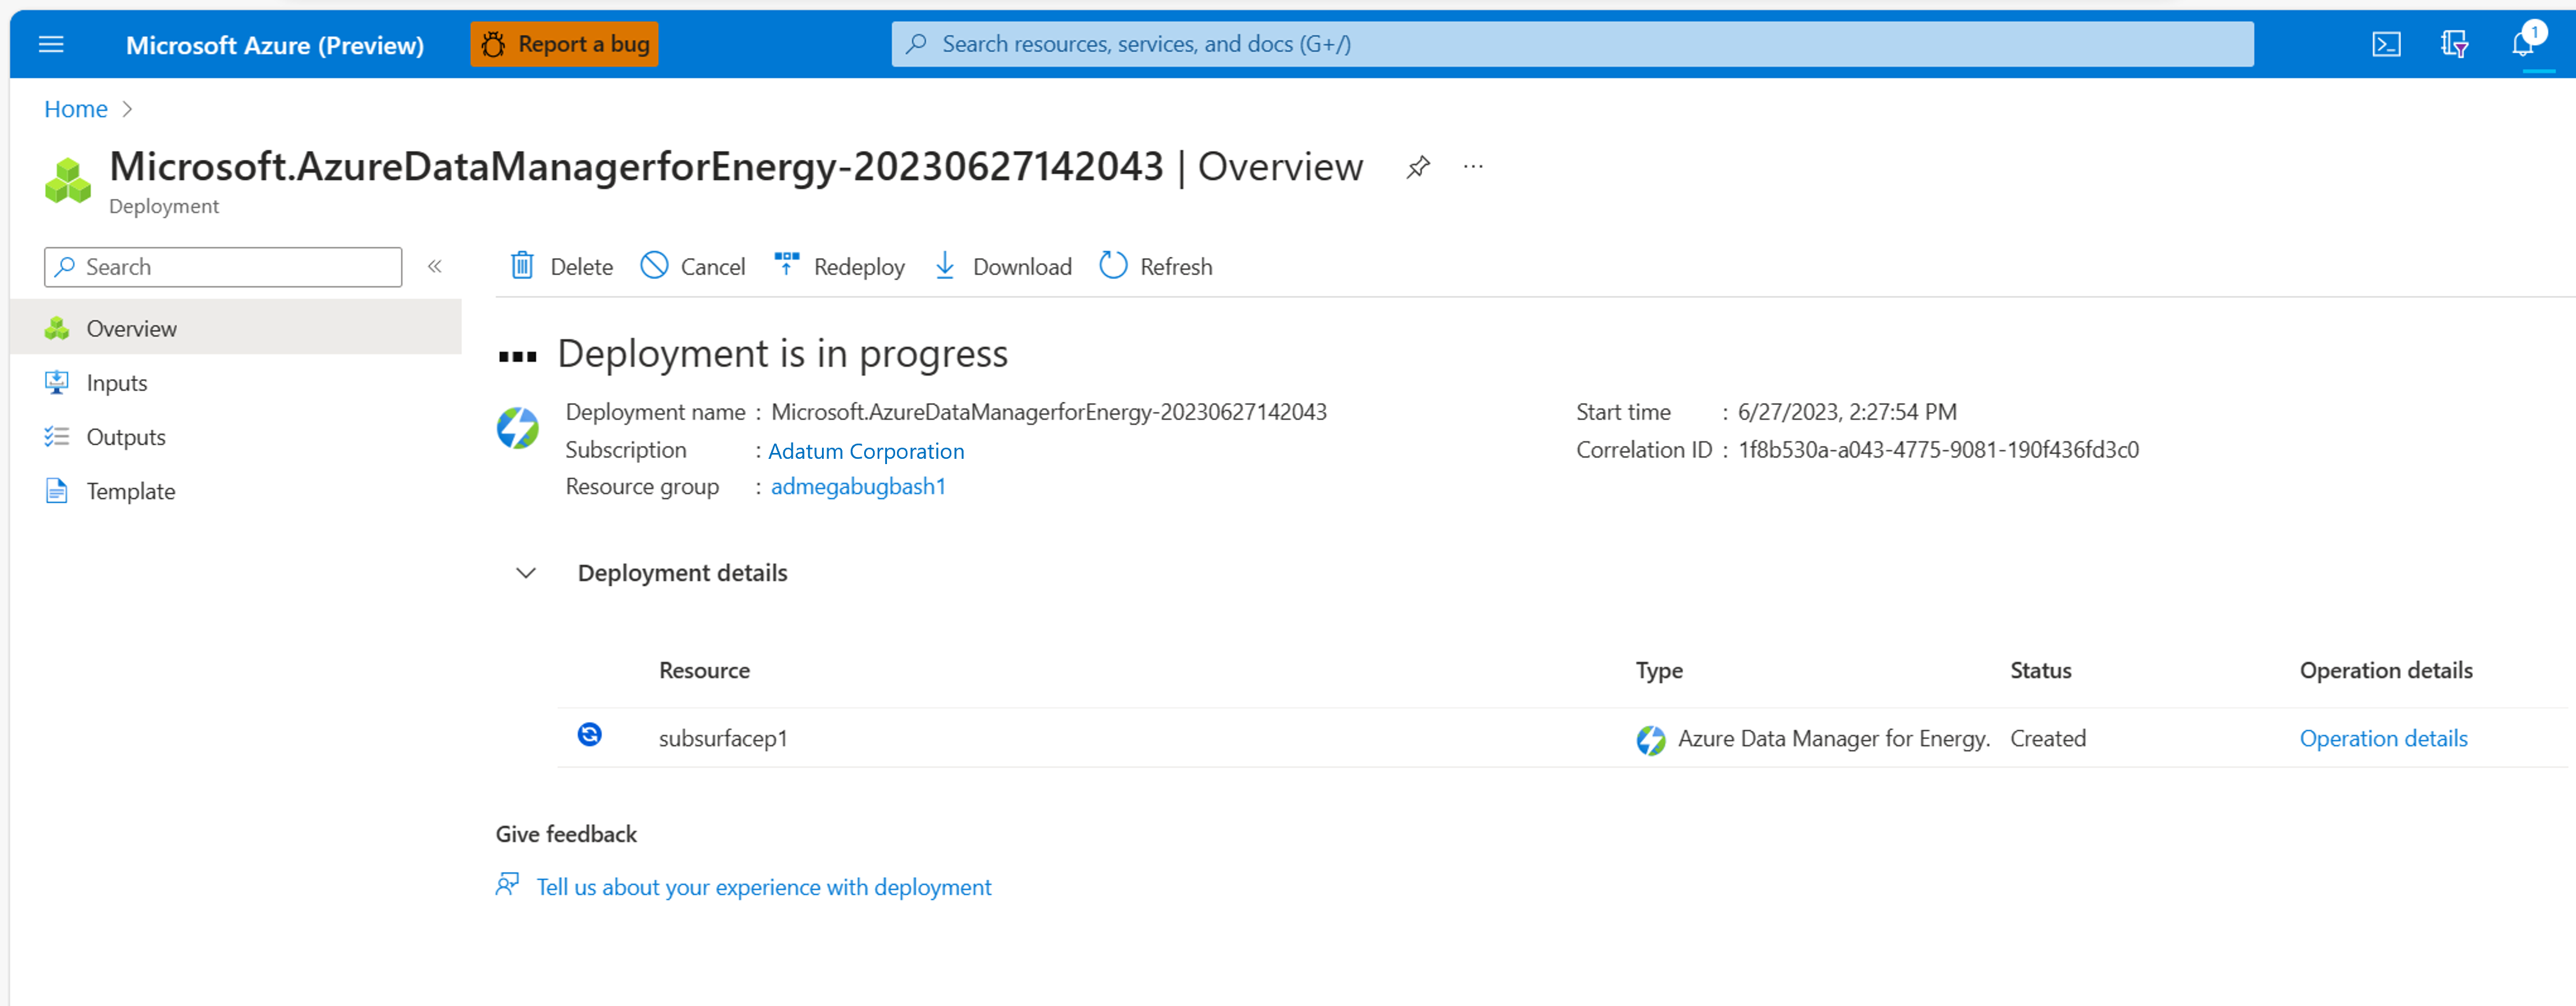


You can find the newly created Azure Data Manager for Energy resource in your resource group. Select it to open the resource UI in the portal. Details such as data partitions, instance URI, and app ID are available.

Delete an Azure Data Manager for Energy instance
Deleting an Azure Data Manager for Energy instance also deletes any data that the instance ingested. This action is permanent. You can't recover ingested data after deletion.
To delete an Azure Data Manager for Energy instance:
Remove any locks that you set at the resource group level. Locked resources remain active until you remove the locks and successfully delete the resources.
Sign in to the Azure portal and delete the resource group in which the Azure Data Manager for Energy components are installed.
(Optional) Go to Microsoft Entra ID and delete the app registration that you linked to your Azure Data Manager for Energy instance.