Note
Access to this page requires authorization. You can try signing in or changing directories.
Access to this page requires authorization. You can try changing directories.
The article provides step-by-step instructions to publish events to Azure Event Grid in the CloudEvents JSON format and deliver those events by using the push delivery model.
To be specific, you use Azure portal and Curl to publish events to a namespace topic in Event Grid and push those events from an event subscription to an Event Hubs handler destination. For more information about the push delivery model, see Push delivery overview.
If you don't have an Azure account, create a free account before you begin.
Create an Event Grid namespace
An Event Grid namespace provides a user-defined endpoint to which you post your events. The following example creates a namespace in your resource group using Bash in Azure Cloud Shell. The namespace name must be unique because it's part of a Domain Name System (DNS) entry.
Navigate to the Azure portal.
In the search bar at the topic, type
Event Grid Namespaces, and selectEvent Grid Namespacesfrom the results.
On the Event Grid Namespaces page, select + Create on the command bar.

On the Create Namespace page, follow these steps:
- Select the Azure subscription in which you want to create the namespace.
- Create a new resource group by selecting Create new or select an existing resource group.
- Enter a name for the namespace.
- Select the location where you want to create the resource group.
- Then, select Review + create.
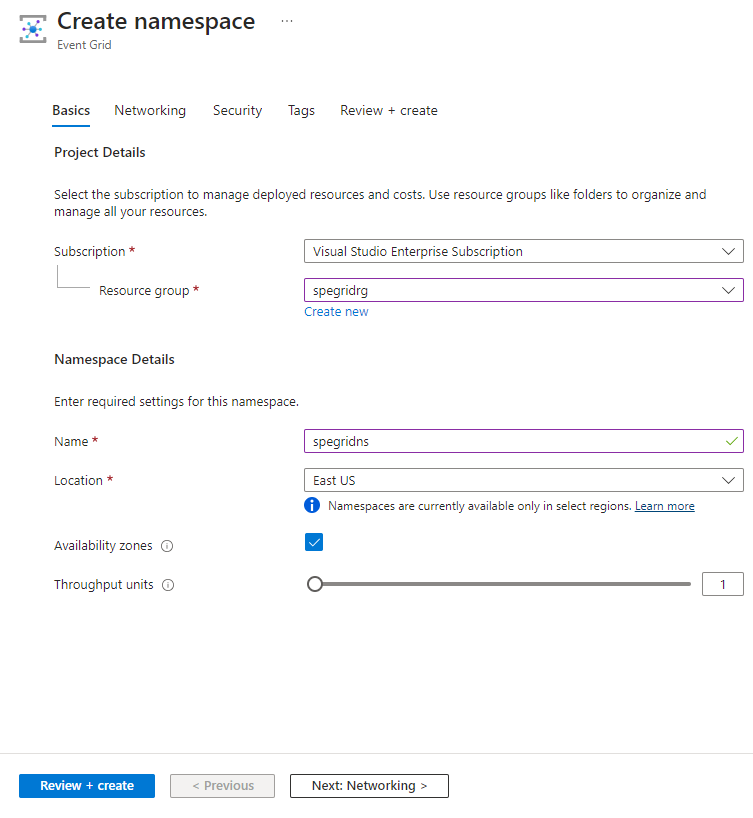
- On the Review + create page, select Create.
On the Deployment page, select Go to resource after the successful deployment.


Get the access key
- On the Event Grid Namespace page, select Access keys on the left menu.
- Select copy button next to the access key.

- Save the access key somewhere. You use it later in this quickstart.

Enable managed identity for the Event Grid namespace
Enable system assigned managed identity in the Event Grid namespace. To deliver events to event hubs in your Event Hubs namespace using managed identity, follow these steps:
- Enable system-assigned or user-assigned managed identity: namespaces. Continue reading to the next section to find how to enable managed identity using Azure CLI.
- Add the identity to the Azure Event Hubs Data Sender role on the Event Hubs namespace, continue reading to the next section to find how to add the role assignment.
- Configure the event subscription that uses an event hub as an endpoint to use the system-assigned or user-assigned managed identity.
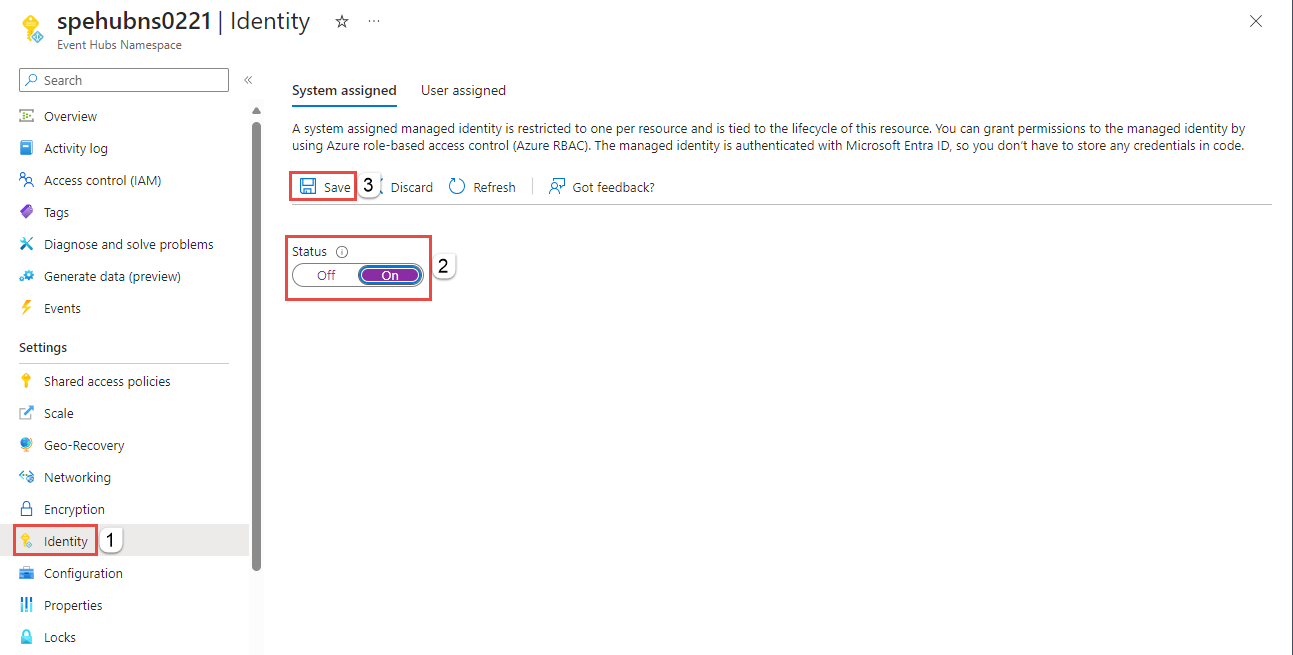
In this section, you enable a system-assigned managed identity on the namespace. You do the other steps later in this quickstart.
On the Event Grid Namespace page, select Identity on the left menu.
On the Identity page, select On for the Status.
Select Save on the command bar.

Create a topic in the namespace
Create a topic that's used to hold all events published to the namespace endpoint.
- Select Topics on the left menu.
- On the Topics page, select + Topic on the command bar.

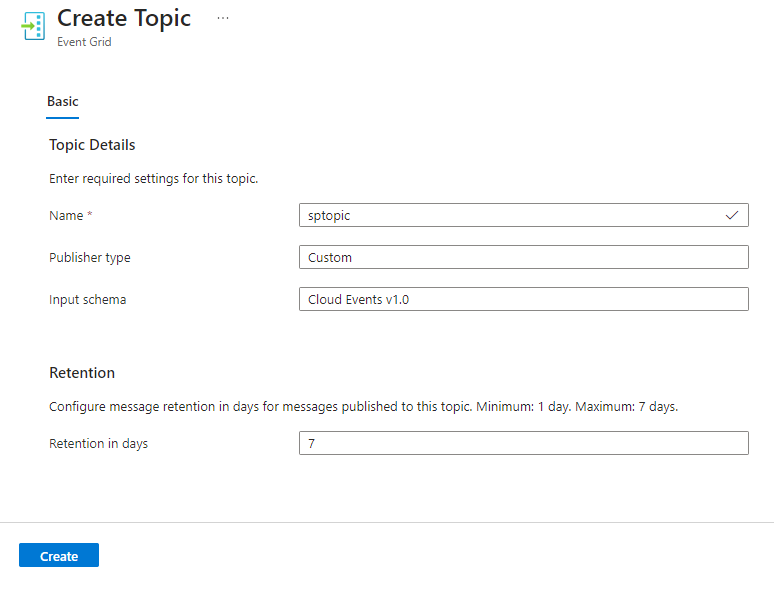
- On the Create Topic page, follow these steps:
- Enter a name for the topic.
- Select Create.


Create an Event Hubs namespace
Create an Event Hubs resource that is used as the handler destination for the namespace topic push delivery subscription. Do these steps in a separate tab of your internet browser or in a separate window. Navigate to the Azure portal and sign in using the same credentials you used before and the same Azure subscription.
- Type Event Hubs in the search bar, and select Event Hubs.
- On the Event Hubs page, select + Create on the command bar.
- On the Create Namespace page, follow these steps:
- Select the Azure subscription you used to create the Event Grid namespace.
- Select the resource group you used earlier.
- Enter a name for the Event Hubs namespace.
- Select the same location you used for the Event Grid namespace.
- Select Basic for the Pricing tier.
- Select Review + create.

- On the Review page, select Create.
- On the Deployment page, select Go to resource after the deployment is successful.

Add Event Grid managed identity to Event Hubs Data Sender role
- On the Event Hubs Namespace page, select Access control (IAM) on the left menu.
- Select Add -> Add role assignment on the command bar.
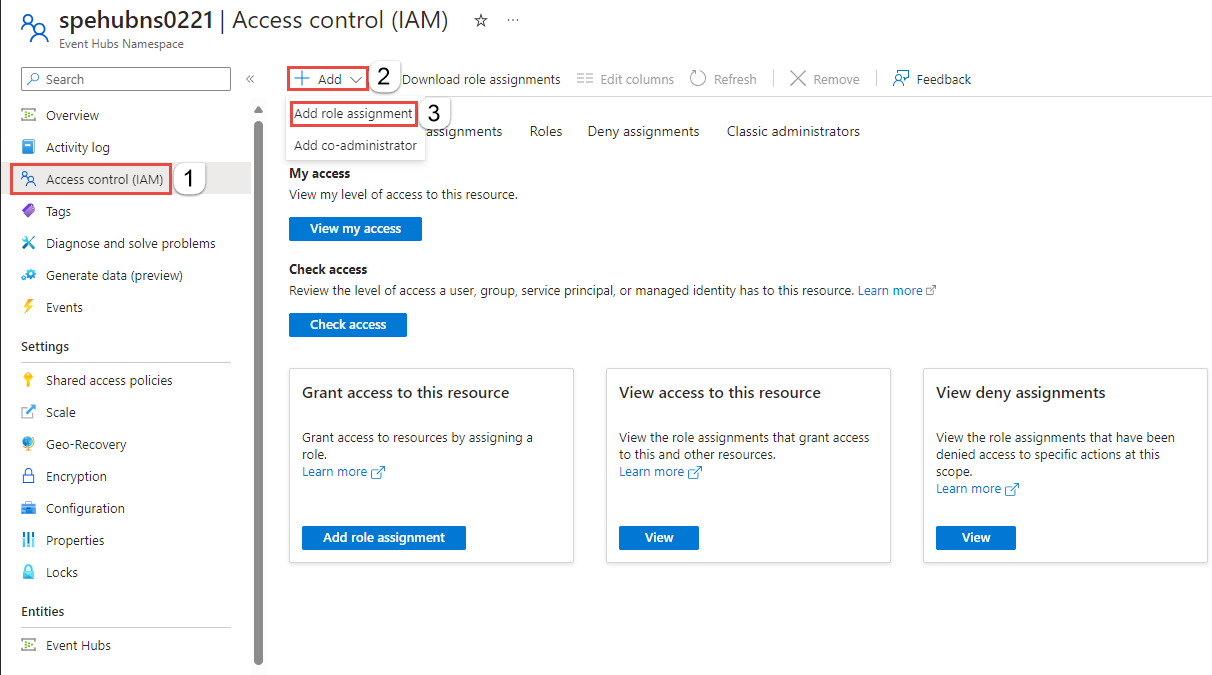
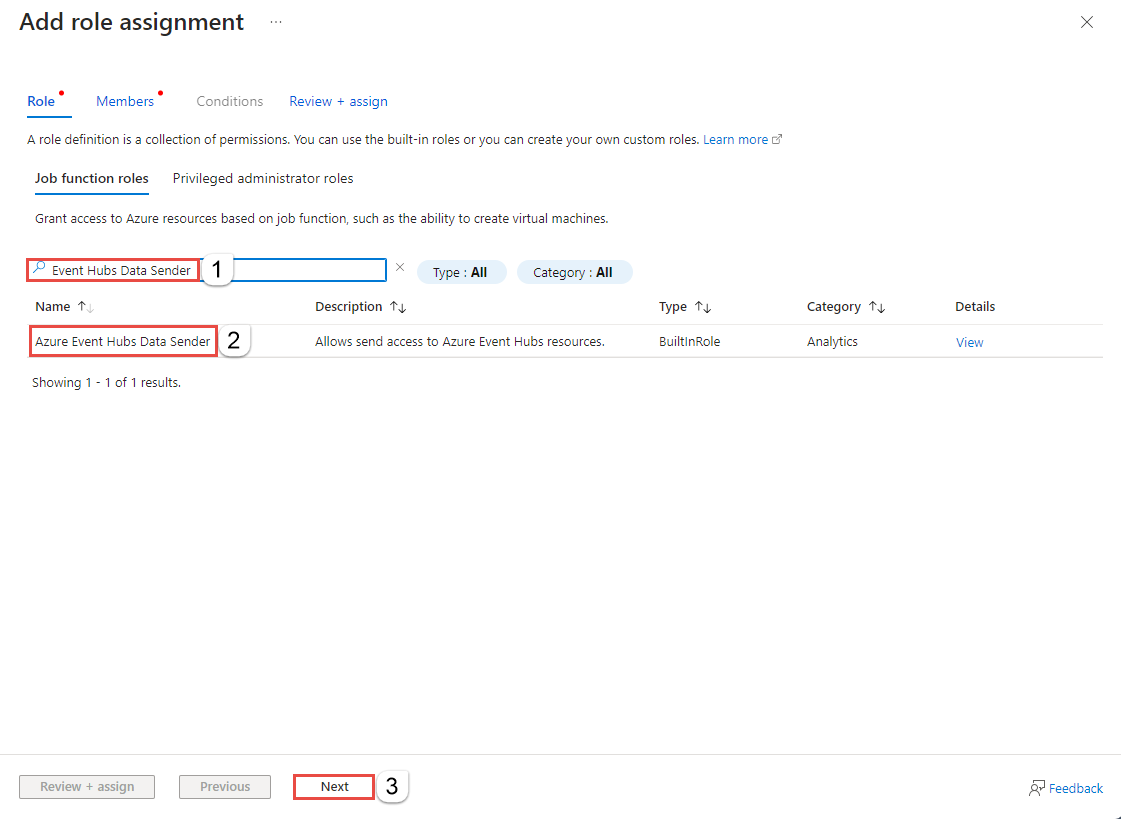
- On the Add role assignment page, search for Event Hubs Data Sender, and select Azure Event Hubs Data Sender from the list of roles, and then select Next.
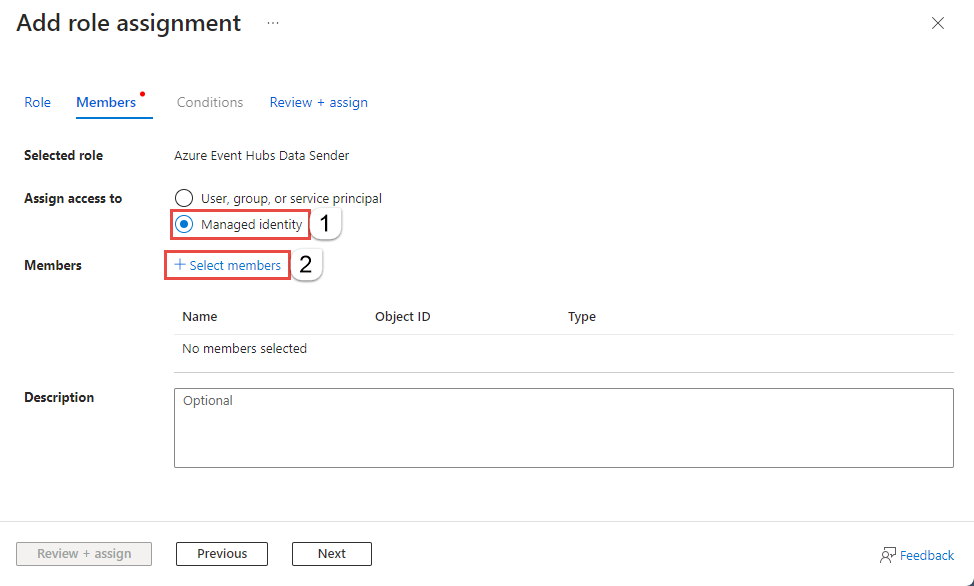
- In the Members tab, select Managed identity for the type, and then select + Select members.
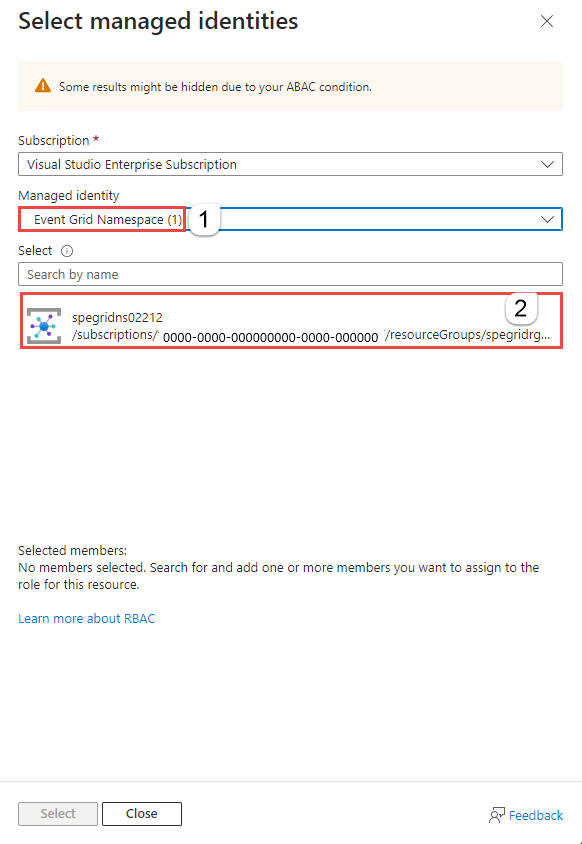
- On the Select managed identities page, select Event Grid Namespace for the Managed identity, and then select the managed identity that has the same name as the Event Grid namespace.
- On the Select managed identities page, choose Select.
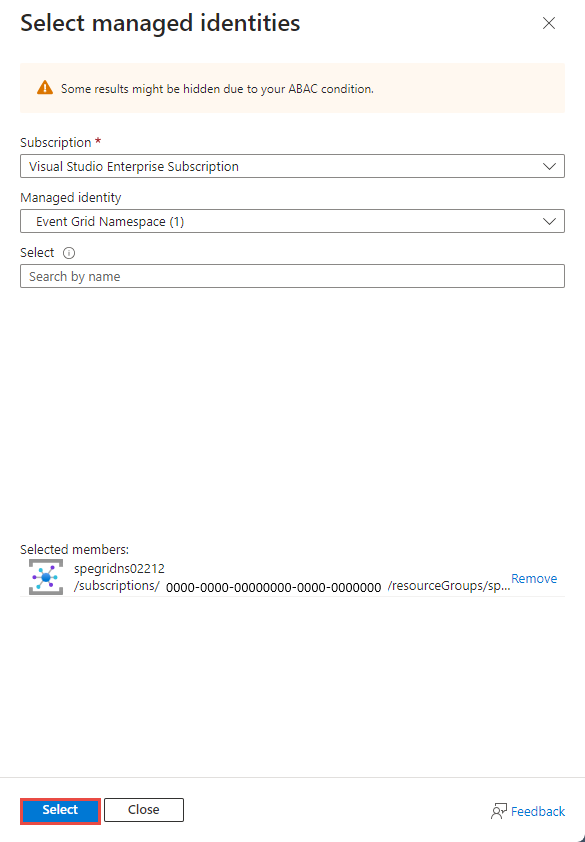
- Now, on the Add role assignment page, select Review + assign.
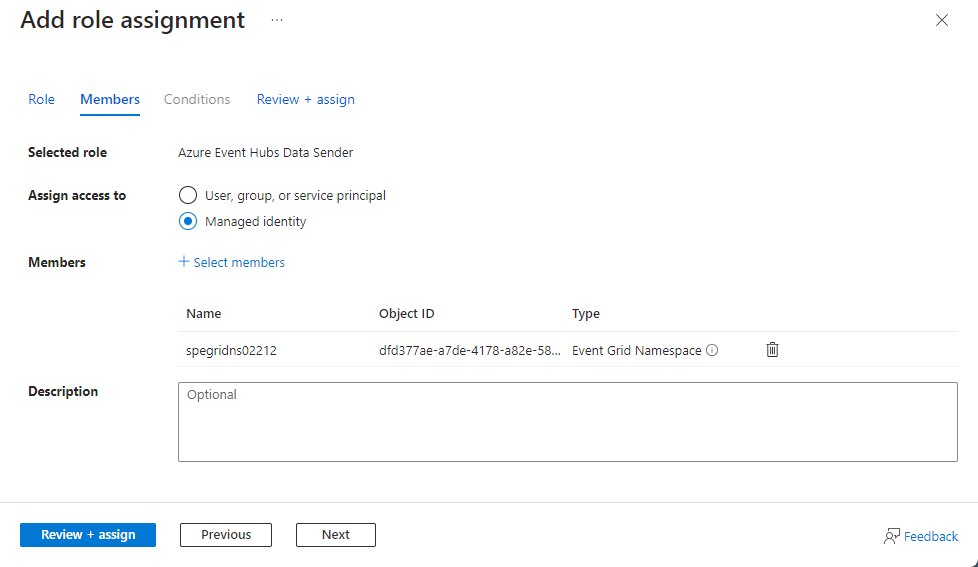
- On the Review + assign page, select Review + assign.


Create an event hub
- On the Event Hubs Namespace page, select Event Hubs on the left menu.
- On the Event Hubs page, select + Event hub on the command bar.

- On the Create Event hub page, enter a name for the event hub, and then select Review + create.
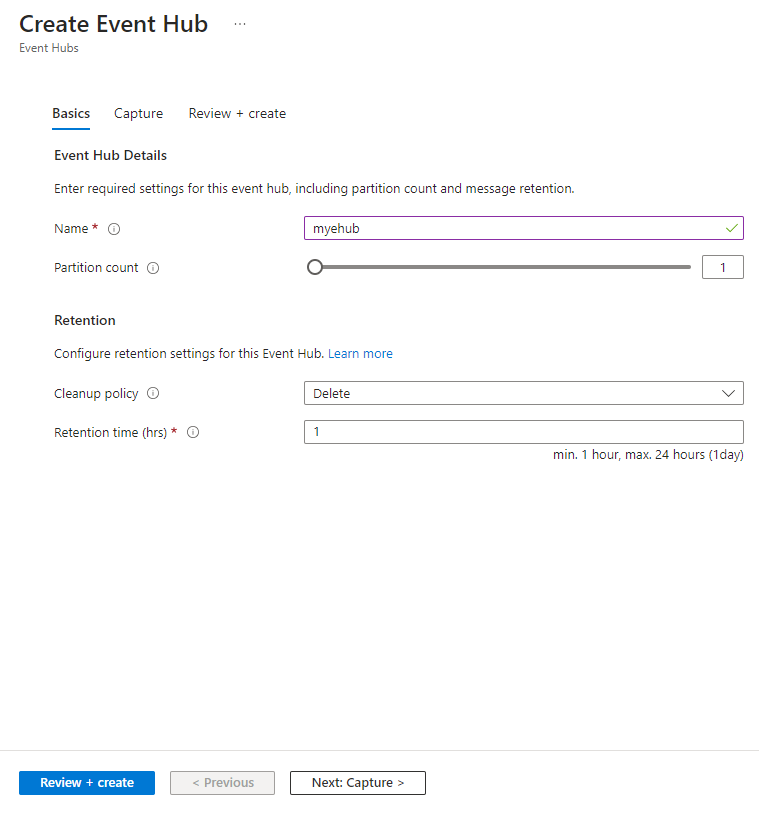
- On the Review + create page, select Create.


Create an event subscription
Create an event subscription setting its delivery mode to Push, which supports push delivery.
- Switch to the tab or window with the Event Grid Namespace page open from the tab or window with the Event Hubs Namespace page open.
- On the Event Grid Namespace page, select Topics on the left menu.
- On the Topics page, select the topic you created in the previous step.
- Select + Subscription on the command bar.

- On the Create Event Subscription page, follow these steps:
- In the Basic tab, enter a name for the event subscription.
- Select Push for the event delivery mode.
- Confirm that Event hub selected for the Endpoint type.
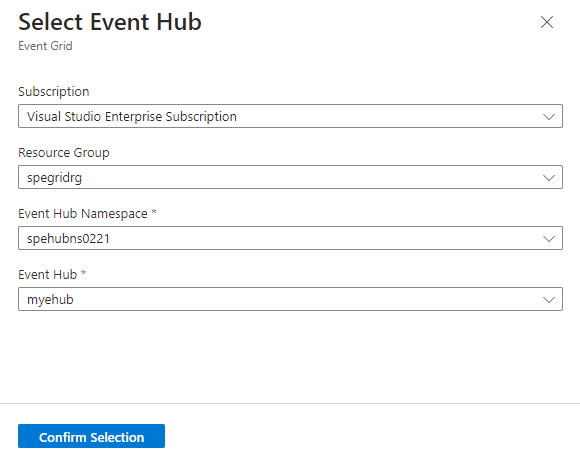
- Select Configure an endpoint.

- On the Select Event hub page, follow these steps:
- Select the Azure subscription and resource group that has the event hub.
- Select the Event Hubs namespace and the event hub.
- Then, select Confirm selection.
- Back on the Create Subscription page, select System Assigned for Managed identity type.
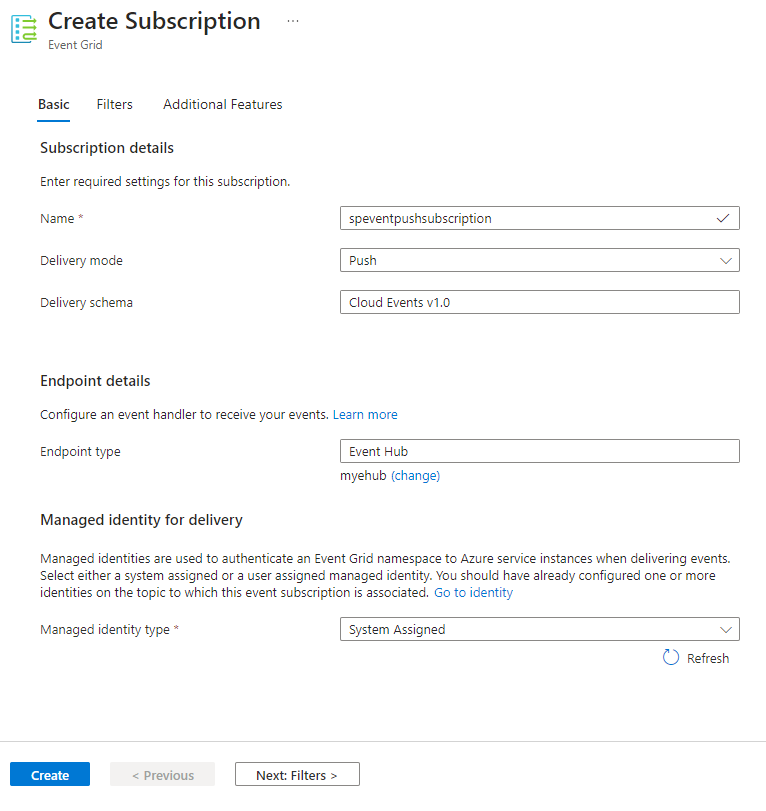
- Select Create.


Send events to your topic
Now, send a sample event to the namespace topic by following steps in this section.
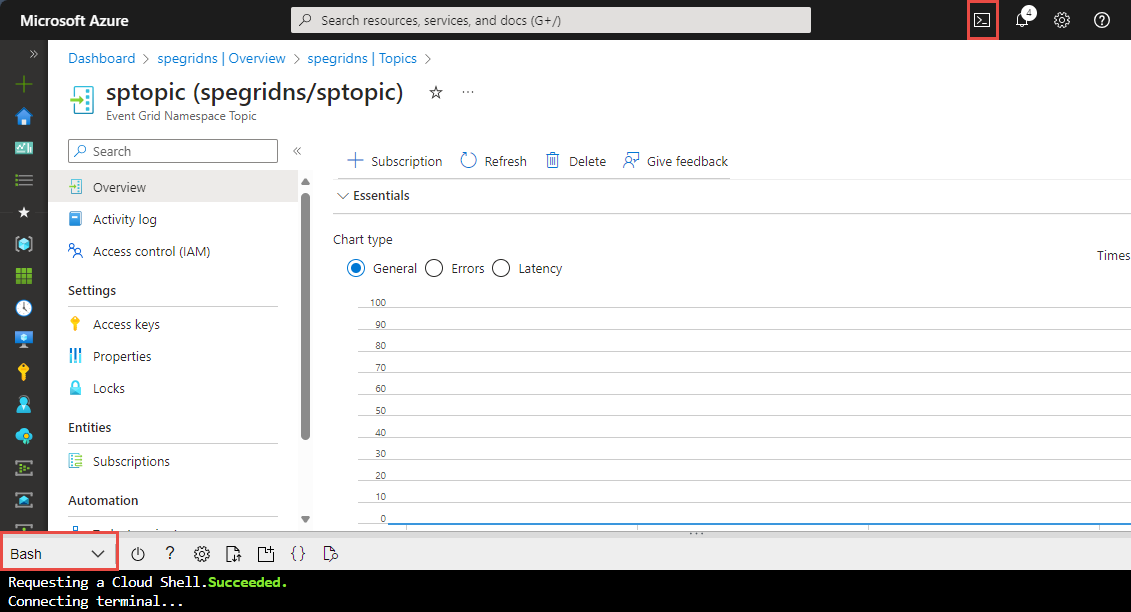
Launch Cloud Shell in the Azure portal. Switch to Bash.
In the Cloud Shell, run the following command to declare a variable to hold the access key for the namespace. You noted the access key earlier in this quickstart.
key=ACCESSKEYDeclare a variable to hold the publishing operation URI. Replace
NAMESPACENAMEwith the name of your Event Grid namespace andTOPICNAMEwith the name of the topic.publish_operation_uri=https://NAMESPACENAME.eastus-1.eventgrid.azure.net/topics/TOPICNAME:publish?api-version=2023-06-01-previewCreate a sample CloudEvents compliant event:
event=' { "specversion": "1.0", "id": "'"$RANDOM"'", "type": "com.yourcompany.order.ordercreatedV2", "source" : "/mycontext", "subject": "orders/O-234595", "time": "'`date +%Y-%m-%dT%H:%M:%SZ`'", "datacontenttype" : "application/json", "data":{ "orderId": "O-234595", "url": "https://yourcompany.com/orders/o-234595"}} 'The
dataelement is the payload of your event. Any well-formed JSON can go in this field. For more information on properties (also known as context attributes) that can go in an event, see the CloudEvents specifications.Use CURL to send the event to the topic. CURL is a utility that sends HTTP requests.
curl -X POST -H "Content-Type: application/cloudevents+json" -H "Authorization:SharedAccessKey $key" -d "$event" $publish_operation_uriNavigate to the Event Hubs Namespace page in the Azure portal, refresh the page and verify that incoming messages counter in the chart indicates that an event has been received.


Next steps
In this article, you created and configured the Event Grid namespace and Event Hubs resources. For step-by-step instructions to receive events from an event hub, see these tutorials: