Configure custom alerts to monitor advertised routes
This article helps you use Azure Automation and Logic Apps to constantly monitor the number of routes advertised from the ExpressRoute gateway to on-premises networks. Monitoring can help prevent hitting the 1000 routes limit
Azure Automation allows you to automate execution of custom PowerShell script stored in a runbook. This article describes a configuration that uses a runbook with a PowerShell script. The script queries one or more ExpressRoute gateways and collects a dataset. The dataset includes the resource group, the ExpressRoute gateway name, and the number of network prefixes advertised from on-premises networks.
Azure Logic Apps schedules a custom workflow that calls the Azure Automation runbook. The execution of the runbook is done using a job. After data collection runs, the Azure Logic Apps workflow classifies the data and, based on match criteria on number of network prefixes greater or less than a predefine threshold, then sends information to a destination email address.
Workflow
Setting up a custom alert is based on three main steps:
Create an Automation Account with a "Run As" account and permissions.
Create and configure runbooks.
Create a logic app that fires the Automation Account and send an alerts e-mail if the number is greater than a threshold (for example, 160).
Before you begin
Verify that you meet the following criteria before beginning your configuration:
You have at least one ExpressRoute gateway in your deployment.
You're familiar with Azure Logic Apps.
You're familiar with using Azure PowerShell. Azure PowerShell is required to collect the network prefixes in ExpressRoute gateway. For more information about Azure PowerShell in general, see the Azure PowerShell documentation.
Notes and limitations
- The custom alert discussed in this article is an add-on to achieve better operation and control. It isn't a replacement for the native alerts in ExpressRoute.
- Data collection for ExpressRoute gateways runs in the background. Runtime can be longer than expected. To avoid job queuing, the workflow recurrence must be set up properly.
- Deployments by scripts or ARM templates could happen faster than the custom alarm trigger. This could result in increasing in number of network prefixes in ExpressRoute gateway above the limit of 1000 routes.
Create and configure accounts
When you create an Automation account in the Azure portal, a Run As account is automatically created. This account takes following actions:
Creates a Microsoft Entra application with a self-signed certificate. The Run As account itself has a certificate that needs to be renewed by default every year.
Creates a service principal account for the application in Microsoft Entra ID.
Assigns itself the Contributor role (Azure role-base access control) on the Azure Subscription in use. This role manages Azure Resource Manager resources using runbooks.
In order to create an Automation account, you need privileges and permissions. For information, see Permissions required to create an Automation account.
1. Create an automation account
Create an Automation account with run-as permissions. For instructions, see Create an Azure Automation account.

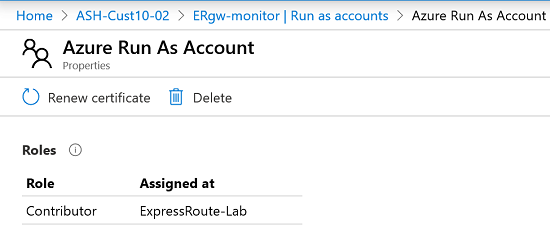
2. Assign the Run As account a role
By default, the Contributor role is assigned to the service principal that is used by your Run As account. You can keep the default role assigned to the service principal, or you can restrict permissions by assigning a built-in role (for example, Reader) or a custom role.
Use the following steps to determine the role assign to the service principal that is used by your Run As account:
Navigate to your Automation account. Navigate to Account Settings, then select Run as accounts.
Select Roles to view the role definition that is being used.
Create and configure runbooks
1. Install modules
In order to run PowerShell cmdlets in Azure Automation runbooks, you need to install a few extra Az PowerShell module. Use the following steps to install the modules:
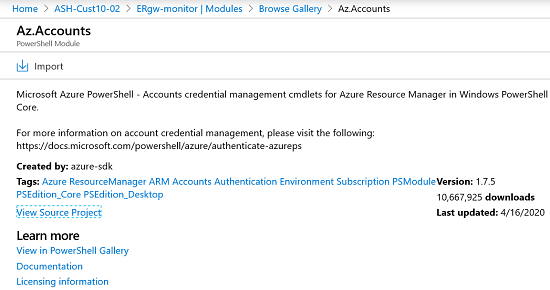
Open your Azure Automation Account and navigate to Modules.
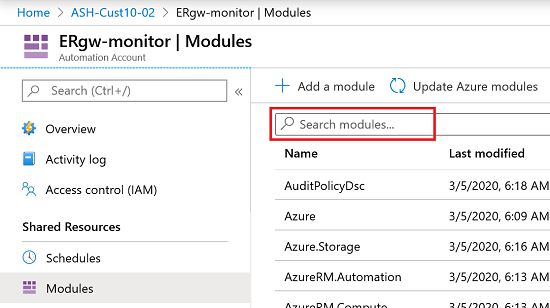
Search the Gallery and import the following modules: Az.Accounts, Az.Network, Az.Automation, and Az.Profile.

2. Create a runbook
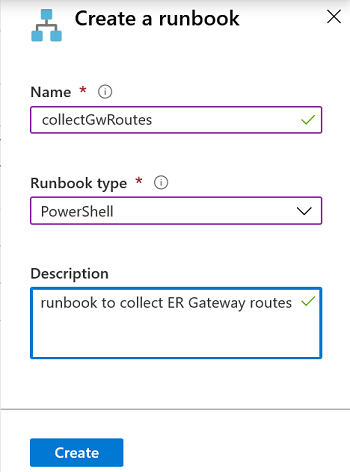
To create your PowerShell runbook, navigate to your Automation Account. Under Process Automation, select the Runbooks tile, and then select Create a runbook.
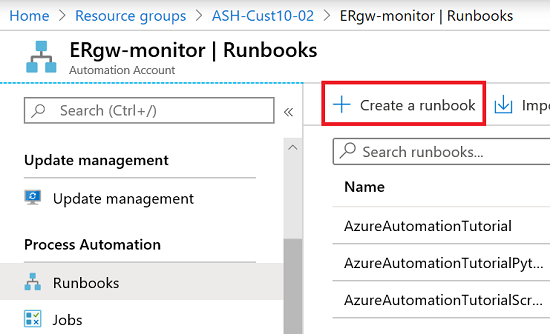
Select Create to create the runbook.
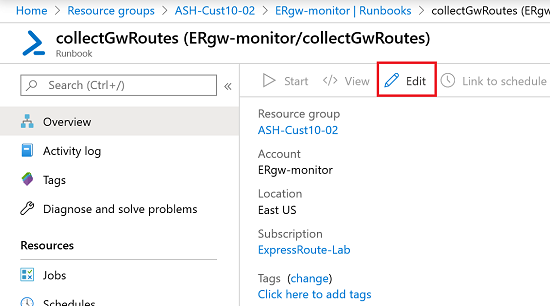
Select the newly created runbook, then select Edit.
In Edit, paste the PowerShell script. The Example script can be modified and used to monitor ExpressRoute gateways in one or more resource groups.
In the example script, notice the following settings:
- The array $rgList contains the list of resource groups with ExpressRoute gateways. You can customize the list-based ExpressRoute gateways.
- The variable $thresholdNumRoutes define the threshold on the number of network prefixes advertised from an ExpressRoute gateway to the on-premises networks.
Example script
  ################# Input parameters #################
# Resource Group Name where the ExR GWs resides in
$rgList= @('ASH-Cust10-02','ASH-Cust30')
$thresholdNumRoutes = 160
###################################################

# Ensures you do not inherit an AzContext in your runbook
Disable-AzContextAutosave -Scope Process | Out-Null

Try {

   $conn = Get-AutomationConnection -Name 'AzureRunAsConnection'
   while(!($connectionResult) -And ($logonAttempt -le 5))
   {
        $LogonAttempt++
        # Logging in to Azure...
        $connectionResult =  Connect-AzAccount `
                               -ServicePrincipal `
                               -ApplicationId $conn.ApplicationId `
                               -Tenant $conn.TenantId `
                               -CertificateThumbprint $conn.CertificateThumbprint `
                               -Subscription $conn.SubscriptionId `
                               -Environment AzureCloud

        Start-Sleep -Seconds 10
    }
} Catch {
    if (!$conn)
    {
        $ErrorMessage = "Service principal not found."
        throw $ErrorMessage
    }
    else
    {
        Write-Error -Message $_.Exception
        throw $_.Exception
    }
}

# Get the name of the Azure subscription
$subscriptionName=(Get-AzSubscription -SubscriptionId $conn.SubscriptionId).Name

#write-Output "<br>$(Get-Date) - selection of the Azure subscription: $subscriptionName"
Select-AzSubscription -SubscriptionId $conn.SubscriptionId | Out-Null


$GtwList = @()
$results= @()

foreach ($rgName in $rgList)
{
## Collect all the ExpressRoute gateways in a Resource Group
$GtwList=Get-AzVirtualNetworkGateway -ResourceGroupName $rgName

## For each ExpressRoute gateway, get the IP addresses of the BGP peers and collect the number of routes advertised
foreach ($gw in $GtwList) {

  $peers = Get-AzVirtualNetworkGatewayBGPPeerStatus -VirtualNetworkGatewayName $gw.Name -ResourceGroupName $rgName


 if ($peers[0].State -eq 'Connected') {
   $routes1=$null
   $routes1 = Get-AzVirtualNetworkGatewayAdvertisedRoute -VirtualNetworkGatewayName $gw.Name -ResourceGroupName $rgName -Peer $peers[0].Neighbor
 }
  if ($peers[1].State -eq 'Connected') {

   $routes2=$null
   $routes2 = Get-AzVirtualNetworkGatewayAdvertisedRoute -VirtualNetworkGatewayName $gw.Name -ResourceGroupName $rgName -Peer $peers[1].Neighbor
 }

  $sampleTime=(Get-Date).ToString("dd-MM-yyyy HH:mm:ss")
  if ($routes1.Count -eq $routes2.Count)
  {

     if ($routes1.Count -lt $thresholdNumRoutes){
       $status='OK'
       $alertMsg='number of routes below threshold'
     }
     else {
       $status='ALERT'
       $alertMsg='number of routes above threshold'
     }
  }
  else
  {
     $status='WARNING'
     $alertMsg='check ER Gateway'
  }

  $obj = [psCustomObject]@{
            resourceGroup =$rgName
            nameGtw  = $gw.Name
            peer1 = $peers[0].Neighbor
            peer2 = $peers[1].Neighbor
            numRoutesPeer1=  $routes1.Count
            numRoutesPeer2=  $routes2.Count
            time=$sampleTime
            status=$status
            alertMessage = $alertMsg
        }
  $results += $obj
} ### end foreach gateways in each resource group
} ### end foreach resource group
$jsonResults= ConvertTo-Json $results -Depth 100
Write-Output  $jsonResults
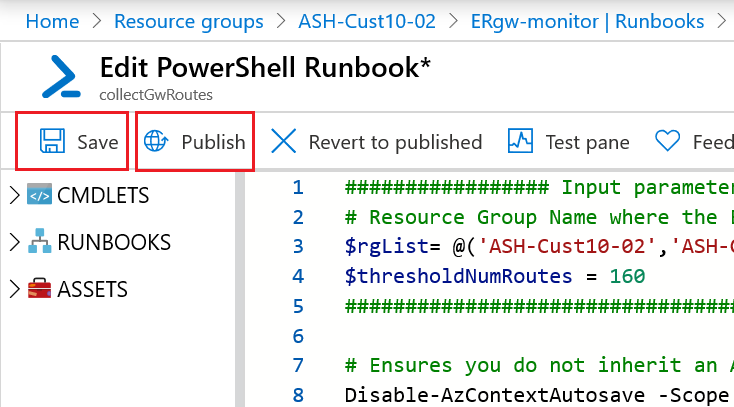
3. Save and publish the runbook
Select Save to save a draft copy of the runbook.
Select Publish to publish the runbook as the official version of the runbook in the automation account.
When you run the PowerShell script, a list of values is collected:
Resource group
ExpressRoute gateway name
IP address of the first BGP peer (peer1)
IP address of the second BGP peer (peer2)
Number of network prefixes advertised from the ExpressRoute gateway to the first BGP peer (peer1)
Number of network prefixes advertised from the ExpressRoute gateway to the second BGP peer (peer2)
Timestamp
Status, classified as:
- 'OK' if the number of routes is less than a threshold value
- 'ALERT' if the number of routes if above a threshold value
- 'WARNING' if the number of network prefixes advertised to the two BGP peer is different
Alert message, for a verbose description of the status (OK, ALERT, WARNING)
The PowerShell script converts the collected information to a JSON output. The runbook uses the PowerShell cmdlet Write-Output as Output stream to communicate information to the client.
4. Validate the runbook
Once the runbook is created, it must be validated. Select Start and check the output and errors for the different job streams.

Create and configure a logic app
Azure Logic Apps is the orchestrator of all process of collection and actions. In the following sections, you build a workflow using a logic app.
Workflow
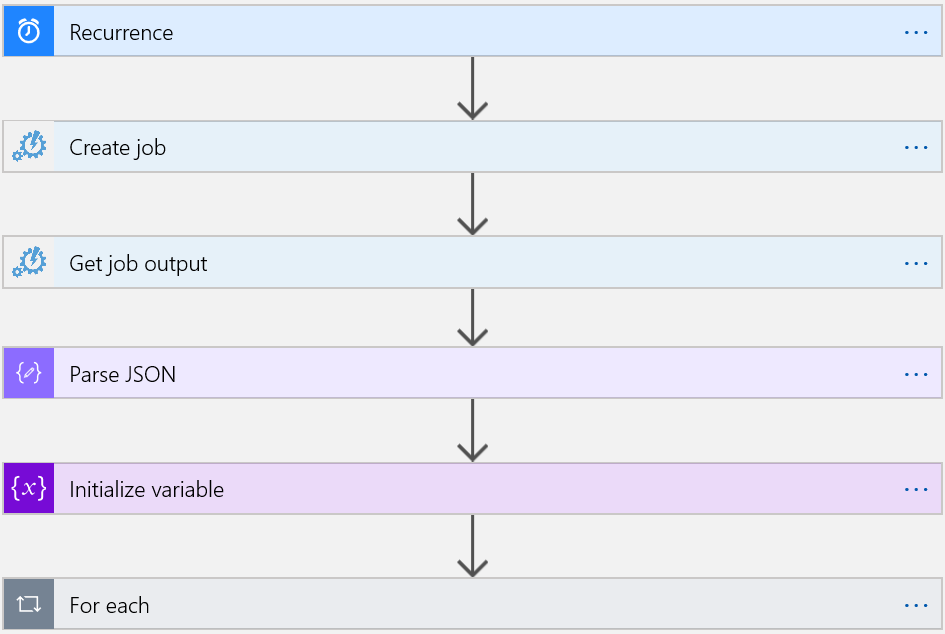
For this logic app, you build a workflow that regularly monitors ExpressRoute gateways. If new items exist, the workflow sends an email for each item. When you're done, your workflow looks like this example at a high level:
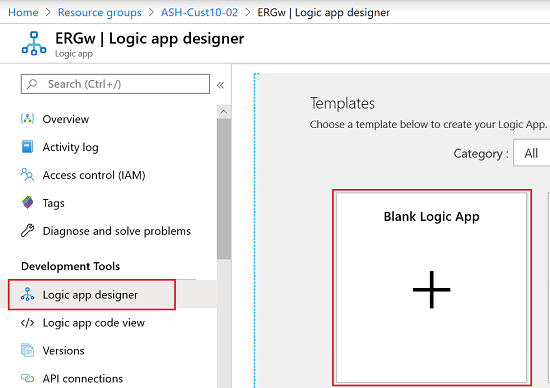
1. Create a logic app resource
In the Azure portal, create a Consumption logic app resource and then select the Blank Logic App template. For more information, see Create an example Consumption logic app workflow.
2. Add a trigger
Every workflow starts with a trigger. A trigger fires when a specific event happens, or when a specific condition is met. Each time the trigger fires, Azure Logic Apps creates and runs a new workflow instance.
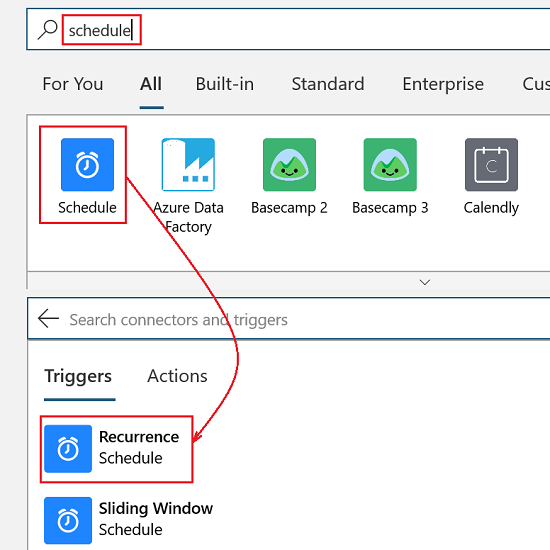
To regularly run a workflow that is based on a predefined time schedule, add the built-in Recurrence trigger to your workflow. In the search box, type schedule. Select the Schedule icon. From the Triggers list, select Recurrence.
In the Recurrence trigger, you can set the time zone and a recurrence for repeating that workflow. Together, the interval and frequency define the schedule for your workflow's trigger. To establish a reasonable minimum recurrence frequency, consider the following factors:
The PowerShell script in the Automation runbook takes time to complete. The runtime depends on the number of ExpressRoute gateways to monitor. A too short recurrence frequency causes job queuing.
The PowerShell script runs as a job in background. It doesn’t start immediately; it runs after a variable delay.
A too short recurrence frequency generates unneeded load on your Azure ExpressRoute gateways.
At the end of the workflow configuration, you can check the consistency of the recurrence frequency by running the workflow a few times, and then verifying the outcome in the Runs history.

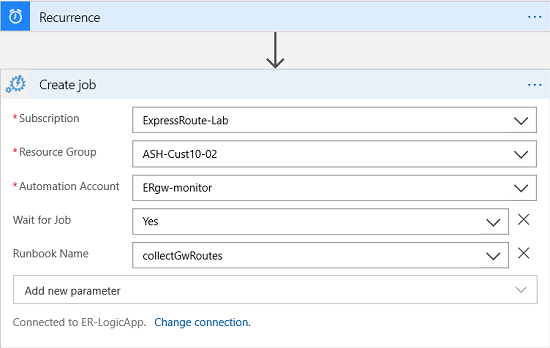
3. Create a job
A logic app workflow accesses other apps, services, and the platform though connectors. The next step is to select a connector to access the Azure Automation account that was defined earlier.
In Logic Apps Designer, below Recurrence, select New step. Under Choose an action and the search box, select All.
In the search box, type Azure Automation and search. Select Create job. Create job is used to fire the automation runbook that was created earlier.

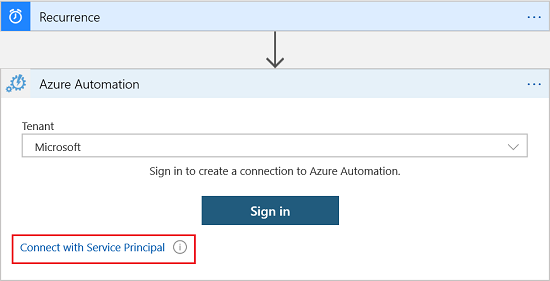
Sign in using a service principal. You can use an existing service principal, or you can create a new one. To create a new service principal, see How to use the portal to create a Microsoft Entra service principal that can access resources. Select Connect with Service Principal.
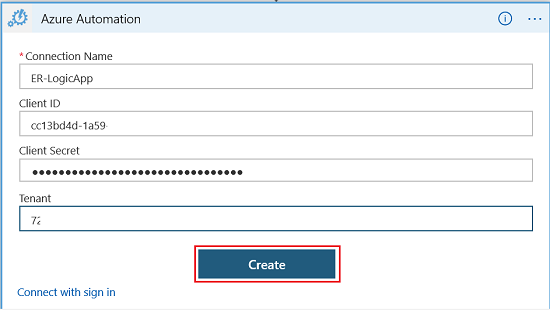
Type a Connection Name, add your Client ID (Application ID), Client Secret, and your Tenant ID. Then, select Create.
On the Create job page, the service principal should have the "Reader" role on the Resource Group hosting the automation account, and "Automation Job Operator" on the Automation Account. Additionally, verify that you added the Runbook Name as a new parameter.

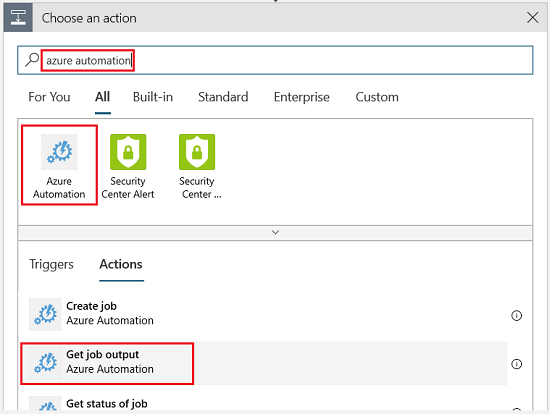
4. Get the job output
Select New step. Search for Azure Automation. From the Actions list, select Get job output.
On the Get job output page, specify the required information to access to the automation account. Select the Subscription, Resource Group, and Automation Account that you want to use. Select inside the Job ID box. When the Dynamic content list appears, select Job ID.


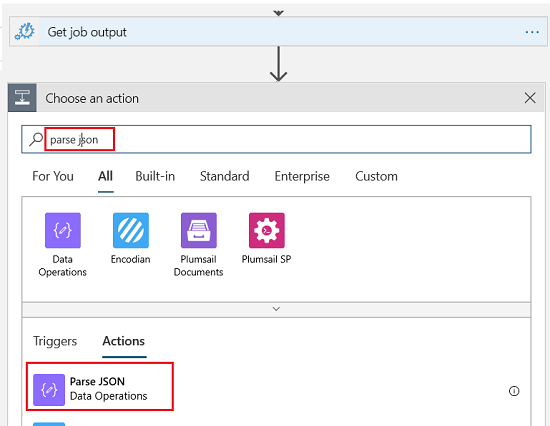
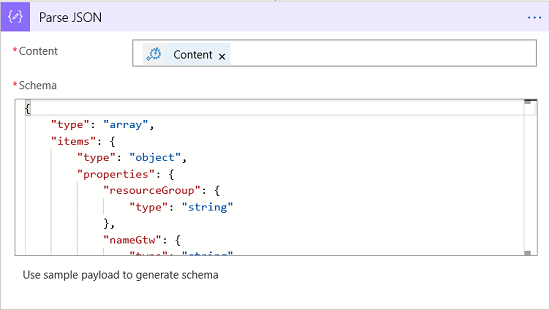
5. Parse the JSON
The information contained in the output from the 'Azure Automation Create job action' (previous steps) generates a JSON object. The built-in Parse JSON action creates user-friendly tokens from the properties and their values in JSON content. You can then use those properties in your workflow.
Add an action. Under the Get job output ->action, select New step.
In the Choose an action search box, type "parse json" to search for connectors that offer this action. Under the Actions list, select the Parse JSON action for the data operations that you want to use.
Select inside the Content box. When the Dynamic content list appears, select Content.

Parsing a JSON requires a schema. The schema can be generated using the output of the Automation runbook. Open a new web browser session, run the Automation runbook and grab the output. Return to the Logic Apps Parse JSON Data Operations action. At the bottom of the page, select Use sample payload to generate schema.

For Enter or paste a sample JSON payload, paste the output of the Automation runbook and select Done.
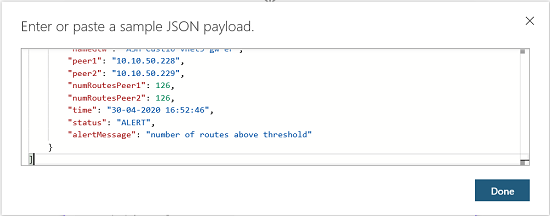
A schema is automatically generated by parsing the JSON input payload.


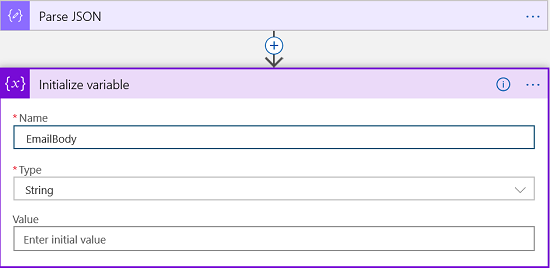
6. Define and initialize a variable
In this step of the workflow, we create a condition to send an alarm by email. For a flexible, custom formatting of an email body message, an auxiliary variable is introduced in the workflow.
Under the Get job output action, select New step. In the search box, find and select Variables.
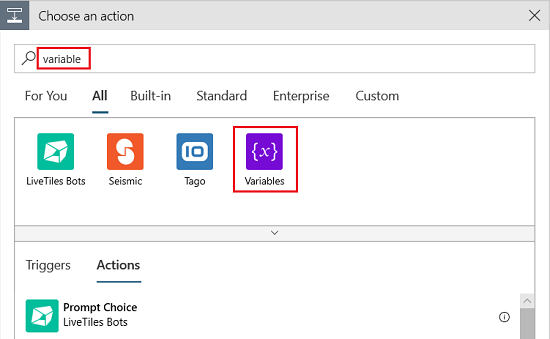
From the Actions list, select the Initialize variable action.
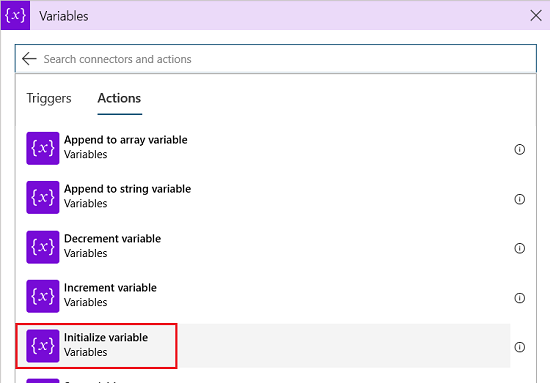
Specify the name of the variable. For Type, select String. The Value of the variable gets assigned later in the workflow.

7. Create a "For each" action
Once the JSON is parsed, the Parse JSON Data Operations action stores the content in the Body output. To process the output, you can create a "For each" loop repeating one or more actions on each item in the array.
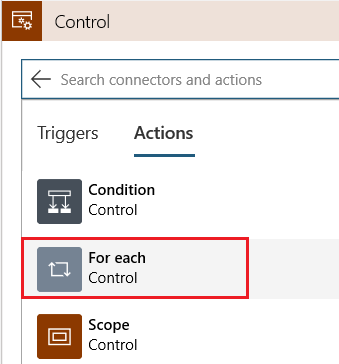
Under Initialize variable, select Add an action. In the search box, type "for each" as your filter.
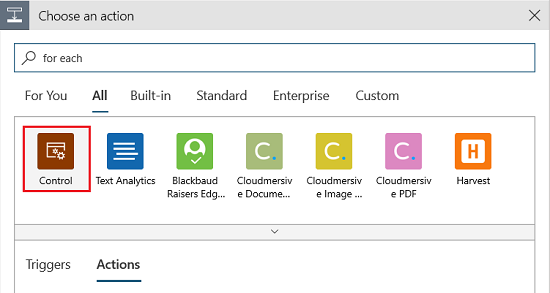
From the Actions list, select the action For each - Control.
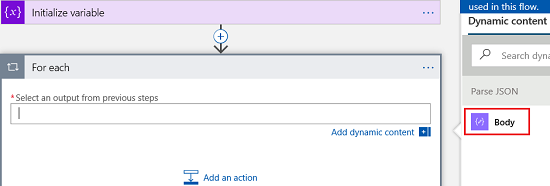
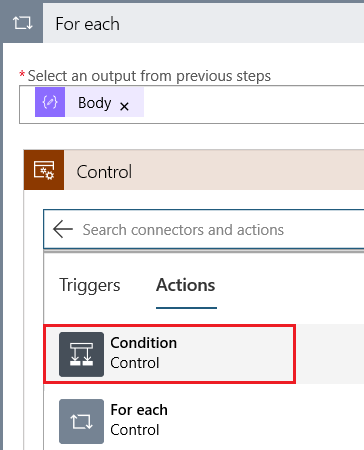
Select in the Select an output from previous steps text box. When the Dynamic content list appears, select the Body, which is output from the parsed JSON.
For each element of JSON body, we want to set a condition. From the action group, select Control.
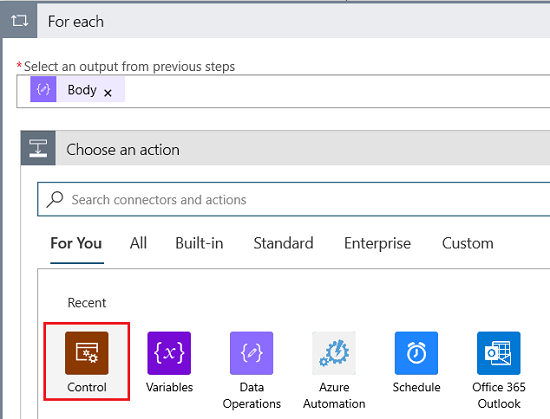
In the Actions list, select Condition-Control. The Condition-Control is a control structure compares the data in your workflow against specific values or fields. You can then specify different actions that run based on whether or not, the data meets the condition.
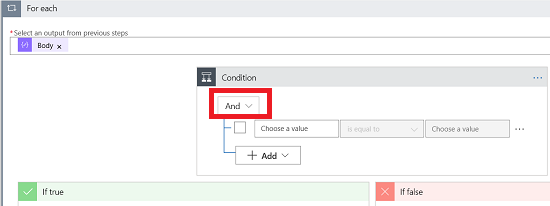
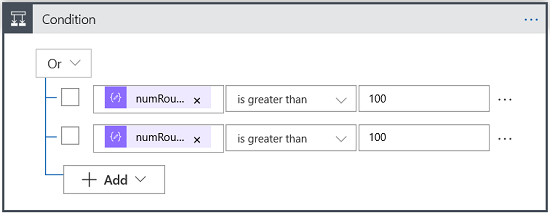
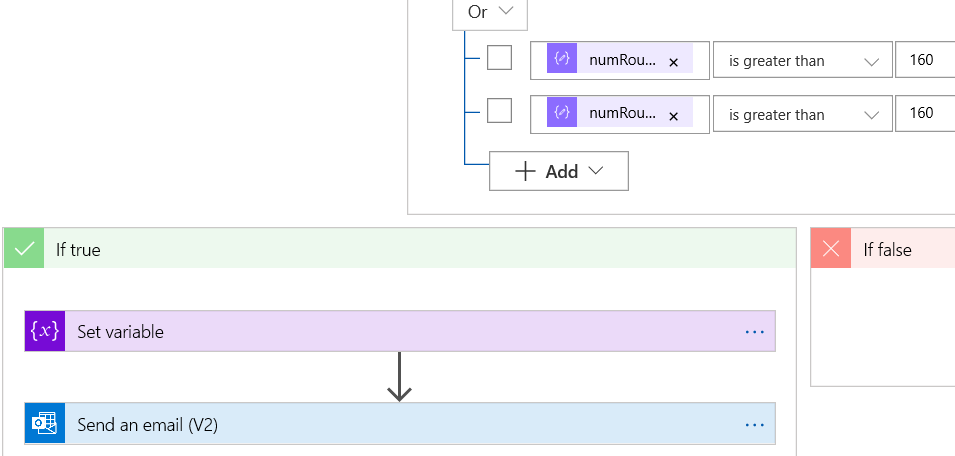
In the root of Condition action, change the logic operation to Or.
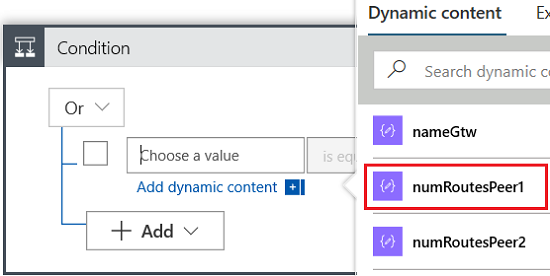
Check the value for the number of network prefixes an ExpressRoute gateway advertises to the two BGP peers. The number of routes is available in "numRoutePeer1" and "numRoutePeer2" in Dynamic content. In the value box, type the value for numRoutePeer1.
To add another row to your condition, choose Add -> Add row. In the second box, from Dynamic content, select numRoutePeer2.
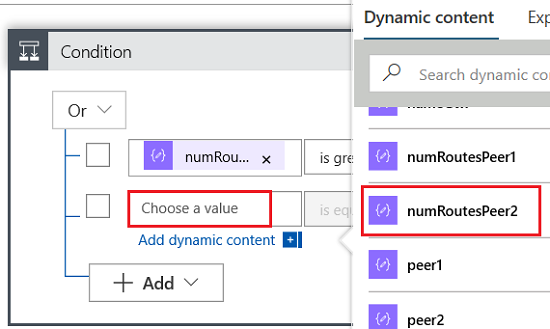
The logic condition is true when one of two dynamic variables, numRoute1 or numRoute2, is greater than the threshold. In this example, the threshold is fixed to 800 (80% of max value of 1000 routes). You can change the threshold value to fit your requirements. For consistency, the value should be the same value used in the runbook PowerShell script.
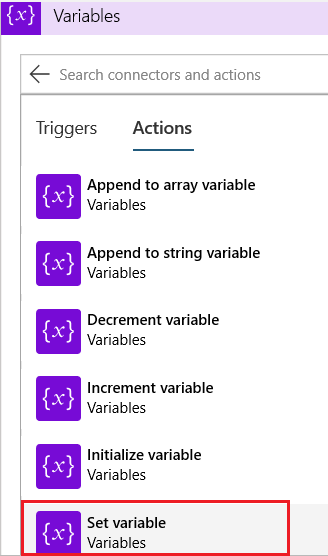
Under If true, format and create the actions to send the alert by email. In **Choose an action, search and select Variables.

In Variables, select Add an action. In the Actions list, select Set variable.
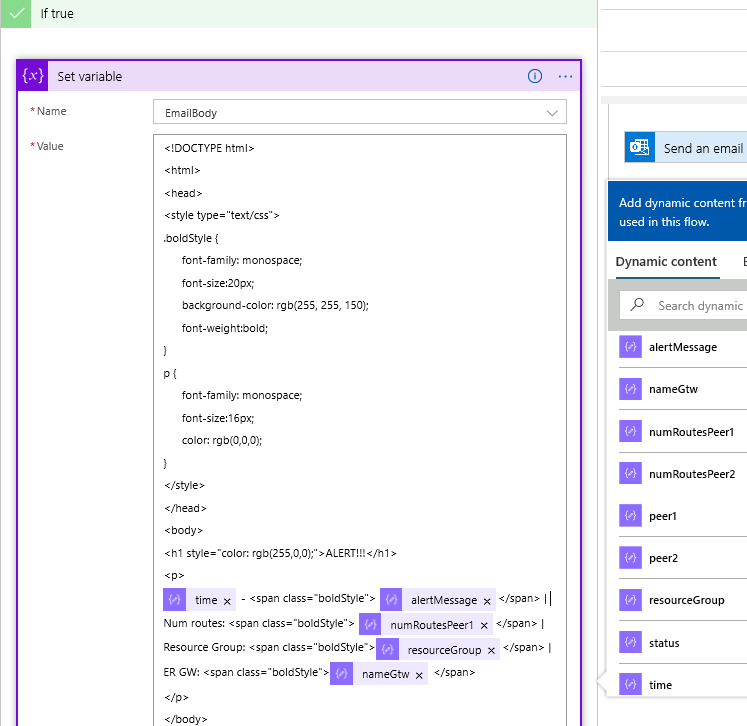
In Name, select the variable named EmailBody that you previously created. For Value, paste the HTML script required to format the alert email. Use the Dynamic content to include the values of JSON body. After configuring these settings, the result is that the variable Emailbody contains all the information related to the alert, in HTML format.

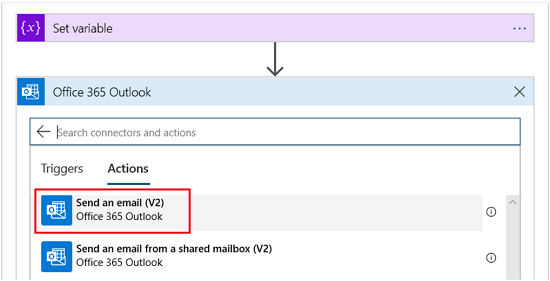
8. Add the Email connector
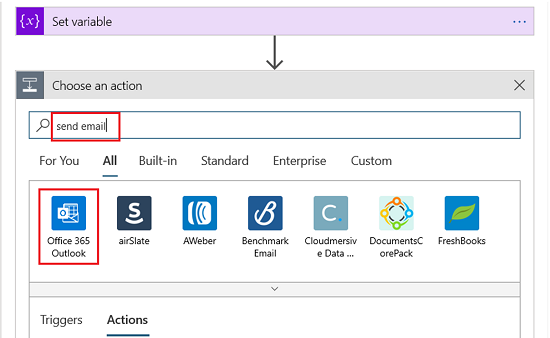
Logic Apps provides many email connectors. In this example, we add an Outlook connector to send the alert by email. Under Set variable, select Add an action. In Choose an action, type "send email" in the search box.
Select Office 365 Outlook.
In the Actions list, select Send an email(V2).
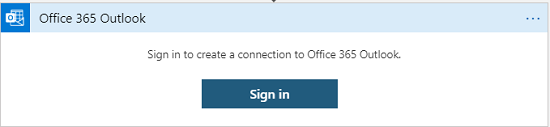
Sign in to create a connection to Office 365 Outlook.
In the Body field, select Add dynamic content. From the Dynamic content panel, add the variable Emailbody. Fill out the Subject and To fields.
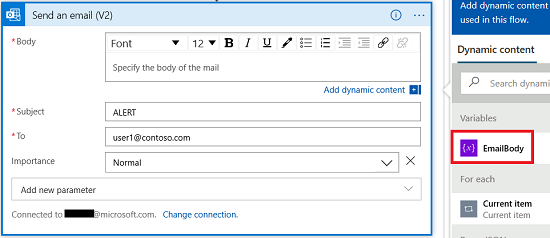
The Send an email (v2) action complete the workflow setup.

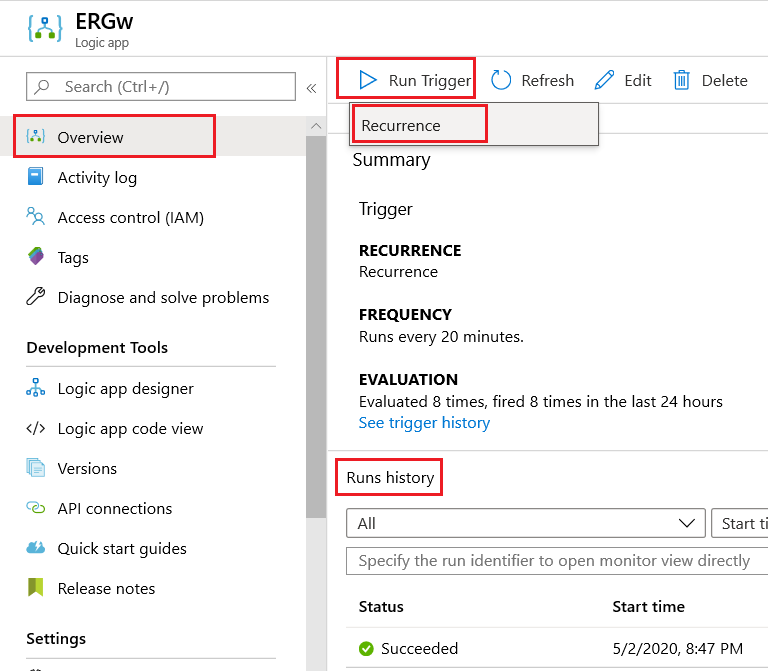
9. Workflow validation
The final step is the workflow validation. In Logic Apps Overview, select Run Trigger. Select Recurrence. The workflow can be monitored and verified in the Runs history.
Next steps
To learn more about how to customize the workflow, see Azure Logic Apps.
Feedback
Coming soon: Throughout 2024 we will be phasing out GitHub Issues as the feedback mechanism for content and replacing it with a new feedback system. For more information see: https://aka.ms/ContentUserFeedback.
Submit and view feedback for