Note
Access to this page requires authorization. You can try signing in or changing directories.
Access to this page requires authorization. You can try changing directories.
Sign in to Azure, and then select an existing Foundry project or create one with Microsoft Foundry Toolkit for Visual Studio Code. Foundry Toolkit uses the project you select as its default project for cloud models, agents, tools, and evaluations.
Prerequisites
- Install Microsoft Foundry Toolkit for Visual Studio Code.
- An Azure subscription.
- To select an existing project, access to that project. For more information, see Role-based access control for Microsoft Foundry.
- To create a project, meet the prerequisites to create a Foundry project.
Sign in to Azure
Foundry Toolkit uses the account, tenant, and subscriptions available through the Azure Resources extension.
- In the Activity Bar, select Azure.
- In the Azure Resources view, select Sign in to Azure.
- Complete the sign-in flow.
- In Accounts & Tenants, confirm that the account and tenant for your Foundry resources are selected.
- In Resources, confirm that the target subscription is visible.
Select an existing project
Set an accessible project as the default project for Foundry Toolkit.
In the Activity Bar, select Foundry Toolkit.
Under My Resources, select Set Foundry Project.
Select Switch project.
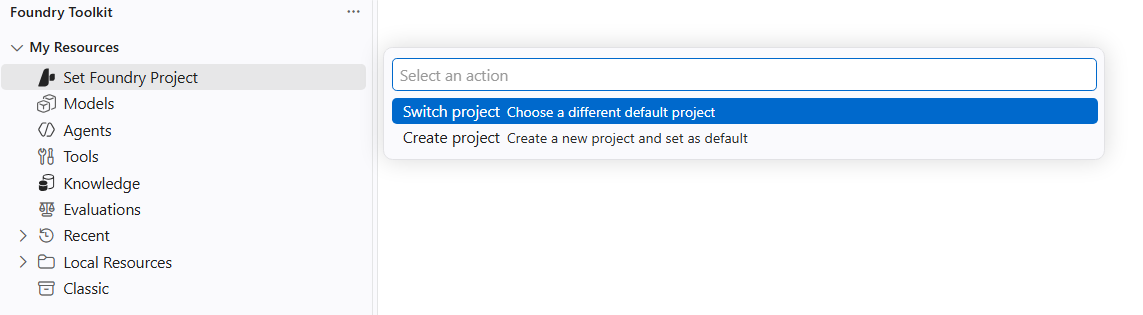
Select the Azure subscription that contains the project.
Select the Foundry project.
Under My Resources, confirm that the project resources appear.
The selected project remains the default until you select another project, clear the default project, sign out, or lose access to the project.
Create a project
Use Foundry Toolkit to create a Foundry account and project with basic default settings. For customized networking, security, naming, or Azure Policy requirements, use the Foundry portal or an infrastructure template.
In the Activity Bar, select Foundry Toolkit.
Under My Resources, select Set Foundry Project.
Select Create project.
Select your Azure subscription.
Select an existing resource group, or select Create new resource group.
If you create a resource group, enter the resource group name, and then select a location.
Enter a name for the Foundry project.
Monitor the notification for project creation progress.
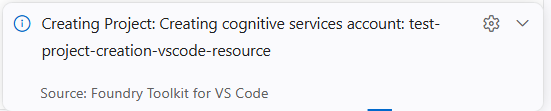
Wait for the notification that the project deployed successfully.
Under My Resources, confirm that the new project resources appear.
Foundry Toolkit creates a Foundry account named from the project, creates the project under that account, and sets the project as the Toolkit default.
Switch the default project
Change the cloud project used by Foundry Toolkit without changing your Azure account.
Under My Resources, locate the current default project.
Select the gear icon next to the project.
Select Switch Default Project.
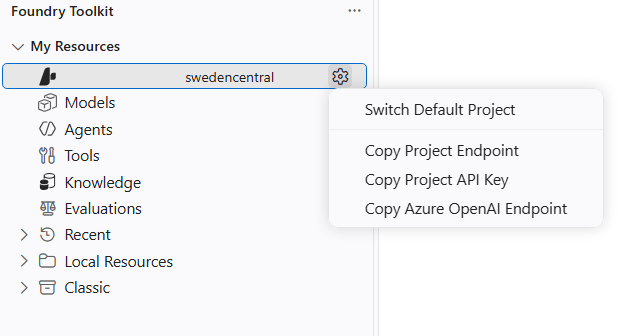
Select Switch project.
Select the subscription and another accessible project.
Under My Resources, confirm that the selected project resources appear.
To work without a cloud project, run Foundry Toolkit: Clear Default Project.
Clean up resources
Selecting an existing project doesn't create Azure resources. If you created a project in this article, its resources can incur charges.
- If you used a shared resource group, don't delete the resource group. Follow Delete projects to remove the project. Delete the Foundry account only if Toolkit created it for this procedure and it contains no other projects or resources.
- If you created a dedicated resource group and no longer need anything in it, open the Azure portal, select the resource group, and select Delete resource group.
Warning
Deleting a resource group permanently deletes every resource in it. Review the resource list before you confirm deletion.