Get started with one-click deployment
Note
We will retire Azure HDInsight on AKS on January 31, 2025. Before January 31, 2025, you will need to migrate your workloads to Microsoft Fabric or an equivalent Azure product to avoid abrupt termination of your workloads. The remaining clusters on your subscription will be stopped and removed from the host.
Important
This feature is currently in preview. The Supplemental Terms of Use for Microsoft Azure Previews include more legal terms that apply to Azure features that are in beta, in preview, or otherwise not yet released into general availability. For information about this specific preview, see Azure HDInsight on AKS preview information. For questions or feature suggestions, please submit a request on AskHDInsight with the details and follow us for more updates on Azure HDInsight Community.
One-click deployments are designed for users to experience zero touch creation of HDInsight on AKS. It eliminates the need to manually perform certain steps. This article describes how to use readily available ARM templates to create a cluster pool and cluster in few clicks.
Note
- These ARM templates cover the basic requirements to create a cluster pool and cluster along with prerequisite resources. To explore advanced options, see Create cluster pool and clusters.
- Necessary resources are created as part of the ARM template deployment in your resource group. For more information, see Resource prerequisites.
- The user must have permission to create new resources and assign roles to the resources in the subscription to deploy these ARM templates.
- Before you begin with ARM templates, please keep object ID ready for the identity you are going to use for deployment.
| Workload | Template | Description |
|---|---|---|
| Trino | Creates cluster pool and cluster without HMS, custom VNet, and Monitoring capability. | |
| Flink | Creates cluster pool and cluster without HMS, custom VNet, and Monitoring capability. | |
| Spark | Creates cluster pool and cluster without HMS, custom VNet, and Monitoring capability. | |
| Trino | Creates cluster pool and cluster with an existing custom VNet. | |
| Flink | Creates cluster pool and cluster with an existing custom VNet. | |
| Spark | Creates cluster pool and cluster with an existing custom VNet. |
When you click on one of these templates, it launches Custom deployment page in the Azure portal. You need to provide the details for the following parameters based on the template used.
| Property | Description |
|---|---|
| Subscription | Select the Azure subscription in which resources are to be created. |
| Resource Group | Create a new resource group, or select the resource group in your subscription from the drop-down list under which resources are to be created. |
| Region | Select the region where the resource group is deployed. |
| Cluster Pool Name | Enter the name of the cluster pool to be created. Cluster pool name length can't be more than 26 characters. It must start with an alphabet, end with an alphanumeric character, and must only contain alphanumeric characters and hyphens. |
| Cluster Pool Version | Select the HDInsight on AKS cluster pool version. |
| Cluster Pool Node VM Size | From the drop-down list, select the virtual machine size for the cluster pool based on your requirement. |
| Location | Select the region where the cluster and necessary resources are to be deployed. |
| Resource Prefix | Provide a prefix for creating necessary resources for cluster creation, resources are named as [prefix + predefined string]. |
| Cluster Name | Enter the name of the new cluster. |
| HDInsight on AKS Version | Select the minor or patch version of the HDInsight on AKS of the new cluster. For more information, see versioning. |
| Cluster Node VM Size | Provide the VM size for the cluster. For example: Standard_D8ds_v5. |
| Cluster OSS Version | Provide the cluster type supported OSS version in three part naming format. For example: Trino - 0.410.0, Flink - 1.16.0, Spark - 3.3.1 |
| Custom VNet Name | Provide custom virtual network to be associated with the cluster pool. It should be in the same resource group as your cluster pool. |
| Subnet Name in Custom Vnet | Provide subnet name defined in your custom virtual network. |
| User Object ID | Provide user alias object ID from Microsoft Entra ID (Microsoft Entra ID). |
Find Object ID of an identity
In the top search bar in the Azure portal, enter your user ID. (For example, john@contoso.com)
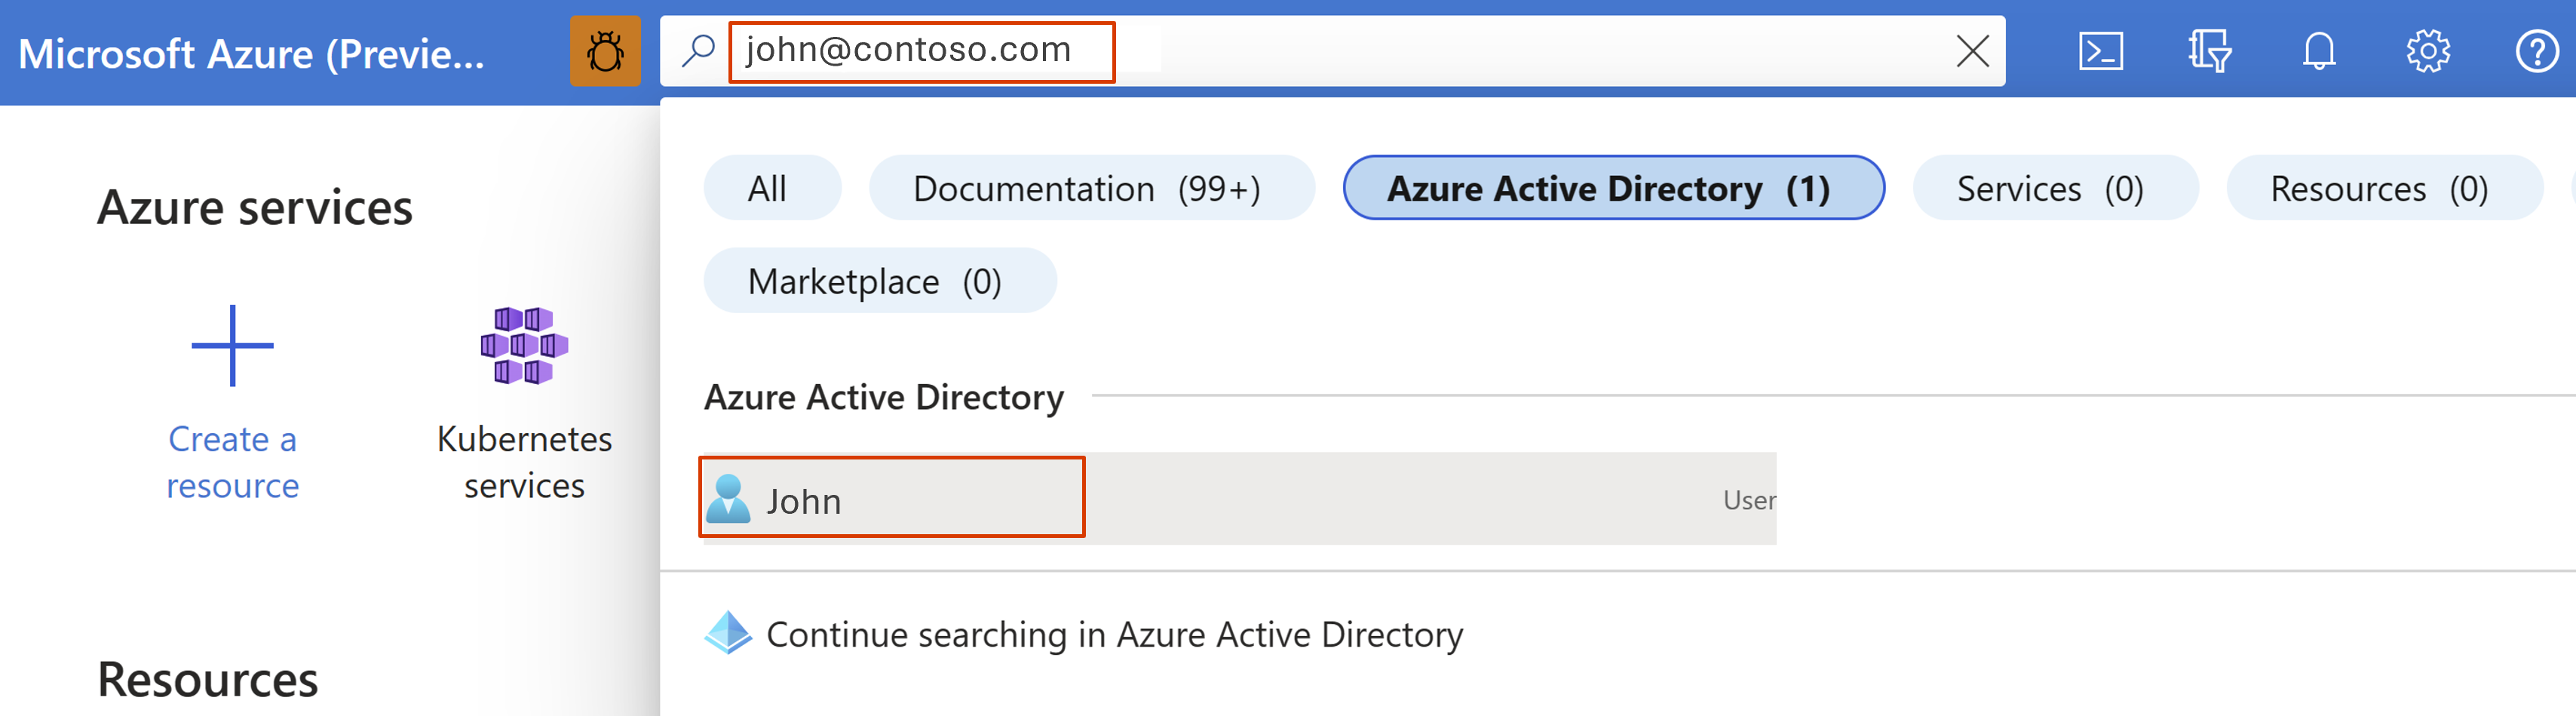
From Microsoft Entra ID box, click on your user ID.
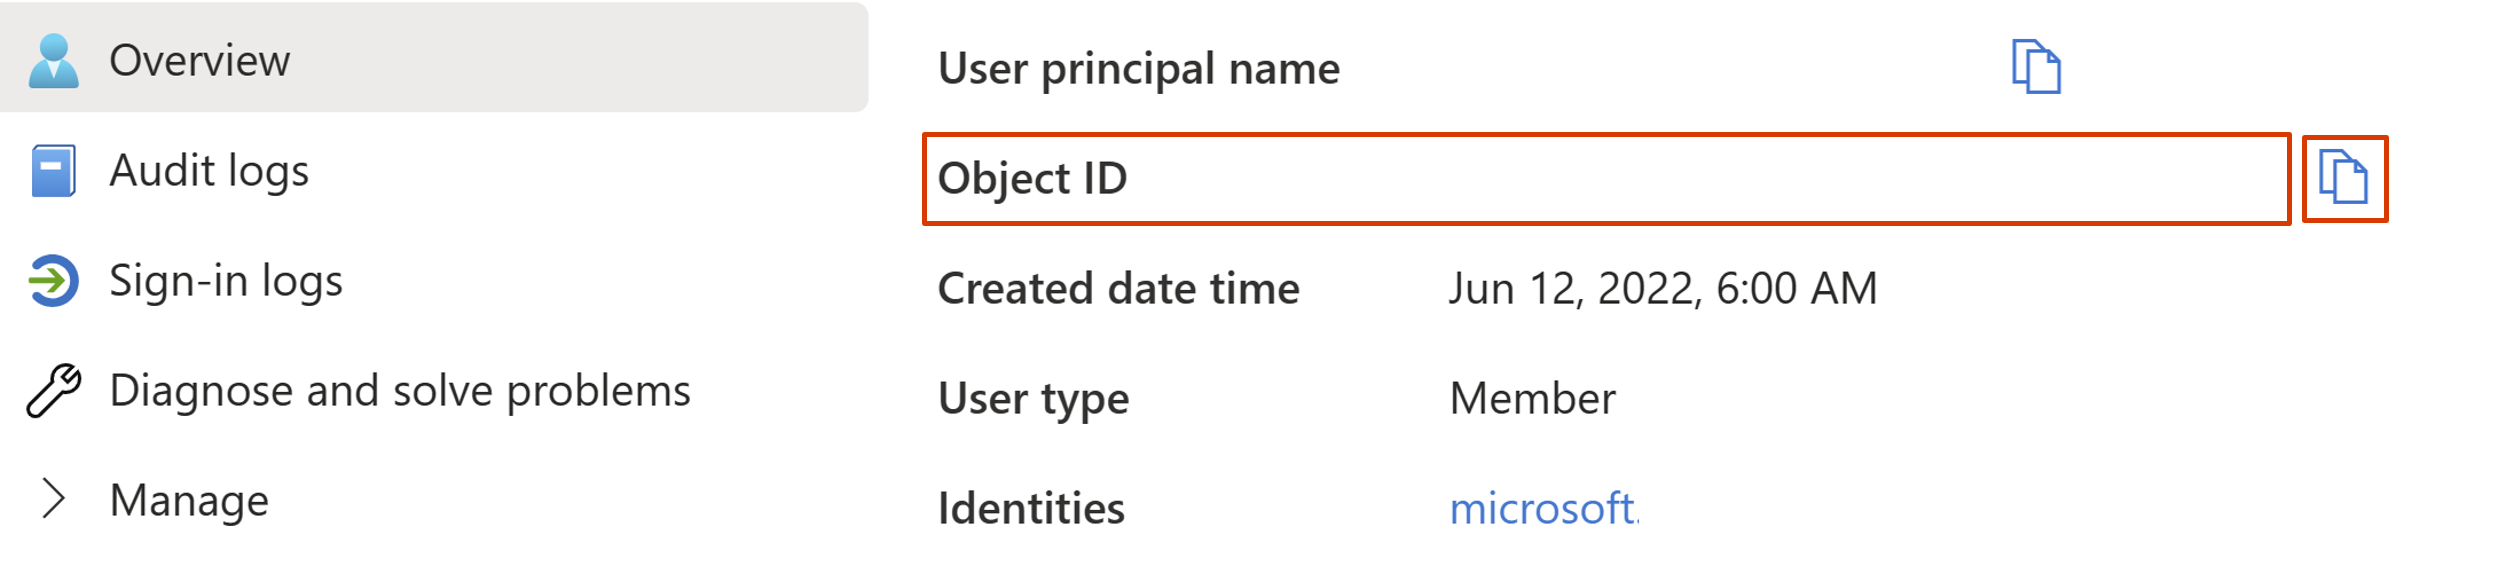
Copy the Object ID.
Deploy
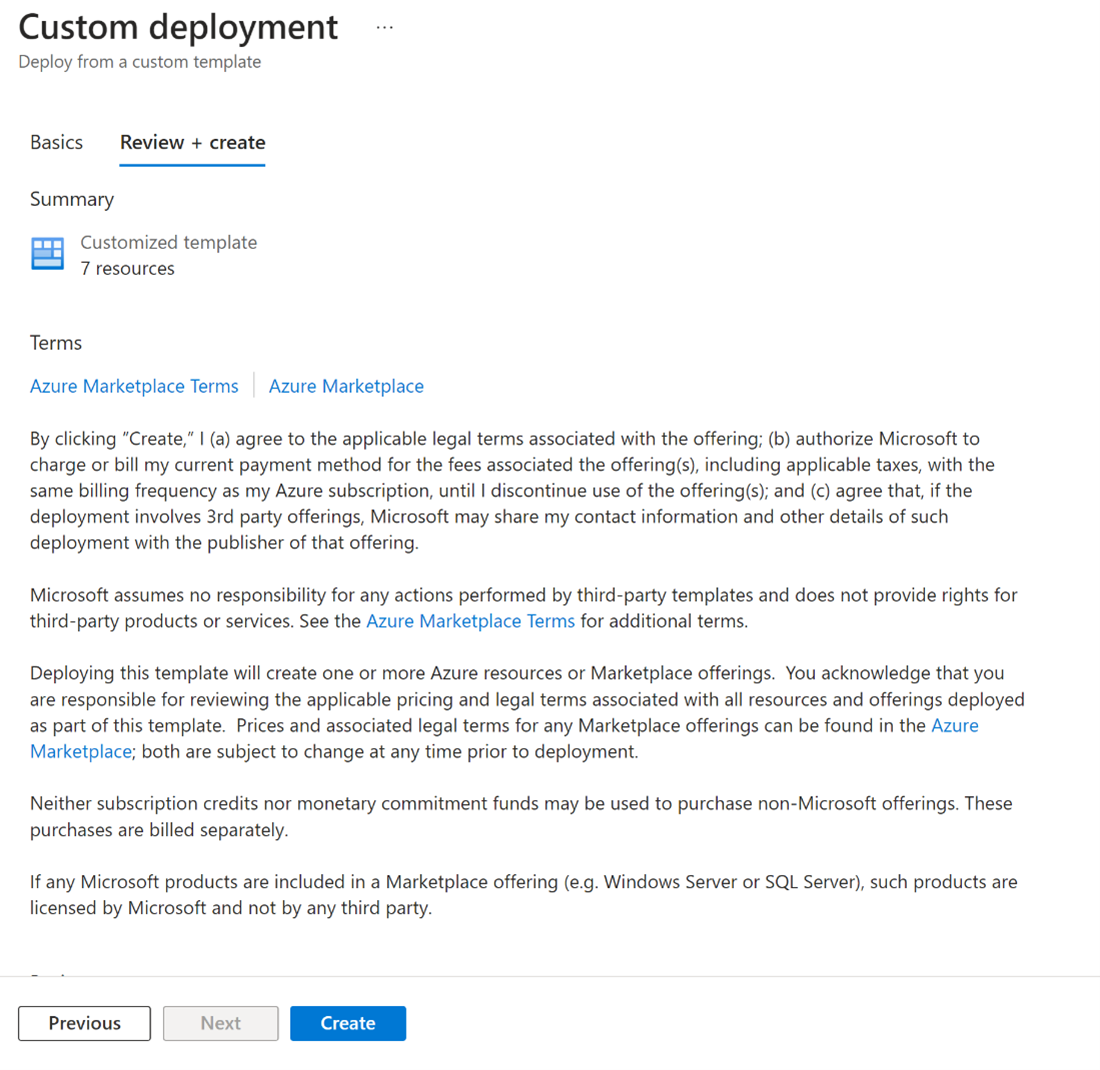
Select Next: Review + create to continue.
On the Review + create page, based on validation status, continue to click Create.
The Deployment is in progress page is displayed while the resources are getting created, and the "Your deployment is complete" page is displayed once the cluster pool and cluster are fully deployed and ready for use.
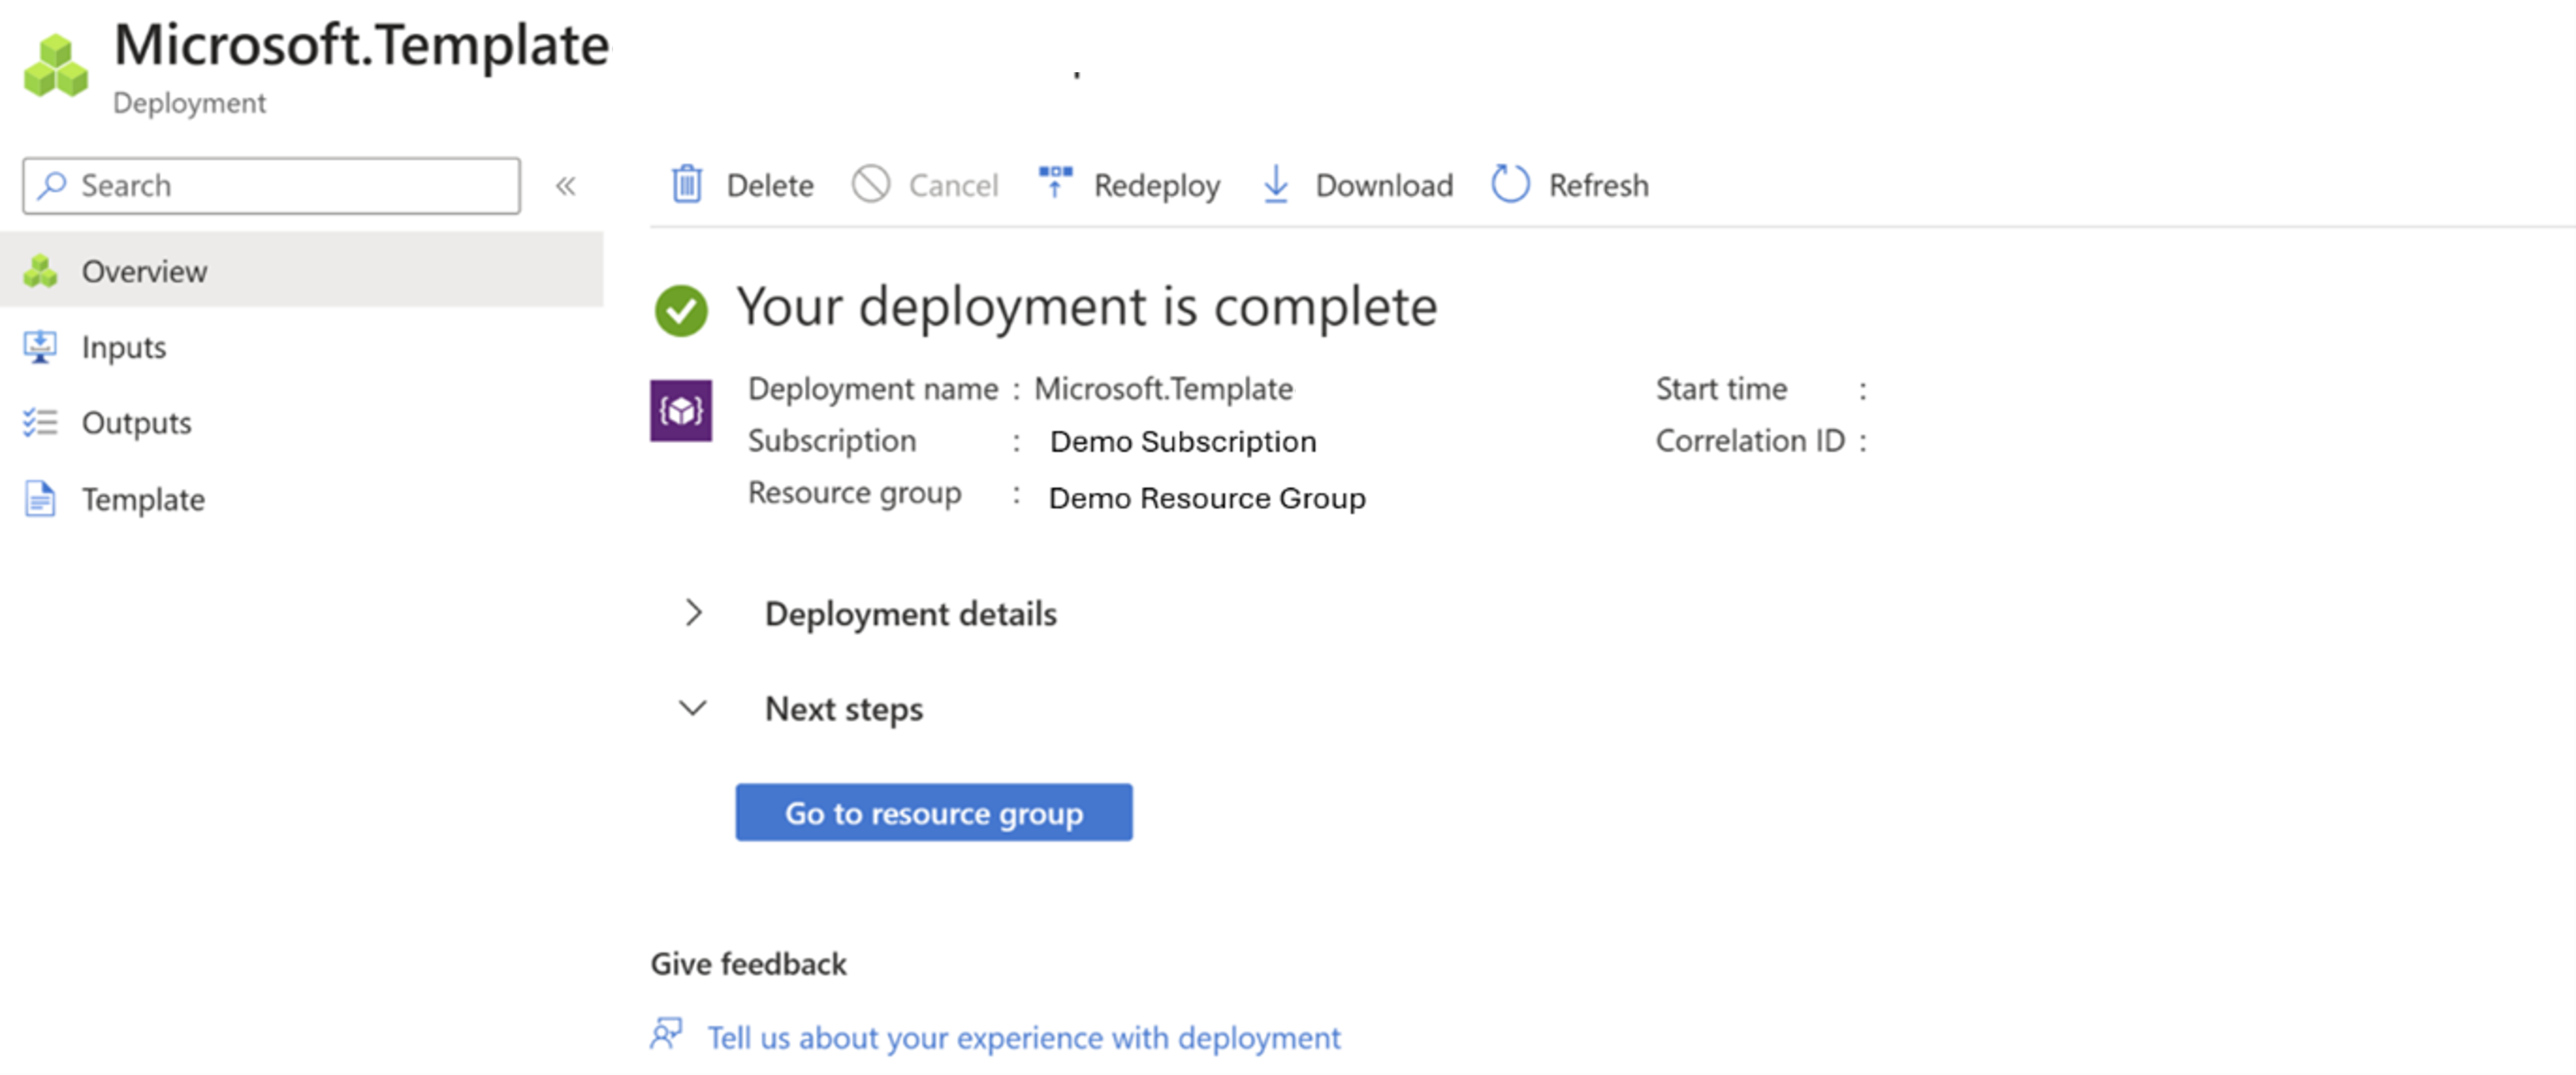
If you navigate away from the page, you can check the status of the deployment by clicking Notifications  in the Azure portal.
Tip
For troubleshooting any deployment errors, you can refer this page.