Note
Access to this page requires authorization. You can try signing in or changing directories.
Access to this page requires authorization. You can try changing directories.
Important
Azure API for FHIR will be retired on September 30, 2026. Follow the migration strategies to transition to Azure Health Data Services FHIR® service by that date. Due to the retirement of Azure API for FHIR, new customer deployments won't be allowed beginning April 1, 2025. Azure Health Data Services FHIR service is the evolved version of Azure API for FHIR that enables customers to manage FHIR, DICOM, and MedTech services with integrations into other Azure services.
In the previous tutorial, you deployed and set up your Azure API for FHIR®. Now that you have your Azure API for FHIR setup, we register a public client application. You can read through the full register a public client app how-to guide for more details or troubleshooting. We call out the major steps in this tutorial.
Navigate to Microsoft Entra ID
Select App Registration --> New Registration
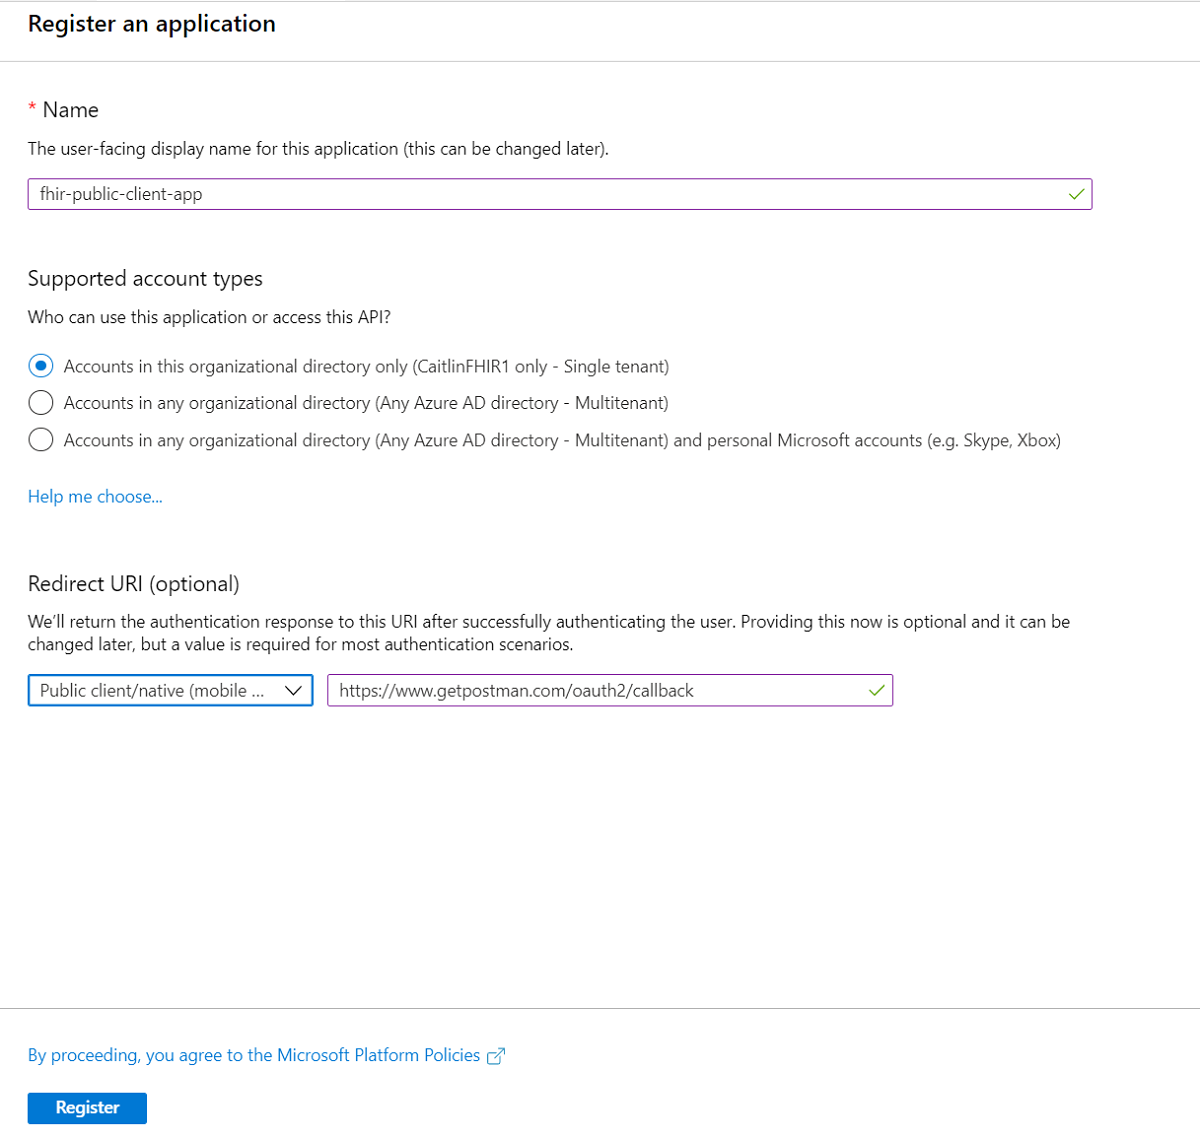
Name your application
Select Public client/native (mobile & desktop) and set the redirect URI.
Client application settings
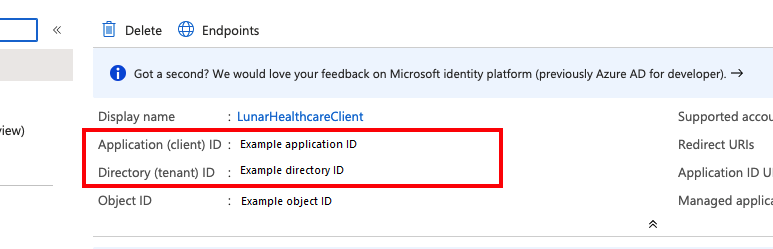
Once your client application is registered, copy the Application (client) ID and the Tenant ID from the Overview Page. You’ll need these two values later when accessing the client.
Connect with web app
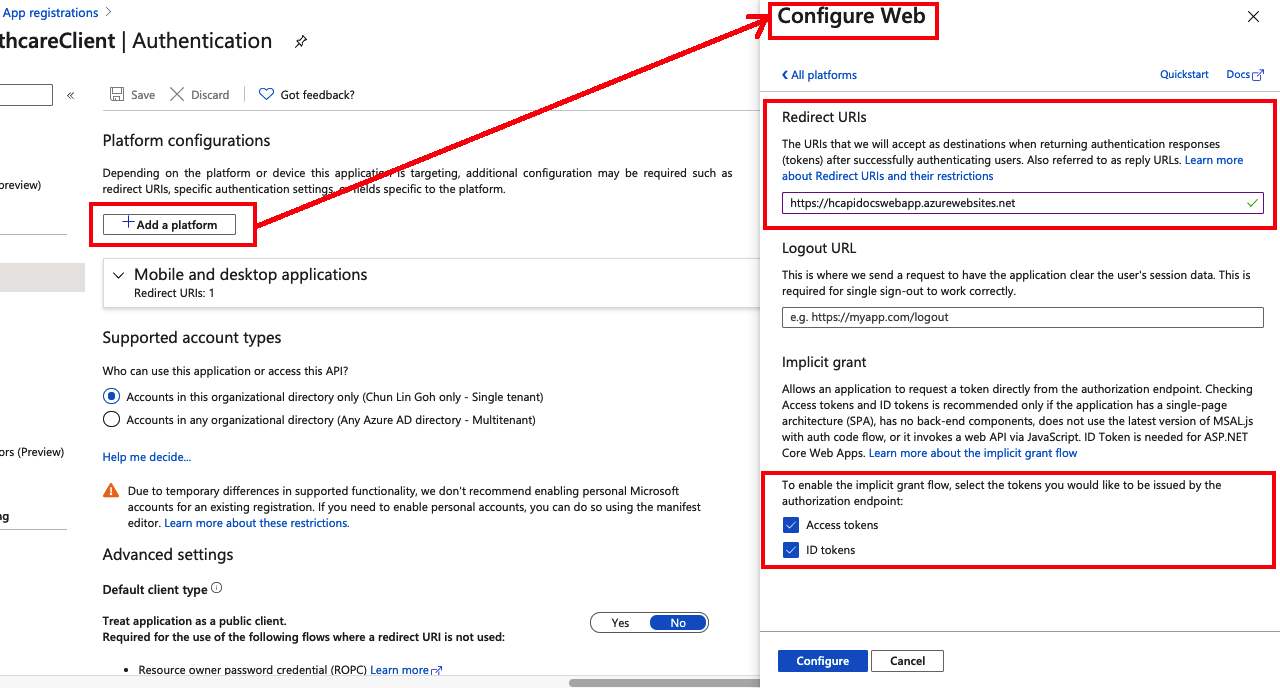
If you’ve written your web app to connect with the Azure API for FHIR, you also need to set the correct authentication options.
In the left menu, under Manage, select Authentication.
To add a new platform configuration, select Web.
Set up the redirect URI in preparation for when you create your web application. To do this, add
https://\<WEB-APP-NAME>.azurewebsites.netto the redirect URI list. If you choose a different name during the step where you write your web app, you’ll need to come back and update this.Select the Access Token and ID token check boxes.
Add API permissions
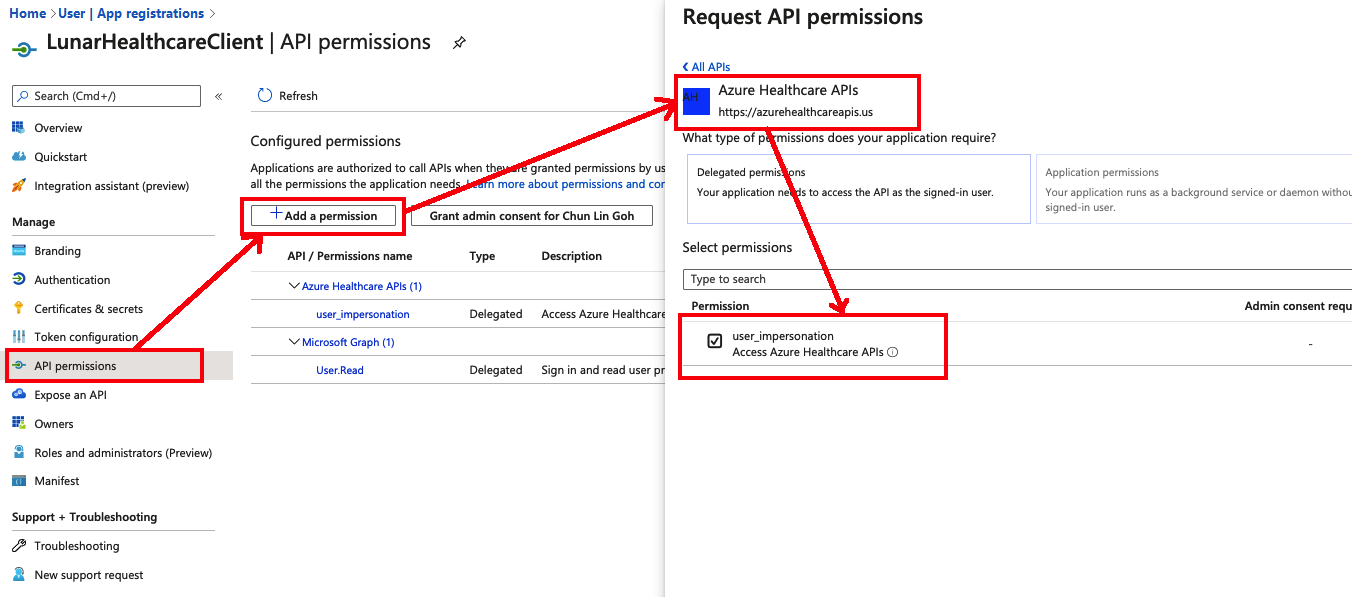
Now that you have set up the correct authentication, set the API permissions.
- Select API permissions and select Add a permission.
- Under APIs my organization uses, search for Azure Health Data Services.
- Select user_impersonation and select add permissions.
Next Steps
You now have a public client application. There are tools available that can allow intuitive querying. Once you have successfully connect to your client application, you’re ready to write your web application.
Note
FHIR® is a registered trademark of HL7 and is used with the permission of HL7.