Add non-graded and graded assessments to a course
Community Training (CT) platform allows trainers to add assessments as a way to evaluate learners on their knowledge and proficiency. The platform provides two types of assessments in the form of non-graded assessments and graded assessments containing one or more multiple-choice questions.
Non-graded Assessments - A Non-graded Assessment serves as a refresher for learners and facilitates revision of a particular lesson. There is no limit to the number of assessments you can add to a course.
Graded Assessments - A Graded Assessments is used to evaluate learners on their proficiency and knowledge in a particular course to measure learning outcome. Unlike non-graded assessments, a graded assessment has a limited number of attempts and a passing percentage as specified by the trainer.
In this article, you will learn how to add assessments to a course followed by an overview on sample assessment question types, in respective sections.
Permission Level
The CT management portal provides role-based permission levels. The table below shows which administrator roles are allowed to add non-graded and graded assessments to a course in the portal:
| Access Level | Add assessments to a course |
|---|---|
| Global Administrator | Yes |
| Organization Administrator | Yes |
| Learning Path Administrator | Yes |
| Category Administrator | Yes |
| Course Administrator | Yes |
| Group Administrator | No |
Add a non-graded assessments for a course
In this section, you will learn how to add non-graded assessments to a course:
Tip
Use the non-graded assessments after every 2-3 lessons to help learners retain and revise the learning concept. Keep the questions short and simple. Answering correctly makes the learner want to go to the next lesson, ensuring higher completion rate of courses.
On the Community Training portal, login and switch to administrator view.
Search for the Category then select the Course you want to manage under a category in the list to which you want to add a non-graded assessments.
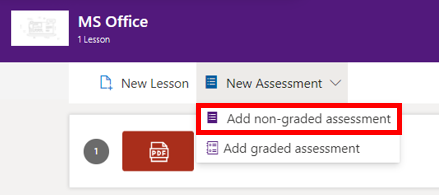
Select New Assessment button and select the Add non-graded assessments option from the drop-down menu.
Enter details for the non-graded assessments on the portal as below:
Non-graded Assessments Title – This would be assessment name.
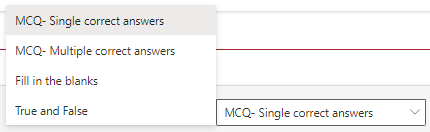
Question Type dropdown - Select the format that you would like to use for this question. You can select:
- MCQ - Single correct answers
- MCQ - Multiple correct answers
- Fill in the blanks
- True and False
Note
You can not change the question type once you have saved the assessment.
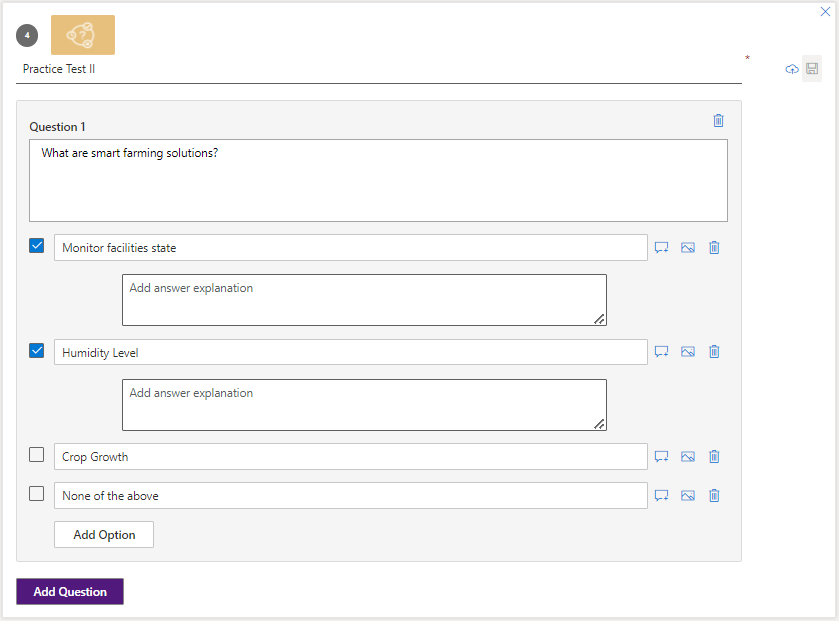
- Question Title – add your question in this field. Check the sample questions to know more about the types of questions you can create on the portal.
- Options – add one or more options as possible answers for the question. Check the radio button/checkbox to the left of the text field to select the correct answer(s).
- Answer Explanation - Click on the icon besides every option to add explanation for that specific option.

A non-graded assessment might typically look like this:
Note
If only two possible options are needed use the Delete button next to the option field to remove it. To add more options use the Add Option button to increase choices for the question.
Tip
The Question and Options both support HTML rich text. Please ensure the rich text formatting is applied from the options available in the editing box only and not from the content source.
Select Add Question at the bottom-left of the assessment card, to add more questions in the non-graded assessment and repeat Step 4.
Once you have finished adding questions, select the Save icon to the right of the assessment title to upload the non-graded assessment to the portal.
Tip
To import your existing list of questions for a non-graded assessment, use the Bulk upload questions feature to seamlessly import your existing questions.
Add graded assessment(s) to a course
In this section, you will learn how to add a graded assessment to a course.
Tip
Use the graded assessment to evaluate the knowledge of a learner that is acquired from the course at various points in a course. Keep a fair pass percentage based on the degree of difficulty and number of attempts as required for the role.
On the Community Training portal, login and switch to administrator view.
Under the Course tab, select the course under a category in the list to which you want to add an assessment.
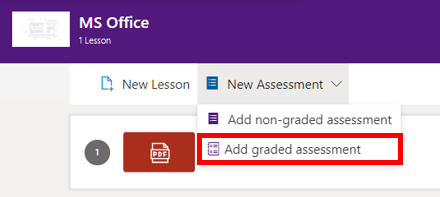
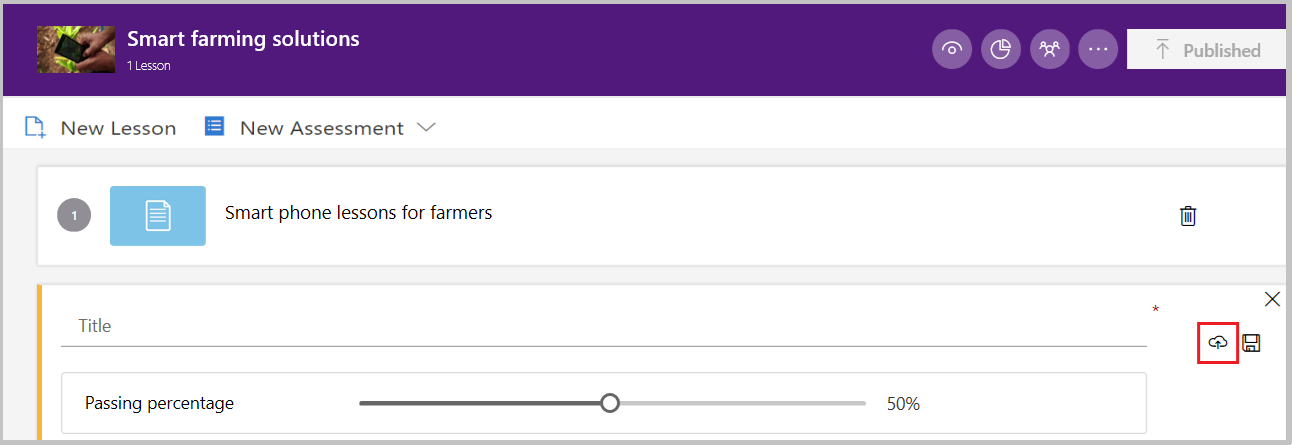
Click or tap on the New Assessment button and select the Graded assessment option from the drop-down menu.
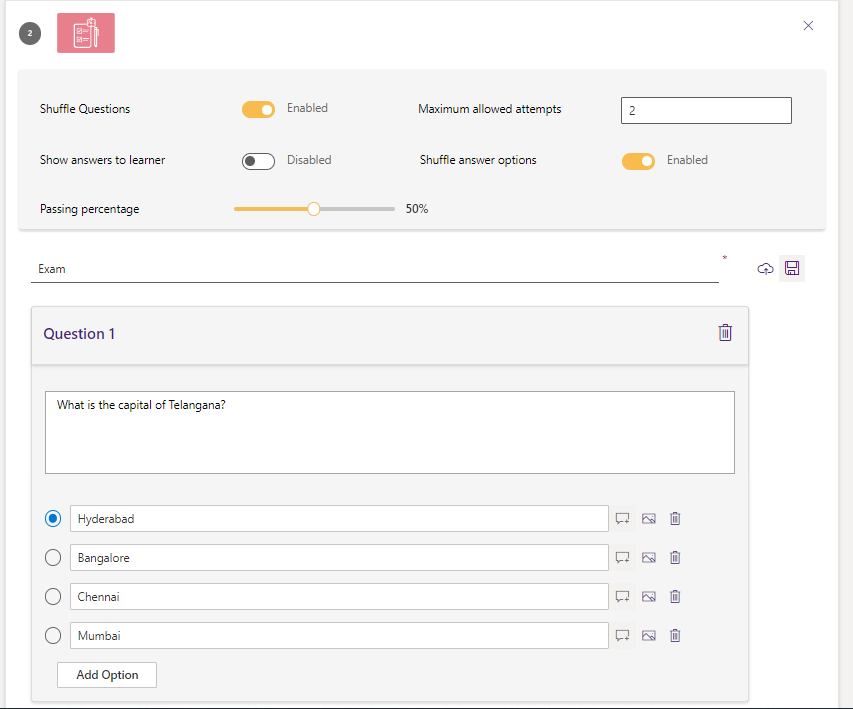
Enter details for the graded assessment on the portal as below:
Enable the shuffle mode for the questions/answer options if required. This will ensure that learners will always be offered a different version of the assessment so you can be sure that answers cannot be memorized for subsequent attempts or copied from others.
Define the passing percentage and number of attempts a learner can take the assessment based on the degree of difficulty.
Enable the Show answers to learner if you would like to add answer explanation which would be shown to the learner once he/she completes the assessment and are viewing their answers/scores.
Enter Graded Assessment Title. The graded assessment title is the name for the assessment displayed to the learners on the web portal and mobile application. For example: Final Assessment
Note
All the questions in the assessment carry equal weightage. And an assessment is always the last segment of the course.
Enter details for Question 1 on the portal as below:
Question Type dropdown - Select the format that you would like to use for this question. You can select:
- MCQ - Single correct answers
- MCQ - Multiple correct answers
- Fill in the blanks
- True and False
Note
You can not change the question type once you have saved the assessment.
- Question Title – add your question in this field. Check sample questions to know more about the types of questions you can create on the portal.
- Options – add one or more options as possible answers for the question. Check the checkbox/radio button to the left of the text field to select the correct answer.
Note
If only two possible options are needed, use Delete button next to the option field to remove the options. To add more options use Add Option button to increase choices for the question.
Tip
The Question and Options both support HTML rich text. Please ensure the rich text formatting is applied from the options available in the editing box only and not from the content source.
To add answer explanation, first enable the toggle near assessment title and then click on the Add explanation icon beside the option text field and provide the relevant details in the text box.
Click or tap Add Question, to add more questions in the assessment and repeat Step 5.
Once you have finished adding questions, click or tap the Save icon to the right-end of the assessment title to upload the assessment to the portal.
Tip
Use the bulk upload questions feature to seamlessly import your existing questions list for an assessment.
Bulk upload questions for a non-graded assessment or graded assessment
In this topic, you will learn how to bulk upload questions for a non-graded or graded assessment in the management portal:
Prerequisite for bulk upload questions
Before starting the bulk upload you need to make sure the question list is structured in the right format on your local machine. The steps below provide information on how to create and verify that the question list is in the correct format.
Step 1 - Download the sample CSV file
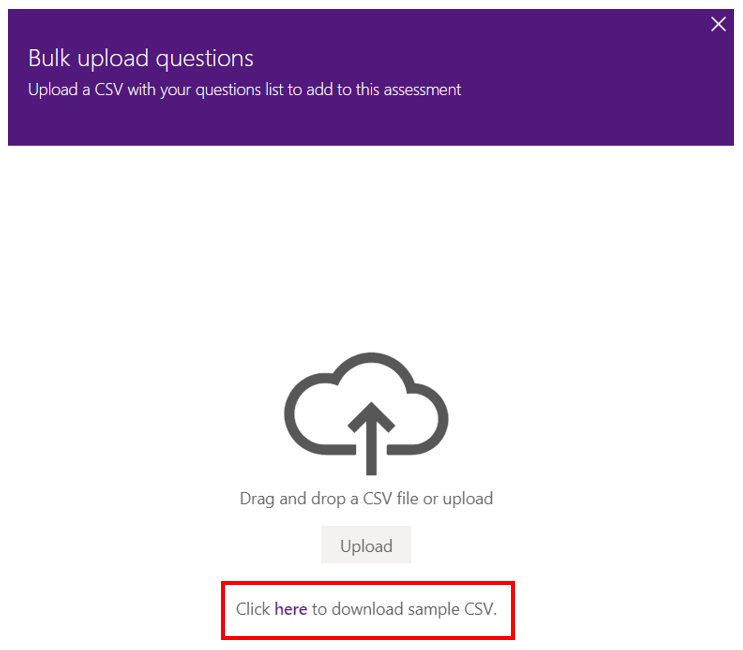
Click or tap on the Import CSV icon to the top right of the assessment.
In the bulk upload panel, download the sample CSV and save on your local machine.

Step 2 – Edit the sample CSV file to create question list
Open the sample csv file in Microsoft Excel.
Remove the sample questions from the CSV file.
Important
Do not remove the column headers from the CSV file.
Start adding 1 question per row with the following information under each column header:
Question type Question Text Choices (1 to N) Correct Answer Answer Explanation Match Criterion Single choice Entire question body Add as many choices as required Add the numeric value of the correct option Add answer explanation for each option separated by semi-colon Not applicable Multiple choice Entire question body Add as many choices as required Add the numeric value of the correct option(s) Add answer explanation for each option separated by semi-colon Not applicable Fill blanks Entire question body with blanks depicted by pipe delimiter Not applicable Correct answer(s) for a blank to be separated by semi-colon. Correct Answer(s) for multiple blank separated via pipe delimiter Add answer explanation for each option separated by semi-colon Add the Match type (Contains/ Exact Match) for each blank separated by pipe delimiter True false Entire question body Only choice 1,2 can be filled Add "TRUE" or "FALSE" Not applicable Not applicable 
Note
A sample CSV file is available for quick reference (here.
Rename and save the edited file once you have finished creating the question list. When editing the CSV file, please take care of the following things:
- Do not add comma (,) in the question or choices when editing the sample file
- Use semi-colon (;) or pipe ( | ) as delimiter when adding multiple values for a single option. Refer to the above step for desired usage.
- For any cell, do not split the text into multiple lines (i.e. do not use ALT + Enter)
Note
There may be questions with different number of choices. For questions which have fewer choices, add some placeholder values while uploading from CSV. Later, remove these options after upload.
For example, there are 5 questions in the list – first 3 questions have 4 choices each and remaining 2 questions have only 2 choices, add as placeholder value for choice 3 and choice 4 in the CSV file for the last two questions.
Step 3 – Verify the CSV file before uploading
Open the question list csv file in Notepad. Right Click > Open with > Notepad.
Remove Word Wrap formatting from the tool bar. Format > Word Wrap.
Verify the structure of the file is correct by ensuring the following things:
- For each question row, number of commas (,) is one less than the number of column headers
- For each question, there should not be any line break i.e. question must be contained in a single line.
- For each question, there is no blank values for the choices.
In case you find any issues with the file, edit and correct the structure as described in the previous step.
Steps for bulk upload questions for a non-graded or graded assessment
Click or tap on the Import CSV icon to the top right of non-graded assessment or graded assessment.
In the bulk upload panel, choose the Upload option and select the csv file containing the question list.
.png)
Click or tap on the Done button to begin bulk upload questions operation.
Once completed, you will see the newly added questions in the non-graded assessment or graded assessment.
Question Types for any assessment
In this article, you will learn about the variety of question types that you can create for any assessment in the management portal.
Following are the question types that can be created on the portal,
- Single Choice Question – can be answered with only one correct answer
- Multi Choice - Multi Correct Question – can be answered with more than one correct answer
- True/False Question – can be answered with either True or False
- Fill in the Blank Question – can be answered by filling blank in a statement
- Chronological Question – can be answered by logical ordering of text/images
- Numerical Question – can be answered with a specified mathematical precision
- Association Question – can be answered by logical matching of text/images
Note
The question and answer options support rich text to enable text formatting (bold, italics, underline, bullets, numbering etc.), images and external web links.
Single Choice Question
.png)
For this type of question, learners can choose a single answer among the available answer choices because there is only one correct answer.
To create a single choice question,
Add the question with required images/links and a set of answer option
Select the correct answer by checking the radio button to the left of the answer option
This question will appear like this for the learners
.png)
Multi Choice - Multi Correct Question
This type of question can be created by selecting MCQ - Multiple correct answers. This will allow the Administrator to select multiple correct answers to that question - hence making the question multiple-choice multi-correct type.
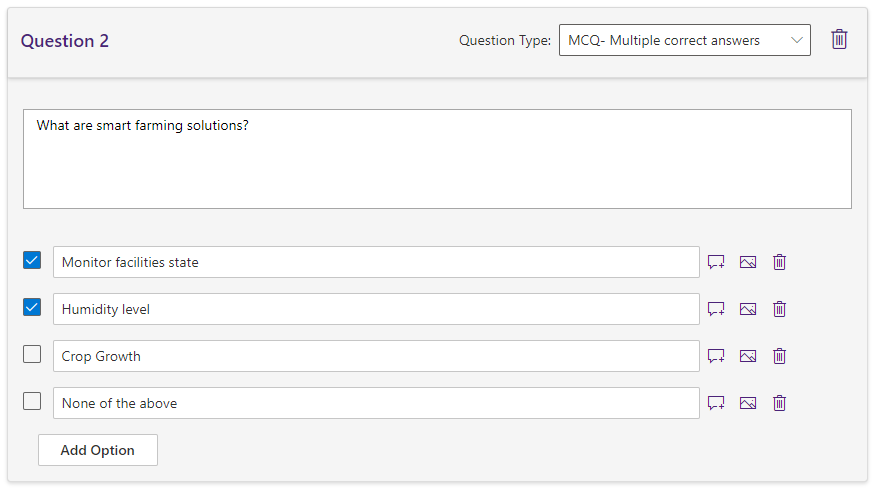
Note
The change in type of question cannot be done once the assessment is saved as the question type dropdown will disappear from the question box.
True/False Question
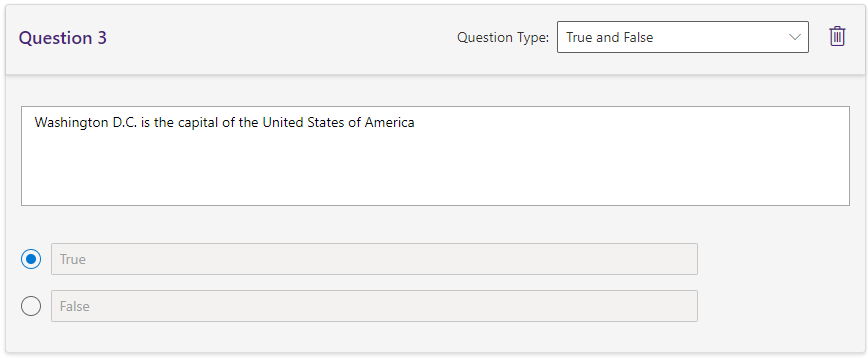
For this type of question, learners can choose only one amongst the two available options of true and false.
To create a True/False question,
- Add the question text with image/links in the question title box
- Select the correct answer option by checking the radio button to the left of the answer text field
The question will appear like this for the learners –

Fill in the Blank Question
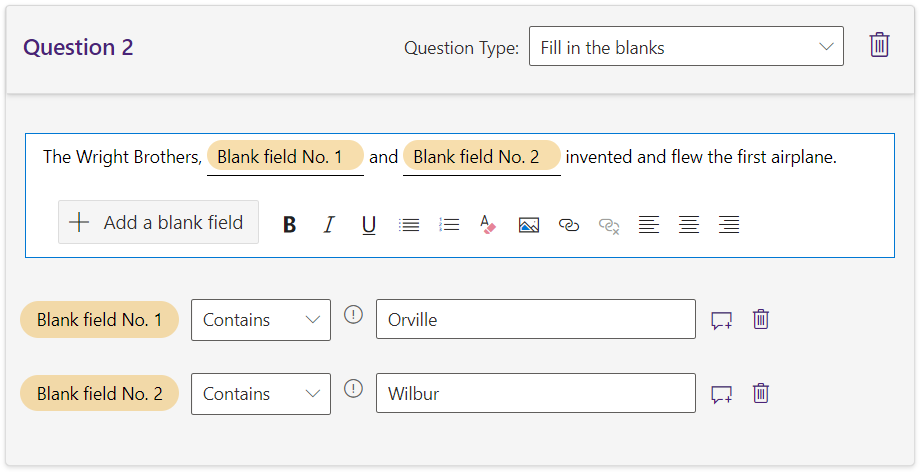
For this type of question, learners can choose only one answer among the available options which fills the blank in the question to complete the phrase.
To create a Fill in the Blank question,
- Add the question statement along with the blank fields placeholders added using the option + Add a blank field
- Select the match criterion of blank using the dropdown and add the answer options with text to be filled in the blanks.
- Contains: The answer from the learner is marked correct if it matches any of the value(s) provided by Admin. Multiple values in answer text can be provide as 'Cat;The cat;cats' etc. And if the learner's answer is any of these in case in-sensitive manner, then its marked as correct.
- Exact Match: This accepts only 1 value and answer evaluation is case-sensitive. Hence, the learner has to enter the exact string to get it marked correct.
The question will appear like this for the learners –

Chronological Question
.png)
For this type of question, learners need to decide on the correct chronological order for the objects in the question.
To create a chronological question,
- Add the question with text or images to be ordered in a specified chronological order
- Add the answer options with possible ordering schemes (including the correct order)
- Select the correct order by checking the radio button left of the answer text field
The question will appear like this for the learners -
.png)
Numerical Question
.png)
For this type of question, learners can answer to the nearest possible numerical answer option based on their mathematical computation.
To create a numerical question,
- Add the computation question mentioning the precision scale required for the answer
- Complex equations can be included in the question and answers by inserting them as images
- Add the answer options and select the correct answer by checking the radio button on the left
The question will appear like this for the learners –
.png)
Association Question
.png)
For this type of question, learners can define associations between the elements of two lists.
To create an association or matching question,
- Add the question statement to match/associate the text or images
- Add the answer options with possible matches (including the correct match)
- Select the correct order by checking the radio button left of the answer text field
The question will appear like this for the learners –
.png)
Please reach out to us via HelpDesk if you have any further queries.