Setup Microsoft Teams as learner's endpoint for the platform
Community Training allows organizations to enable online learning inside Microsoft Teams across web, mobile and desktop applications. For more details on the Community Training platform integration with Microsoft Teams, visit our website.
In this article, we will describe the steps required to configure your instance with Microsoft Teams.
Before you begin
This article assumes you have followed the steps outlined in the installation article and enabled Microsoft Teams as an endpoint during deployment from the marketplace.
If you haven't, please follow the Installation steps first and then refer this article to configure Microsoft Teams for your instance. Make sure you have the teams app package.
Steps to enable learning inside Microsoft Teams
Step 1 - Delegate permissions on your Azure AD application setup for Community Training
Login to the Azure Portal with admin credentials.
Select Directory + Subscription in the portal toolbar then the directory that contains your Azure AD tenant or search for and select Azure Active Directory.
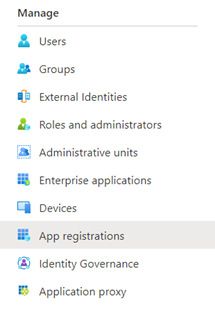
Select the App Registration option from the left panel.
.png)
On the App registrations page, search for and select the Azure AD application created for the Community Training instance during the installation process.
.png)
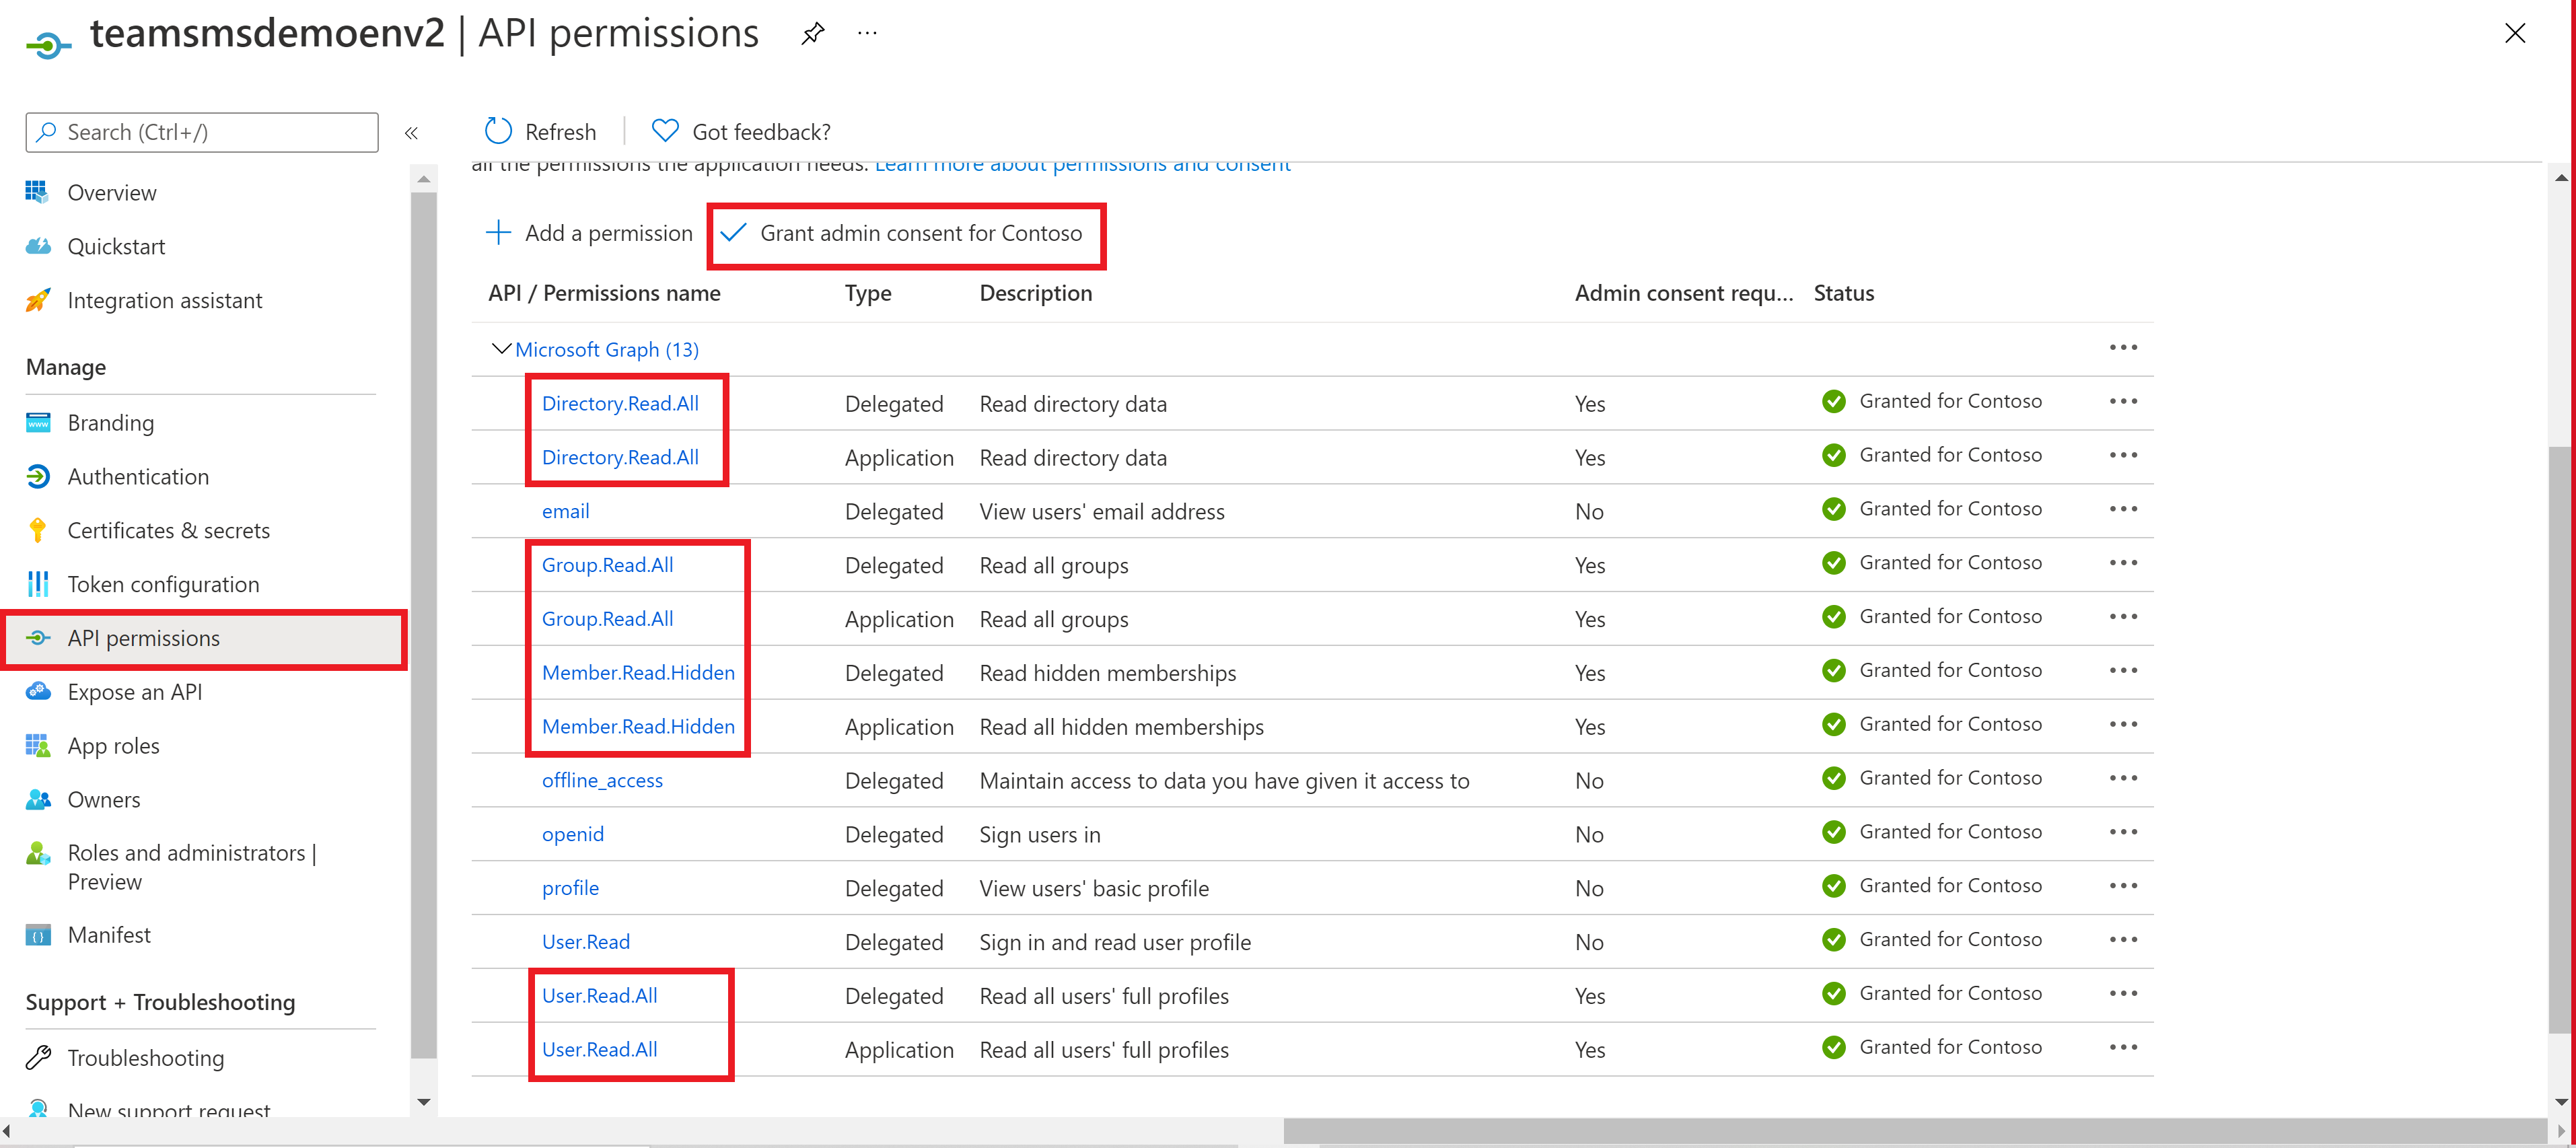
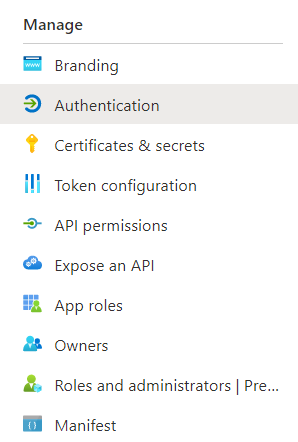
On the application details, select the API permissions option on the left panel.
Select Add Permission and select Microsoft Graph from the right panel.
.png)
Next, in Delegated permissions and Application permissions check the following options:
- Under Delegated permissions - Directory.Read.All, Group.Read.All, User.Read.All, Member.Read.Hidden
- Under Application permissions - Directory.Read.All, Group.Read.All, User.Read.All, Member.Read.Hidden
.png)
Select Grant admin consent then Yes to confirm.
Note
Please ensure all the values marked with a red rectangle are correctly set.
Step 2 - Generate a Teams Manifest File (Microsoft Teams App) for your Community Training instance
Unzip the file steps_to_create_manifest_file.zip.
Open the PDF document "Steps to create a MS Teams file.pdf".
Follow the steps in the word file and make the necessary changes (as suggested in document) with reference to your CT instance.
Note
The color.png and outline.png file to be attached while following the word documentation can be obtained from the same zip file Manifest file setup.zip.
Step 3 - Install the Microsoft Teams App for your organization
Note
If you published the app already in Step 2, you can skip to Step 4.
Open the Microsoft Teams client application and sign in using your global or teams service admin credentials.
Upload the manifest file (.zip file) created in the Step 2 above as a custom app for organization in Teams.
.png)
Note
For more details on how to publish apps in the Microsoft Teams Tenant Apps Catalog, see this article.
Step 4 - Setup app policies to pin the training application from the Microsoft Team admin center
Visit Teams Admin portal and select Setup policies option under Teams apps in the left navigation panel.
.png)
Next select the Add Apps button and search for the training application uploaded in Step 3 - Install the Microsoft Teams App for your organization.
Add the training application as a pinned application.
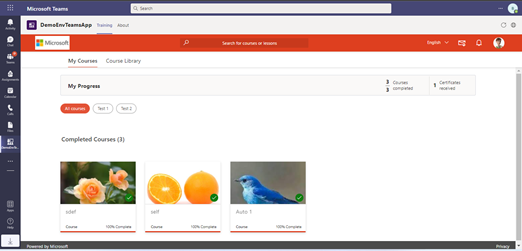
Now your learners can login to Microsoft Teams and access learning content across web, mobile and desktop applications.
Step 5 - Allow portal embedding in MS Teams
Login to Azure portal.
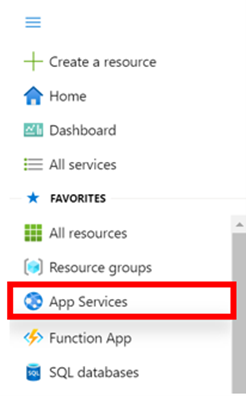
Go to App Services on the left-menu.
.png)
Select the app service belonging to your Community Training instance.
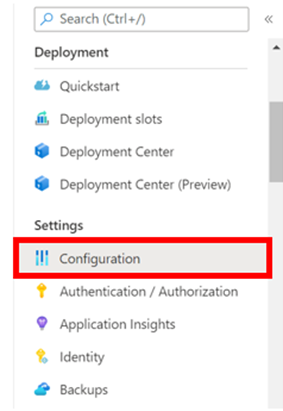
Select Configuration under settings from the left-menu.
.png)
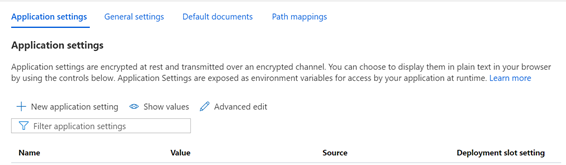
Go to the Applications Settings tab.
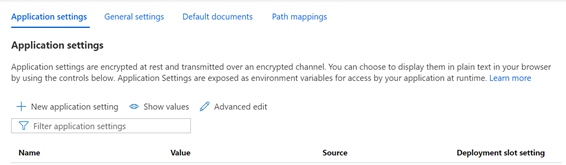
Select the setting Features:AllowSiteEmbedding and update it with value “true”, select OK to confirm.
.png)
Select Save.
.png)
Multi-Tenant support for Azure Active Directory based Authentication in Teams
The Community Training platform supports login via multiple tenants in Teams for AAD based authentication instances.
In this article, you will learn about how to setup Teams SSO to support multiple tenants.
Steps to enable multi-tenant login in Teams for an AAD based instance
Login to Azure portal.
Go to App Services from the left-menu and select the app service belonging to your Community Training instance.
Select Configuration under settings from the left-menu.
Go to the Applications Settings tab
Search for
Features:IsMultiOrgDeployment, add this if it does not exist, set the value to True, then select Ok to confirm.Next, search for
idp:AzureADExternalAuthTenantId, add this application setting if it does not exist using New application setting option.Set the value to common replacing the existing Tenant ID keeping a copy of your original Tenant ID value as a reference, then select Ok.

Whilst in the Configurations section, search for
idp:AzureADExternalAuthTenantand note the Tenant name then search foridp:AzureADExternalAuthClientIdand note the Client ID.Navigate to your tenant (tenant name that you noted from Step 9) where your AAD exists, select App registrations then search for the application which corresponds to your Client ID noted from Step 10.

Select the application, navigate to ‘Authentication’ then select Accounts in any organizational directory (Any Azure AD directory - Multitenant) under Supported account types and select Save.

For each tenant follow these steps:
Setup app policies to pin the training application from the Microsoft Team admin center.
Once the above steps are complete, for first time login using multiple tenants, administrators of those tenants needs to approve the client ID of the CT application by using the below URL
https://login.microsoftonline.com/common/adminconsent?client_id=<client_ID_of_your_application>The users belonging to multiple tenants will now be able to access Community Training through Teams.
Creating Organizations for Each Tenant
Creating Organizations for each tenant is an important step. Unless you create an organization for the Tenant, users from that tenant will not be able to login.
Note
To enable common content across multiple tenants, refer to Enabling Global Content across organizations.
Steps to create organization for each tenant
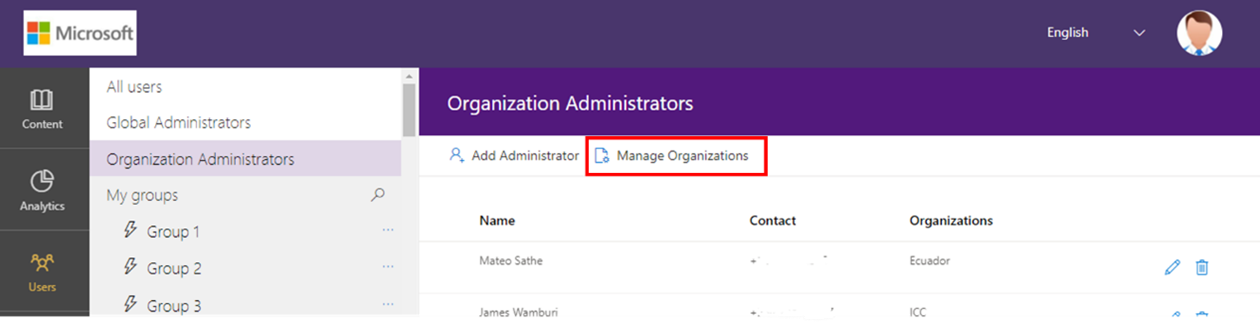
In Admin View, go to the Users tab.
Select Organization Administrators then Manage Organizations.
Select Add Organization.
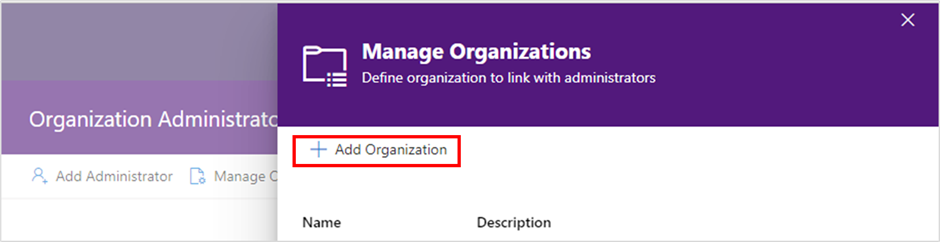
Enter Organization Name and Organization Description then provide the TenantId (Steps to find TenantId) of the respective tenant to be added.
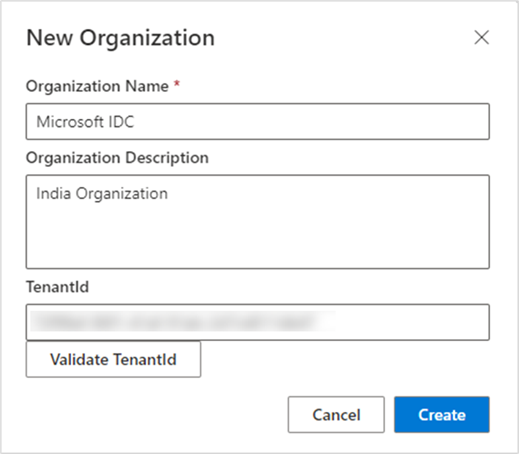
Select Create.
Repeat the above steps to create organizations for the all tenants requiring access.
Schedule an MS Teams meeting for your learners
The Community Training platform allows Administrators to set-up and schedule meetings over MS Teams from within the platform. These meetings can be for the learners enrolled to a specific course/ learning path/ or a user group to enhance their learning curve.
In this article, you will learn how to setup your instance to allow Administrators to set-up a Microsoft Teams meeting for a Course, Learning Path, and User Group.
Steps to configure Microsoft Teams Meeting Scheduling in CT
Follow the steps below that refer to the login identity used on your instance.
- Microsoft Work or School account.
- Social email-based login via your Microsoft, Google or Facebook account.
Note
You need a separate MS Teams license to integrate MS Teams with the Community Training portal. If you do not have one, you may refer to this documentation to get it.
Microsoft Work or School account
Prerequisite:
- For your instance, setup the Work or School Account based authentication.
Next steps:
Once you have completed the AD App registration, follow these steps:
- Configure
https://<instanceurl>/meetingas a single-page application reply URL. Please note that you need to add both '.azurefd.net' and '.azurewebsites.net' URL. For example:- If a custom domain is not set:
<instancename>.azurewebsites.net/meetingand<instancename>.azurefd.net/meeting - If a custom domain is set:
<TeamsMeetingInstanceCustomURL>/meeting
- If a custom domain is not set:
- Configure supported account types as accounts in any organizational directory (Any Azure AD – Multitenant).
- Go to the Commuinty Training app settings and add the following configurations:
- Name:
Features:Meetings:EnableMeetingswith Value:True - Name:
Features:Meetings:ClientIdwith Value of the ClientId of the AD tenant app that has registered the instance.
- Name:
Social email-based login
Step 1
CT must be registered in the same Azure Active Directory which has MS Teams enabled in it. The steps for the app registration are outlined in this documentation.
Step 2
Follow only Step 1 on this link for setting up Teams for the platform.
Step 3
Login to the Azure Portal with admin credentials for the tenant which has the Teams license.
Select the Directory and Subscription icon in the portal toolbar then the directory that contains your Azure AD tenant, or search for and select Azure Active Directory.
Click on the App Registration option from the left panel
On the App registrations page, search for and select the Azure AD application created for the Community Training Instance during the installation process.

Select Authentication from the left panel
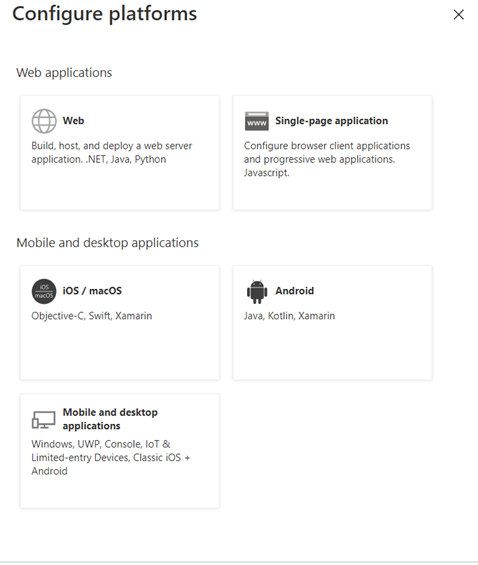
On the Authentication page, search for and select Add a platform
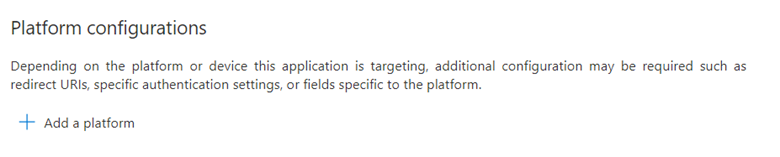
Select the Single-page application option on the configure platforms panel presented.
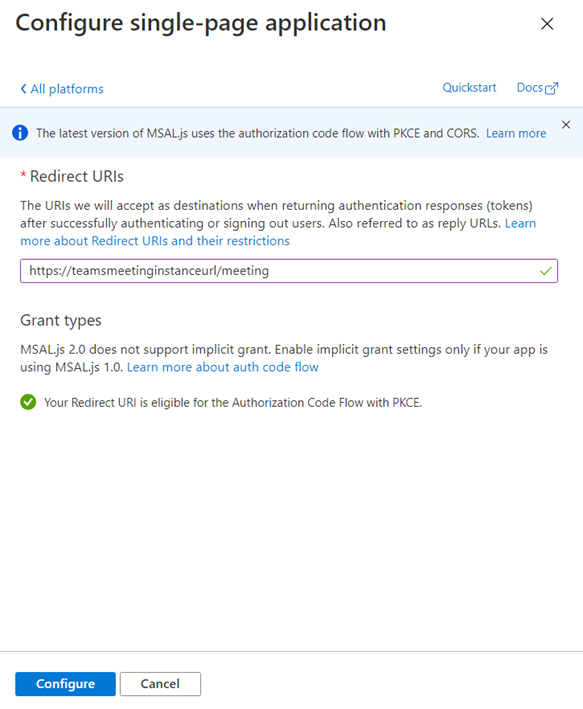
On the configure single page application page, enter
https://<yourinstanceurl>/meeting. Please note that you need to add both .azurefd.net and .azurewebsites.net URL. For example:- If a custom domain is not set:
<instancename>.azurewebsites.net/meetingand<instancename>.azurefd.net/meeting - If a custom domain is set:
<TeamsMeetingInstanceCustomURL>/meeting
Select Configure after typing the URL.
- If a custom domain is not set:
On the Authentication page from point 5 of the list, scroll down to Supported account types. Select the option ‘Accounts in any organizational directory (Any Azure AD directory – Multitenant)
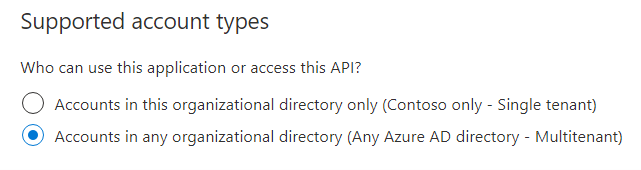
Select Save to confirm the configuration.

Step 4
Setup configurations from the CT app settings:
- Go to the CT app settings and add the configurations:
- Name: Features:Meetings:EnableMeetings
- Value: True
- Add another configuration with these details:
- Name: Features:Meetings:ClientId
- Value of the ClientId of the AD tenant app that has registered the instance.
Steps to Schedule an MS Teams meeting
Once you have configured Microsoft Teams Meeting Scheduling in CT, the administrator will need to follow these steps to schedule a meeting.
Warning
The number of users is limited to 500 and any course/ learning path/group creating a meeting more than that number will not be supported.
Log on to the Community Training portal and switch to administrator view.
Go to the respective Course, Learning Path or User Group you want to schedule a meeting for.
Select the MS Teams option:
- For Course/ Learning Path, click or tap the MS Teams icon on top-right of the details page.

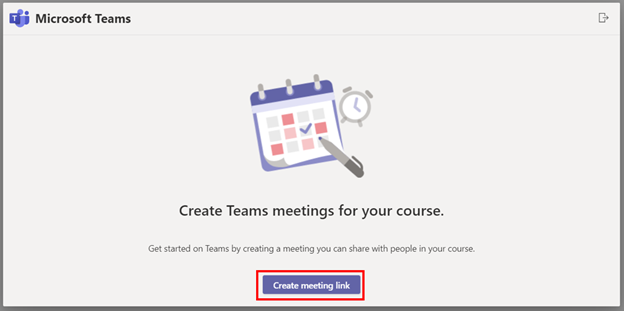
- For User Groups, click on “Create a meeting” icon as shown below.

- For Course/ Learning Path, click or tap the MS Teams icon on top-right of the details page.
Select Create meeting link Ton the pop-up window.
On the “New Meeting” page presented, enter the details required for the meeting:
- Meeting Title.
- The attendees data will be auto-filled from the data you had selected in CT portal.
- Select a range of time in the calendar i.e. Date & Time of Start and End of the meeting.
- Enter the details for this meeting like agenda etc.
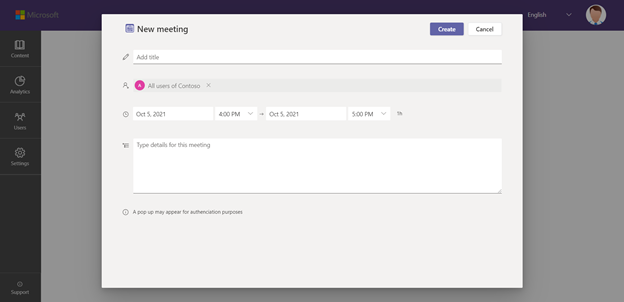
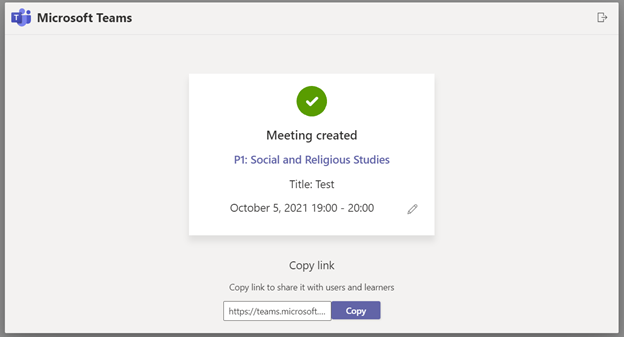
Select Create.
A new pop-up window will open sharing the meeting details along with the meeting link that can be shared with the users.
Note
- For Work or School based instance and Social email-based login, the learner will get an email as well as the meeting notification in his calendar.
Edit MS teams meeting scheduled in CT
You may edit the details of the meeting organized in the CT platform from:
From the CT platform
Once the meeting is created click on the pencil icon on the pop-up window (as shown below).
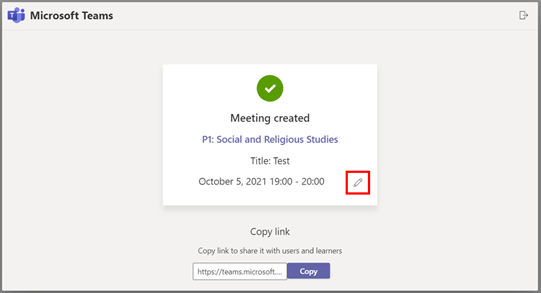
In the Edit meeting pop-up you can modify the title of the meeting.
Note
You will not be able to modify the invitee list and the meeting details.

Select Update to save your changes.
From Microsoft Teams
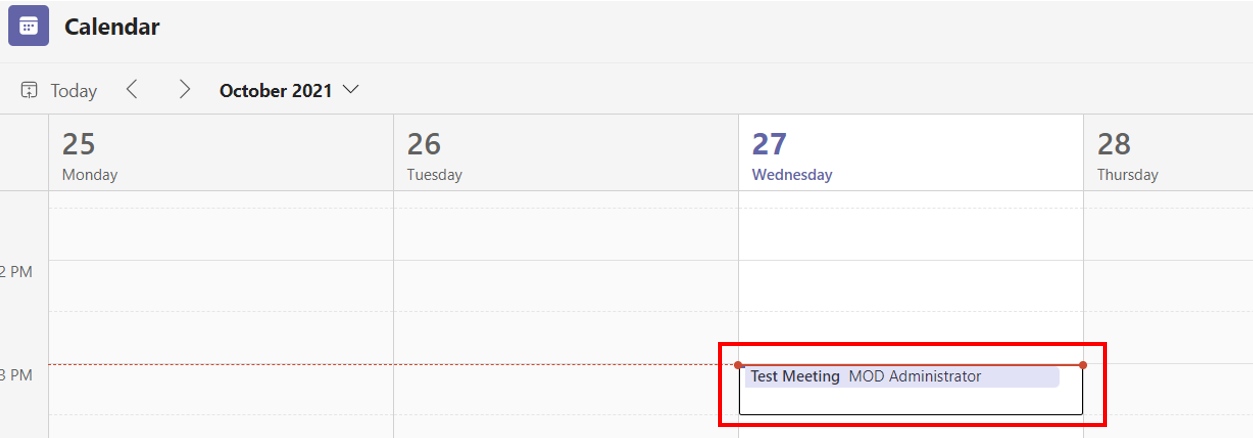
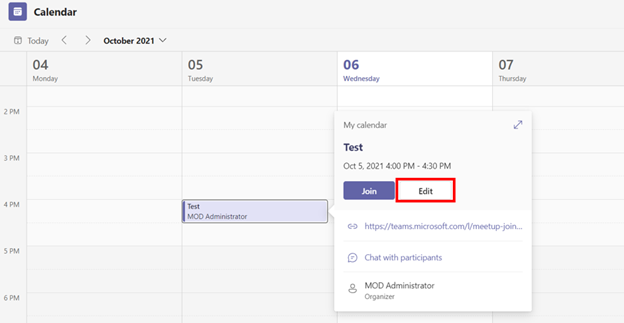
Once the meeting is created, it will appear in the Microsoft Teams calendar.
Open your Microsoft Teams and select Calendar.
Click once on the meeting appointment and select Edit.
Select Show meeting info.
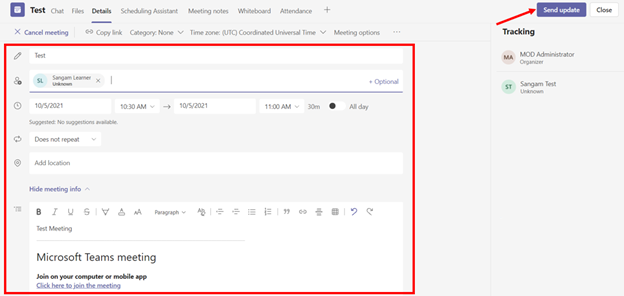
Edit the details from the page and select Send update.
Please reach out to us via HelpDesk if you have any further queries.
Feedback
Coming soon: Throughout 2024 we will be phasing out GitHub Issues as the feedback mechanism for content and replacing it with a new feedback system. For more information see: https://aka.ms/ContentUserFeedback.
Submit and view feedback for