Note
Access to this page requires authorization. You can try signing in or changing directories.
Access to this page requires authorization. You can try changing directories.
To add business context around the Azure resources in an integration solution, you can visualize business processes flows for the tasks implemented by these resources. In Azure Business Process Tracking, a business process is a series of stages that represent the tasks that flow through a real-world business scenario. This business process also specifies a single business identifier or transaction ID, such as a ticket number, order number, case number, and so on, to identify a transaction that exists across all the stages in the business process and to correlate those stages together.
When you add a stage to your business process, you can also define other business property values to capture as data moves through each stage. You can then later map the transaction ID and other properties to specific operations and data outputs in Standard logic app workflows. For more information, see What is Azure Business Process Tracking?
For example, suppose you're a developer or business analyst at a power company. Your company's customer service team has the following business process to resolve a customer ticket for a power outage:

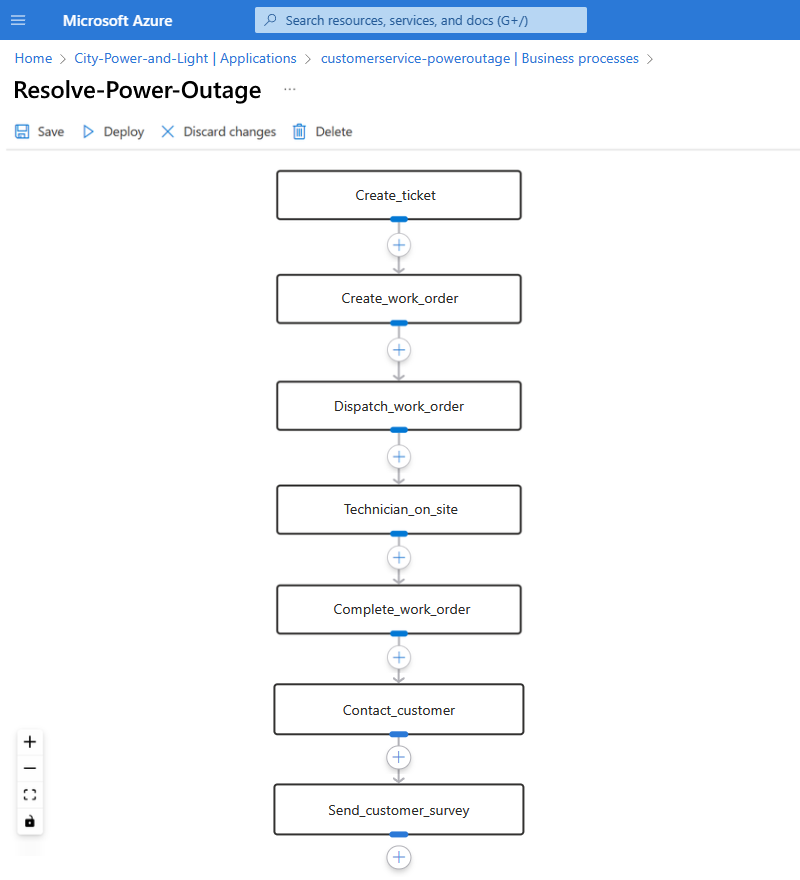
After you create a Business Process resource in Azure, you can use the process editor to create a flow chart that visually describes this business process, for example:

Note
Although this example shows a sequential business process, your process can have parallel branches to represent decision paths.
After you define a business process, you can then map each stage to actual Azure resources.
Note
In this release, you can only map business process stages to Standard logic app resources and their workflows in Azure Logic Apps.
Prerequisites
An Azure account and subscription. If you don't have an Azure subscription, sign up for a free Azure account.
Note
If you're using an Azure integration environment and application groups to organize your Azure resources, and you want to map your business process to Azure resources in your integration environment, all your Azure resources must use the same subscription, including your business processes and integration environment. If you're not using an Azure integration environment, you can map your business process to Azure resources where you have access.
An existing or new Azure Data Explorer cluster and database
This Azure resource is required to create, deploy, and store specified data in a business process. Your business process uses this database to store the transactions and business property values that you want to capture as real-time data moves through your workflows at run time. When you create a business process, you specify the cluster, database, and table to use for storing the data that you want.
Note
Although Azure Business Process Tracking doesn't incur charges at this time, Azure Data Explorer incurs charges, based on the selected pricing option. For more information, see Azure Data Explorer pricing.
Create a business process
In the Azure portal search box, enter and select Business Process Tracking.

On the Business Process Tracking toolbar, select Create.
On the Create business process page, on the Basics tab, provide the following information:
Property Required Value Description Subscription Yes <Azure-subscription> The Azure subscription to use for your business process. Resource group Yes <Azure-resource-group-name> A new or existing Azure resource group.
This example uses City-Power-and-Light-RG.Business process name Yes <process-name> A name for your business process. Use only alphanumeric characters, hyphens, underscores, parentheses, or periods.
This example uses Resolve-Power-Outage.Description No <process-description> The purpose for your business process. Region Yes <Azure-region> The Azure region for your business process. The following example shows the information for the sample business process:

When you're done, select Next: Transaction ID. On the Transaction ID tab, provide the following information:
Property Required Value Description Transaction ID Yes <transaction-ID> This important and unique ID identifies a transaction, such as an order number, ticket number, case number, or another similar business identifier that's available across all stages in your business process.
This example uses the transaction ID named TicketNumber to correlate events across the different systems in the example business process, which include CRM, Work Order Management, and Marketing.
Note: Azure Business Process Tracking automatically includes and records the transaction timestamp so that you don't have to separately add this value. Although you can define only a single transaction ID when you create a business process, you can later define other business properties in each stage that you want to record.Data type Yes <transaction-ID-data-type> The data type for your transaction ID: String or Integer.
This example uses the Integer data type.The following example shows the sample transaction ID:

When you're done, select Next: Data storage. On the Data storage tab, provide the following information:
Property Required Value Description Subscription Yes <Azure-subscription> The Azure subscription for your Data Explorer instance. Cluster Yes <cluster-name> The name for the cluster in your Data Explorer instance. Database Yes <database-name> The name for the database in your Data Explorer instance. Table Yes <table-name> The name for the table to create or use. To update an existing table, select the option to Use an existing table.
Note: Although you can use the same name as an existing table, which updates that table, for security purposes, create a unique and separate table for each business process. This practice helps you avoid mixing sensitive data with non-sensitive data and is useful for redeployment scenarios.Use an existing table No Enabled or disabled To update an existing table, select this option. When you're done, select Create.
After the Azure portal completes deployment for your new Business Process resource, the portal automatically opens the resource's Overview page.
Now, continue on to add the stages for your business process.


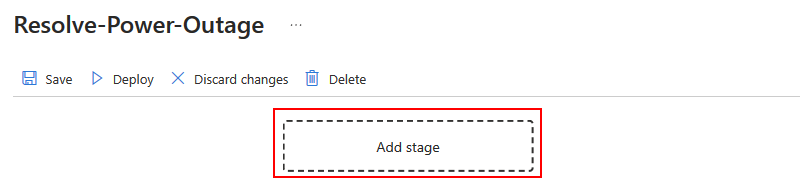
Add a business process stage
After you create your business process, add the stages for that process. For example, suppose you're an integration developer at a power company. You manage a solution for a customer work order processor service that's implemented by multiple Standard logic app resources and their workflows. Your customer service team follows the following business process to resolve a customer ticket for a power outage:
In the Azure portal, open your business process resource, if not already open.
On the resource menu, under Business process tracking, select Editor.
In the editor, select Add stage.
On the Add stage pane, provide the following information:
Tip
To quickly draft the stages in your business process, just provide the stage name, select Add, and then return later to provide the remaining values when you map the business process to a Standard logic app workflow.
Property Required Value Description Stage name Yes <stage-name> The name for this process stage. Use only alphanumeric characters, hyphens, underscores, parentheses, or periods. Description No <stage-description> The purpose for this stage. This example creates a stage named Create_ticket:

In the Properties to track table, on the Success tab, your previously defined transaction ID is automatically included. This value is required for correlation across stages and workflows.
On the Success and Failure tabs, you can optionally define and map other business property values that you want to record. You can use these property values to correspondingly identify a successful or failed stage, which is left entirely to your interpretation, business scenarios, or needs.
Success tab: Define and map other business property values to identify and record from a successful stage.
Failure tab: Define and map other business property values to identify and record from a failed stage.
To define other business property values to use for this stage, follow these steps:
Under Properties to track, select Success or Failure as appropriate.
Under the Properties to track table, select Add property.
Enter the property name and type, which is either a String or Integer.
For example, this stage specifies a few more properties, such as CustomerName, CustomerEmail, and CustomerPhone, to record from a successfully completed stage:

When you're done, select Add stage.
Now, you can continue adding more stages or map each business property in your stage to the respective operation and outputs in a Standard logic app workflow.
To add another stage, choose one of the following options on the process editor:
Under the last stage, select the plus sign (+) for Add a stage.
Between stages, select the plus sign (+), and then select either Add a stage or Add a parallel stage, which creates a branch in your business process.
Tip
To delete a stage, open the stage's shortcut menu, and select Delete.
Repeat the preceding steps to add another stage as needed.
The following example shows a completed business process:
When you're done, on the process editor toolbar, select Save.
Now, continue on to map each business property to the respective operation and outputs in a Standard logic app workflow so that you can get insights about your deployed resource.

