Note
Access to this page requires authorization. You can try signing in or changing directories.
Access to this page requires authorization. You can try changing directories.
In this article, you learn how to create a Microsoft Exchange peering with a route server using the Azure portal. This article also shows you how to check the status of the resource, update it, or delete and deprovision it.
Prerequisites
- Review the Prerequisites to set up peering with Microsoft and the Exchange peering walkthrough before you begin configuration.
- If you already have an Exchange peering with Microsoft that isn't converted to Azure resources, see Convert a legacy Exchange peering to an Azure resource by using the portal.
- Associate your public ASN with your Azure subscription. For more information, see Associate peer ASN to Azure subscription using the Azure portal.
Create and provision an Exchange peering
In this section, you learn how to create an Exchange peering with a route server using the Azure portal.
Sign in to the Azure portal.
In the search box at the top of the portal, enter peering. Select Peerings in the search results.
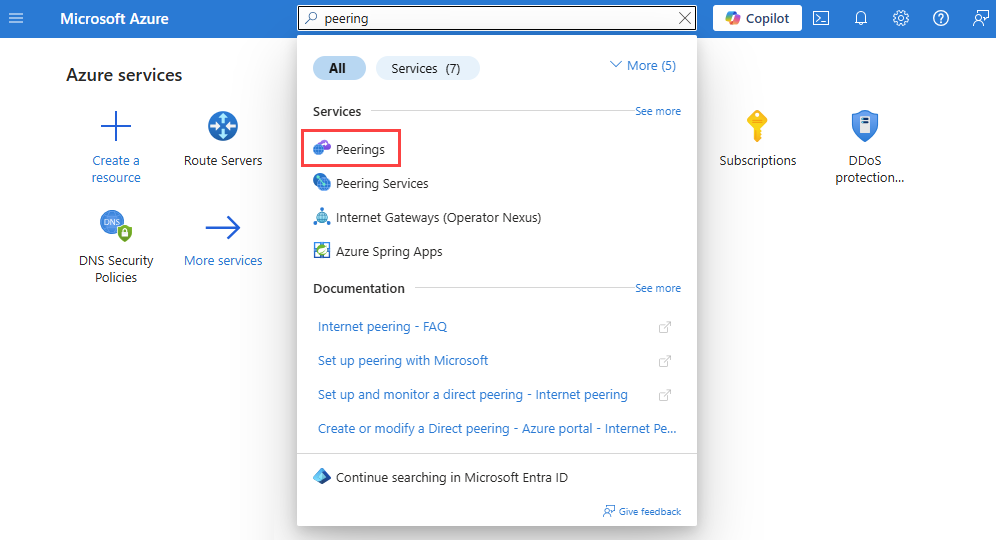
In the Peerings page, select + Create to create a new peering.
In the Basics tab of Create a peering, enter or select your Azure subscription, resource group, name, and ASN of the peering:
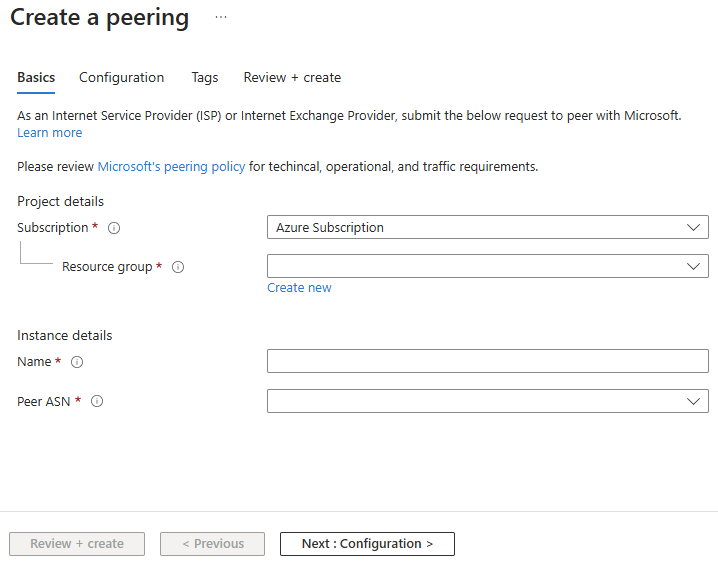
Important
You can only choose an ASN with ValidationState as Approved before you submit a peering request. After submitting a PeerAsn request, wait for about 12 hours for the ASN association to be approved. If the ASN you select is pending validation, you'll see an error message. If you don't see the ASN you needed to choose, check that you selected the correct subscription. If so, check if you have already created PeerAsn. For more information, see Associate peer ASN to Azure subscription using the Azure portal.
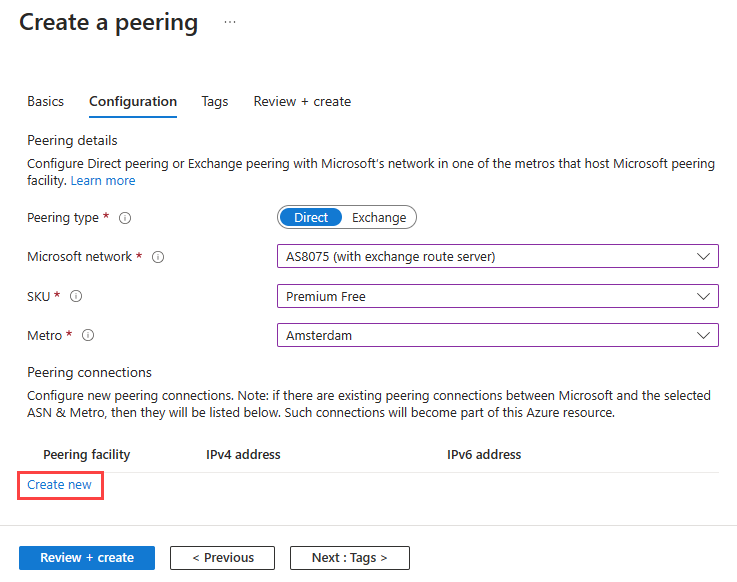
Select Next: Configuration to continue. In the Configuration tab, you MUST choose the following required configurations to create a peering for Peering Service Exchange with Route Server:
- Peering type: Direct.
- Microsoft network: AS8075 (with exchange route server).
- SKU: Premium Free.
Select your Metro, then select Create new to add a connection to your peering.
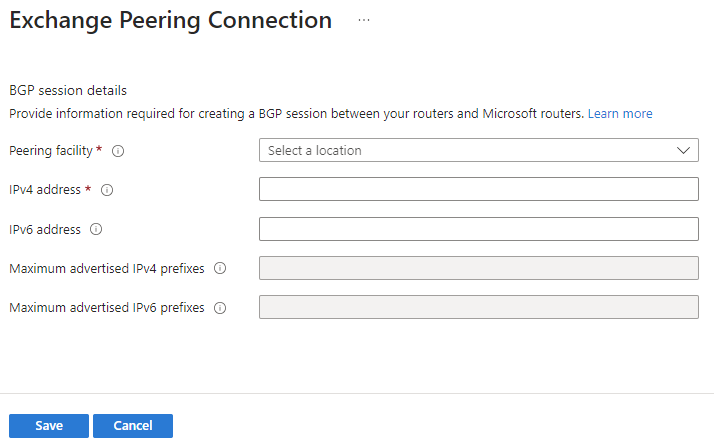
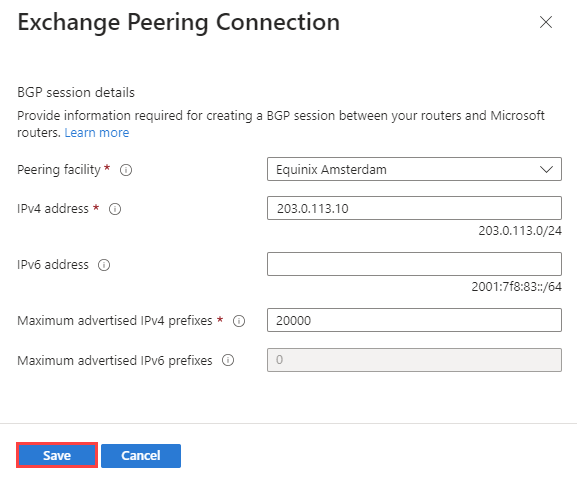
In Direct Peering Connection, enter or select your peering facility details then select Save.
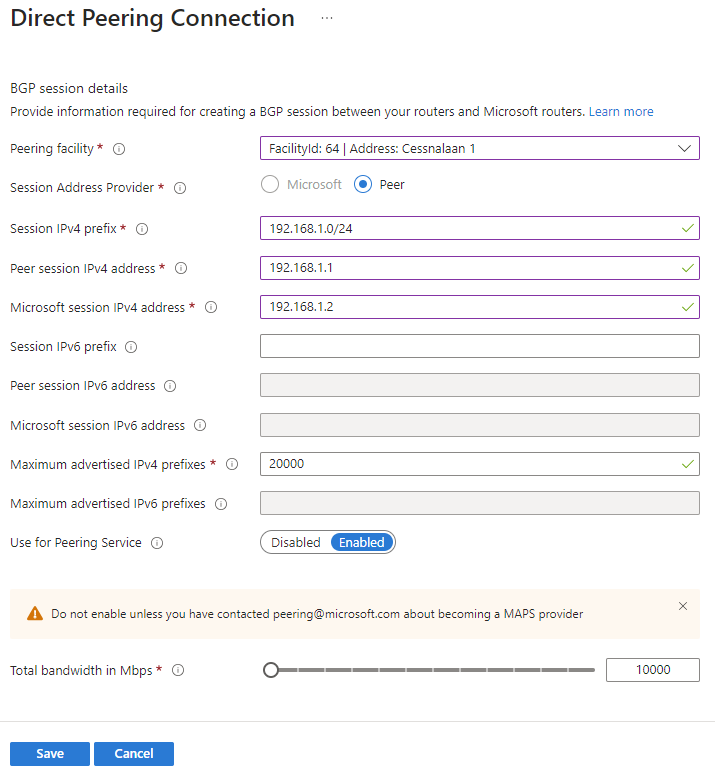
Note
- Peering connections for Peering Service Exchange with Route Server must have Peer as the Session Address Provider.
- Use for Peering Service is disabled by default. It can be enabled after the exchange provider signs a Peering Service agreement with Microsoft.
Select Review + create. Review the summary and select Create after the validation passes.
Allow time for the resource to finish deploying. When deployment is successful, your peering is created and provisioning begins.
Note
For normal Internet Service Providers (ISP) who are a Microsoft Peering Service partner, customer IP prefixes registration is required. However, in the case of exchange partners with a route server, it is required to register customer ASNs and not prefixes. Same ASN key would be valid for the customer's prefix registration.
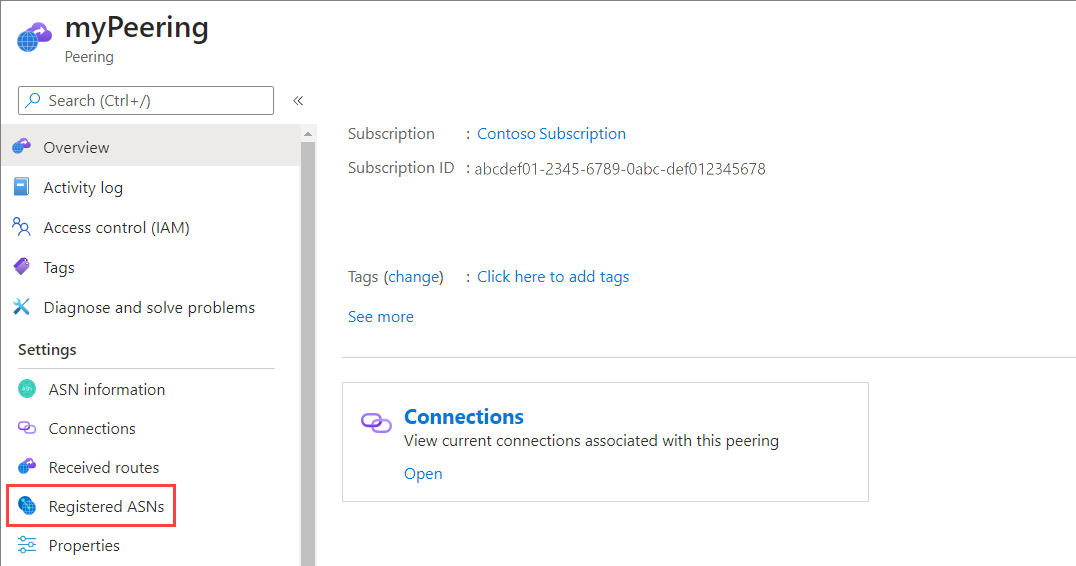
Open the peering in the Azure portal, and select Registered ASNs.
Select Add registered ASN to create a new customer Autonomous System Number (ASN) under your exchange subscription.

Select Save.
In Registered ASNs, each ASN has an associated Prefix Key assigned to it. As an exchange provider, you need to provide this Prefix Key to your customer so they can register Peering Service under their subscription.

Verify an Exchange peering
In this section, you learn how to view a peering to verify its configuration and state.
In the search box at the top of the portal, enter peering. Select Peerings in the search results.
Select the peering resource that you want to view.
Select Connections to view the PeerAsn information.
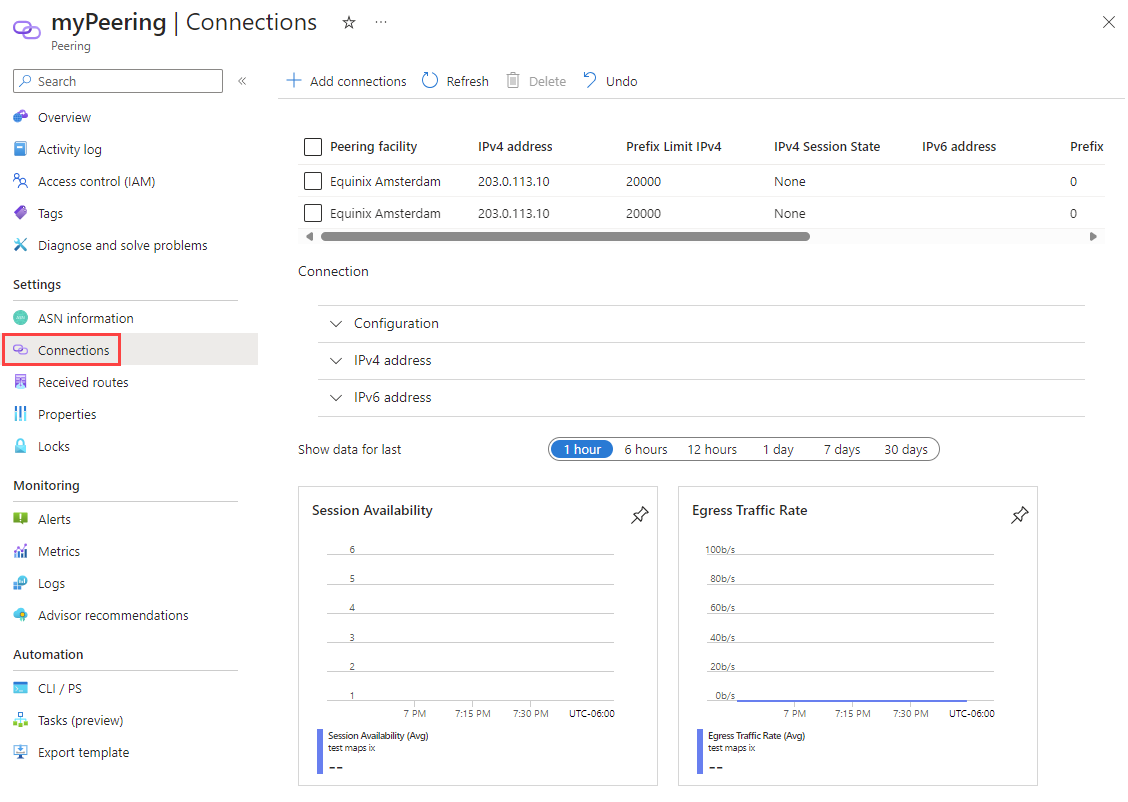
At the top of the screen, you see a summary of peering connections between your ASN and Microsoft, across different facilities within the metro.
Note
- Connection State corresponds to the state of the peering connection setup. The states displayed in this field follow the state diagram shown in the Exchange peering walkthrough.
- IPv4 Session State and IPv6 Session State correspond to the IPv4 and IPv6 BGP session states respectively.
- When you select a row at the top of the screen, the Connection section at the bottom shows details for each connection. Select the arrows to expand Configuration, IPv4 address, and IPv6 address.

Modify an Exchange peering
In this section, you learn how to modify an Exchange peering.
In the search box at the top of the portal, enter peering. Select Peerings in the search results.
Select the peering resource that you want to modify.
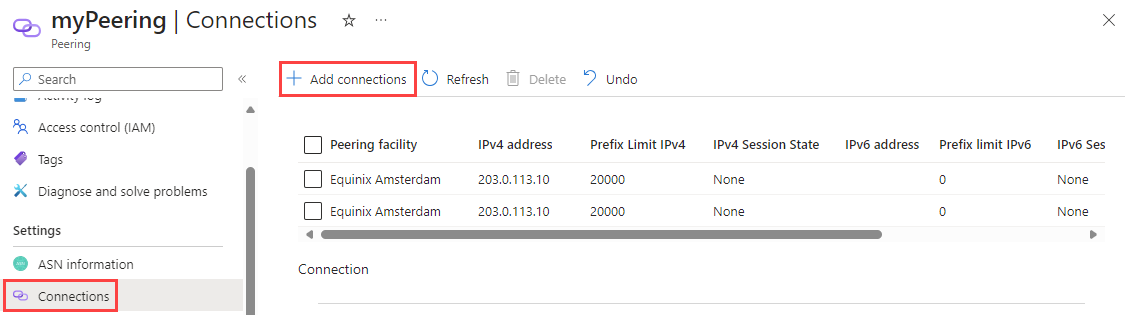
Select Connections.
Add Exchange peering connections
Select the + Add connections button to add and configure a new peering connection.
In Exchange Peering Connection, enter or select the required information and then select Save. For more information, see Create and provision an Exchange peering.

Remove Exchange peering connections
Right-click the peering connection you want to delete, and then select Delete connection.
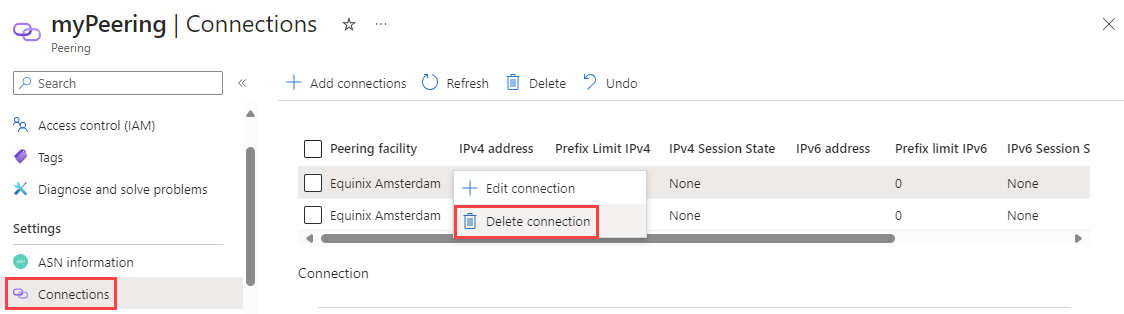
Confirm the delete by entering yes and then select Delete.

Add an IPv4 or IPv6 session on Active connections
Right-click the peering connection you want to delete, and then select Edit connection.
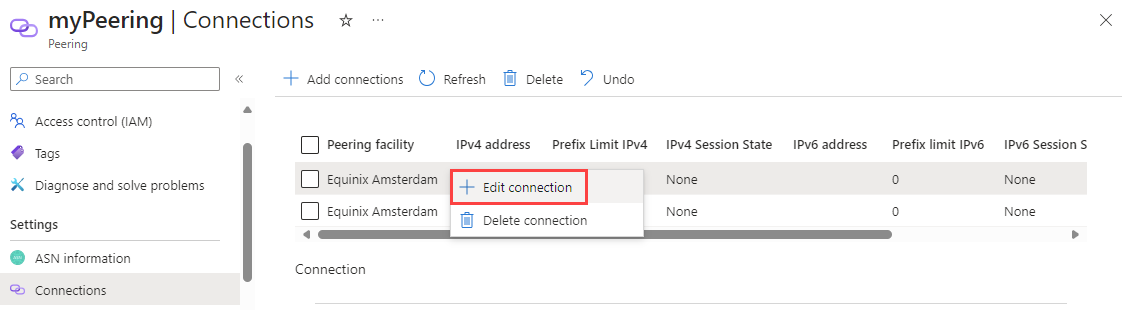
Modify the IPv4 address or IPv6 address information, and select Save.

Remove an IPv4 or IPv6 session on Active connections
To remove an IPv4 or IPv6 session from an existing connection, contact Microsoft peering. This operation isn't currently supported using the Azure portal.
Deprovision an Exchange peering
To deprovision an Exchange peering, contact Microsoft peering. This operation isn't currently supported using the Azure portal or PowerShell.