Note
Access to this page requires authorization. You can try signing in or changing directories.
Access to this page requires authorization. You can try changing directories.
The Device Update module agent can run along with other system processes and IoT Edge modules that connect to your IoT Hub as part of the same logical device. This article describes how to provision the Device Update agent as a module identity.
Note
If you use the Device Update agent, make sure you're on the version 1.0.0 general availability (GA) version. You can check the installed versions of the Device Update agent and the Delivery Optimization agent in the properties section of your IoT device twin. For more information, see Migrate devices and groups to the latest Device Update release.
Module identity and device identity
You can create up to 50 module identities under each Azure IoT Hub device identity. Each module identity implicitly generates a module identity twin. On the device side, you can use the IoT Hub device SDKs to create modules that each open an independent connection to IoT Hub.
Module identity and module identity twin provide similar capabilities to device identity and device twin, but at a finer granularity. For more information, see Understand and use module twins in IoT Hub.
When you provision the Device Update agent as a module identity, all communications between the device and the Device Update service must happen over the module twin. Remember to tag the module twin of the device when you create device groups. If you migrate from a device-level agent to adding the agent as a module identity, remove the older agent that communicated over the device twin.
Supported update types
Device Update supports the following IoT device over the air update types:
- IoT Edge and non-IoT Edge Linux devices:
- Eclipse ThreadX Device Update agent
- Disconnected devices behind gateways
Prepare for package updates
To set up an IoT device or IoT Edge device to install package based updates, add packages.microsoft.com to your machine's repositories by following these steps:
Open a Terminal window on the machine or IoT device where you want to install the Device Update agent.
Install the repository configuration that matches your device's operating system, for example:
curl https://packages.microsoft.com/config/ubuntu/18.04/multiarch/prod.list > ./microsoft-prod.listCopy the generated list to your sources.list.d directory.
sudo cp ./microsoft-prod.list /etc/apt/sources.list.d/Install the Microsoft GPG public key.
curl https://packages.microsoft.com/keys/microsoft.asc | gpg --dearmor > microsoft.gpgsudo cp ./microsoft.gpg /etc/apt/trusted.gpg.d/
Provision the Device Update agent
You can provision the Device Update agent as a module identity on IoT Edge enabled devices or non-IoT Edge IoT devices. To check if you have IoT Edge enabled on your device, see View registered devices and retrieve provisioning information.
You can download sample images to use from the Assets section on the Releases page. In Tutorial_RaspberryPi3.zip, the swUpdate file is the base image that you can flash onto a Raspberry Pi B3+ board. The .gz file is the update you can import through Device Update. For more information, see Azure Device Update for IoT Hub using a Raspberry Pi image.
On IoT Edge enabled devices
Follow these instructions to provision the Device Update agent on IoT Edge enabled devices:
Follow the instructions at Manually provision a single Linux IoT Edge device.
Install the Device Update image update agent by running the following command:
sudo apt-get install deviceupdate-agentInstall the Device Update package update agent.
For latest agent versions from packages.microsoft.com, update package lists on your device and install the Device Update agent package and its dependencies using:
sudo apt-get updatesudo apt-get install deviceupdate-agentFor release candidate (rc) agent versions, download the .deb file from Releases to the machine you want to install the Device Update agent on, and then run the following command:
sudo apt-get install -y ./"<PATH TO FILE>"/"<.DEB FILE NAME>"If you're setting up a Microsoft Connected Cache (MCC) for a disconnected device scenario, install the Delivery Optimization APT plugin as follows:
sudo apt-get install deliveryoptimization-plugin-apt
On non-IoT Edge enabled devices
Follow these instructions to provision the Device Update agent on Linux IoT devices without IoT Edge installed.
Install the latest version of the IoT Identity Service by following instructions in Installing the Azure IoT Identity Service.
Configure the IoT Identity Service by following the instructions in Configuring the Azure IoT Identity Service.
Install the Device Update agent by running the following command:
sudo apt-get install deviceupdate-agent
Note
If your IoT device isn't able to run the IoT Identity Service or IoT Edge, which bundles the IoT Identity Service, you can still install the Device Update agent and configure it by using a connection string.
Configure the Device Update agent
After you install the device update agent, edit the Device Update configuration file by running the following command.
sudo nano /etc/adu/du-config.json
In the du-config.json file, set all values that have a Place value here placeholder. For agents that use the IoT Identity Service for provisioning, change the connectionType to AIS, and set the ConnectionData field to an empty string. For an example, see Example "du-config.json" file contents.
Use a connection string
For testing or on constrained devices, you can configure the Device Update agent without using the IoT Identity service. You can use a connection string to provision the Device Update agent from the module or device.
In the Azure portal, copy the primary connection string. If the Device Update agent is configured as a module identity, copy the module's primary connection string. Otherwise, copy the device's primary connection string.
In a Terminal window on the machine or IoT device where you installed the Device Update agent, edit the Device Update configuration file by running the following command:
- For an Ubuntu agent:
sudo nano /etc/adu/du-config.json. - For a Yocto reference image:
sudo nano /adu/du-config.json.
- For an Ubuntu agent:
In the du-config.json file, set all values that have a
Place value hereplaceholder, and enter the copied primary connection string as theconnectionDatafield value. For an example, see Example "du-config.json" file contents.
Start the Device Update agent
Start the Device Update agent and verify that it's running successfully on your device.
In a Terminal window on the machine or IoT device where you installed the Device Update agent, restart the agent by running the following command:
sudo systemctl restart deviceupdate-agentCheck the agent status by running the following command.
sudo systemctl status deviceupdate-agentYou should see status
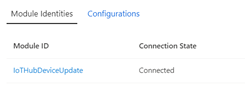
OK.On the IoT Hub portal page, go to Devices or IoT Edge to find the device that you configured, and see the Device Update agent running as a module. For example:
Enable Device Update agent behind a proxy server
Devices running the Device Update agent send HTTPS requests to communicate with IoT Hub. If you connected your device to a network that uses a proxy server, you need to configure the Device Update systemd service to communicate through the server.
Before configuring Device Update, ensure that you have the the Proxy URL. Proxy URL is in the format protocol://proxy_host:proxy_port.
Navigate to the Device Update configuration by running the following command:
sudo systemctl edit deviceupdate-agent.service
Add the proxy details to the configuration
[Service]
Environment="https_proxy=<Proxy URL>"
Restart the agent to apply the changes:
sudo systemctl daemon-reload
sudo systemctl restart deviceupdate-agent
sudo systemctl status deviceupdate-agent
Build and run a Device Update agent
You can also build and modify your own custom Device Update agent. Follow the instructions at How To Build the Device Update Agent to build the Device Update Agent from source.
Once the agent successfully builds, follow Running the Device Update for IoT Hub Reference Agent to run the agent. To make changes needed to incorporate the agent into your image, follow How To Modify the Device Update Agent Code.
Troubleshooting
If you run into issues, review the Device Update for IoT Hub Troubleshooting Guide to help resolve the issues and collect necessary information to provide to Microsoft.
Related content
- Device Update for IoT Hub Troubleshooting Guide
- Azure Device Update for IoT Hub using a Raspberry Pi image
- Azure Device Update for IoT Hub using the Ubuntu package agent
- Tutorial: Complete a proxy update by using Device Update for Azure IoT Hub
- Azure Device Update for IoT Hub using a simulator agent
- Device Update for Azure IoT Hub using Eclipse ThreadX