Note
Access to this page requires authorization. You can try signing in or changing directories.
Access to this page requires authorization. You can try changing directories.
Learn how to initiate a Device Update for IoT Hub log operation and view collected logs within Azure blob storage.
Prerequisites
- Access to an IoT Hub with Device Update for IoT Hub enabled.
- An IoT device (or simulator) provisioned for Device Update within IoT Hub and implementing the Diagnostic Interface.
- An Azure Blob storage account under the same subscription as your Device Update for IoT Hub account.
Note
The remote log collection feature is currently compatible only with devices that implement the Diagnostic Interface and are able to upload files to Azure Blob storage. The reference agent implementation also expects the device to write log files to a user-specified file path on the device.
Supported browsers:
- Microsoft Edge
- Google Chrome

Link your Azure Blob storage account to your Device Update instance
In order to use the remote log collection feature, you must first link an Azure Blob storage account with your Device Update instance. This Azure Blob storage account is where your devices will upload diagnostic logs to.
In the Azure portal, navigate to your Device Update for IoT Hub account.
Select Instances under the Instance Management section of the navigation pane.
Select your Device Update instance from the list, then Configure Diagnostics.
Select the Customer Diagnostics tab, then Select Azure Storage Account.
Choose your desired storage account from the list and select Save.
Once back on the instance list, select Refresh periodically until the instance's provisioning state shows "Succeeded." This process usually takes 2-3 minutes.
Configure log collection
The device update agent refers to a configuration file on the device, located at /etc/adu/du-diagnostics-config.json in the reference agent.
Log collection file paths
The Device Update agent on a device will collect files from specific file paths on the device when it receives a log upload start signal from the Device Update service. These file paths are defined in the diagnostics config file.
Within the configuration file, each log file to be collected and uploaded is represented as a logComponent object with componentName and logPath properties. This configuration can be modified as desired.
Max log file size
The Device Update agent will only collect log files under a certain file size. This max file size is defined in the diagnostics config file.
The relevant parameter "maxKilobytesToUploadPerLogPath" will apply to each logComponent object and can be modified as desired.
Create a log operation
Log operations are a service-driven action that you can instruct your IoT devices to perform through the Device Update service. For a more detailed explanation of how log operations function, see Device update diagnostics.
Navigate to your IoT Hub and select the Updates tab under the Device Management section of the navigation pane.
Select the Diagnostics tab in the UI. If you don't see a Diagnostics tab, make sure you're using the newest version of the Device Update for IoT Hub user interface. If you see "Diagnostics must be enabled for this Device Update instance," make sure you've linked an Azure Blob storage account with your Device Update instance.
Select Add log upload operation to navigate to the log operation creation page.
Enter a name (ID) and description for your new log operation, then select Add devices to select which IoT devices you want to collect diagnostic logs from.
Select Add.
Once back on the Diagnostics tab, select Refresh until you see your log operation listed in the Operation Table.
Once the operation status is Succeeded or Failed, select the operation name to view its details. An operation will be marked "Succeeded" only if all targeted devices successfully completed the log upload. If some targeted devices succeeded and some failed, the log operation will be marked "Failed." You can use the log operation details page to see which devices succeeded and which failed.
In the log operation details, you can view the device-specific status and see the log location path. This path corresponds to the virtual directory path within your Azure Blob storage account where the diagnostic logs have been uploaded.
View and export collected diagnostic logs
Once your log operation has succeeded, navigate to your Azure Blob storage account.
Select Containers under the Data storage section of the navigation pane.
Select the container with the same name as your Device Update instance.
Use the log location path from the log operation details to navigate to the correct directory containing the logs. By default, the remote log collection feature instructs targeted devices to upload diagnostic logs using the following directory path model: Blob storage container/Target device ID/Log operation ID/On-device log path
If you haven't modified the diagnostic component of the Device Update agent, the device will respond to any log operation by attempting to upload two plaintext log files: the Device Update agent diagnostic log ("aduc.log"), and the DO agent diagnostic log ("do-agent.log"). You can learn more about which log files the Device Update reference agent collects by reading the Device Update diagnostics concept page.
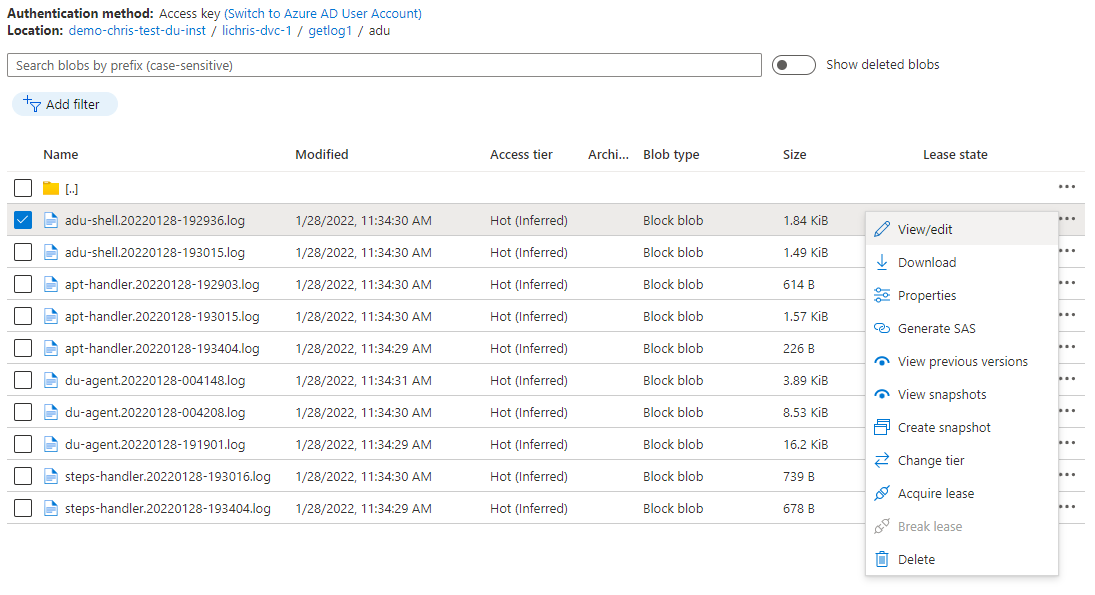
You can view the log file's contents by selecting the file name, then selecting the menu element (ellipsis) and clicking View/edit. You can also download or delete the log file by selecting the respectively labeled options.

Next steps
To learn more about Device Update's diagnostic capabilities, see Device update diagnostic feature overview