Note
Access to this page requires authorization. You can try signing in or changing directories.
Access to this page requires authorization. You can try changing directories.
Important
Azure Lab Services will be retired on June 28, 2027. For more information, see the retirement guide. To simplify your migration, Microsoft has published automation scripts to help you clean up Lab Services resources, these are available in the Azure Lab Services Retirement Scripts GitHub repository.
In this article, you learn how to troubleshoot problems with connecting to your lab virtual machine (VM) in Azure Lab Services. As a lab user, you can perform troubleshooting operations on the lab VM, without support from the lab creator or an administrator.
You can perform the following troubleshooting operations on the lab VM:
Redeploy a lab VM: Azure Lab Services moves the VM to a new node in the Azure infrastructure, and then powers it back on. All data on the OS disk is still available after a redeploy operation.
Reimage a lab VM: Azure Lab Services recreates a new lab VM from the original template. All data in the lab VM is lost.
Redeploy a lab VM
When you redeploy a lab VM, Azure Lab Services shuts down the lab VM, moves the lab VM to a new node in the Azure infrastructure, and then powers it back on. You can think of a redeploy operation as a refresh of the underlying VM for your lab.
All data that you saved in the OS disk (usually the C: drive on Windows) of the VM is still available after the redeploy operation. Any data on the temporary disk (usually the D: drive on Windows) is lost after a redeploy operation.
You can redeploy a lab VM that is assigned to you. If you have the Lab Assistant, or Lab Contributor role, you can redeploy any lab VM for which you have permissions.
To redeploy a lab VM that's assigned to you:
Go to the Azure Lab Services website to view your virtual machines.
For a specific lab VM, select ... > Redeploy.
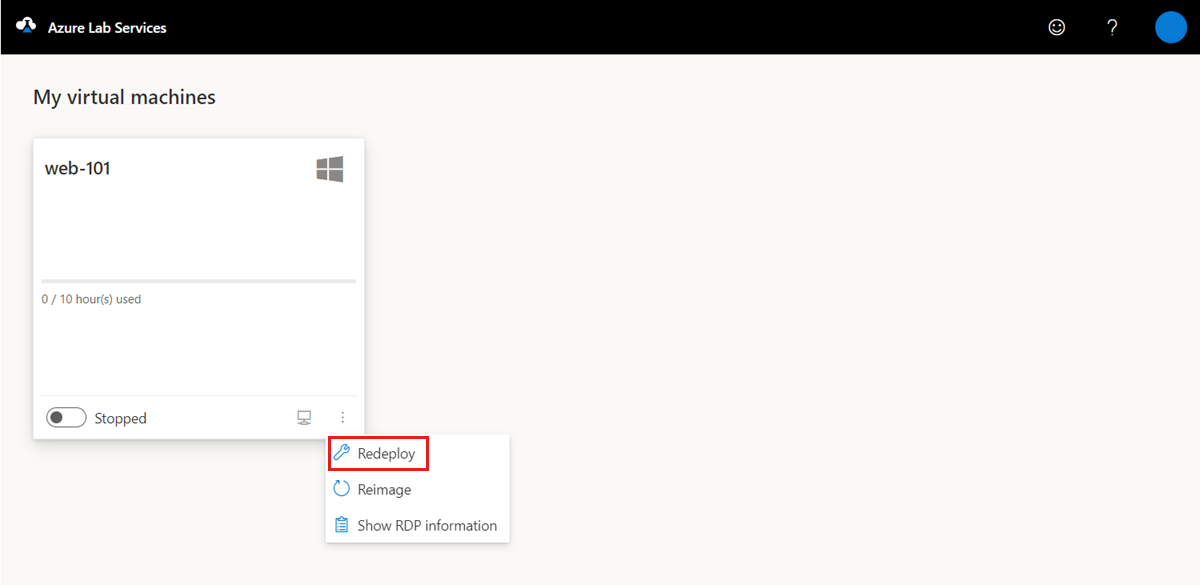
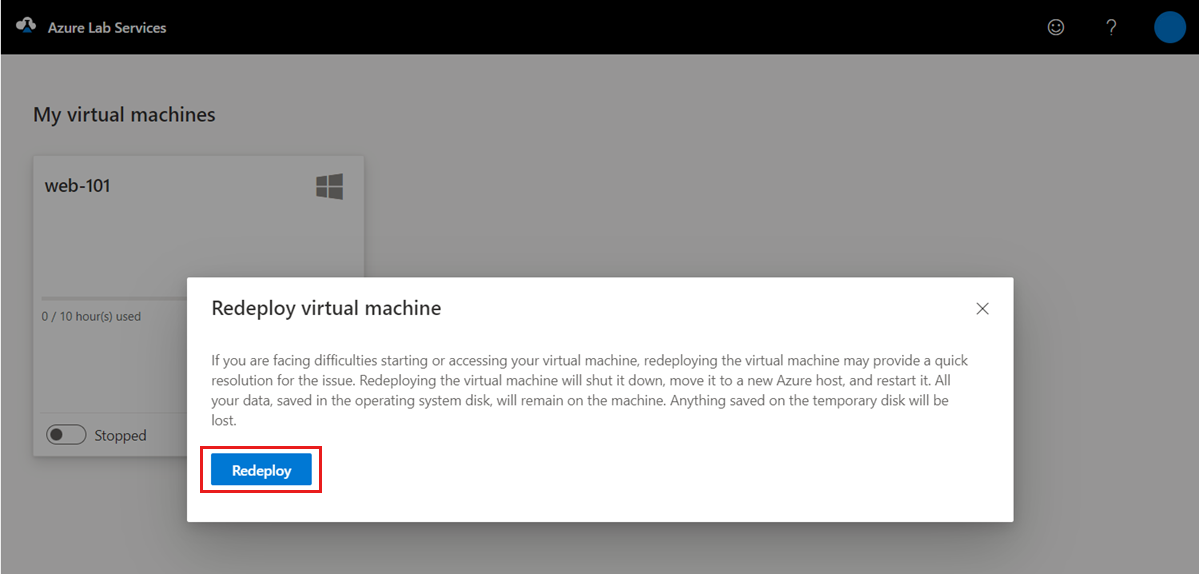
On the Redeploy virtual machine dialog box, select Redeploy to start the redeployment.
Alternatively, if you have permissions across multiple labs, you can redeploy multiple VMs for a lab:
Go to the Azure Lab Services website.
Select a lab, and then go to the Virtual machine pool tab.
Select one or multiple VMs from the list, and then select Redeploy in the toolbar.
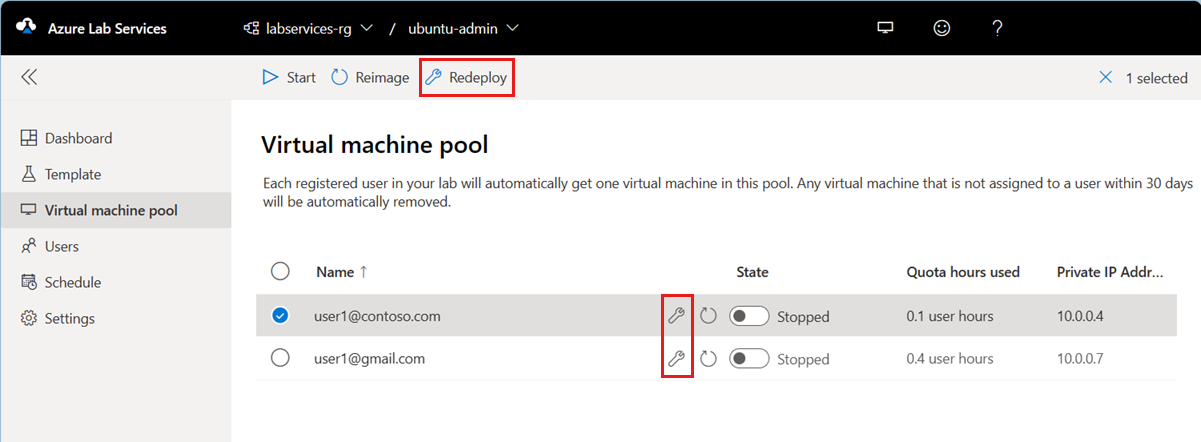
On the Redeploy virtual machine dialog box, select Redeploy to start the redeployment.
You can also redeploy a lab VM by using the REST api, PowerShell, or the .NET SDK.
Reimage a lab VM
When you reimage a lab VM, Azure Lab Services shuts down the lab VM, deletes it, and recreates a new lab VM from the original lab template. You can think of a reimage operation as a refresh of the entire VM.
You can reimage a lab VM that is assigned to you. If you have the Lab Assistant, or Lab Contributor role, you can reimage any lab VM for which you have permissions.
Warning
After you reimage a lab VM, all the data that you saved on the OS disk (usually the C: drive on Windows), and the temporary disk (usually the D: drive on Windows), is lost. Learn how you can store the user data outside the lab VM.
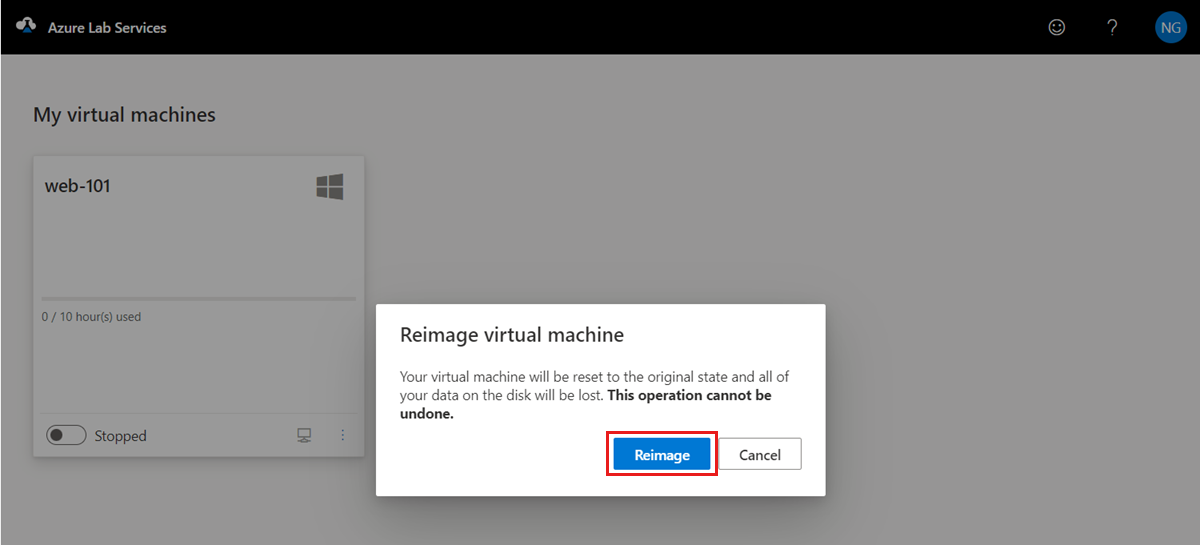
To reimage a lab VM that's assigned to you:
Go to the Azure Lab Services website to view your virtual machines.
For a specific lab VM, select ... > Reimage.
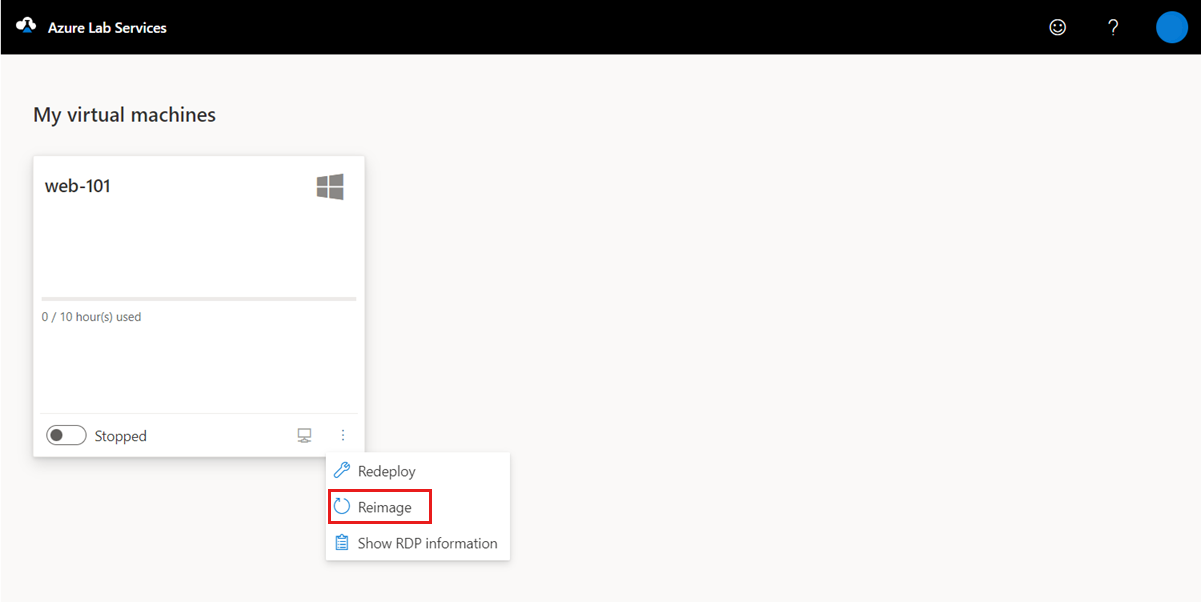
On the Reimage virtual machine dialog box, select Reimage.
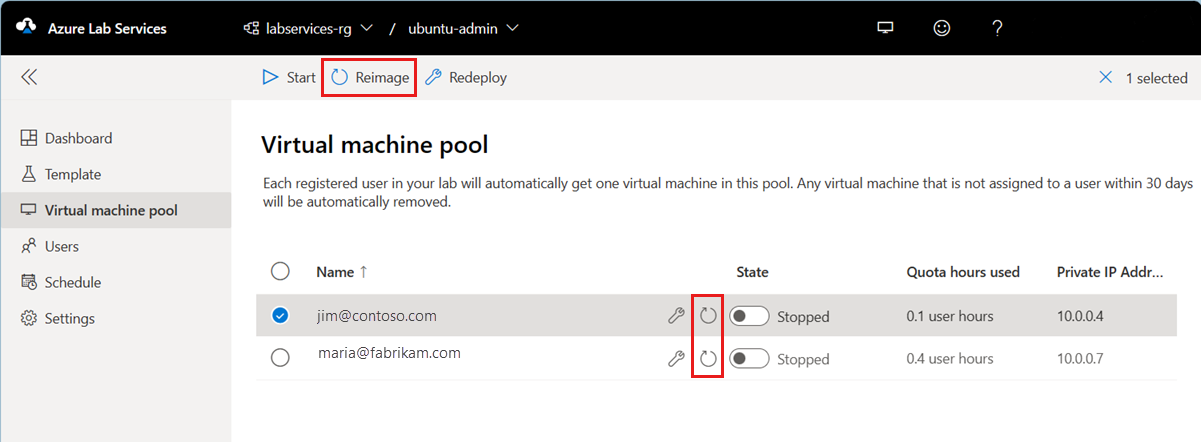
Alternatively, if you have permissions across multiple labs, you can reimage multiple VMs for a lab:
Go to the Azure Lab Services website.
Select a lab, and then go to the Virtual machine pool tab.
Select one or multiple VMs from the list, and then select Reimage in the toolbar.
On the Reimage virtual machine dialog box, and then select Reimage.
You can also reimage a lab VM by using the REST api, PowerShell, or the .NET SDK.
Next steps
- Learn more about strategies for troubleshooting lab VMs.
- As a student, learn to access labs.
- As a student, connect to a VM.