Note
Access to this page requires authorization. You can try signing in or changing directories.
Access to this page requires authorization. You can try changing directories.
Important
Azure Lab Services will be retired on June 28, 2027. For more information, see the retirement guide. To simplify your migration, Microsoft has published automation scripts to help you clean up Lab Services resources, these are available in the Azure Lab Services Retirement Scripts GitHub repository.
This article shows you how to access your lab virtual machines (VMs) in Azure Lab Services. Use Teams, Canvas, or the Azure Lab Services website to view, start, stop, and connect to a lab virtual machine.
Prerequisites
- To register for a lab, you need a lab registration link.
- To view, start, stop, and connect to a lab VM, you need to register for the lab and have an assigned lab VM.
Access a lab virtual machine
Important
Azure Lab Services will be retired on June 28, 2027. For more information, see the retirement guide. To simplify your migration, Microsoft has published automation scripts to help you clean up Lab Services resources, these are available in the Azure Lab Services Retirement Scripts GitHub repository.
In the Azure Lab Services website, you can view and manage your assigned lab virtual machines. To access the Azure Lab Services website:
Go to the Azure Lab Services website (https://labs.azure.com) in a web browser.
Sign in with the email address that the lab creator granted access to the lab.
Important
If you received a lab registration link from the lab creator, you need to go through a one-time registration process before you can access your labs. The registration process depends on how the lab creator configured the lab.
Register for the lab
When a creator invites you to a lab based by using your email address, you need to register for the lab by using the registration link. You receive this link from the lab creator. You only need to register once. After you register for the lab, you can then access the lab details in the Azure Lab Services website.
When you access a lab through Teams or Canvas, or if the lab creator added you based on your Microsoft Entra group membership, you're automatically registered for the lab.
Register for each lab that you want to access. After you complete the lab registration, you no longer need the registration link to access the lab in the Azure Lab Services website.
To register for a lab by using the registration link:
Open the registration URL that you received from the lab creator in a web browser.
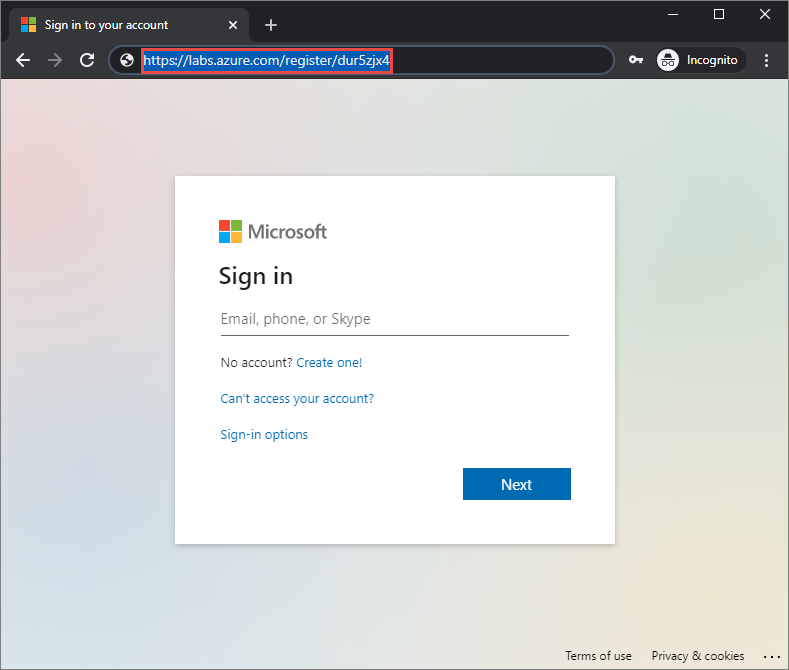
Sign in with the email address to which the registration link was sent.
Note
You need a Microsoft account to use Azure Lab Services, unless you're using Canvas. Follow these steps to use a non-Microsoft account, such as a Yahoo or Google account, to sign in to the Azure Lab Services website.
After the registration finishes, confirm that you see the lab virtual machine in My virtual machines.
User account types
Azure Lab Services supports different email account types when registering for a lab:
- An organizational email account that your Microsoft Entra instance provides.
- A Microsoft-domain email account, such as outlook.com, hotmail.com, msn.com, or live.com.
- A non-Microsoft email account, such as one provided by Yahoo! or Google. You need to link your account with a Microsoft account.
Use a non-Microsoft email account
You can use non-Microsoft email accounts to register and sign in to a lab. However, the registration requires that you first create a Microsoft account that's linked to your non-Microsoft email address.
You might already have a Microsoft account that's linked to your non-Microsoft email address. For example, users already have a Microsoft account if you used this email address with other Microsoft products or services, such as Office, Skype, OneDrive, or Windows.
When you use the lab registration link to sign into a lab, you're prompted for your email address and password. If you sign in with a non-Microsoft account that's not linked to a Microsoft account, you receive the following error message:
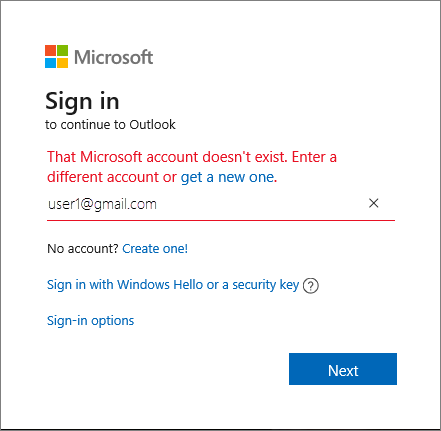
Follow these steps to sign up for a new Microsoft account.


View lab VM details
When you access your lab, either through the Azure Lab Services website, Microsoft Teams, or Canvas, you get the list of lab virtual machines that are assigned to you.

For each lab VM, you can view the following information:
- Lab name. The lab creator assigns this name.
- Operating system. An icon represents the operating system of the lab VM.
- Quota hours. A progress bar shows your assigned and consumed quota hours. Learn more about the quota hours.
- Lab VM status. Indicates whether the lab VM is starting, running, or stopped.
You can also perform specific actions on the lab VM:
- Start or stop the lab VM. Learn more about starting and stopping a lab VM.
- Connect to the lab VM. Select the computer icon to connect to the lab VM with remote desktop or SSH. Learn more about connecting to the lab VM.
- Redeploy or reimage the lab VM. Learn more how you can redeploy or reimage the lab VM when you experience problems.
View quota hours
Quota hours are the extra time allotted to you outside of the scheduled time for the lab. For example, the time outside of classroom time to complete homework.
On the lab VM tile, you can view your consumption of quota hours in the progress bar. The progress bar color and the message give an indication of the usage:
| Status | Description |
|---|---|
| The progress bar is grayed out | A class is in progress, based on the lab schedule. You don't consume any quota hours during scheduled hours.
|
| The progress bar is red | You've consumed all your quota hours. If there's a lab schedule, then you can only access the lab VM during the scheduled hours.
|
| The progress bar is blue | No class is currently in progress and you still have quota hours available to access the lab VM.
|
| The text Available during classes only is shown | There are no quota hours allocated to the lab. You can only access the lab VM during the scheduled hours for the lab.
|
Start or stop the lab VM
You can start and stop a lab virtual machine from the My virtual machines page. If the lab creator configured a lab schedule, the lab VM is automatically started and stopped during the scheduled hours.
You can also stop a lab VM by using the operating system shutdown command from within the lab VM. The preferred method to stop a lab VM is to use the My virtual machines page to avoid incurring extra costs.
Warning
If you use the shutdown command inside the lab VM, you might still incur costs. The preferred method is to use the stop action on the My virtual machines page. When you use lab plans, Azure Lab Services detects when the lab VM is shut down, marks the lab VM as stopped, and billing stops.
To start or stop a lab VM:
Go to the My virtual machines page in Teams, Canvas, or the Azure Lab Services website.
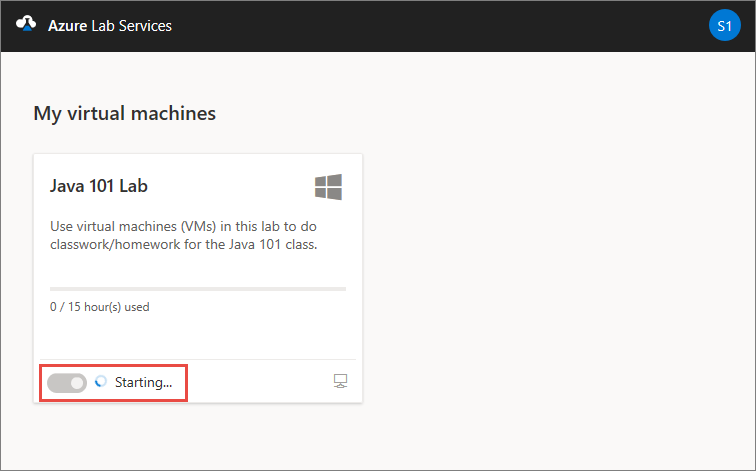
To start or stop the lab VM, use the toggle control next to the lab VM status.
When the VM is in progress of starting or stopping, the control is inactive.
Starting or stopping the lab VM might take some time to complete.
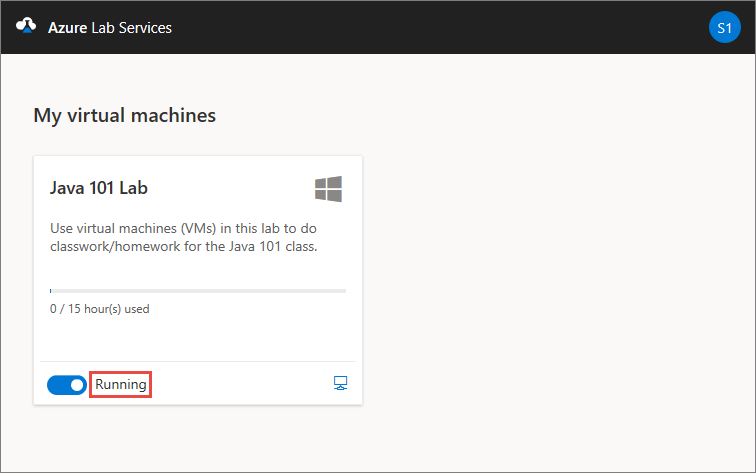
After the operation finishes, confirm that the lab VM status is correct.


Connect to the lab VM
When the lab virtual machine is running, you can remotely connect to the VM. Depending on the lab VM operating system configuration, you can connect by using remote desktop (RDP) or secure shell (SSH).
If there are no quota hours available, you can't start the lab VM outside the scheduled lab hours and can't connect to the lab VM.
Learn more about how to connect to a lab VM.
Related content
- Learn how to change your lab VM password
- Learn how to redeploy or reimage your lab VM
- Learn about key concepts in Azure Lab Services, such as quota hours or lab schedules