Tutorial: Set up a lab account with Azure Lab Services
Important
Azure Lab Services lab plans replace lab accounts. Learn how you can get started by creating a lab plan. For existing lab account customers, we recommend that you migrate from lab accounts to lab plans.
In Azure Lab Services, a lab account serves as the central resource in which you manage your organization's labs. In your lab account, give permission to others to create labs, and set policies that apply to all labs under the lab account. In this tutorial, learn how to create a lab account by using the Azure portal.
In this tutorial, you do the following actions:
- Create a lab account
- Add a user to the Lab Creator role
Prerequisites
- An Azure account with an active subscription. If you don't have an Azure subscription, create a free account before you begin.
Create a lab account
The following steps illustrate how to use the Azure portal to create a lab account with Azure Lab Services.
Sign in to the Azure portal.
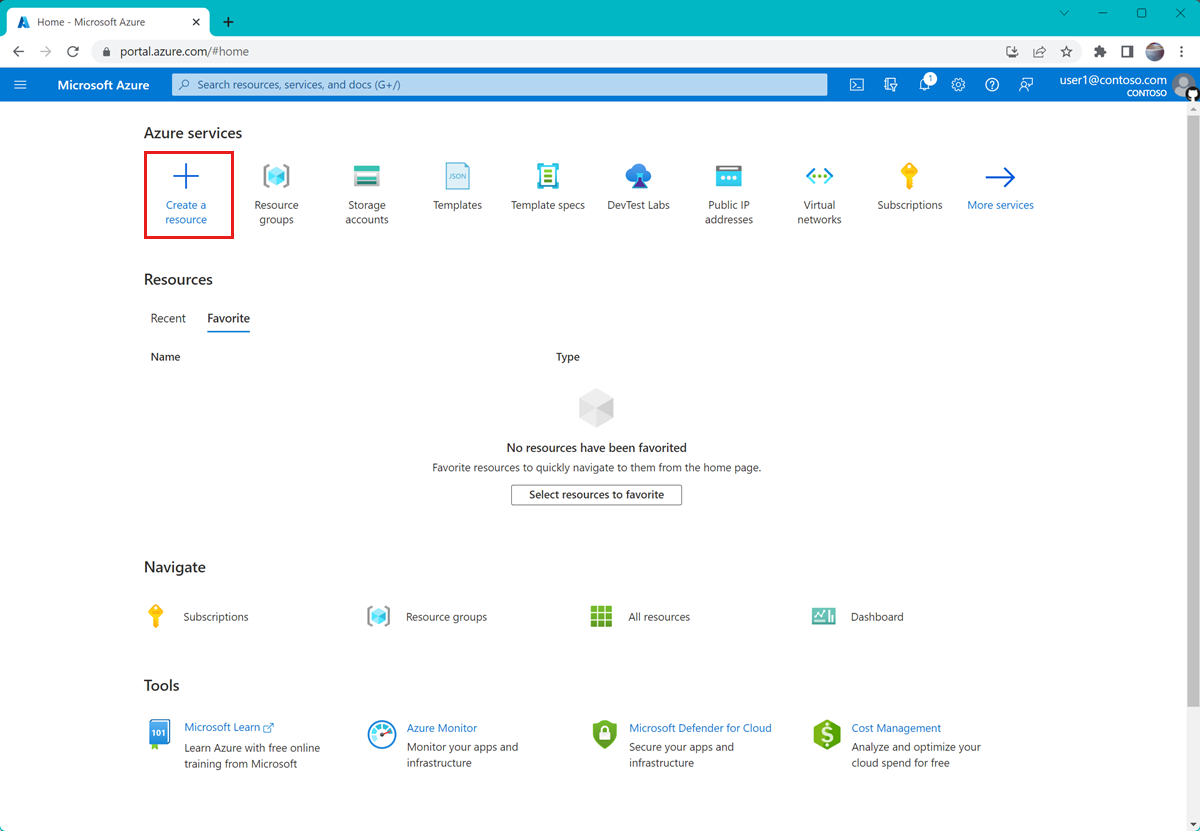
Select Create a resource in the upper left-hand corner of the Azure portal.
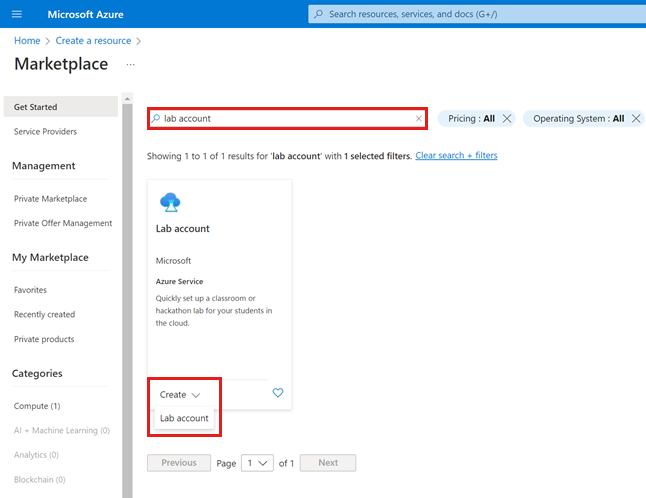
Search for lab account. (Lab account can also be found under the DevOps category.)
On the Lab account tile, select Create > Lab account.
On the Basics tab of the Create a lab account page, provide the following information:
Field Description Subscription Select the Azure subscription that you want to use to create the resource. Resource group Select an existing resource group or select Create new, and enter a name for the new resource group. Name Enter a unique lab account name.
For more information about naming restrictions, see Microsoft.LabServices resource name rules.Region Select a geographic location to host your lab account. After you're finished configuring the resource, select Review + Create.

Review all the configuration settings and select Create to start the deployment of the lab account.
To view the new resource, select Go to resource.
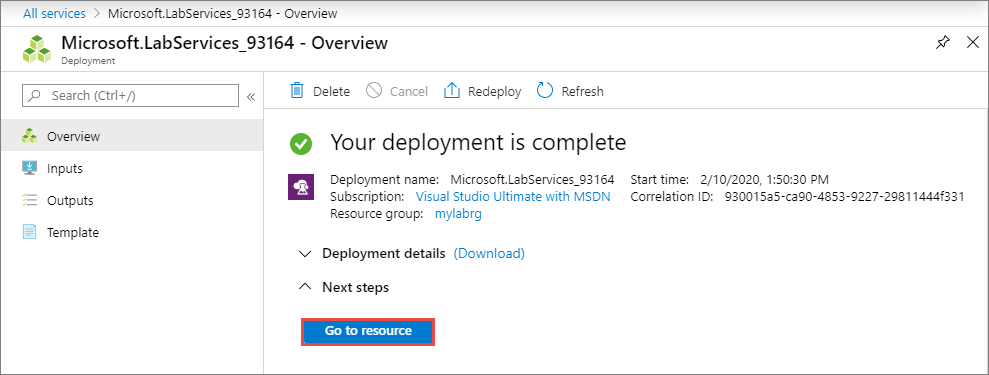
Confirm that you see the lab account Overview page.

You've now successfully created a lab account by using the Azure portal. To let others create labs in the lab account, you assign them the Lab Creator role.
Add a user to the Lab Creator role
To set up a lab in a lab account, you must be a member of the Lab Creator role in the lab account. To grant people the permission to create labs, add them to the Lab Creator role.
Follow these steps to assign Azure roles using the Azure portal.
Note
Azure Lab Services automatically assigns the Lab Creator role to the Azure account you use to create the lab account. If you plan to use the same user account to create a lab in this tutorial, skip this step.
On the Lab Account page, select Access control (IAM).
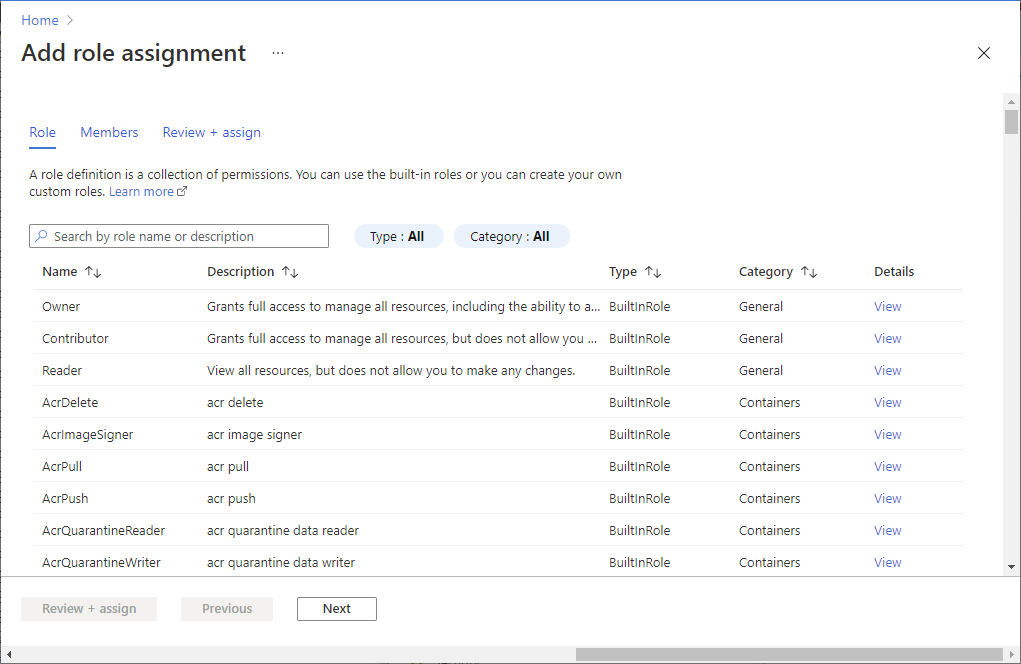
From the Access control (IAM) page, select Add > Add role assignment.

On the Role tab, select the Lab Creator role.
On the Members tab, select the user you want to add to the Lab Creators role.
On the Review + assign tab, select Review + assign to assign the role.
Troubleshooting
Lab creation fails because of insufficient IP addresses
Lab creation can fail if the lab account is peered to a virtual network but has too narrow of an IP address range. You can run out of space in the address range if there are too many labs in the lab account (each lab uses 512 addresses).
For example, if you have a block of /19, this address range can accommodate 8192 IP addresses and 16 labs (8192/512 = 16 labs). In this case, lab creation fails on the 17th lab creation.
Learn how to increase the IP address range for a lab account.
Next steps
In this tutorial, you created a lab account and granted lab creation permissions to another user. To learn about how to create a lab, advance to the next tutorial:
Feedback
Coming soon: Throughout 2024 we will be phasing out GitHub Issues as the feedback mechanism for content and replacing it with a new feedback system. For more information see: https://aka.ms/ContentUserFeedback.
Submit and view feedback for