Note
Access to this page requires authorization. You can try signing in or changing directories.
Access to this page requires authorization. You can try changing directories.
Learn how to configure notifications for events in Azure Load Testing. For example, you can set up notifications to alert you when a test run completes or when a scheduled test run begins. Notifications enable you to stay informed about test run updates, schedules, and test results through email or webhooks.
Overview
Azure Load Testing allows you to configure notifications to receive updates for key events, such as test completion or schedule changes. These notifications can help you automate follow-up actions and improve team collaboration.
Supported events
Azure Load Testing supports the following events for notifications:
Test Run Started: Notifications for all test runs when they start.
Test Run Completed: Notifications when a test run is completed, including failed tests or failed results.
Schedule Events: Notifications when schedules complete or are disabled.
Supported notification channels
Action groups
Action Groups are collections of notification preferences and actions that can be triggered by events. In the context of Azure Load Testing, they enable users to route notifications to email recipients, webhooks, or integrated tools like Azure Logic Apps.
Note
Action groups might incur additional costs. To view associated costs, refer to the Azure Monitor pricing details.
Prerequisites
To configure notifications, ensure you meet the following requirements:
Permissions: You should have at least the "Load Test Owner" or "Owner/Contributor" role at the resource level.
Action Group Creation: To create Action Groups, ensure you have the required permissions or contact your system administrator.
Configure notifications in the Azure portal
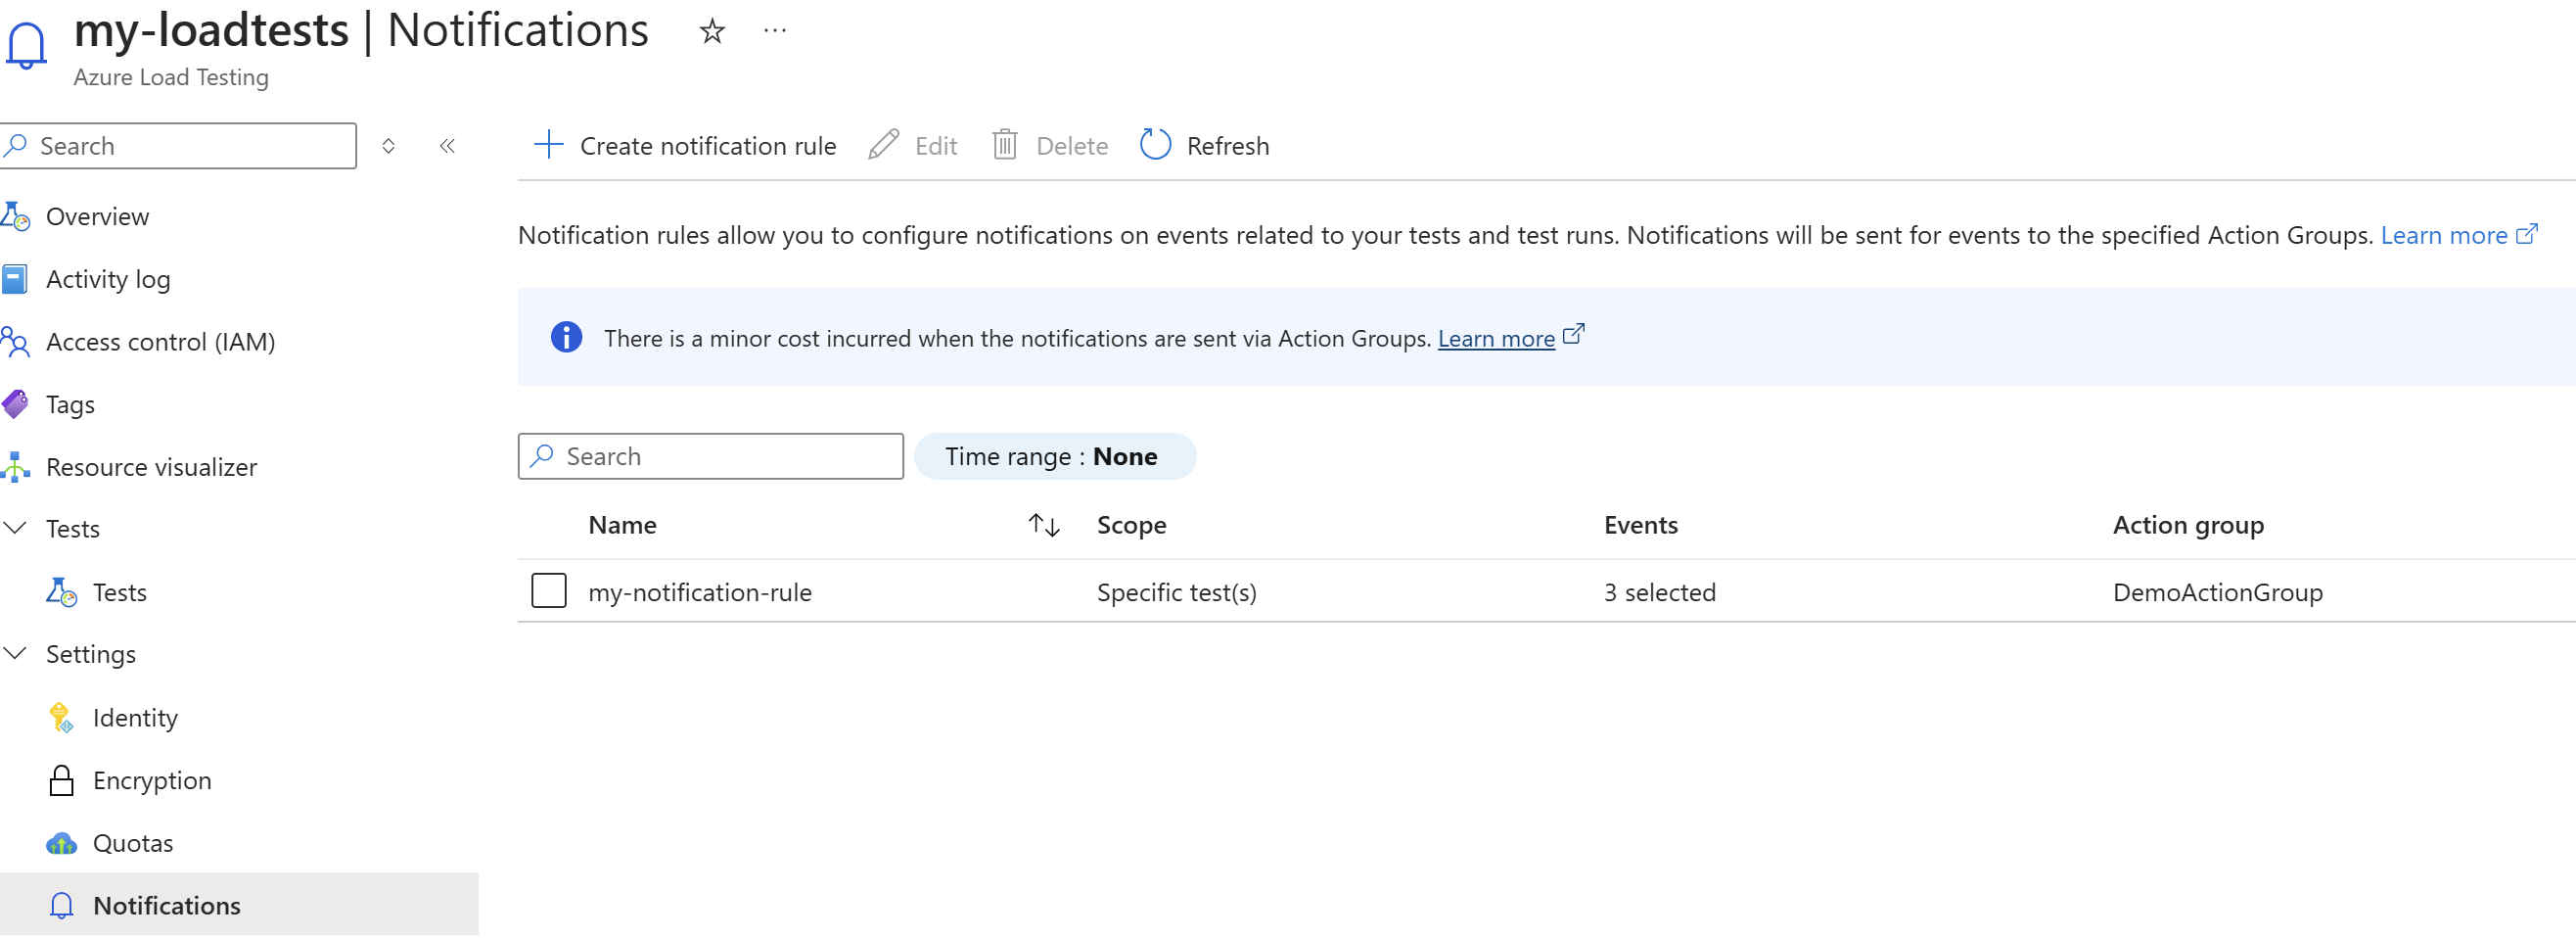
In the Azure portal, navigate to your Load Test Resource. In the left navigation menu, select Notifications.

Click Create notification rule.
In the Scope tab, provide a name for the notification rule. Select from one of the following scopes:
All tests: The notification rule is applicable for all current and future tests.
Specific Test: Select one or more tests in the resource on which the notification rule is applicable by clicking on Add Test.
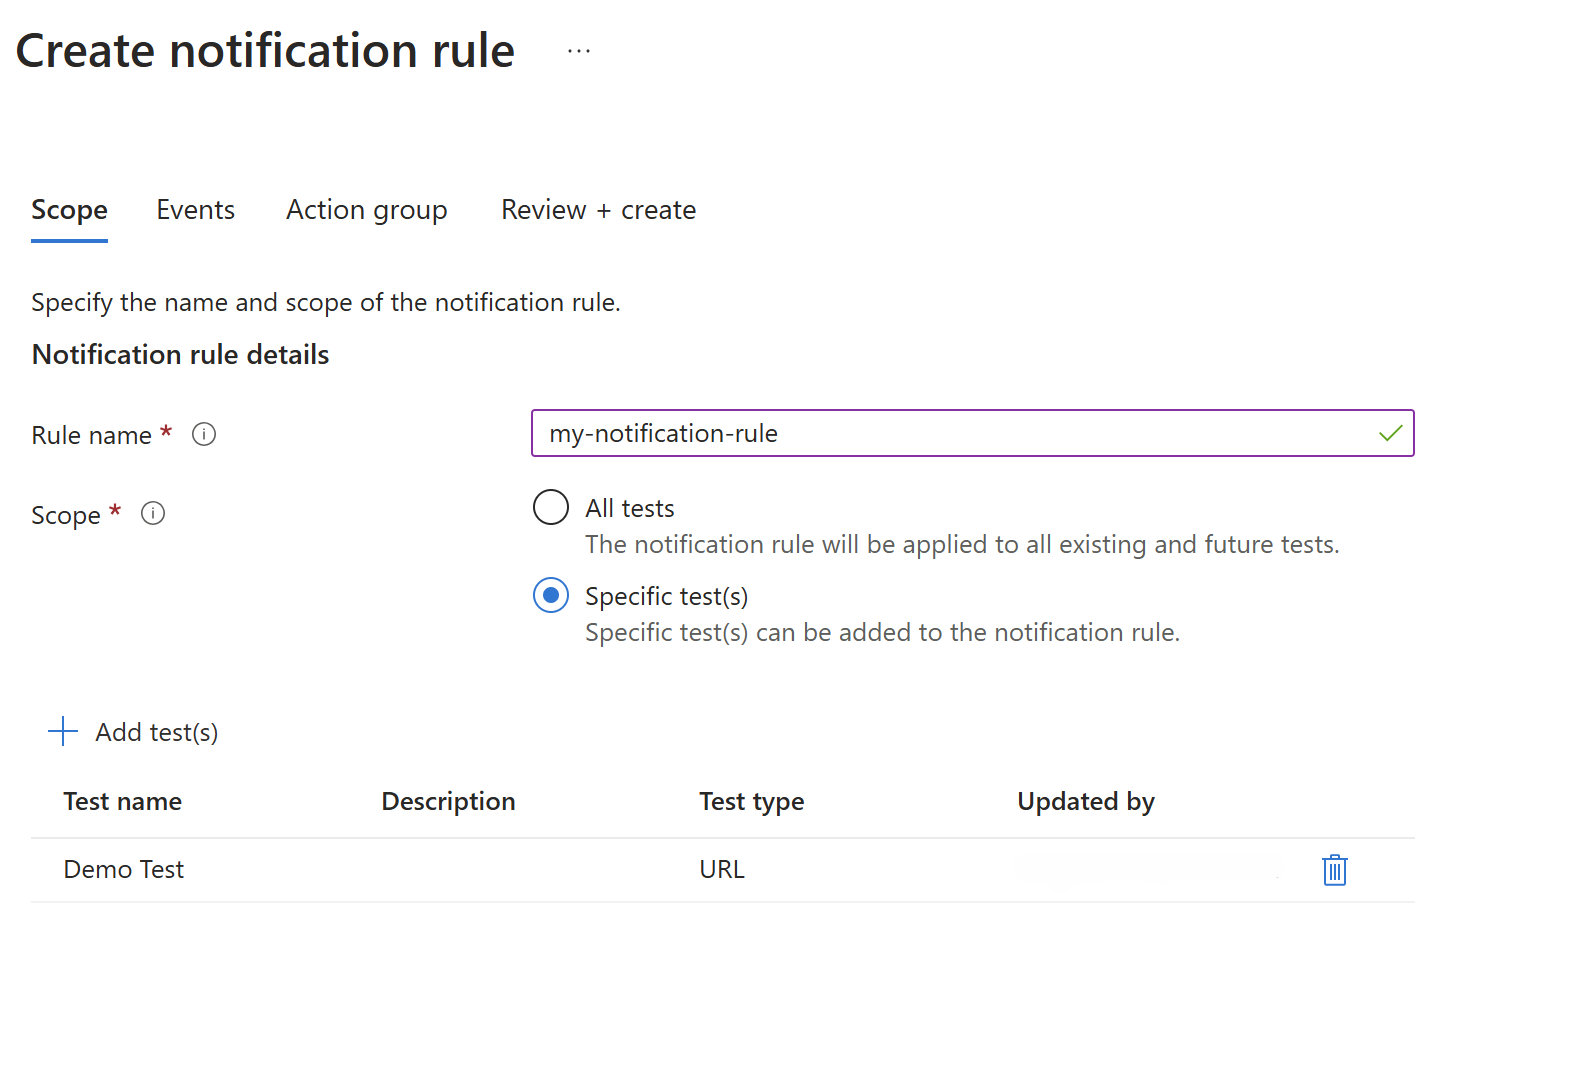
Note
A maximum of 20 tests can be selected in this scope.
- Under the Events tab, choose one or more events from the available list:
Test Run Started (All Runs)
Test Run Completed (All Runs, Failed Status, Failed Test Results)
Schedule Events (Schedule Completed, Schedule Disabled)
Choose an existing Action Group or create a new Action Group. To select an Action Group, select Add action group and choose from the available ones in the tenant.
If you need to create one, refer to the Action Group creation guide. Ensure you have at least write permissions for the resource group where you are creating the Action Group.
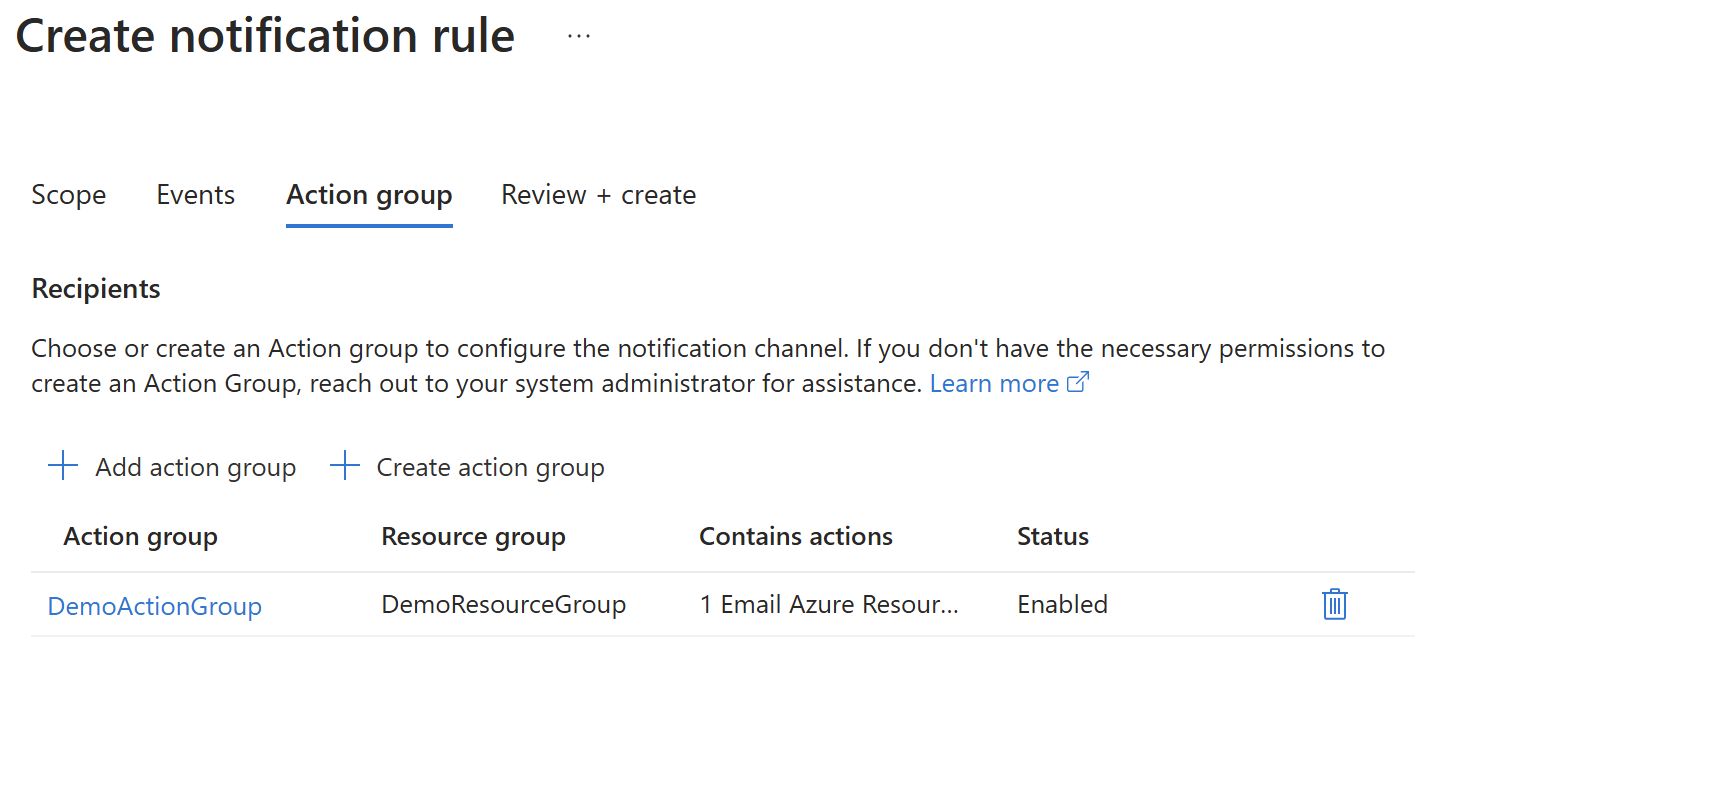
Note
A maximum of 5 Action Groups can be added to a Notification Rule.
- Click Save to create the notification rule. The new rule appears in the notification rules table.
Linking notification rules to tests
You can associate existing Notification Rules with specific tests or create new Notification Rules as needed. Follow the steps below.
- For an existing test, go to the Test page, and click Notifications. A right context-pane pops up.
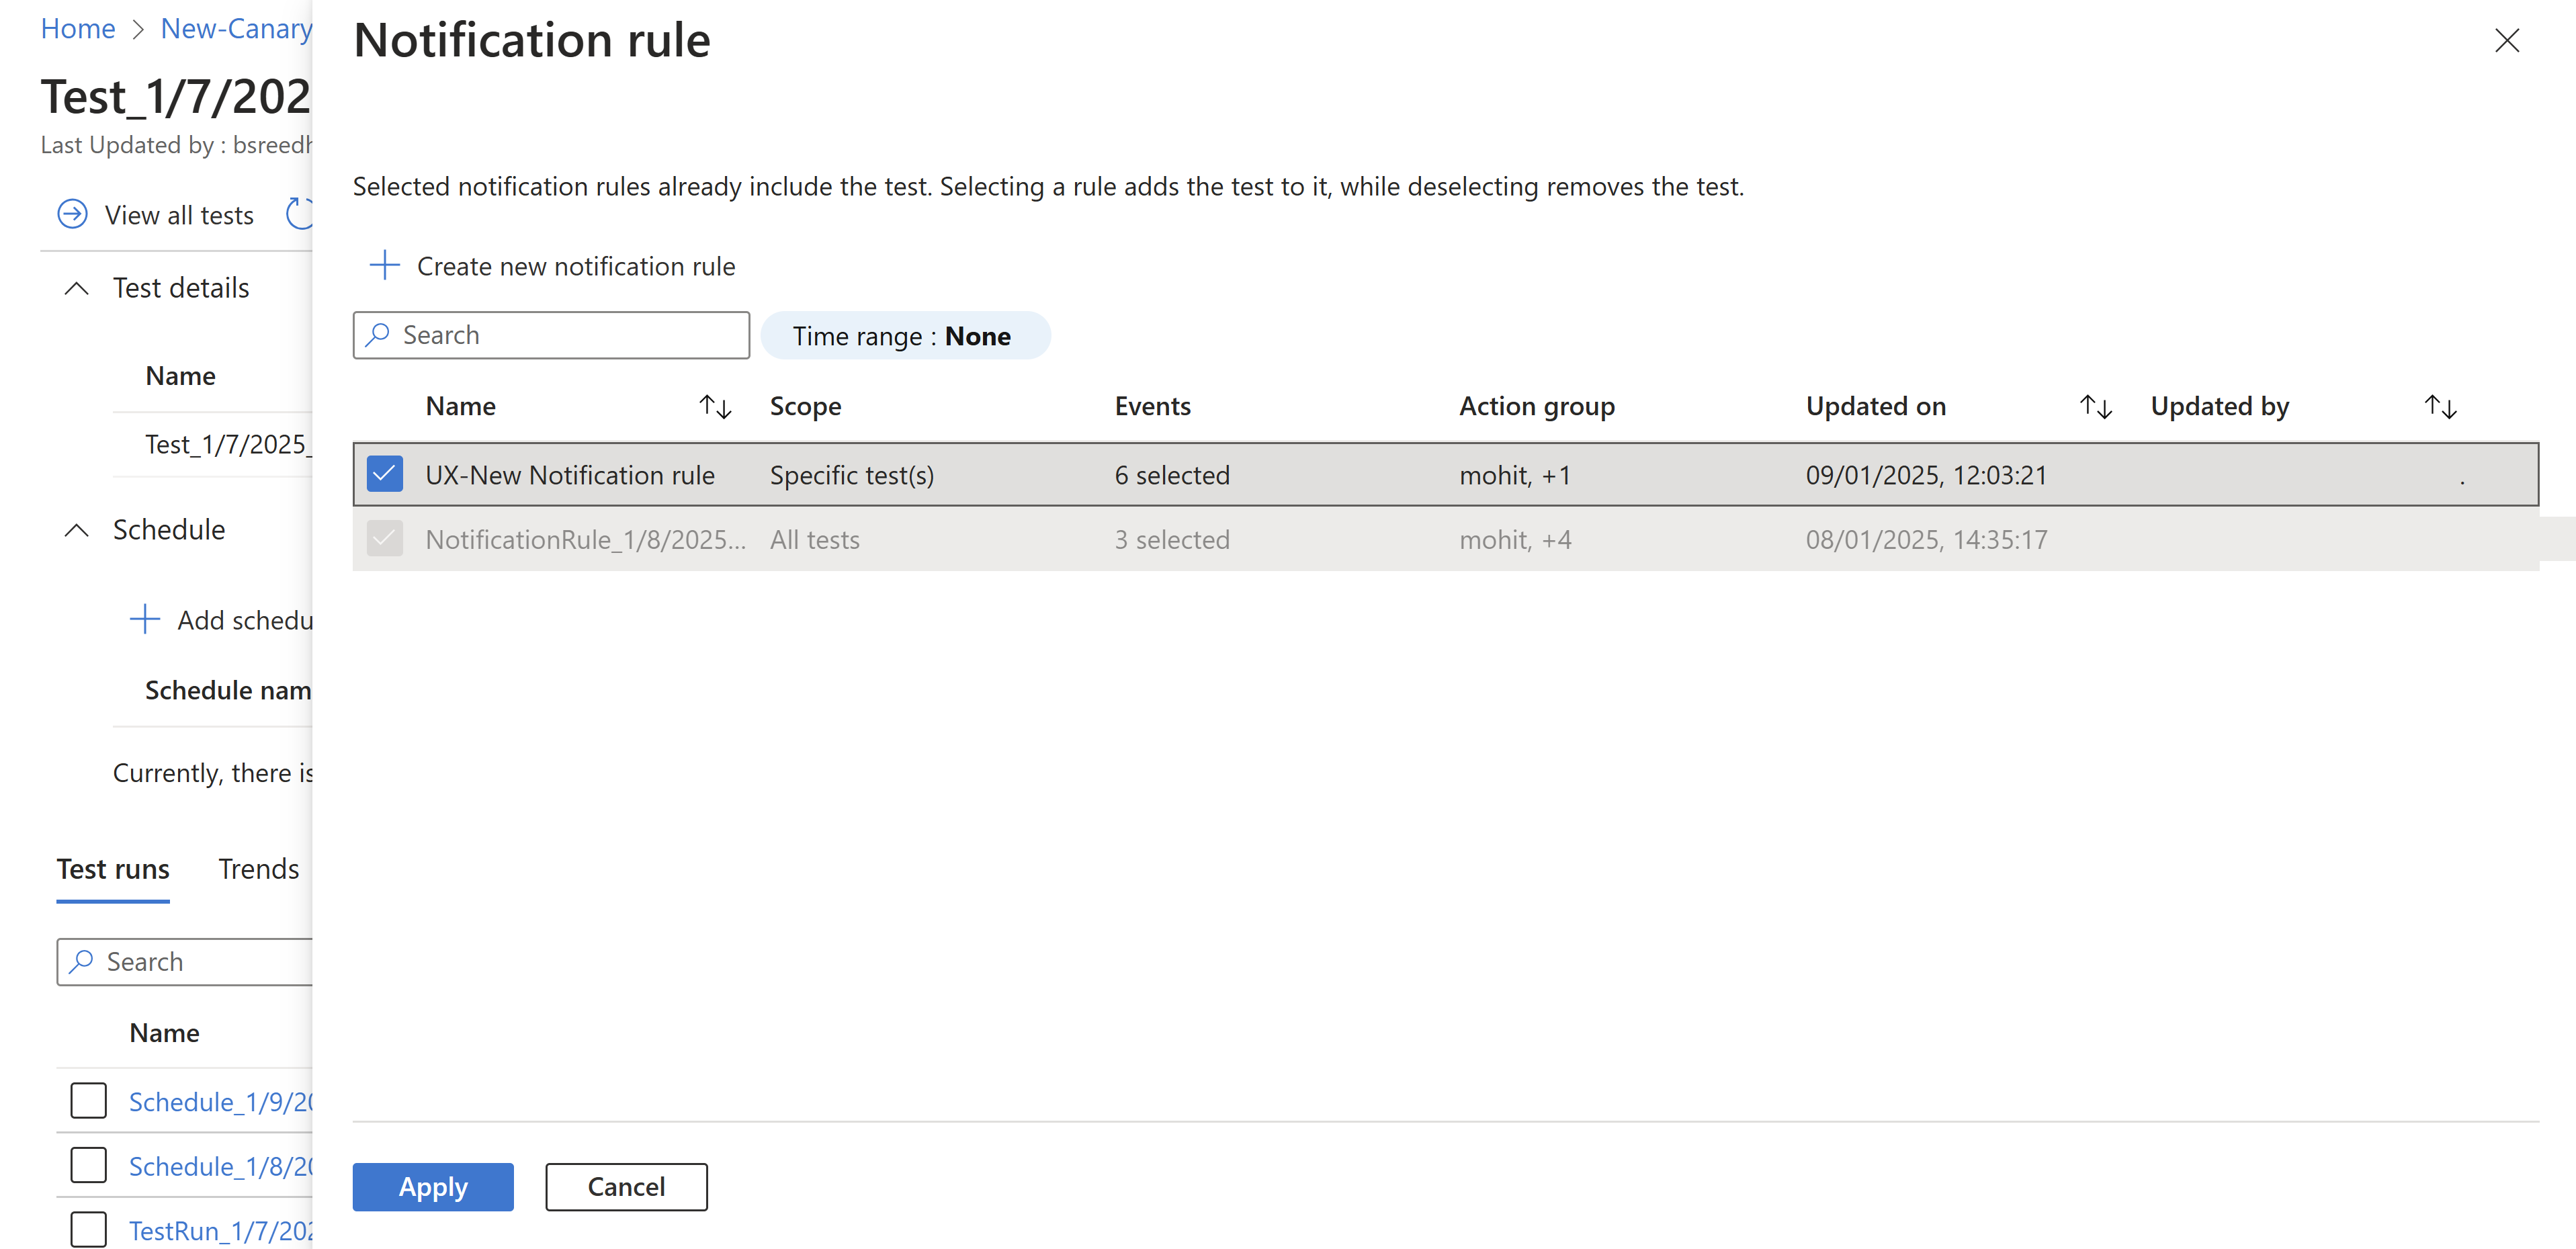
You can associate a test with a rule by selecting it, and remove the test from the rule by deselecting it.
If you do not wish to select an existing Notification Rule, you can click on Create Notification Rule.
After making the changes, click on Apply.
Edit a notification rule
In the Azure portal, navigate to your Load Test Resource. In the left navigation menu, select Notifications.
Select the rule you want to edit and click Edit.
Make changes to the subscribed events, channels, or test filters.
Save your changes.
Delete a notification rule
In the Azure portal, navigate to your Load Test Resource. In the left navigation menu, select Notifications.
Select the rule to delete and click Delete.
Related content
- Learn how to schedule load test runs.
- Learn how to add tests in your CI/CD workflows.