Note
Access to this page requires authorization. You can try signing in or changing directories.
Access to this page requires authorization. You can try changing directories.
In this article, you learn how to export your Azure Load Testing test results and reports. You can download the results by using the Azure portal, as an artifact in your CI/CD workflow, in JMeter by using a backend listener, in Locust by using event hooks or listener plugins, or by copying the results from an Azure storage account. You can use these results for reporting in third-party tools or for diagnosing test failures. Azure Load Testing generates the test results in comma-separated values (CSV) file format, and provides details of each application request for the load test.
You can also use the test results to diagnose errors during a load test. The responseCode and responseMessage fields give you more information about failed requests. For more information about investigating errors, see Diagnose failing load tests.
You can generate the Apache JMeter dashboard from the CSV log file following the steps mentioned here.
You can also download the Azure Load Testing Result dashboard as an HTML report for offline viewing and collaboration.
Prerequisites
- An Azure account with an active subscription. If you don't have an Azure subscription, create a free account before you begin.
- An Azure Load Testing resource that has a completed test run. If you need to create an Azure Load Testing resource, see Create and run a load test.
Test results file format
Azure Load Testing generates a test results CSV file for each test engine instance. Learn how you can scale out your load test.
Azure Load Testing uses the Apache JMeter CSV log format. For more information about the different fields, see the JMeter Glossary in the Apache JMeter documentation.
You can find the details of each application request for the load test run in the test results file. The following snippet shows a sample test result:
timeStamp,elapsed,label,responseCode,responseMessage,threadName,dataType,success,failureMessage,bytes,sentBytes,grpThreads,allThreads,URL,Latency,IdleTime,Connect
1676040230680,104,Homepage,200,OK,172.18.33.7-Thread Group 1-5,text,true,,1607,133,5,5,https://www.example.com/,104,0,100
1676040230681,101,Homepage,200,OK,172.18.33.7-Thread Group 1-3,text,true,,1591,133,5,5,https://www.example.com/,101,0,93
1676040230680,101,Homepage,200,OK,172.18.33.7-Thread Group 1-1,text,true,,1591,133,5,5,https://www.example.com/,98,0,94
Access and download load test results and report
After a load test run finishes, you can access and download the load test results and the HTML report through the Azure portal, or as an artifact in your CI/CD workflow.
Important
For load tests with more than 45 engine instances or a greater than 3-hour test run duration, the results file is not available for download. You can configure a JMeter Backend Listener to export the results to a data store of your choice or copy the results from a storage account container. For tests with samplers greater than 30, the downloaded HTML report will only have graphs for data aggregated over all samplers. Graphs will not show sampler-wise data. Additionally, the downloaded report doesn't support graphs corresponding to server-side metrics.
To download the test results and the HTML report for a test run in the Azure portal:
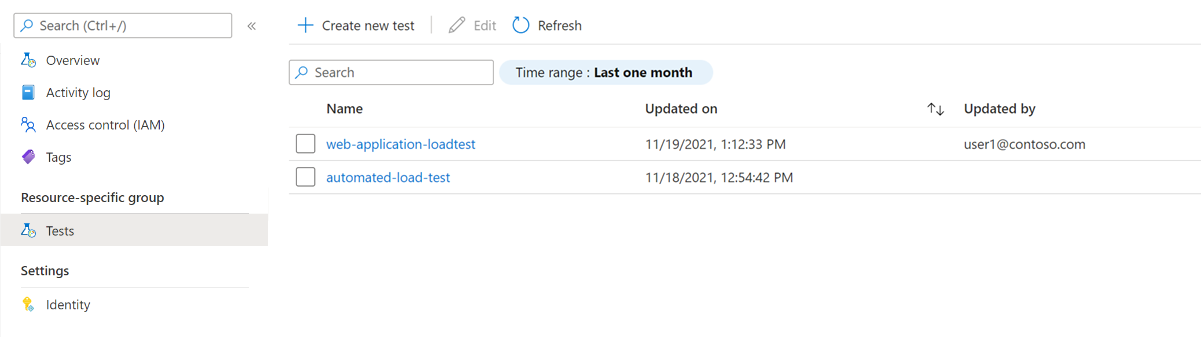
In the Azure portal, go to your Azure Load Testing resource.
On the left pane, select Tests to view a list of tests, and then select your test.
Tip
To limit the number of tests to display in the list, you can use the search box and the Time range filter.
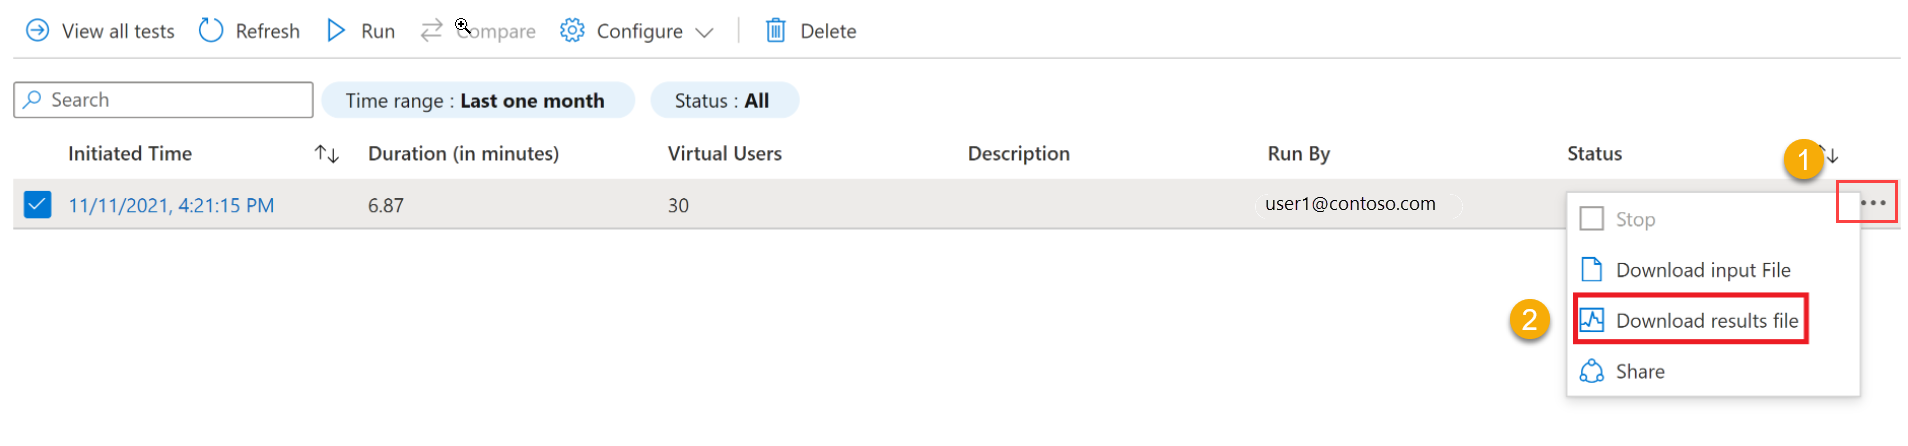
You can download the test results file as a zipped folder in either of two ways:
Select the ellipsis (...) next to the load test run you're working with, and then select Download results file.
Note
A load test run needs to have a Done, Stopped, or Failed status for the results file to be available for download.
Select Download on the Test run details pane. To download the results, select Results. To download the HTML report, select Report.

You can use any zip tool to extract the folder and access the downloaded files.
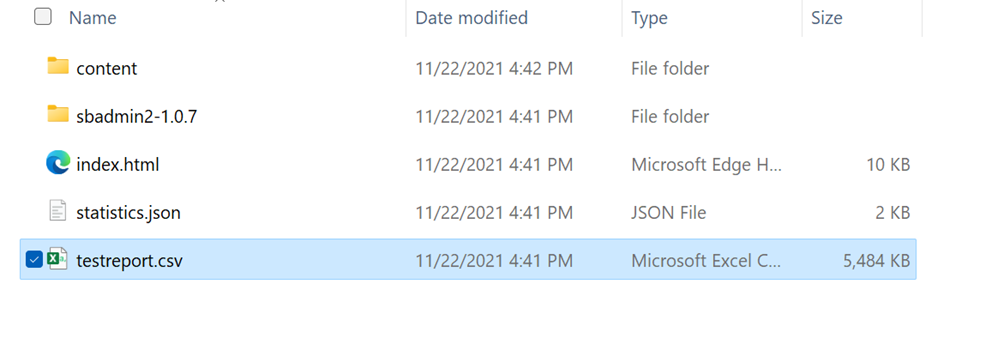
The results folder contains a separate CSV file for every test engine and contains details of requests that the test engine executed during the load test.
The report folder contains an HTML file that provides a summary of the test run and graphs of the performance metrics for offline viewing and collaboration.


Export test results using listeners
For JMeter-based tests, you can use a JMeter backend listener to export test results to databases like InfluxDB, MySQL, or monitoring tools like Azure Application Insights.
You can use the default JMeter backend listeners, backend listeners from jmeter-plugins.org, or a custom backend listener in the form of a Java archive (JAR) file.
The following code snippet shows an example of how to use the backend listener for Azure Application Insights, in a JMeter file (JMX):
<BackendListener guiclass="BackendListenerGui" testclass="BackendListener" testname="Backend Listener" enabled="true">
  <elementProp name="arguments" elementType="Arguments" guiclass="ArgumentsPanel" testclass="Arguments" enabled="true">
    <collectionProp name="Arguments.arguments">
      <elementProp name="testName" elementType="Argument">
        <stringProp name="Argument.name">testName</stringProp>
        <stringProp name="Argument.value">jmeter</stringProp>
        <stringProp name="Argument.metadata">=</stringProp>
      </elementProp>
      <elementProp name="connectionString" elementType="Argument">
        <stringProp name="Argument.name">connectionString</stringProp>
        <stringProp name="Argument.value">Enter your AppInsights connection string</stringProp>
        <stringProp name="Argument.metadata">=</stringProp>
      </elementProp>
      <elementProp name="liveMetrics" elementType="Argument">
        <stringProp name="Argument.name">liveMetrics</stringProp>
        <stringProp name="Argument.value">true</stringProp>
        <stringProp name="Argument.metadata">=</stringProp>
      </elementProp>
      <elementProp name="samplersList" elementType="Argument">
        <stringProp name="Argument.name">samplersList</stringProp>
        <stringProp name="Argument.value"></stringProp>
        <stringProp name="Argument.metadata">=</stringProp>
      </elementProp>
      <elementProp name="useRegexForSamplerList" elementType="Argument">
        <stringProp name="Argument.name">useRegexForSamplerList</stringProp>
        <stringProp name="Argument.value">false</stringProp>
        <stringProp name="Argument.metadata">=</stringProp>
      </elementProp>
      <elementProp name="logResponseData" elementType="Argument">
        <stringProp name="Argument.name">logResponseData</stringProp>
        <stringProp name="Argument.value">OnFailure</stringProp>
        <stringProp name="Argument.metadata">=</stringProp>
      </elementProp>
      <elementProp name="logSampleData" elementType="Argument">
        <stringProp name="Argument.name">logSampleData</stringProp>
        <stringProp name="Argument.value">OnFailure</stringProp>
        <stringProp name="Argument.metadata">=</stringProp>
      </elementProp>
    </collectionProp>
  </elementProp>
  <stringProp name="classname">io.github.adrianmo.jmeter.backendlistener.azure.AzureBackendClient</stringProp>
</BackendListener>
You can download the full example of using the Azure Application Insights backend listener.
For Locust-based tests, you can use event hooks or listener plugins.
Copy test artifacts from a storage account container
Important
Copying test artifacts from a storage account container is only enabled for load tests with more than 45 engine instances or with a test run duration greater than three hours.
To copy the test results and log files for a test run from a storage account, in the Azure portal:
In the Azure portal, go to your Azure Load Testing resource.
On the left pane, select Tests to view a list of tests, and then select your test.
From the list of test runs, select your test run.

Tip
To limit the number of tests to display in the list, you can use the search box and the Time range filter.
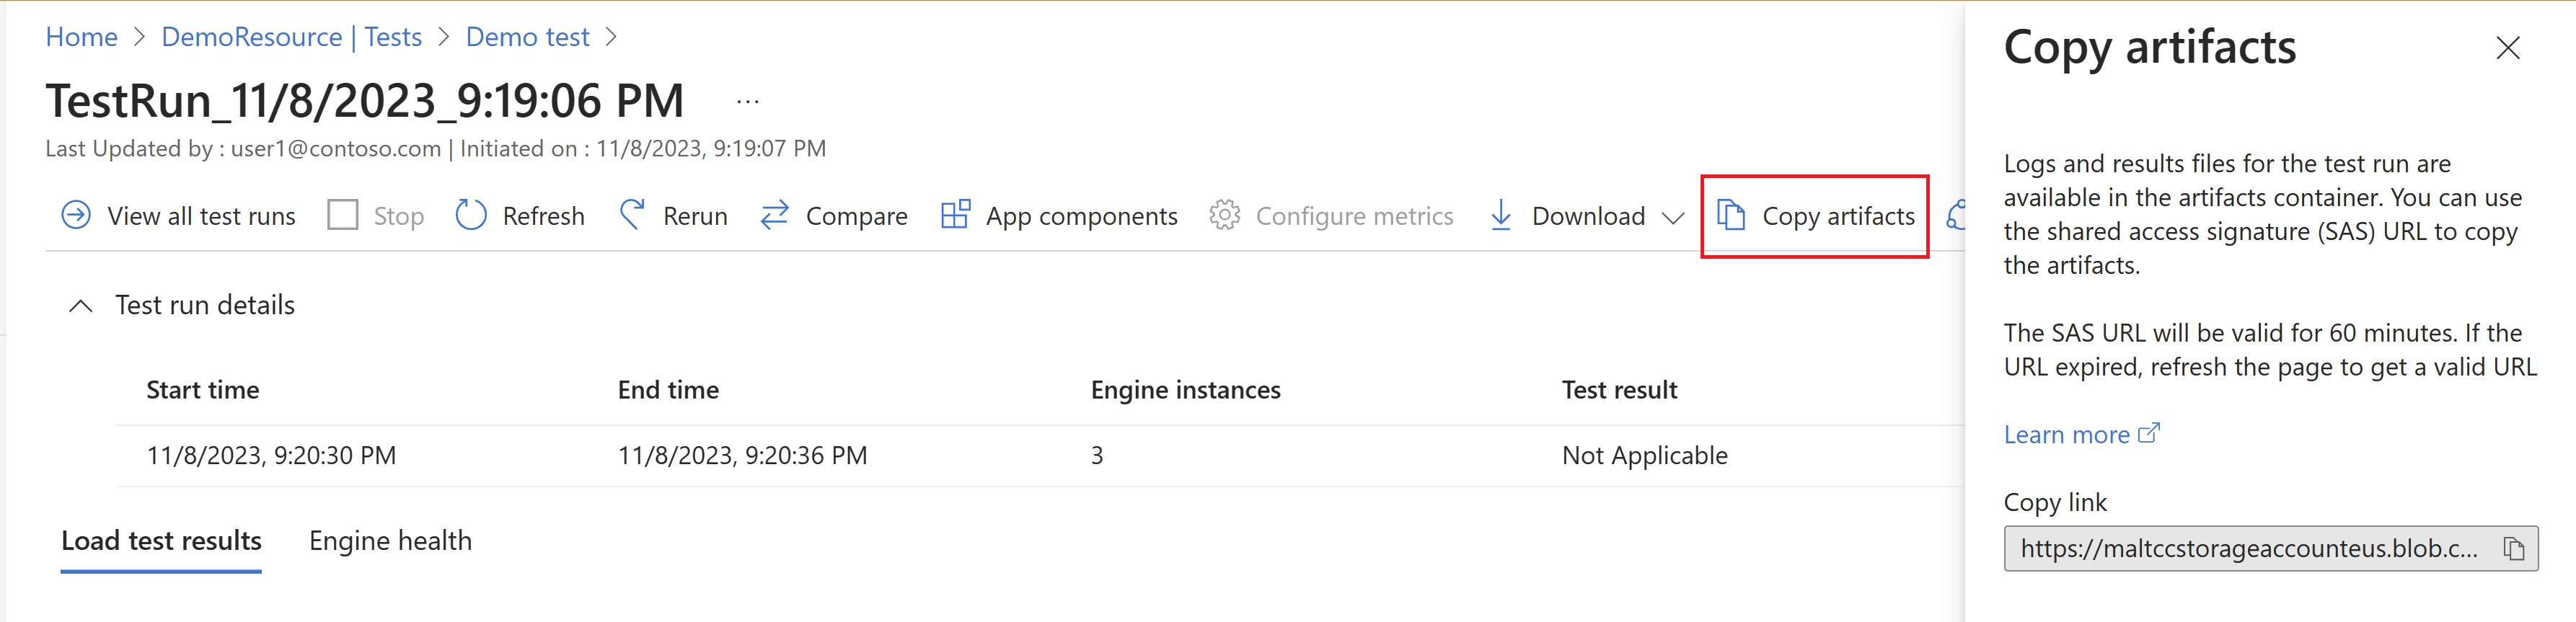
On the Test run details pane, select Copy artifacts.
Note
A load test run needs to be in the Done, Stopped, or Failed status for the results file to be available for download.
Copy the SAS URL of the storage account container.
You can use the SAS URL in the Azure Storage Explorer or AzCopy to copy the results CSV files and the log files for the test run to your storage account.
The SAS URL is valid for 60 minutes from the time it gets generated. If the URL expires, select Copy artifacts to generate a new SAS URL.
Related content
- Learn more about Diagnosing failing load tests.
- Learn more about Comparing multiple test results.
- Learn more about Configuring automated performance testing in Azure Pipelines.