Note
Access to this page requires authorization. You can try signing in or changing directories.
Access to this page requires authorization. You can try changing directories.
Applies to: Azure Logic Apps (Standard)
Note
This capability is in preview, might incur charges, and is subject to the Supplemental Terms of Use for Microsoft Azure Previews.
After you build an agent in Microsoft Foundry, you need the agent to run at the right time, respond to business events, access services and systems to perform work, and execute processes that might span durations or multiple teams. Without an orchestration layer, agents remain isolated from the production workflows that customers need to automate.
Azure Logic Apps and Microsoft Foundry together solve this problem as a single agentic stack. Foundry provides the intelligence for the agent, including models, instructions, knowledge, and guardrails. Azure Logic Apps provides the automation layer that orchestrates and invokes the agent through workflows and connections to enterprise systems. Together, Microsoft Foundry and Azure Logic Apps help you move from just having an agent to running that agent in a production-level business workflow after a few steps - without custom integration code.
This guide shows how to connect and call Foundry agents from workflows in Azure Logic Apps so you can automate business processes without custom integration code. For example, the following screenshot shows the workflow designer in Azure Logic Apps with a sample automated business process for a loan application workload, which includes calling an auto loan agent hosted in Foundry:
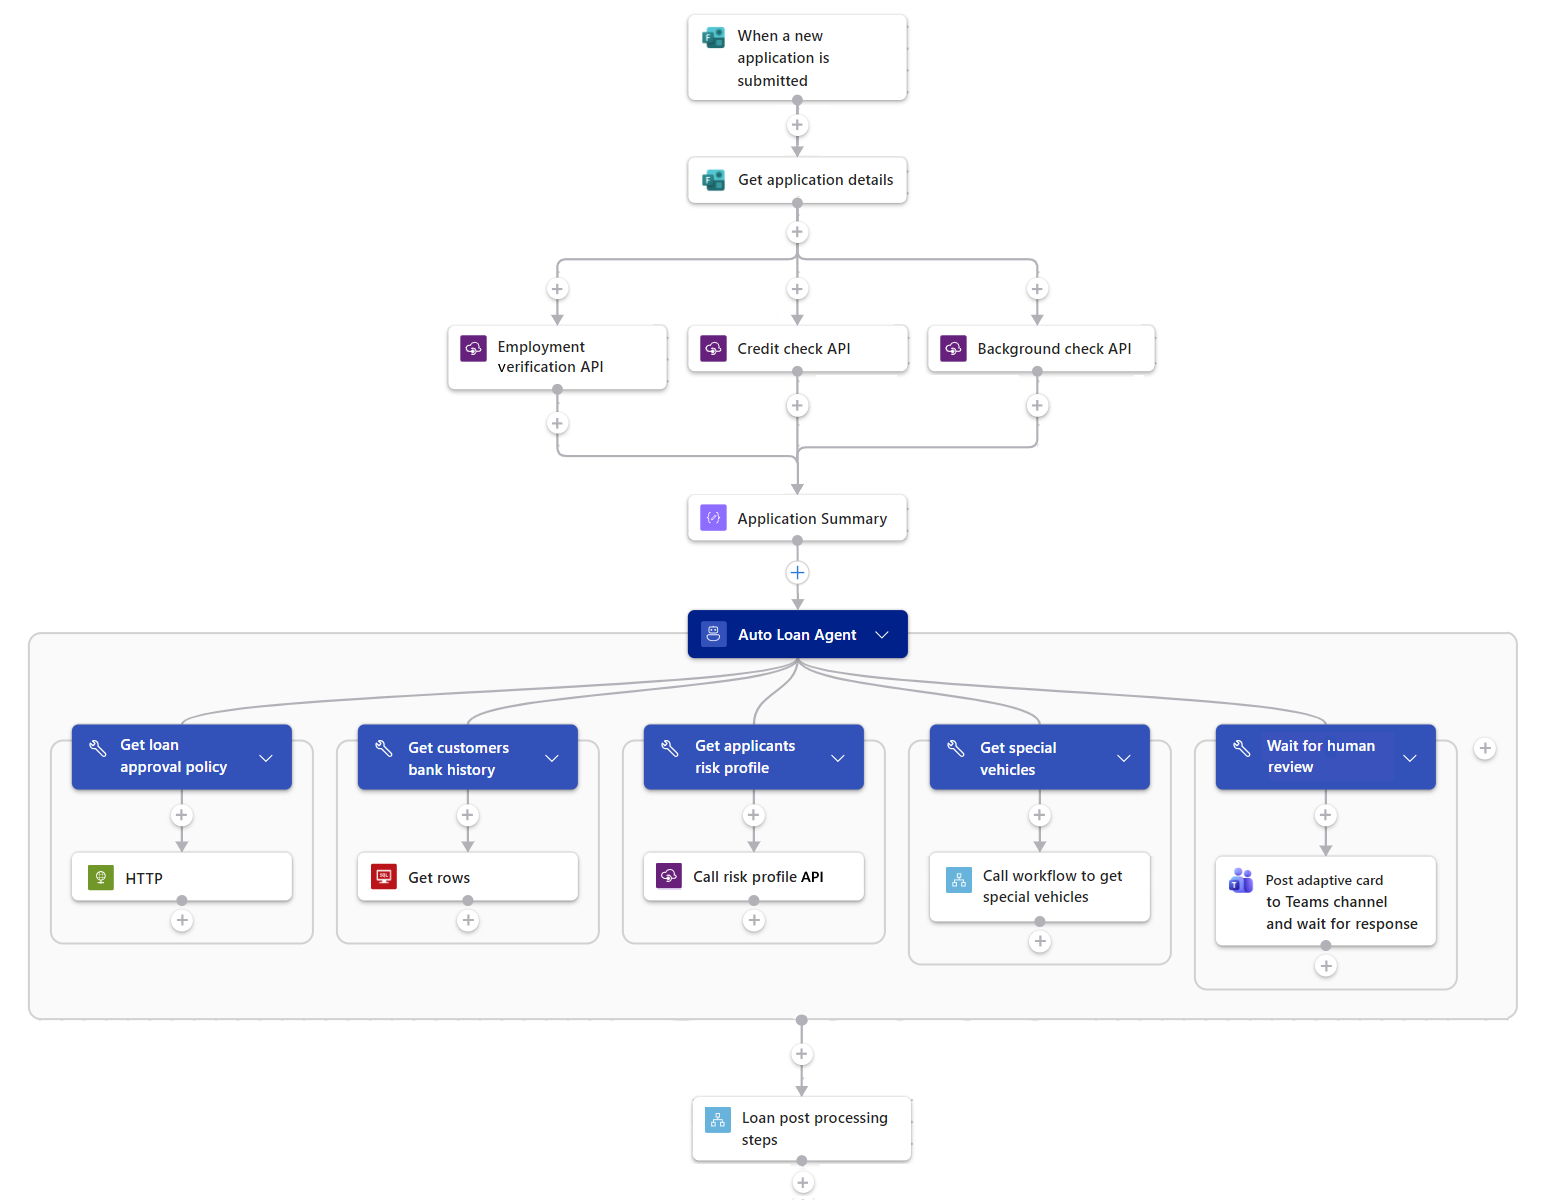
How agents work with logic app workflows
Azure Logic Apps and Microsoft Foundry work together so you can:
Add, set up, and call Foundry agents from your workflow in the designer.
Run Foundry agents autonomously from the trigger in your workflow.
An autonomous agent runs based on your business needs, while a chat-based agent runs based on prompts or instructions. When you pair a workflow trigger with a Foundry agent, you can automate a business process where agents react to events, run on a schedule, or both.
Optionally, expose any connector action for a Foundry agent to use as a tool.
You can choose from built-in connectors, APIs, workflows, and MCP servers for various services and systems - all with the capability to run as tools for Foundry agents. These agents activate when work arrives through triggers across 1,400+ connectors, reason about the necessary steps, and take action through their tools.
For example, an agent can reason about a customer issue, update the customer relationship management database, file the ticket, send the approval, or post the message.
Note
Built-in actions run within the same process as the Azure Logic Apps runtime and support virtual network integration, so agents can access protected resources over a private network.
Expose an entire workflow as an agent tool.
Your agent can run a workflow as a tool, not just a single API call.
Execute long-running workflows or those that require a human in the loop. For example, you can have a single workflow that includes the following steps:
- A webhook callback.
- A multistep approval that waits for a human response.
- A long-running orchestration that spans multiple systems.
- A process that pauses and resumes based on external events.
The agent reasons over the necessary steps to take, and the workflow durably runs as long as the process needs. Business process automation, durable workflows, and agentic AI are available on the same stack.
Why use an agentic stack
Traditionally, automated solutions with agents and deterministic logic require you to work across separate worlds:
- The platform where you build and host the agent.
- The platform where you connect the agent with the services and systems where the work happens and to call the agent.
However, agents are only useful when they can act autonomously, durably, across systems, and over the timeframes that real business processes need. Most real world AI solutions need to combine both agents and deterministic steps. Foundry provides the agent platform, while Azure Logic Apps offers the workflows, triggers, connectors, webhooks, and agent-as-tool composition.
| Microsoft Foundry | Azure Logic Apps |
|---|---|
| Build and host agents with models, instructions, and tools. | Trigger agents from any event or schedule. |
| Ground responses in knowledge and enterprise data. | Orchestrate multistep, multi-agent business processes. |
| Evaluate, version, and observe agent behavior. | Expose built-in connectors, workflows, and agents as native tools. |
Azure Logic Apps brings both worlds together, while optimizing what each platform does best so you get AI capability that drives automated business processes. Workflows support both before-and-after agent processing and deterministic steps to automate predictable, rule-based processes.
Common scenarios
When you pair Foundry agents with workflows in Azure Logic Apps, agents can autonomously run based on events or a schedule, pausing for human approval when needed. For example:
- When an invoice arrives, an agent adds fields, extracts data from existing fields, validates them against the purchase order, creates the payment record, and updates the records system.
- When a request arrives, an agent prepares and calls a long-running approval workflow that waits for a manager's response before completing the purchase.
- On a recurring schedule, an agent gathers data from multiple systems, summarizes the results, and sends a report by email.
Prerequisites
An Azure account and subscription. Get a free Azure account.
The following Foundry assets, which you create by using the Foundry portal:
-
If you don't have an agent, you can create an agent that exists in Foundry without leaving the workflow designer by following the steps in this article.
The Standard logic app resource and workflow where you want to add and call your agent.
If you want to expose a workflow as an action tool to a Foundry agent, the workflow must begin with a Request trigger such as When an HTTP request is received and end with a Response action. The Request trigger provides the REST endpoint that the agent calls to run the workflow.
For Standard, see Create an example Standard workflow in the Azure portal.
Set up a Foundry agent in a workflow
In the Azure portal, open your Standard logic app resource and workflow in the designer.
On the designer, follow the general steps to add an action named Agent to your workflow.
After the Agent action appears on the designer, the Create connection pane automatically opens, if you don't have an existing connection.
In the Create connection pane, provide the following information:
Property Value Description Connection name <descriptive-name> A name that identifies the connection. Agent Model Source Foundry project The source type with the Foundry model. Subscription <subscription-name> The Azure subscription for your Azure OpenAI resource. AI Foundry Project <Foundry-project-name> Your Foundry project. API Endpoint <API-endpoint> The automatically populated API endpoint for your Foundry project. The following screenshot shows the connection information for an example Foundry project:
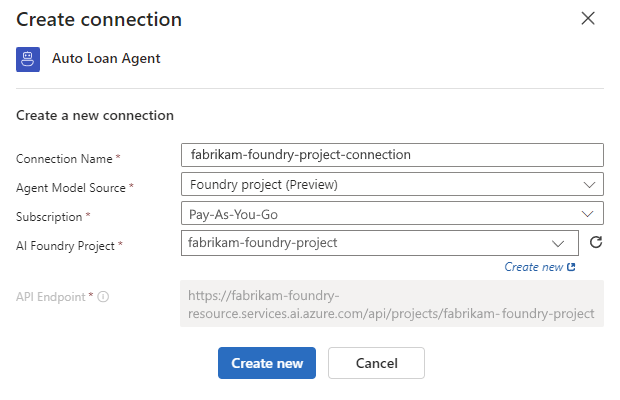
For more information, see Set up the AI model.
When you finish, select Create new.
The Agent action information pane opens so you can set up your Foundry agent.
To rename the Agent action, in the action information pane, select the agent title, and enter a name for the agent's purpose.
Follow the steps to select an existing agent or create an agent:
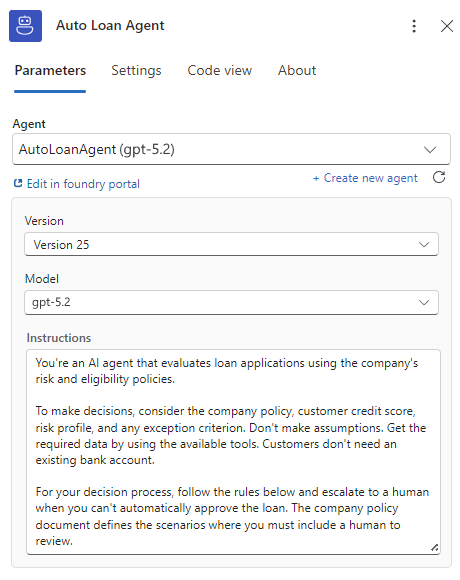
If you have an agent, on the Parameters tab, from the Agent list, select your Foundry agent.
The agent list defaults to latest version and shows the agent's preconfigured model and instructions. You can call the agent as configured, or make changes by editing the agent in the Foundry portal or adding connector actions as tools to the agent.
The following screenshot shows the agent action information pane automatically populated with an example agent hosted in Foundry:
If you don't have an agent, follow these steps to create an agent in Foundry:
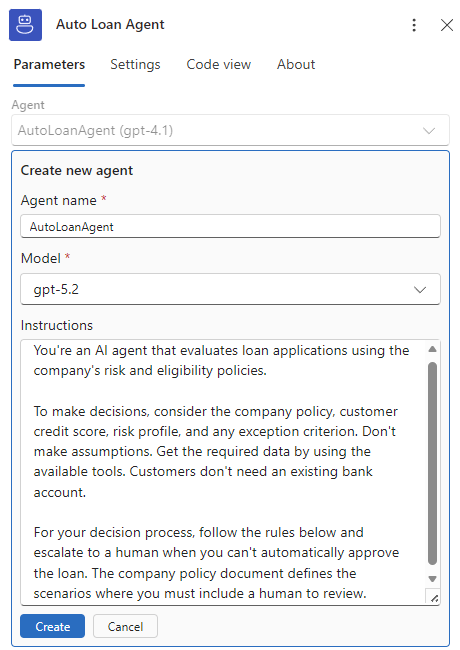
- On the Parameters tab, under Agent, select Create new agent.
- For Agent name, enter the name you want.
- For Model, select the model to use.
- For Instructions, enter the agent's role and job description.
- When you finish, select Create.
The following screenshot shows the agent action information pane with details to create and host a new agent in Foundry:
The designer now shows an action for your created agent. You can call your agent from a workflow in Azure Logic Apps or from the Foundry portal.
Optionally, for User instructions, enter any instructions for the agent to use as prompts.
For the best results, make each user instruction focus on a specific task, for example:
- On the agent information pane, in the User instructions Item - 1 box, enter a prompt for the agent.
- To add another instruction, select Add new item.
- In the User instructions item - 2 box, enter another prompt for the agent.
- Repeat until you finish adding all the prompts that you want.
Optionally, follow these steps to add tools that your agent uses to perform actions:
On the designer, inside the Agent action, and under Add tool, select the plus sign (+).
The Add an action pane opens where you can browse available actions.
On the Add an action pane, follow the general steps to add the appropriate action to use as an agent tool.
After you select the action, both the Tool container and the selected action appear in the Agent action on the designer. Both information panes also open at the same time.
On the tool information pane, select the tool title, and enter a name that describes the tool's purpose.
On the Details tab, for Description, enter the tool description.
Under Description, the Agent Parameters section applies only for specific use cases. For more information, see Create agent parameters.
For an example, see Create a 'Get weather' tool.
When you finish, save your workflow.
