Note
Access to this page requires authorization. You can try signing in or changing directories.
Access to this page requires authorization. You can try changing directories.
Applies to: Azure Logic Apps (Consumption + Standard)
When you want to set up a condition that returns true or false and have the result determine whether your workflow runs one path of actions or another, add the Control action named Condition to your workflow. You can also nest conditions inside each other.
For example, suppose you have a workflow that sends too many emails when new items appear on a website's RSS feed. You can add the Condition action to send email only when the new item includes a specific word.
Note
If you want to specify more than two paths from which your workflow can choose or condition criteria that's not restricted to only true or false, use a switch action instead.
This guide shows how to add a condition to your workflow and use the result to help your workflow choose between two action paths.
Prerequisites
An Azure account and subscription. If you don't have a subscription, sign up for a free Azure account.
Basic knowledge about logic app workflows.
To follow the example in this how-to guide, create either an example Consumption logic app workflow or an example Standard logic app workflow and use either an Outlook.com account or a Microsoft work or school account.
Add a condition
In the Azure portal, open your Consumption logic app resource.
On the sidebar menu, under Development Tools, select the designer to open the blank workflow.
This example uses the RSS trigger named When a feed item is published to start the workflow. However, you can use any trigger that you want in your own scenarios.
Add the trigger that you want by following the general steps to add a trigger.
Add the Condition action to your workflow by following the general steps to add an action.
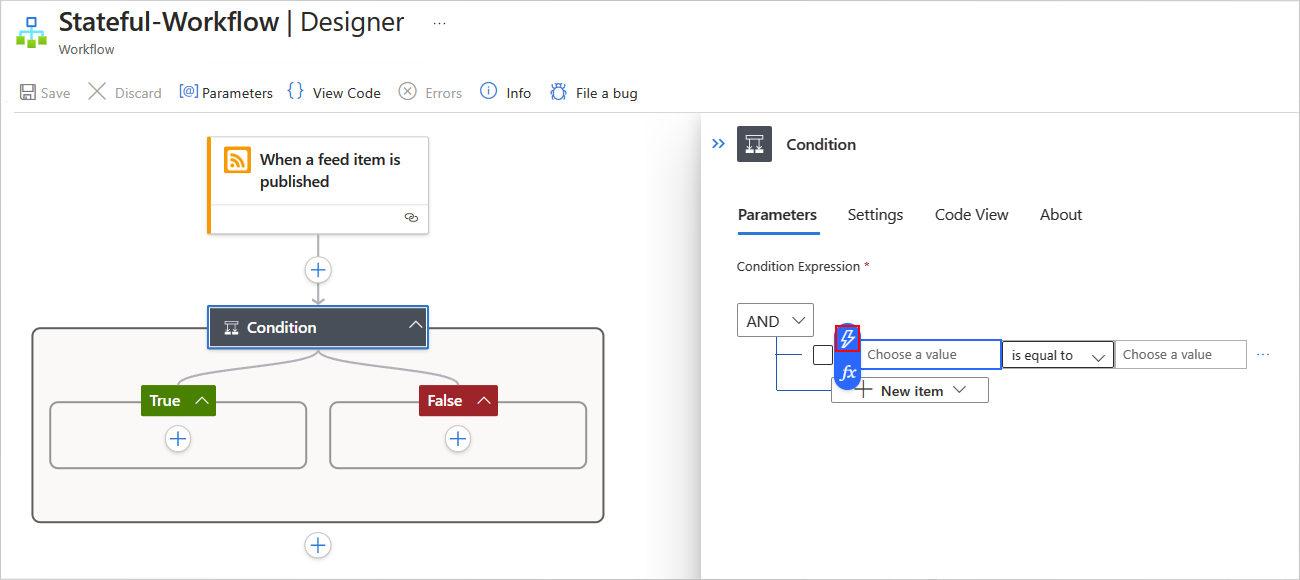
In the Condition action, follow these steps to build your condition:
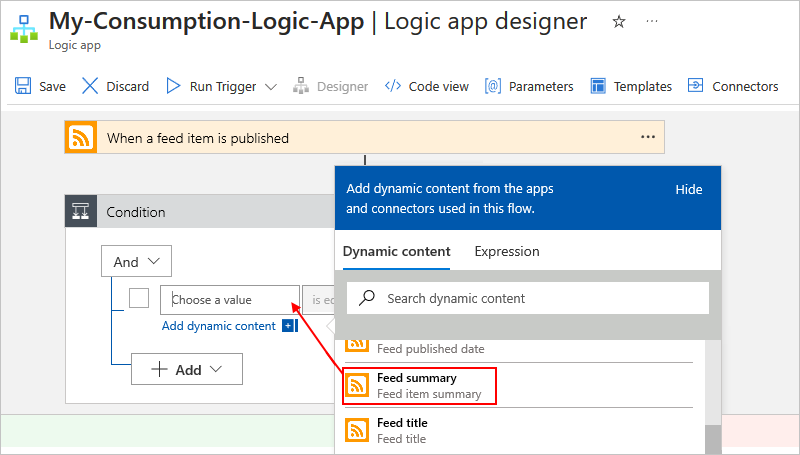
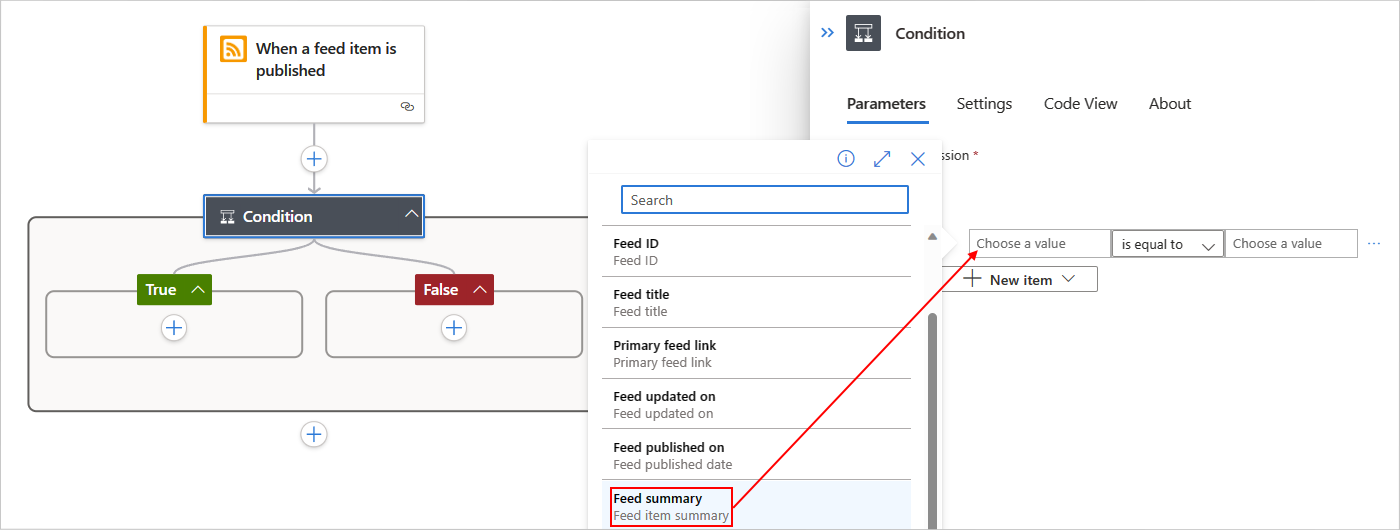
In the left-side box named Choose a value, enter the first value or field that you want to compare.
After you select inside the Choose a value box, the options to open the dynamic content list (lightning icon) or expression editor (formula icon) appear.

Select the lightning icon to open the dynamic content list.
From this list, you can select outputs from previous steps in your workflow. This example selects the RSS trigger output named Feed summary. If you don't see this option, you might need to select See more.
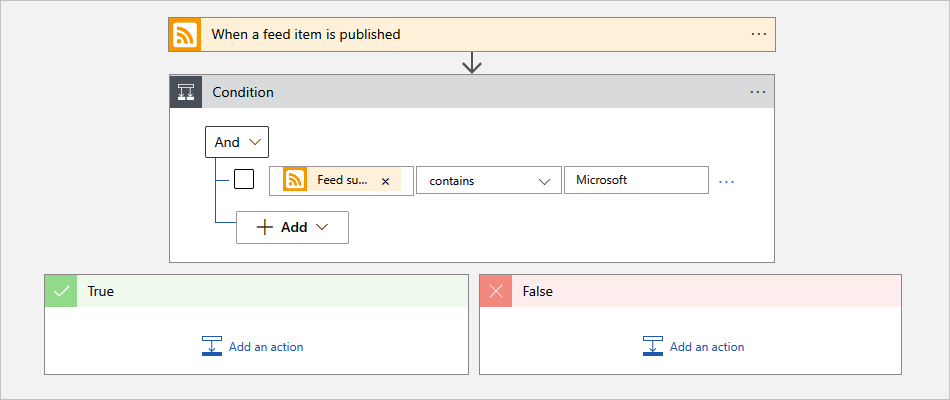
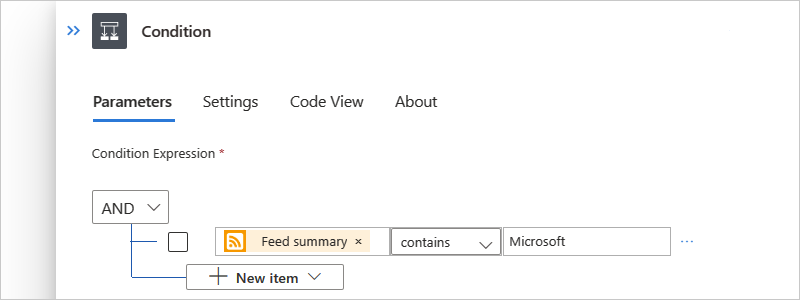
From the middle box, select the operation to perform.
This example selects contains.
In the right-side box named Choose a value, enter the value or field that you want to compare with the first.
This example specifies the following string: Microsoft
The following example shows the complete condition:
To add another row to your condition, from the New item menu, select Add row.
To add a group with subconditions, from the New item menu, select Add group.
To group existing rows, select the checkboxes for those rows, select the ellipses (...) button for any row, and then select Make group.
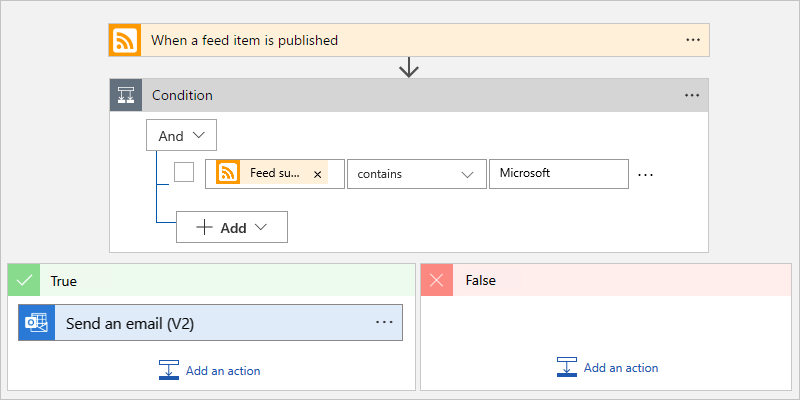
In the True and False action paths, add the actions that you want to run, based on whether the condition is true or false respectively, for example:
Tip
You can drag existing actions into the True and False paths.
Save your workflow. On the designer toolbar, select Save.
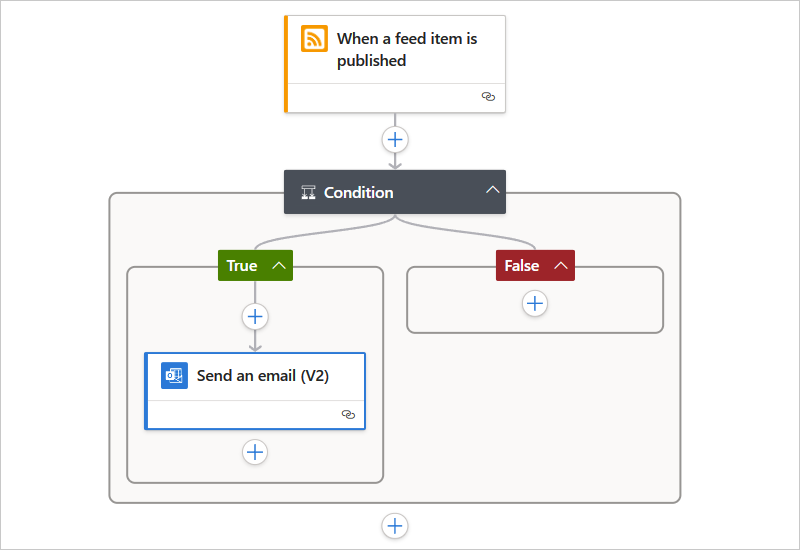
This workflow now sends mail only when the new items in the RSS feed meet your condition.
JSON definition
The following code shows the high-level JSON definition for the Condition action. For the full definition, see If action - Schema reference guide for trigger and action types in Azure Logic Apps.
"actions": {
   "Condition": {
      "type": "If",
      "actions": {
         "Send_an_email_(V2)": {
            "inputs": {},
            "runAfter": {},
            "type": "ApiConnection"
         },
      },
      "expression": {
         "and": [
            {
               "contains": [
                  "@triggerBody()?['summary']",
                  "Microsoft"
               ]
            }
         ]
      },
      "runAfter": {
         "Condition": [
            "Succeeded"
         ]
      }
   }
},