Note
Access to this page requires authorization. You can try signing in or changing directories.
Access to this page requires authorization. You can try changing directories.
To send and receive EDIFACT messages in workflows that you create using Azure Logic Apps, use the EDIFACT connector, which provides operations that support and manage EDIFACT communication.
This guide shows how to add the EDIFACT encoding and decoding actions to an existing logic app workflow. When no EDIFACT trigger is available, you can any trigger to start your workflow. The examples in this guide use the Request trigger.
Connector technical reference
The EDIFACT connector has different versions, based on logic app type and host environment.
| Logic app | Environment | Connector version |
|---|---|---|
| Consumption | Multitenant Azure Logic Apps | EDIFACT managed connector (Standard class). The EDIFACT connector has only one trigger, but you can use any trigger that works for your scenario. For more information, see the following documentation: - EDIFACT managed connector reference - EDIFACT message limits |
| Standard | Single-tenant Azure Logic Apps and App Service Environment v3 (Windows plans only) | EDIFACT built-in connector and EDIFACT managed connector. The built-in version differs in the following ways: - The built-in version provides only actions, but you can use any trigger that works for your scenario. - Accepts a flat file as input versus XML for the managed version. - The built-in version can directly access Azure virtual networks. You don't need an on-premises data gateway. For more information, see the following documentation: - EDIFACT managed connector reference - EDIFACT built-in connector operations - EDIFACT message limits |
EDIFACT built-in operations (Standard workflows only)
The EDIFACT built-in connector has the following actions, which are similar to their counterpart EDIFACT managed connector actions, except where noted in Limitations and known issues.
Limitations and known issues
EDIFACT built-in connector
This connector's actions currently support payloads up to 100 MB.
The EDIFACT Decode action currently doesn't include the following capabilities:
Check for duplicate interchange, group, and transaction set control numbers, if configured.
Preserve the entire interchange.
Otherwise, the EDIFACT Encode and EDIFACT decode built-in connector actions have capabilities similar to their counterpart EDIFACT managed connector actions.
This connector's actions currently don't support interchanges with multiple transactions or batched messages.
This connector's actions don't currently emit EDI-specific tracking.
Prerequisites
An Azure account and subscription. Get a free Azure account.
An integration account resource where you define and store artifacts, such as trading partners, agreements, certificates, and so on, for use in your enterprise integration and B2B workflows. This resource has to meet the following requirements:
Both your integration account and logic app resource must exist in the same Azure subscription and Azure region.
Defines at least two trading partners that participate in the EDIFACT operation used in your workflow. The definitions for both partners must use the same business identity qualifier, which is ZZZ - Mutually Defined for this scenario.
Defines an EDIFACT agreement between the trading partners that participate in your workflow. Each agreement requires a host partner and a guest partner. The content in the messages between you and the other partner must match the agreement type. For information about agreement settings to use when receiving and sending messages, see EDIFACT message settings.
Important
The EDIFACT connector supports only UTF-8 characters. If your output contains unexpected characters, check that your EDIFACT messages use the UTF-8 character set.
Based on whether you're working on a Consumption or Standard logic app workflow, your logic app resource might require a link to your integration account:
Logic app workflow Link required? Consumption Connection and link to integration account are required. You can create the connection when you add the EDIFACT operation to your workflow. Standard Connection to integration account required, but no link required. You can create the connection when you add the EDIFACT operation to your workflow. The logic app resource and workflow where you want to use the EDIFACT operations.
For more information, see the following documentation:
The content to encode or decode. In Consumption workflows, the EDIFACT managed connector actions accept an XML message as input. In Standard workflows, the EDIFACT built-in connector actions accept a flat file, while the EDIFACT managed connector accepts an XML message.
Encode EDIFACT messages
The EDIFACT managed connector action named Encode to EDIFACT message action and the EDIFACT built-in connector action named EDIFACT Encode performs the following tasks, except where noted in Limitations and known issues:
Resolve the agreement by matching the sender qualifier & identifier and receiver qualifier and identifier.
Serialize the Electronic Data Interchange (EDI), which converts XML-encoded messages into EDI transaction sets in the interchange.
Apply transaction set header and trailer segments.
Generate an interchange control number, a group control number, and a transaction set control number for each outgoing interchange.
Replace separators in the payload data.
Validate EDI and partner-specific properties, such as the schema for transaction-set data elements against the message schema, transaction-set data elements, and extended validation on transaction-set data elements.
Generate an XML document for each transaction set.
Request a technical acknowledgment, functional acknowledgment, or both, if configured.
As a technical acknowledgment, the CONTRL message indicates the receipt for an interchange.
As a functional acknowledgment, the CONTRL message indicates the acceptance or rejection for the received interchange, group, or message, including a list of errors or unsupported functionality.
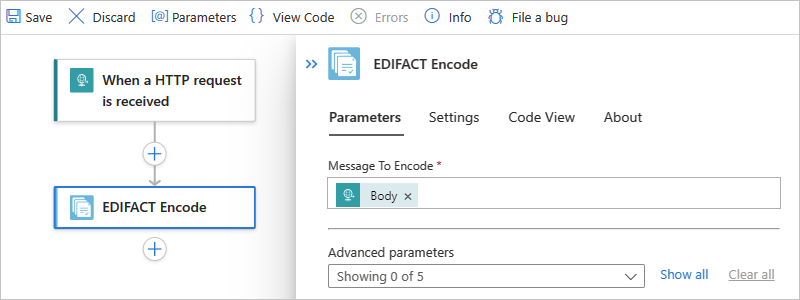
In the Azure portal, open your logic app resource and workflow in the designer.
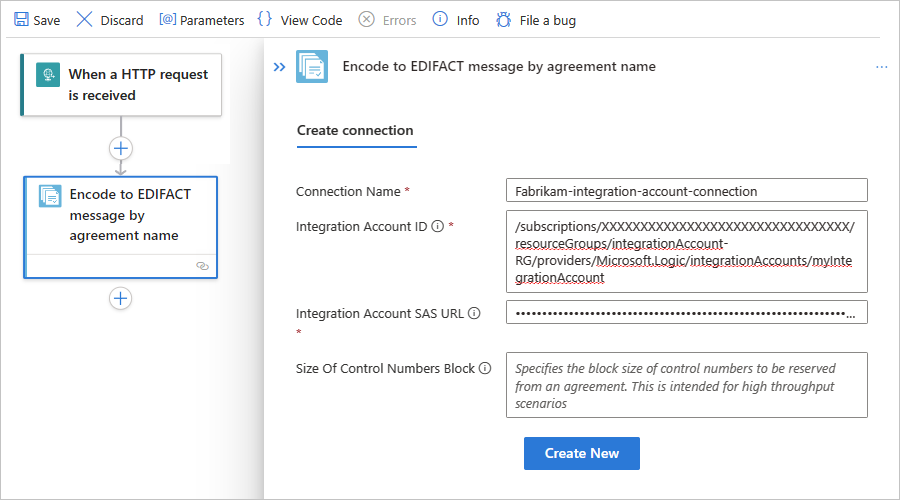
In the designer, follow these general steps to add the EDIFACT action named Encode to EDIFACT message by agreement name to your workflow.
Note
If you want to use Encode to EDIFACT message by identities action instead, you later have to provide different values, such as the Sender identifier and Receiver identifier that's specified by your EDIFACT agreement. You also have to specify the XML message to encode, which can be the output from the trigger or a preceding action.
Provide the following connection information for your integration account:
Property Required Description Connection name Yes A name for the connection Integration account Yes From the list of available integration accounts, select the account to use. For example:
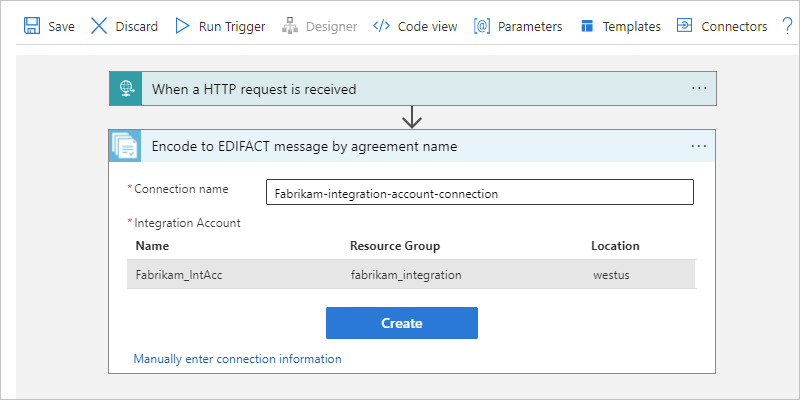
When you're done, select Create.
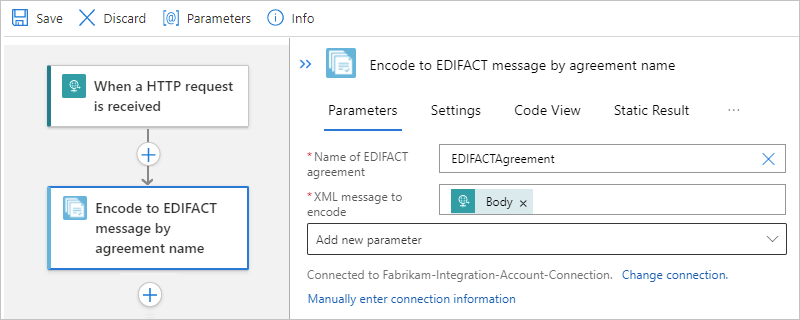
In the EDIFACT action, provide the following property values:
Property Required Description Name of EDIFACT agreement Yes The EDIFACT agreement to use. XML message to encode Yes The XML message to encode. Specifically, the business identifier for the message sender as specified by your EDIFACT agreement. Other parameters No This operation includes the following other parameters:
- Data element separator
- Release indicator
- Component separator
- Repetition separator
- Segment terminator
- Segment terminator suffix
- Decimal indicator
For more information, see EDIFACT message settings.For example, the payload to encode can be the Body content output from the Request trigger:
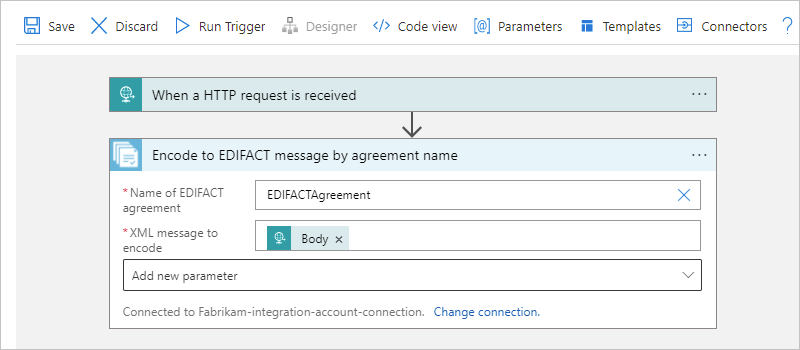
Save your workflow.
Decode EDIFACT messages
The EDIFACT managed connector action named Decode EDIFACT message action and the EDIFACT built-in connector action named EDIFACT Decode performs the following tasks, except where noted in Limitations and known issues:
Validate the envelope against the trading partner agreement.
Resolve the agreement by matching the sender qualifier and identifier along with the receiver qualifier and identifier.
Split an interchange into multiple transaction sets when the interchange has more than one transaction, based on the agreement's Receive Settings.
Disassemble the interchange.
Validate Electronic Data Interchange (EDI) and partner-specific properties, such as the interchange envelope structure, the envelope schema against the control schema, the schema for the transaction-set data elements against the message schema, and extended validation on transaction-set data elements.
Verify that the interchange, group, and transaction set control numbers aren't duplicates (managed connector only), if configured, for example:
Check the interchange control number against previously received interchanges.
Check the group control number against other group control numbers in the interchange.
Check the transaction set control number against other transaction set control numbers in that group.
Split the interchange into transaction sets, or preserve the entire interchange (managed connector only), for example:
Split Interchange as transaction sets - suspend transaction sets on error.
The decoding action splits the interchange into transaction sets and parses each transaction set. The action outputs only those transaction sets that fail validation to
badMessages, and outputs the remaining transactions sets togoodMessages.Split Interchange as transaction sets - suspend interchange on error.
The decoding action splits the interchange into transaction sets and parses each transaction set. If one or more transaction sets in the interchange fail validation, the action outputs the transaction sets in that interchange to
badMessages.Preserve Interchange - suspend transaction sets on error.
The decoding action preserves the interchange and processes the entire batched interchange. The action outputs only those transaction sets that fail validation to
badMessages, and outputs the remaining transactions sets togoodMessages.Preserve Interchange - suspend interchange on error.
The decoding action preserves the interchange and processes the entire batched interchange. If one or more transaction sets in the interchange fail validation, the action outputs the transaction sets in that interchange to
badMessages.
Generate a technical acknowledgment, functional acknowledgment, or both, if configured.
A technical acknowledgment or the CONTRL ACK, which reports the results from a syntactical check on the complete received interchange.
A functional acknowledgment that acknowledges the acceptance or rejection for the received interchange or group.
In the Azure portal, open your logic app resource and workflow in the designer.
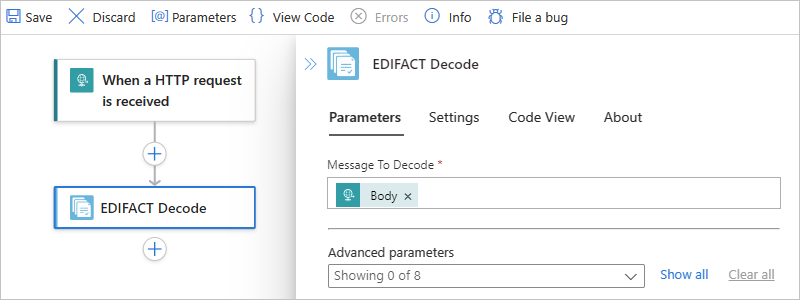
In the designer, follow these general steps to add the EDIFACT action named Decode EDIFACT message to your workflow.
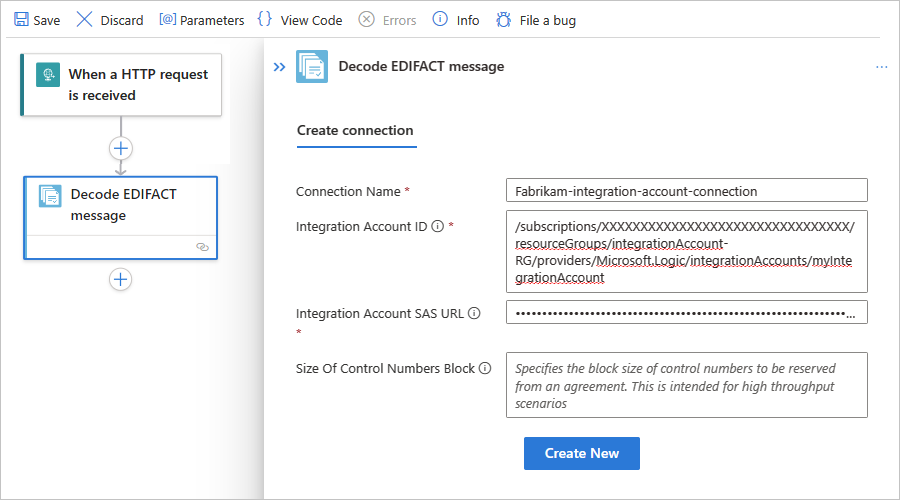
Provide the following connection information for your integration account:
Property Required Description Connection name Yes A name for the connection Integration account Yes From the list of available integration accounts, select the account to use. For example:
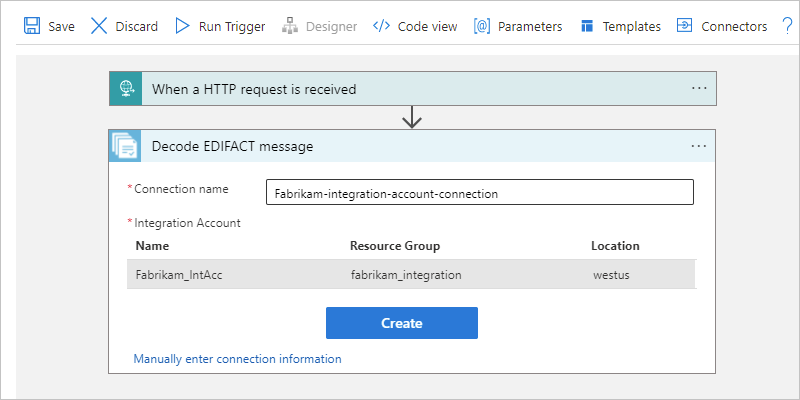
When you're done, select Create.
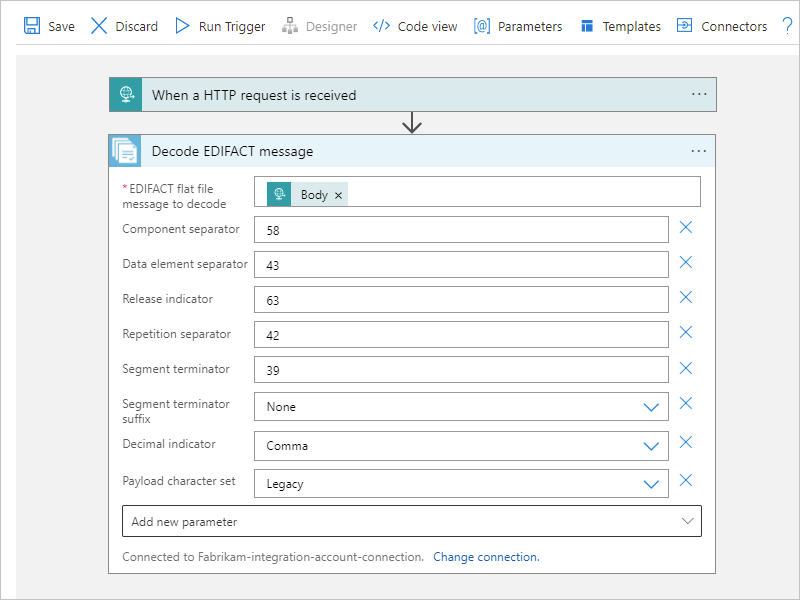
In the EDIFACT action, provide the following property values:
Property Required Description EDIFACT flat file message to decode Yes The XML flat file message to decode. Other parameters No This operation includes the following other parameters:
- Component separator
- Data element separator
- Release indicator
- Repetition separator
- Segment terminator
- Segment terminator suffix
- Decimal indicator
- Payload character set
- Segment terminator suffix
- Preserve Interchange
- Suspend Interchange On Error
For more information, see EDIFACT message settings.For example, the payload to decode can be the Body content output from the Request trigger:

Handle UNH2.5 segments in EDIFACT documents
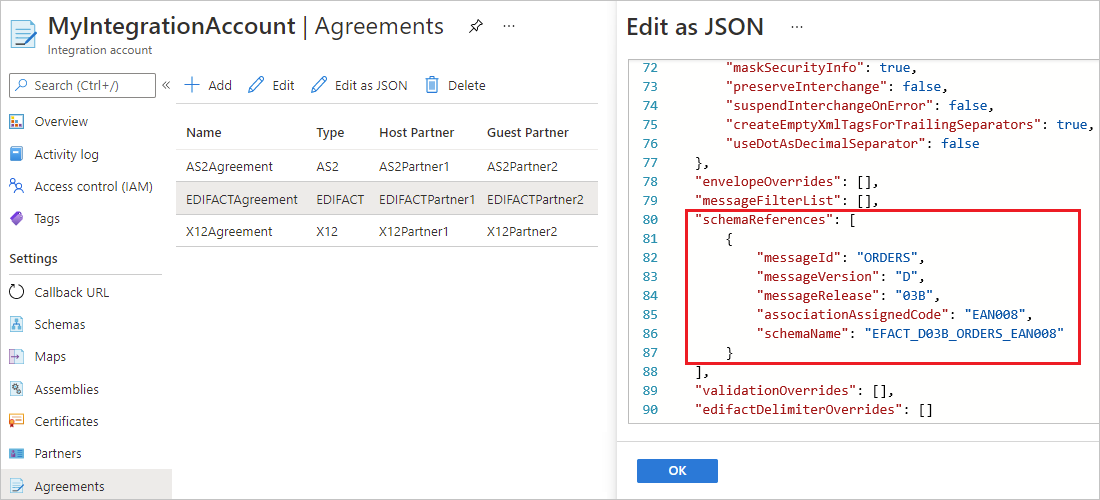
In an EDIFACT document, the UNH2.5 segment is used for schema lookup. For example, in this sample EDIFACT message, the UNH field is EAN008:
UNH+SSDD1+ORDERS:D:03B:UN:EAN008
To handle an EDIFACT document or process an EDIFACT message that has a UN2.5 segment, follow these steps:
Update or deploy a schema that has the UNH2.5 root node name.
For example, suppose the schema root name for the sample UNH field is
EFACT_D03B_ORDERS_EAN008. For eachD03B_ORDERSthat has a different UNH2.5 segment, you have to deploy an individual schema.In the Azure portal, add the schema to your integration account resource or logic app resource, based on whether you have a Consumption or Standard logic app workflow respectively.
Whether you're using the EDIFACT decoding or encoding action, upload your schema and set up the schema settings in your EDIFACT agreement's Receive Settings or Send Settings sections respectively.
To edit your EDIFACT agreement, on the Agreements pane, select your agreement. On the Agreements pane's toolbar, select Edit as JSON.
In the agreement's
receiveAgreementsection, find theschemaReferencessection, and add the UNH2.5 value.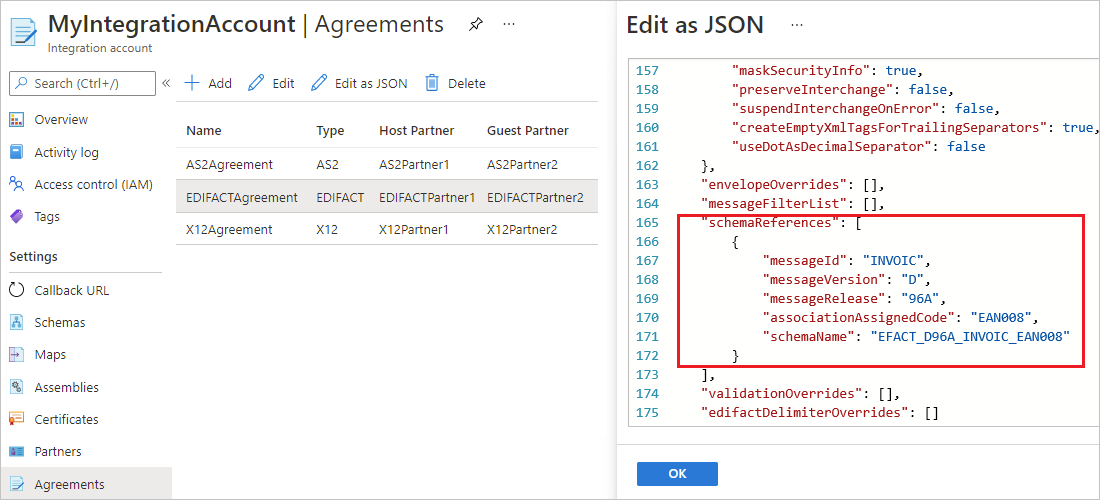
In the agreement's
sendAgreementsection, find theschemaReferencessection, and add the UNH2.5 value.