Note
Access to this page requires authorization. You can try signing in or changing directories.
Access to this page requires authorization. You can try changing directories.
This article describes a component in Azure Machine Learning designer.
Use this component to load data into a machine learning pipeline from existing cloud data services.
Note
All functionality provided by this component can be done by datastore and datasets in the workspace landing page. We recommend you use datastore and dataset which includes additional features like data monitoring. To learn more, see How to Access Data and How to Register Datasets article. After you register a dataset, you can find it in the Datasets -> My Datasets category in designer interface. This component is reserved for Studio(classic) users to for a familiar experience.
The Import Data component support read data from following sources:
- URL via HTTP
- Azure cloud storages through Datastores)
- Azure Blob Container
- Azure File Share
- Azure Data Lake
- Azure Data Lake Gen2
- Azure SQL Database
- Azure PostgreSQL
Before using cloud storage, you must register a datastore in your Azure Machine Learning workspace first. For more information, see How to Access Data.
After you define the data you want and connect to the source, Import Data infers the data type of each column based on the values it contains, and loads the data into your designer pipeline. The output of Import Data is a dataset that can be used with any designer pipeline.
If your source data changes, you can refresh the dataset and add new data by rerunning Import Data.
Warning
If your workspace is in a virtual network, you must configure your datastores to use the designer's data visualization features. For more information on how to use datastores and datasets in a virtual network, see Use Azure Machine Learning studio in an Azure virtual network.
How to configure Import Data
Add the Import Data component to your pipeline. You can find this component in the Data Input and Output category in the designer.
Select the component to open the right pane.
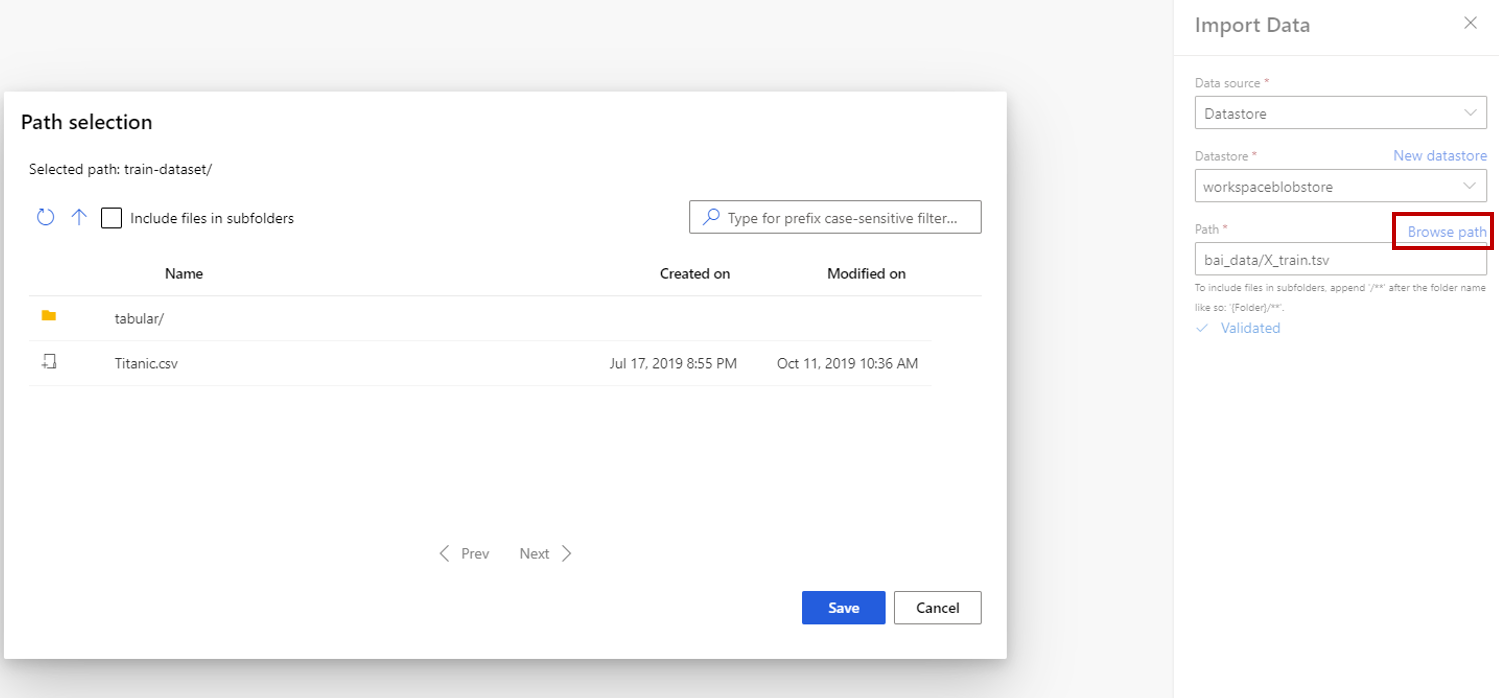
Select Data source, and choose the data source type. It could be HTTP or datastore.
If you choose datastore, you can select existing datastores that are already registered to your Azure Machine Learning workspace or create a new datastore. Then define the path of data to import in the datastore. You can easily browse the path by selecting Browse Path.
Note
Import Data component is for Tabular data only. If you want to import multiple tabular data files one time, it requires following conditions, otherwise errors will occur:
- To include all data files in the folder, you need to input
folder_name/**for Path. - All data files must be encoded in unicode-8.
- All data files must have the same column numbers and column names.
- The result of importing multiple data files is concatenating all rows from multiple files in order.
- To include all data files in the folder, you need to input
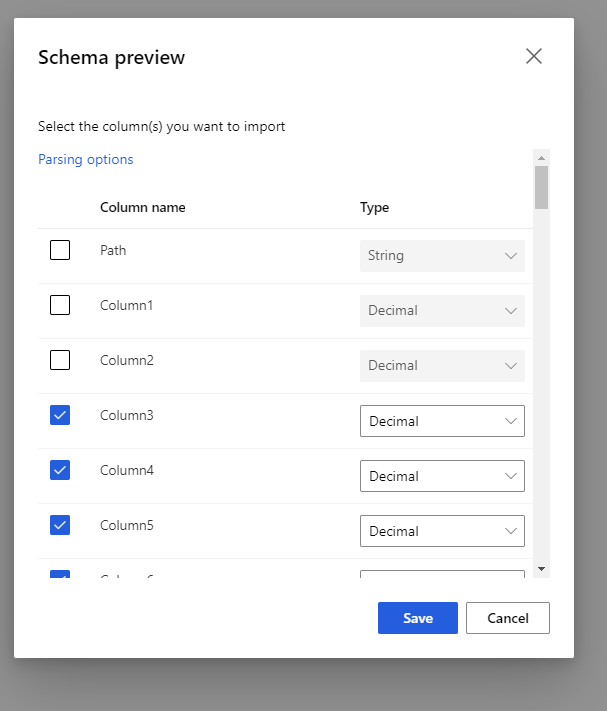
Select the preview schema to filter the columns you want to include. You can also define advanced settings like Delimiter in Parsing options.
The checkbox, Regenerate output, decides whether to execute the component to regenerate output at running time.
It's by default unselected, which means if the component has been executed with the same parameters previously, the system reuses the output from last run to reduce run time.
If it is selected, the system executes the component again to regenerate output. So select this option when underlying data in storage is updated, it can help to get the latest data.
Submit the pipeline.
When Import Data loads the data into the designer, it infers the data type of each column based on the values it contains, either numerical or categorical.
If a header is present, the header is used to name the columns of the output dataset.
If there are no existing column headers in the data, new column names are generated using the format col1, col2,… , coln*.

Results
When import completes, right-click the output dataset and select Visualize to see if the data was imported successfully.
If you want to save the data for reuse, rather than importing a new set of data each time the pipeline is run, select the Register dataset icon under the Outputs+logs tab in the right panel of the component. Choose a name for the dataset. The saved dataset preserves the data at the time of saving. The dataset is not updated when the pipeline is rerun, even if the dataset in the pipeline changes. This can be useful for taking snapshots of data.
After you import the data, it might need some additional preparations for modeling and analysis:
Use Edit Metadata to change column names, handle a column as a different data type, or indicate that some columns are labels or features.
Use Select Columns in Dataset to select a subset of columns to transform or use in modeling. The transformed or removed columns can easily be rejoined to the original dataset by using the Add Columns component.
Use Partition and Sample to divide the dataset, perform sampling, or get the top n rows.
Limitations
Due to datastore access limitation, if your inference pipeline contains Import Data component, it is auto-removed when deployed to real-time endpoint.
Next steps
See the set of components available to Azure Machine Learning.