Note
Access to this page requires authorization. You can try signing in or changing directories.
Access to this page requires authorization. You can try changing directories.
APPLIES TO:
 Azure CLI ml extension v2 (current)
Python SDK azure-ai-ml v2 (current)
Azure CLI ml extension v2 (current)
Python SDK azure-ai-ml v2 (current)
Get started with GitHub Actions to train a model on Azure Machine Learning.
This article teaches you how to create a GitHub Actions workflow that builds and deploys a machine learning model to Azure Machine Learning. You train a scikit-learn linear regression model on the NYC Taxi dataset.
GitHub Actions use a workflow YAML (.yml) file in the /.github/workflows/ path in your repository. This definition contains the various steps and parameters that make up the workflow.
Prerequisites
An Azure Machine Learning workspace. For steps for creating a workspace, see Create the workspace.
The Azure Machine Learning SDK for Python v2. To install the SDK, use the following command:
pip install azure-ai-ml azure-identityTo update an existing installation of the SDK to the latest version, use the following command:
pip install --upgrade azure-ai-ml azure-identityFor more information, see Azure Machine Learning Package client library for Python.
- A GitHub account. If you don't have one, create a free account.
Step 1: Get the code
Fork the following repo at GitHub:
https://github.com/azure/azureml-examples
Clone your forked repo locally.
git clone https://github.com/YOUR-USERNAME/azureml-examples
Step 2: Authenticate with Azure
First, define how to authenticate with Azure. The recommended, more secure option is to sign in by using OpenID Connect with a Microsoft Entra application or a user-assigned managed identity. If necessary, you can also use sign in by using a service principal and secret. This approach is less secure and not recommended.
Generate deployment credentials
To use Azure Login action with OIDC, you need to configure a federated identity credential on a Microsoft Entra application or a user-assigned managed identity.
Option 1: Microsoft Entra application
- Create a Microsoft Entra application with a service principal by Azure portal, Azure CLI, or Azure PowerShell.
- Copy the values for Client ID, Subscription ID, and Directory (tenant) ID to use later in your GitHub Actions workflow.
- Assign an appropriate role to your service principal by Azure portal, Azure CLI, or Azure PowerShell.
- Configure a federated identity credential on a Microsoft Entra application to trust tokens issued by GitHub Actions to your GitHub repository.
Option 2: User-assigned managed identity
- Create a user-assigned managed identity.
- Copy the values for Client ID, Subscription ID, and Directory (tenant) ID to use later in your GitHub Actions workflow.
- Assign an appropriate role to your user-assigned managed identity.
- Configure a federated identity credential on a user-assigned managed identity to trust tokens issued by GitHub Actions to your GitHub repository.
Create secrets
You need to provide your application's Client ID, Directory (tenant) ID, and Subscription ID to the login action. These values can either be provided directly in the workflow or can be stored in GitHub secrets and referenced in your workflow. Saving the values as GitHub secrets is the more secure option.
In GitHub, go to your repository.
Select Security > Secrets and variables > Actions.
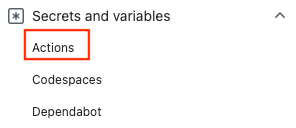
Select New repository secret.
Note
To enhance workflow security in public repositories, use environment secrets instead of repository secrets. If the environment requires approval, a job cannot access environment secrets until one of the required reviewers approves it.
Create secrets for
AZURE_CLIENT_ID,AZURE_TENANT_ID, andAZURE_SUBSCRIPTION_ID. Copy these values from your Microsoft Entra application or user-assigned managed identity for your GitHub secrets:GitHub secret Microsoft Entra application or user-assigned managed identity AZURE_CLIENT_ID Client ID AZURE_SUBSCRIPTION_ID Subscription ID AZURE_TENANT_ID Directory (tenant) ID Note
For security reasons, we recommend using GitHub Secrets rather than passing values directly to the workflow.
Step 3: Update setup.sh to connect to your Azure Machine Learning workspace
Update the CLI setup file variables to match your workspace.
In your forked repository, go to
azureml-examples/cli/.Edit
setup.shand update these variables in the file.Variable Description GROUPName of resource group LOCATIONLocation of your workspace (example: eastus2)WORKSPACEName of Azure Machine Learning workspace
Step 4: Update pipeline.yml with your compute cluster name
Use a pipeline.yml file to deploy your Azure Machine Learning pipeline. The pipeline is a machine learning pipeline and not a DevOps pipeline. You only need to make this update if you're using a name other than cpu-cluster for your compute cluster name.
- In your forked repository, go to
azureml-examples/cli/jobs/pipelines/nyc-taxi/pipeline.yml. - Each time you see
compute: azureml:cpu-cluster, update the value ofcpu-clusterwith your compute cluster name. For example, if your cluster is namedmy-cluster, your new value would beazureml:my-cluster. There are five updates.
Step 5: Run your GitHub Actions workflow
Your workflow authenticates with Azure, sets up the Azure Machine Learning CLI, and uses the CLI to train a model in Azure Machine Learning.
Your workflow file is made up of a trigger section and jobs:
- A trigger starts the workflow in the
onsection. The workflow runs by default on a cron schedule and when a pull request is made from matching branches and paths. Learn more about events that trigger workflows. - In the jobs section of the workflow, you check out code and sign in to Azure with the Azure login action using OpenID Connect.
- The jobs section also includes a setup action that installs and sets up the Machine Learning CLI (v2). Once the CLI is installed, the run job action runs your Azure Machine Learning
pipeline.ymlfile to train a model with NYC taxi data.
Enable your workflow
In your forked repository, open
.github/workflows/cli-jobs-pipelines-nyc-taxi-pipeline.ymland verify that your workflow looks similar to this.Note
The workflow file in the repo may include additional steps (such as bootstrapping and validation) not shown here. The following example shows the core steps.
name: cli-jobs-pipelines-nyc-taxi-pipeline
on:
  workflow_dispatch:
  schedule:
    - cron: "0 0/4 * * *"
  pull_request:
    branches:
      - main
    paths:
      - cli/jobs/pipelines/nyc-taxi/**
      - .github/workflows/cli-jobs-pipelines-nyc-taxi-pipeline.yml
      - cli/run-pipeline-jobs.sh
      - cli/setup.sh
permissions:
  id-token: write
jobs:
  build:
    runs-on: ubuntu-latest
    steps:
    - name: check out repo
      uses: actions/checkout@v4
    - name: azure login
      uses: azure/login@v2
      with:
          client-id: ${{ secrets.AZURE_CLIENT_ID }}
          tenant-id: ${{ secrets.AZURE_TENANT_ID }}
          subscription-id: ${{ secrets.AZURE_SUBSCRIPTION_ID }}
    - name: setup
      run: bash setup.sh
      working-directory: cli
      continue-on-error: true
    - name: run job
      run: bash -x ../../../run-job.sh pipeline.yml
      working-directory: cli/jobs/pipelines/nyc-taxi
Select View runs.
Enable workflows by selecting I understand my workflows, go ahead and enable them.
Select the cli-jobs-pipelines-nyc-taxi-pipeline workflow and choose to Enable workflow.

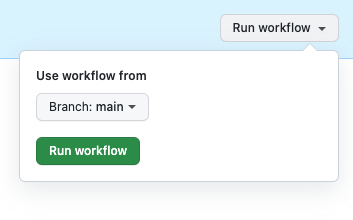
Select Run workflow and choose the option to Run workflow now.
Step 6: Verify your workflow run
Open your completed workflow run and verify that the build job ran successfully. You see a green checkmark next to the job.
Open Azure Machine Learning studio and go to nyc-taxi-pipeline-example. Verify that each part of your job (prep, transform, train, predict, score) completed and that you see a green checkmark.

Clean up resources
When you no longer need your resource group and repository, clean up the resources you deployed by deleting the resource group and your GitHub repository.